A makeup vanity desk is an essential piece of furniture in every woman’s bedroom right? It serves as a place to apply makeup, style hair, and store beauty products. A friend asked if I could give an old desk a makeover and attach a medicine cabinet to it for her daughter. She wanted to turn it into a DIY makeup vanity desk!
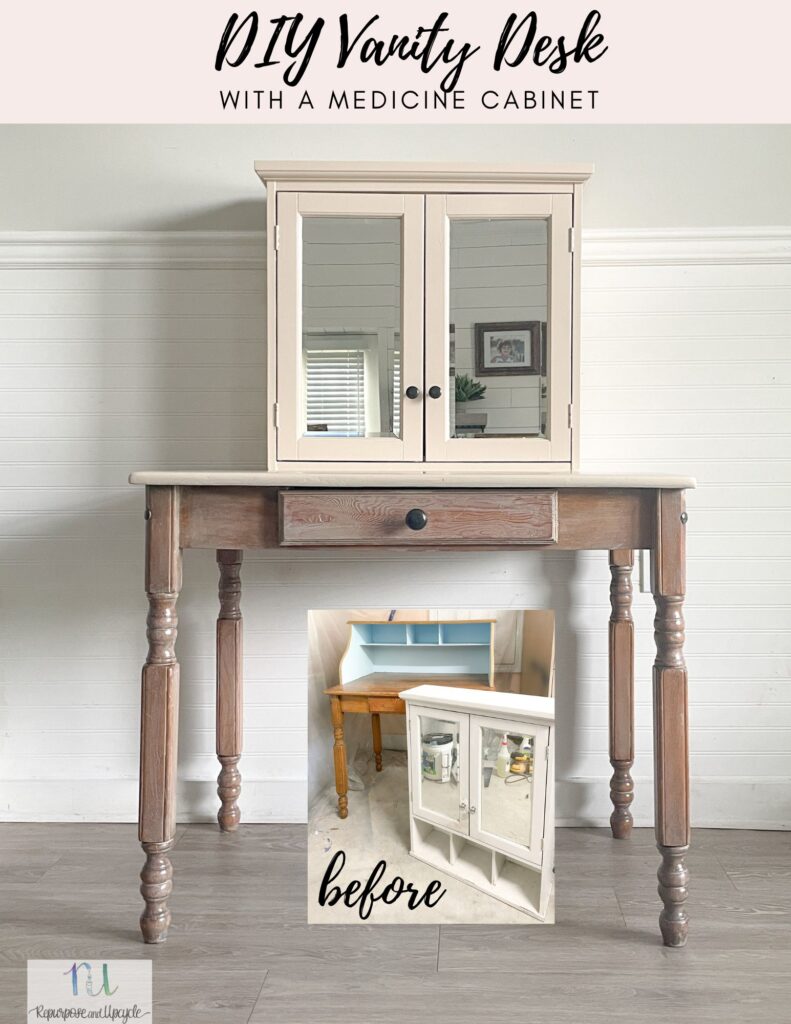
This project is perfect for those who love to DIY and want to create a unique piece of furniture that is both functional and stylish. With just a few materials and not many woodworking skills, you can create a wooden makeup vanity that will meet all your needs and fit perfectly in a small space. So, if you’re ready to take on a fun and rewarding project with a DIY makeup vanity table, let’s get started!
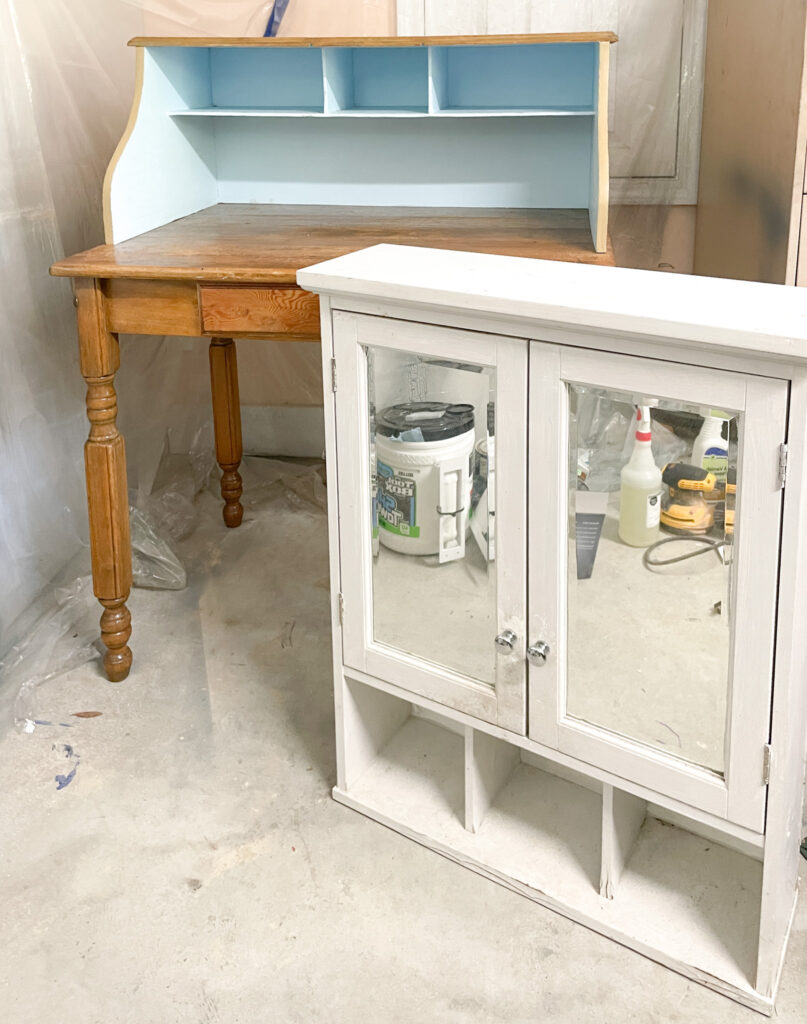
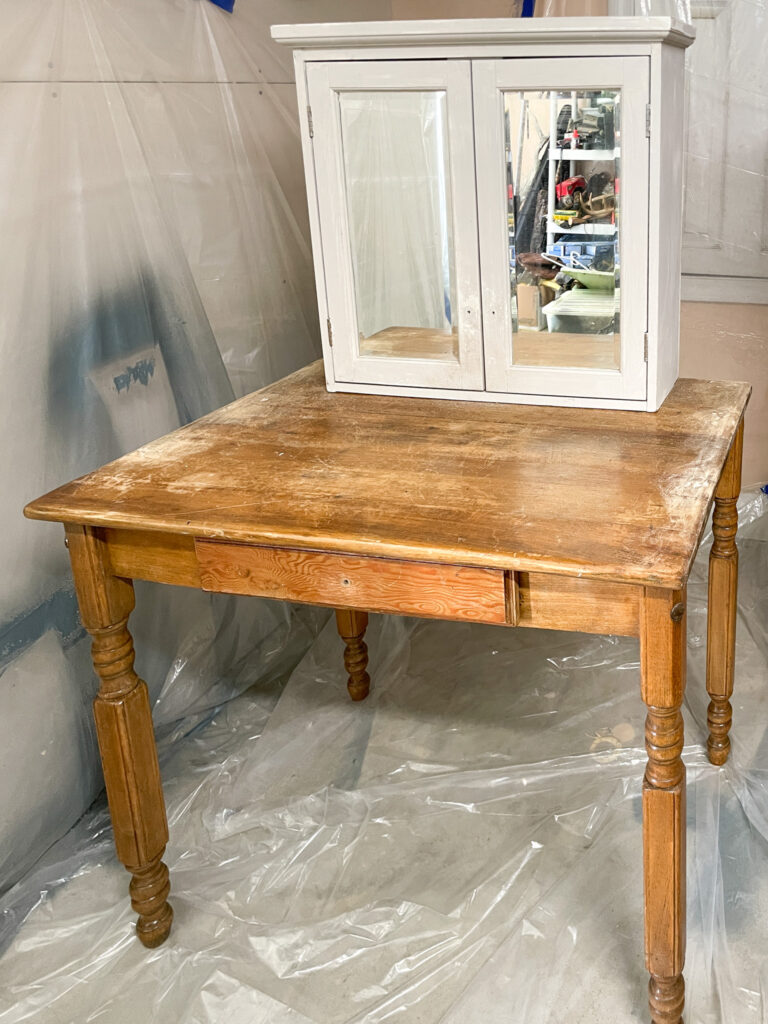
Antique Desk
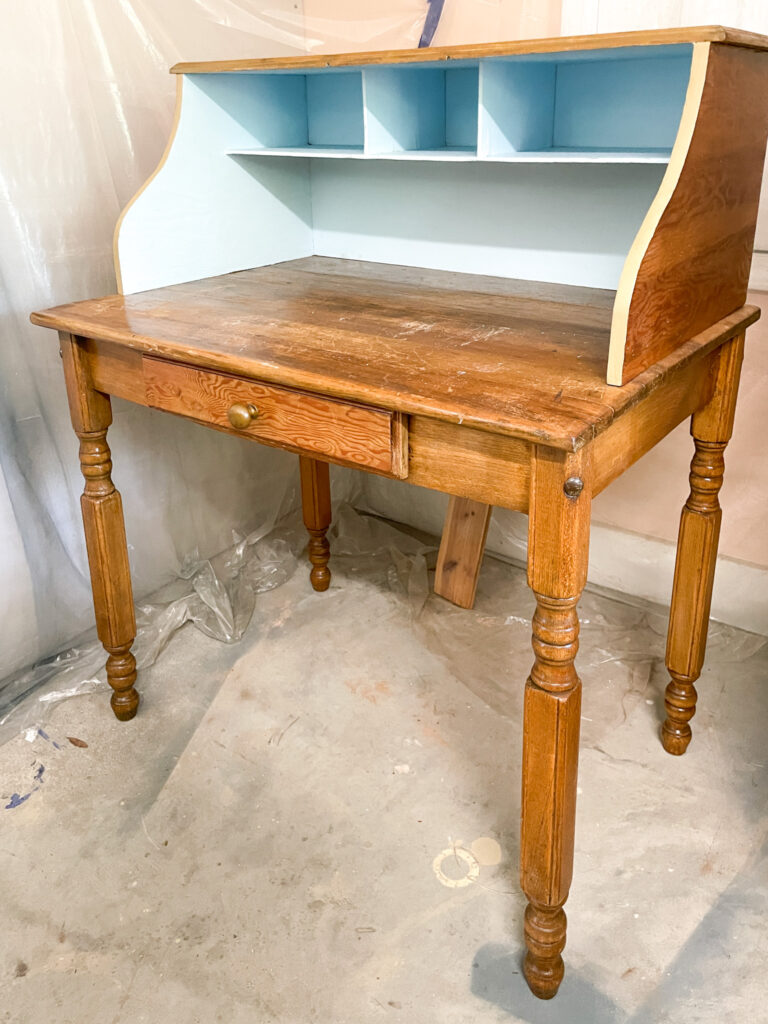
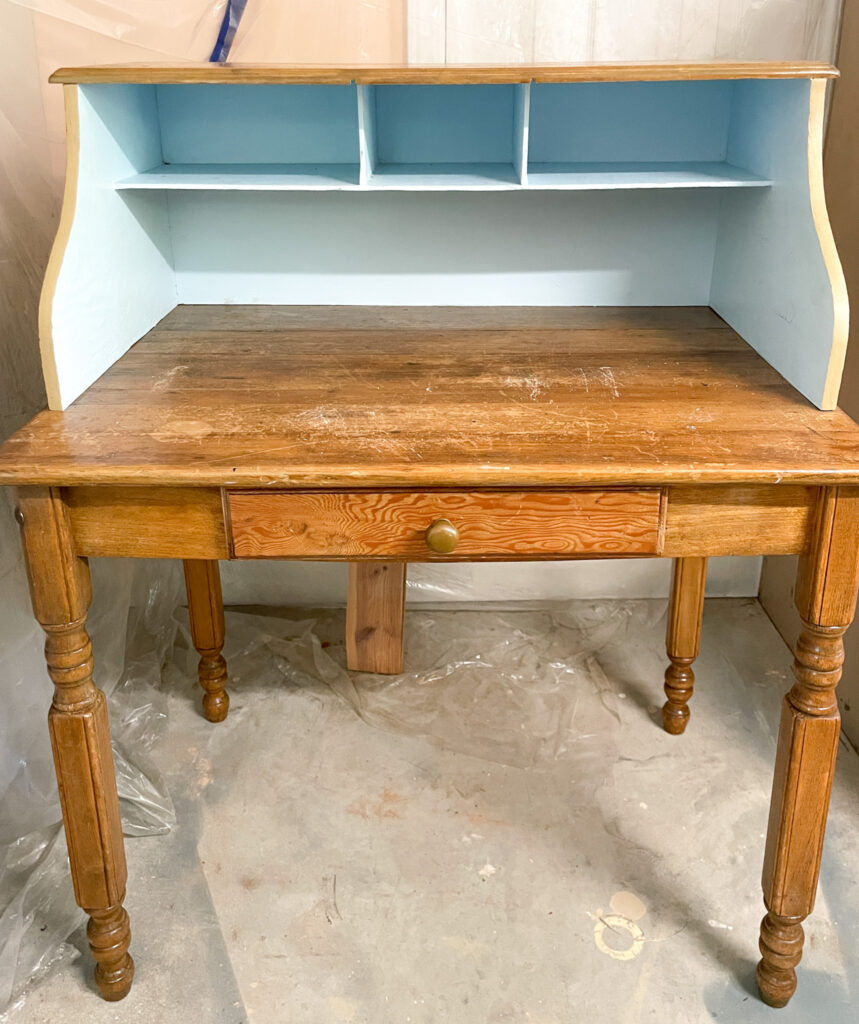
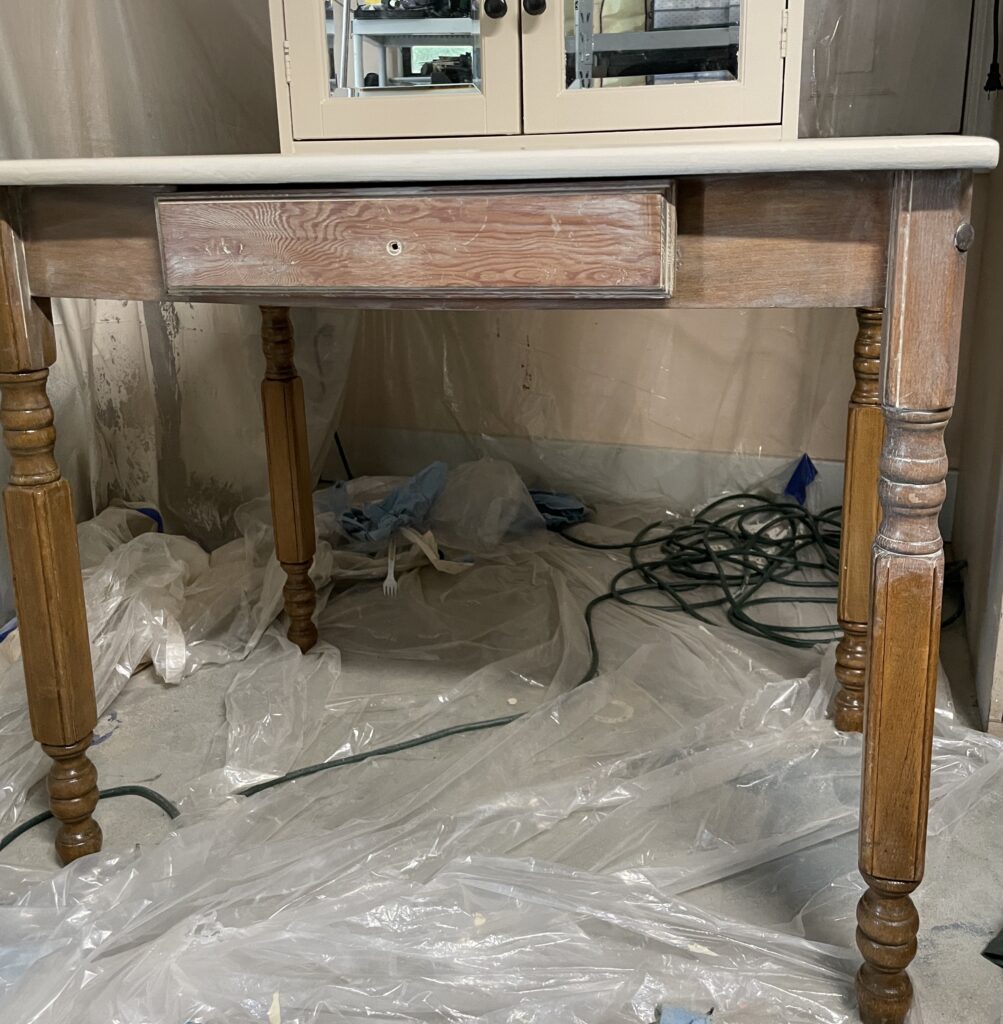
Below is the old desk that needed a new look. Even though it’s solid wood, it’s not in the best condition. I love to refinish old furniture, but unfortunately, this desk was not made from one solid piece of wood. The drawer face was a different type of wood than the top and the sides and the legs were also a different type of wood.
What does this mean? Even if I sanded the entire piece down to it’s raw wood state, all the wood will still have a slightly different finished look.
That’s when I decided a paint wash finish is a great way to cover the old orange toned wood and still allow the wood grain to show through.
Disclosure; this post contains affiliate links. As an Amazon Associate I earn from qualifying purchases. This disclosure statement refers to the rest of the Amazon links in this post. See more on my disclosure page.
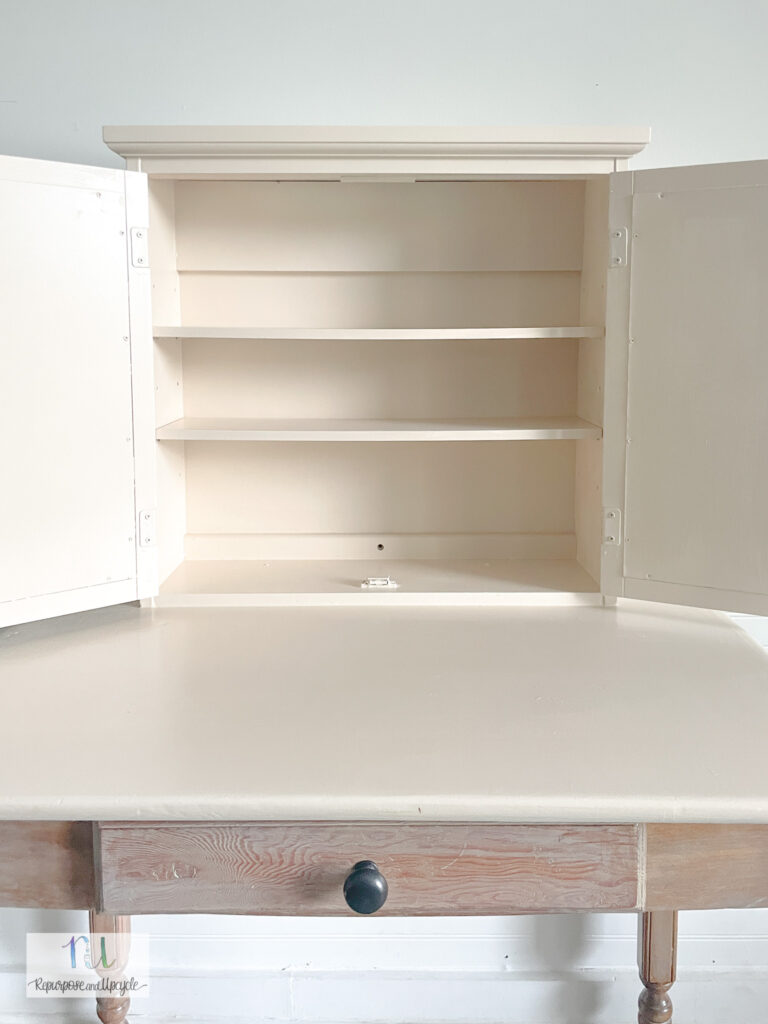
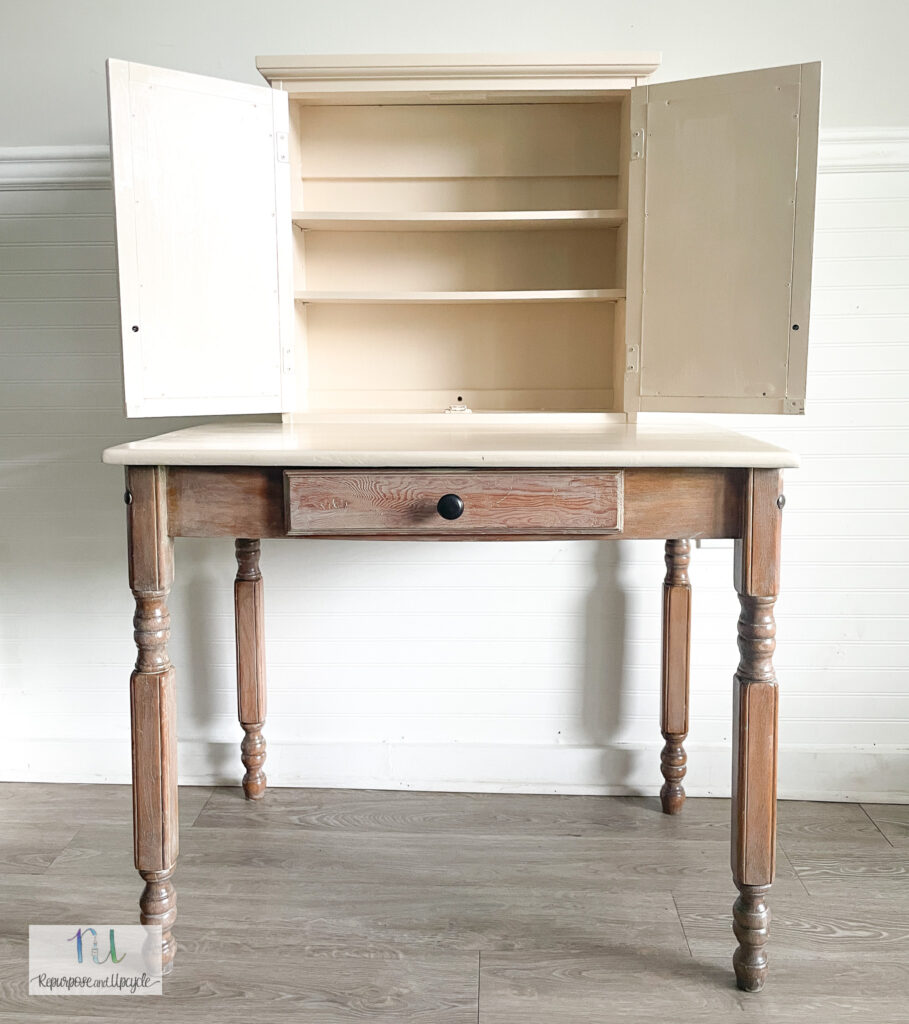
Medicine Cabinet
The Medicine Cabinet she gave me had never been used. Sadly, it sat in her garage in storage space for a while and grew some mold. Did I also mention that the bottom part was rotted out? Let me show you.
You can still buy this exact cabinet from Lowe’s today. So what could I do with it?

You can still buy this exact cabinet from Lowe’s today. So what could I do with it?
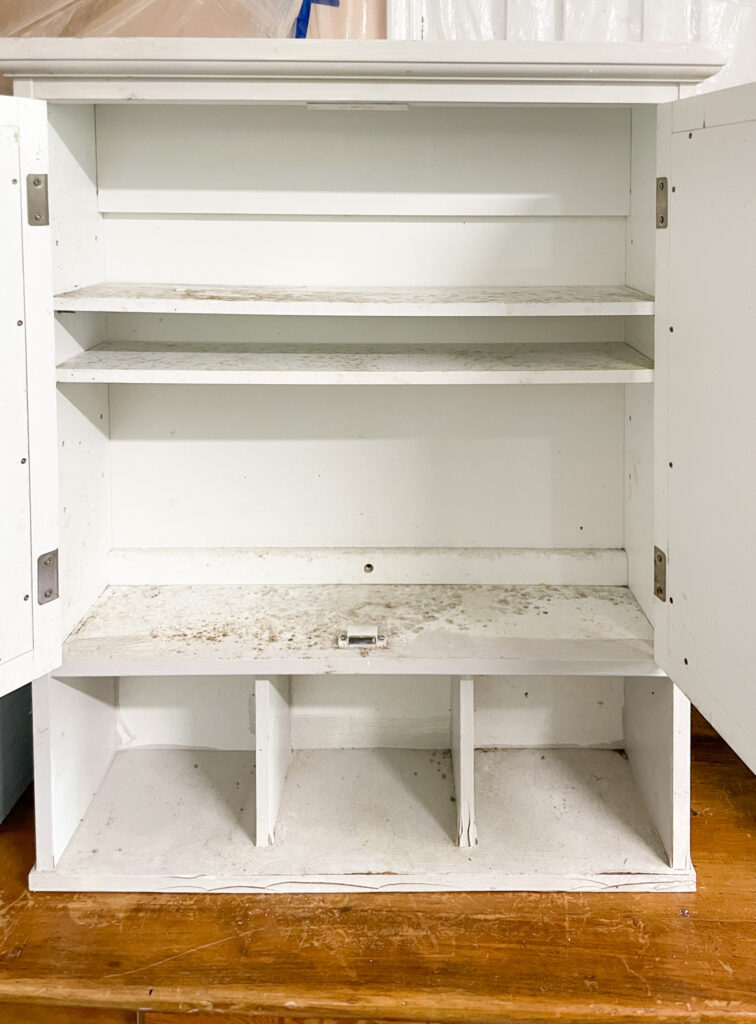
Do you see all the mold growth? First things first….clean and remove anything harmful.
Preparing the Surface
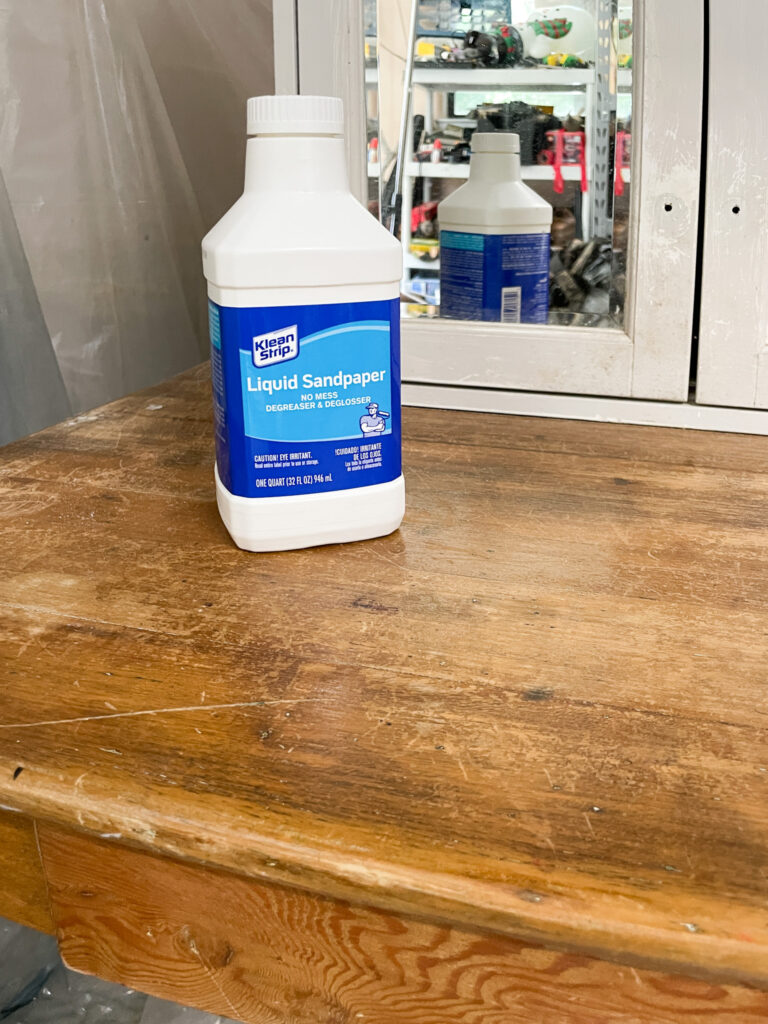
This DIY vanity desk needed a lot of work. I alway say, the prep work is sometimes the most important part.
Cleaning the Desk and Medicine Cabinet
The first step in preparing the surface is to clean the surfaces thoroughly. Any dirt, dust, or mold on the surface can prevent the primer from adhering properly. To clean the desk and cabinet, follow these steps:
- Remove any drawers or shelves.
- Wipe down the entire surface with a damp cloth to remove any loose dirt or dust.
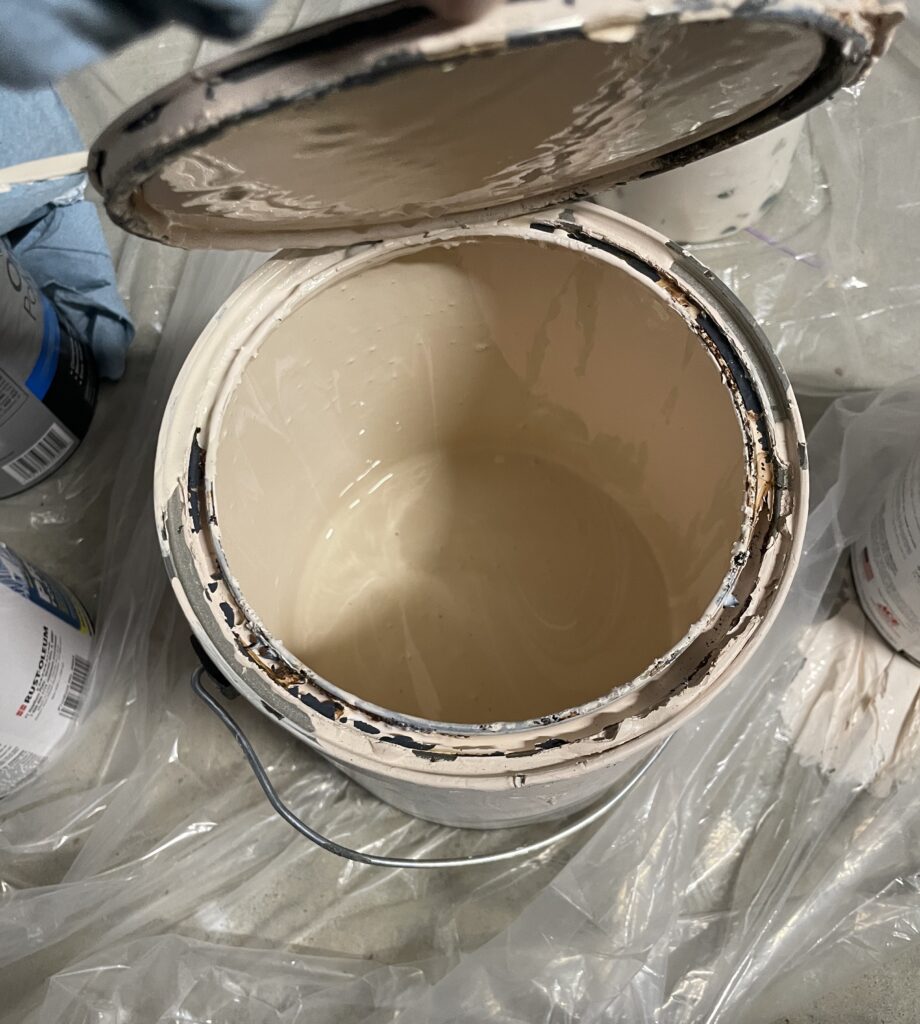
- Use a mild detergent and warm water to clean the surface thoroughly. I used a soapy water solution for the desk. To clean the medicine cabinet, because mold was involved, I used a bleach solution after I washed it with the soapy water solution. See more about how to clean mold off furniture with this post.
- Rinse the surface with clean water and dry it completely with a clean cloth. For the medicine cabinet, I pulled out the hose to fully wash it down. I let it dry and then I applied the bleach solution.
Removing the bottom part of the medicine cabinet
Since the medicine cabinet is a laminate surface with MDF underneath, I couldn’t sand away the broken and rotted pieces. This left me only one choice; to remove them. The actual cabinet part with the mirrored cabinet faces were ok, but the storage cubes underneath were in bad shape. oice; to remove them. The actual cabinet part with the mirrored cabinet faces were ok, but the storage cubes underneath were in bad shape.
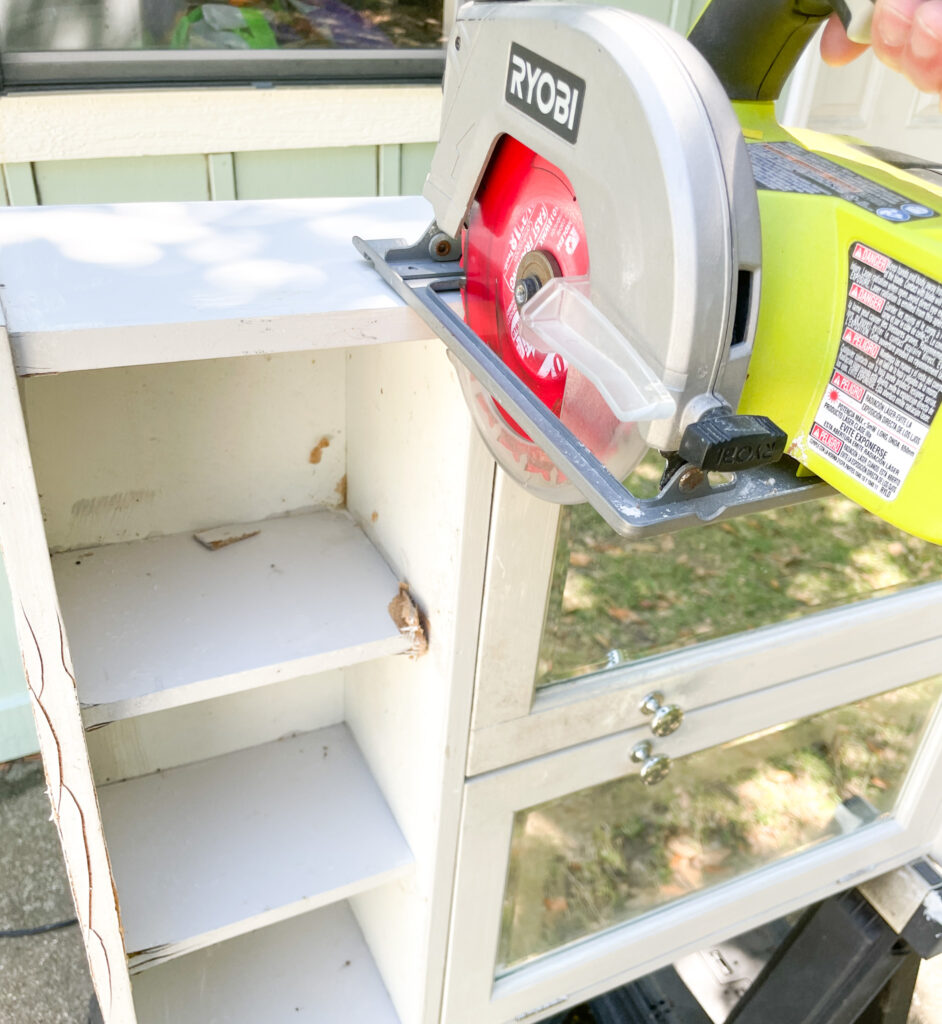
A skill saw and a reciprocating saw is the best thing needed to remove the three bottom cubes.

Then I sanded the bottom of the cabinet with an electric sander.
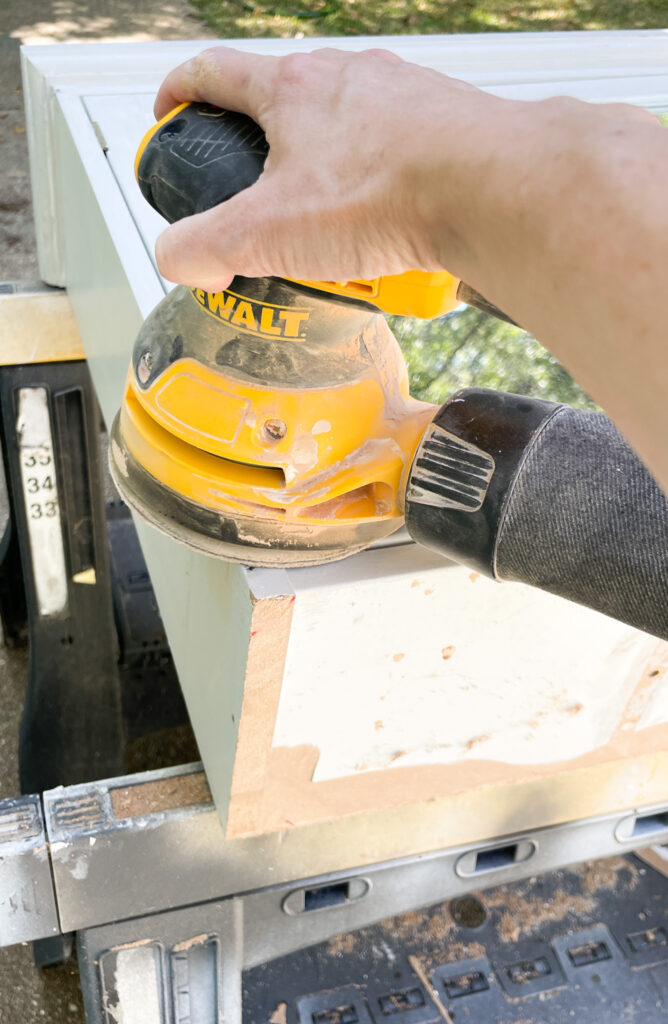
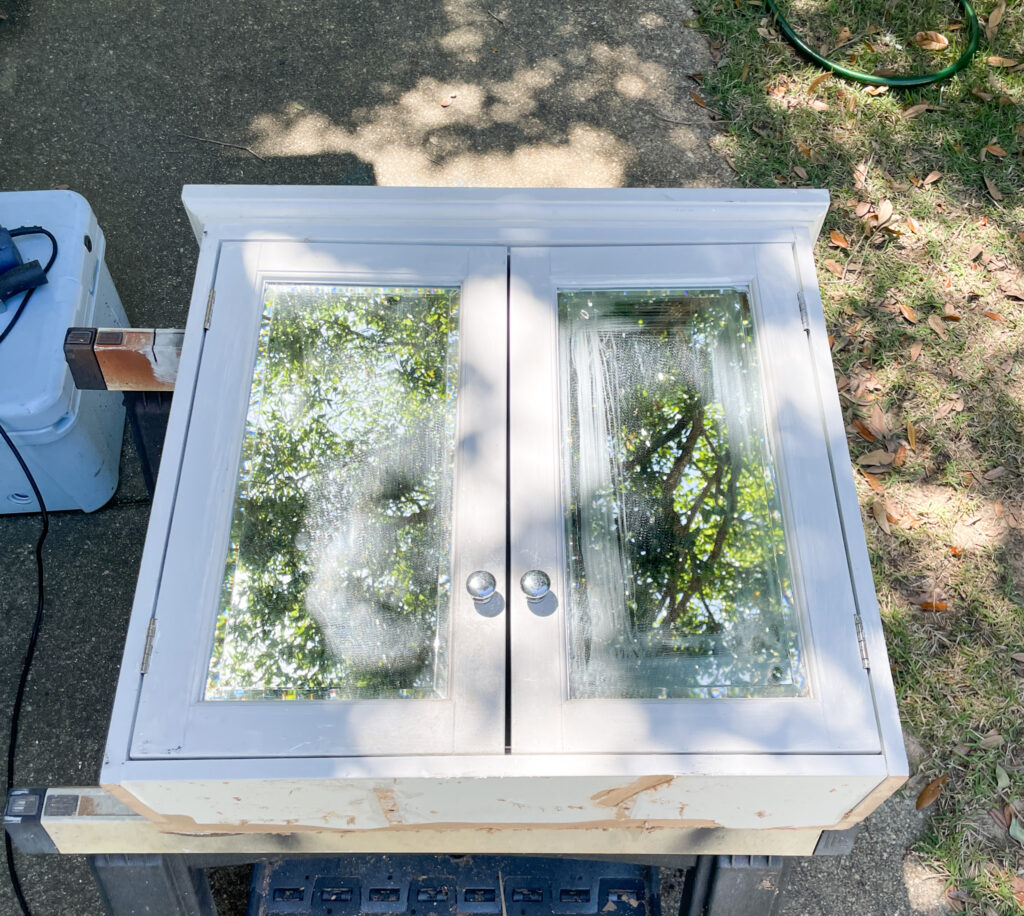
Much better! Now to get to work.
Attaching the medicine cabinet to the desk
Once the bottom of the medicine cabinet was clean, I sat it on top of the desk, measured to make sure it was center, and used two wood deck screws and some wood glue to attach the cabinet to the desk. Sadly I did not get any photos of this step.
Long story short, I opened the cabinet and drilled the screws into the vertical wood piece on the back of the wood desk. If you have a kreg jig, you could also make pocket holes and use pocket hole screws if you want a stronger bond between the two pieces. This should eliminate the need to use wood glue too and is a better option than using straight wood screws.
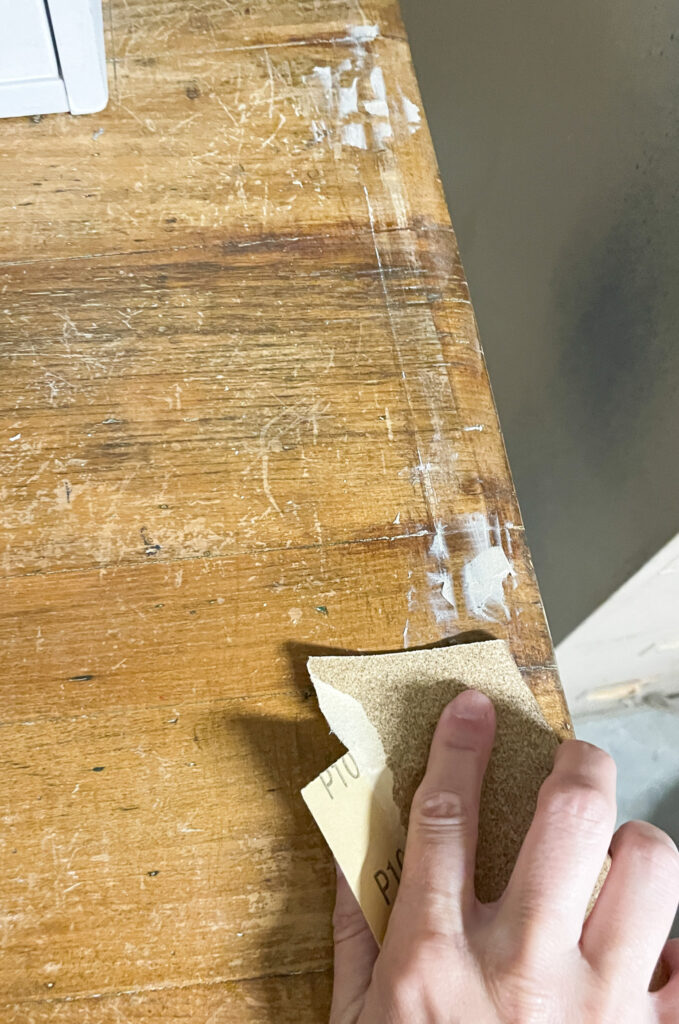
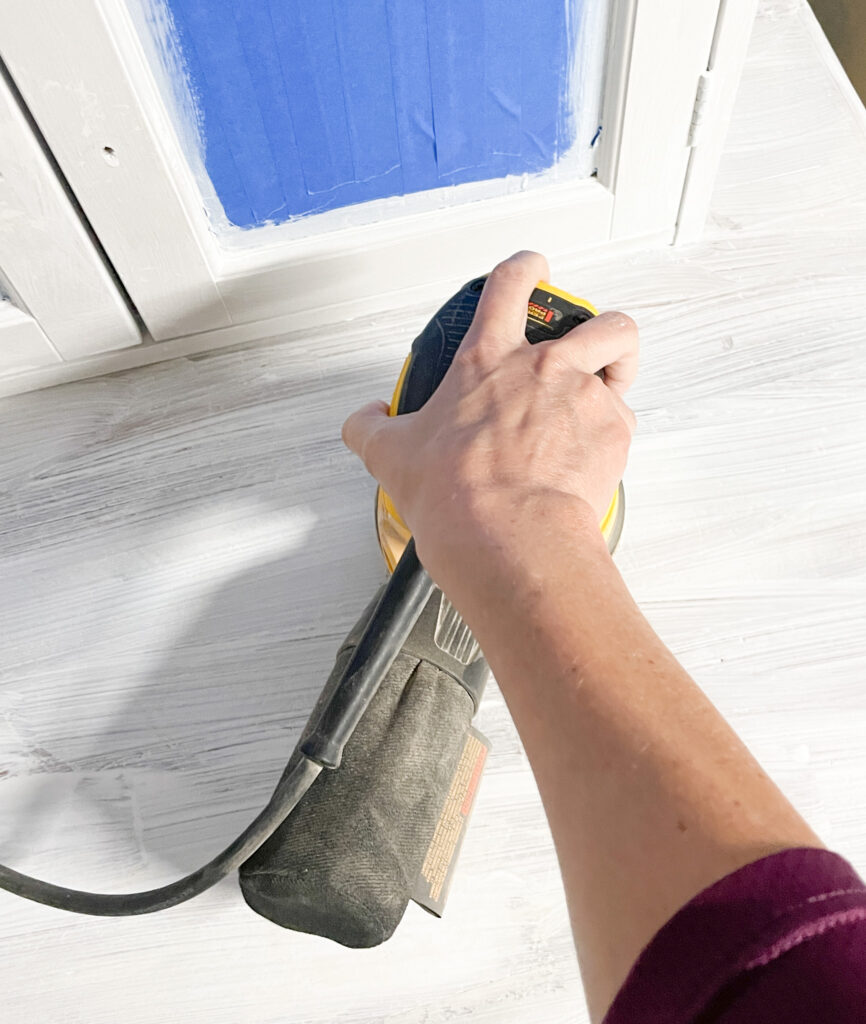
Sanding the Desk
Once the desk is clean and dry, the next step is to sand the surface. Sanding helps to roughen up the surface so that the primer can adhere better. To sand the desk, follow these steps:
- Use a medium-grit sandpaper to sand the entire surface of the desk.
- Sand in the direction of the grain to avoid damaging the surface.
- Wipe down the surface with a clean cloth to remove any dust. My go to cleaner is also a liquid sandpaper product. It does a great job of lightly “scuffing” the surface to prepare for primer or paint while removing dirt and grime.
Wood repair
I removed the top part of the writing desk in order to place the medicine cabinet on it. When I did this it left a handful of holes in the wood.
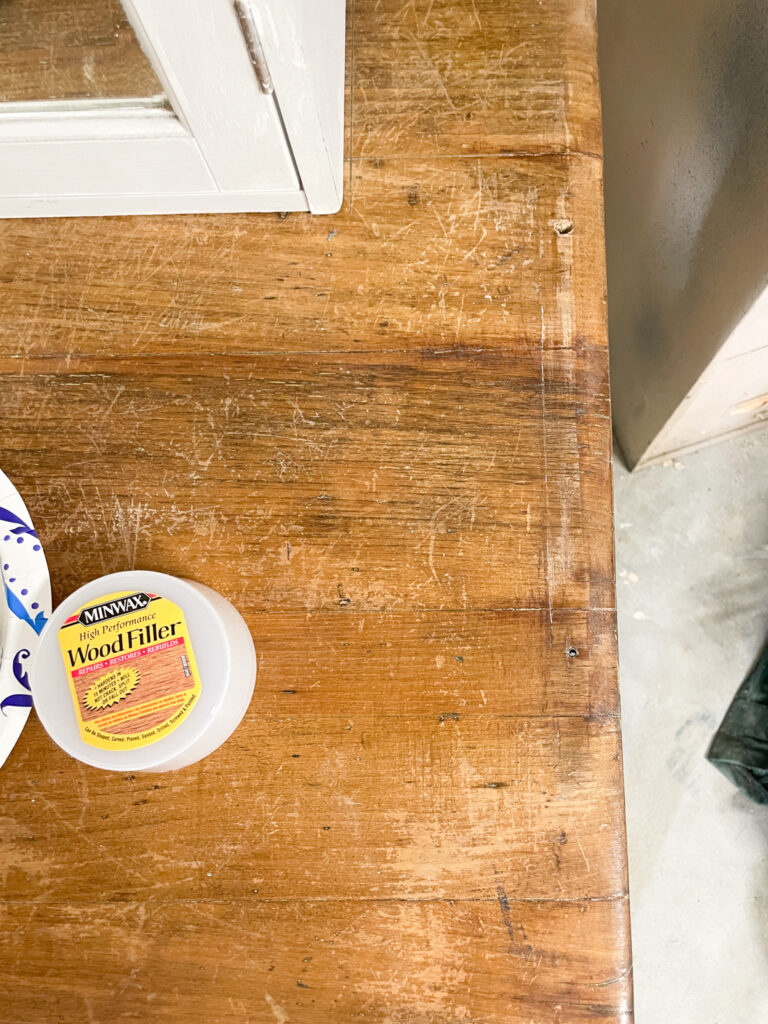
I used a Minwax wood filler product to fill the holes. I highly suggest using a wood filler product and not wood putty when refinishing furniture. You can see more about wood putty vs. wood filler here. I also did a post about one of my favorite furniture refinishing products; Bondo.
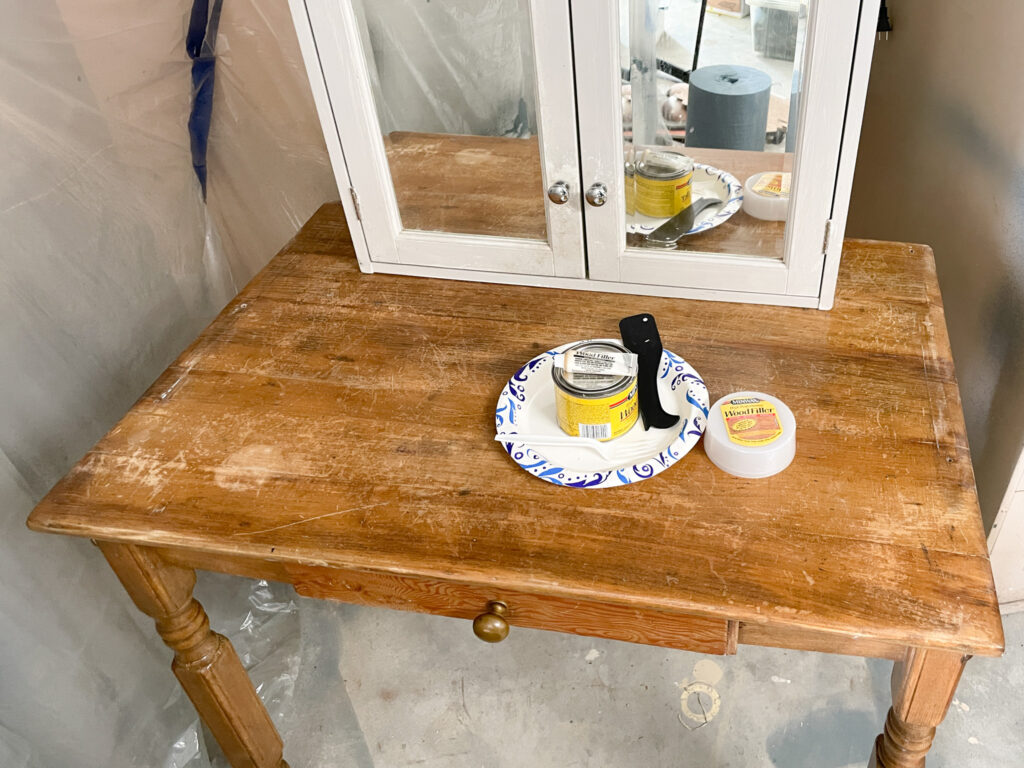
Once the wood filler was dry, I sanded it smooth and then cleaned the wood surface once again.
Apply paintable caulk around the base of the medicine cabinet and wood desk
Truth be told I forgot about this step until I had already applied one coat of paint. Hindsight I would have applied the caulk at this stage of the makeover.
Applying paintable caulk around the base makes the DIY vanity look like one seamless piece of furniture rather than two random pieces screwed together.
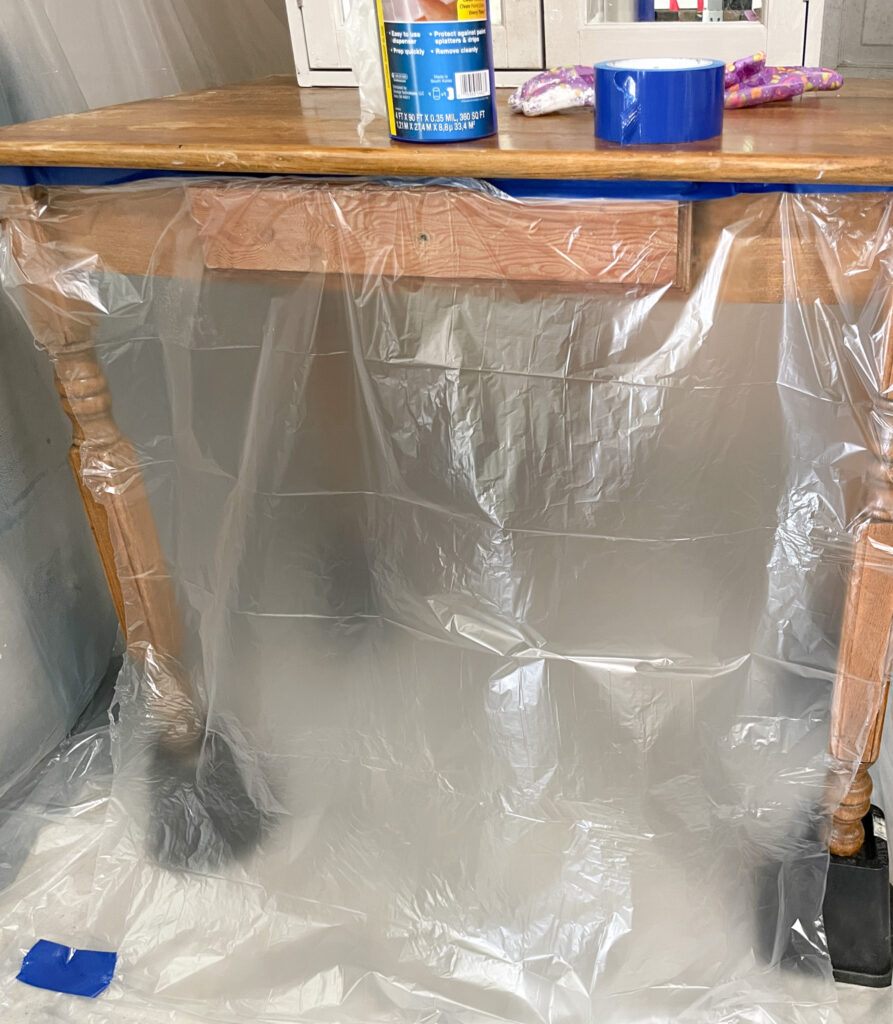
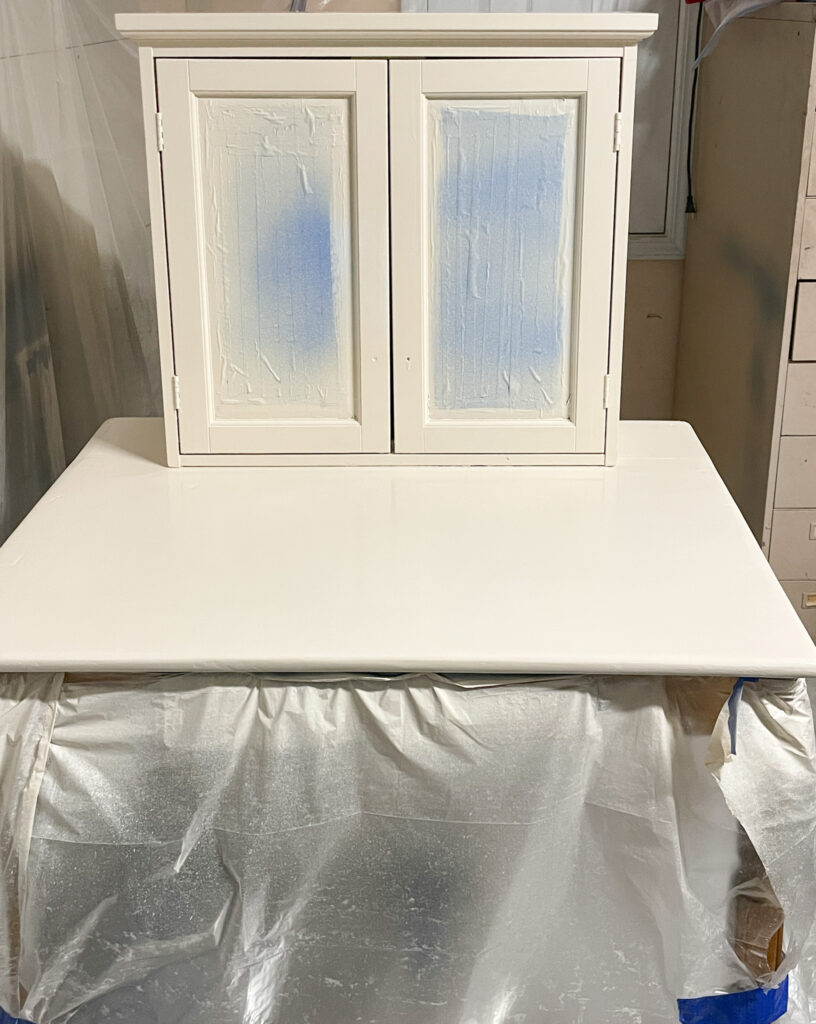
Apply painters tape and remove hardware
The last step before applying primer is to remove the hardware and add the painters tape and plastic drop cloth to any surface you don’t want painted.
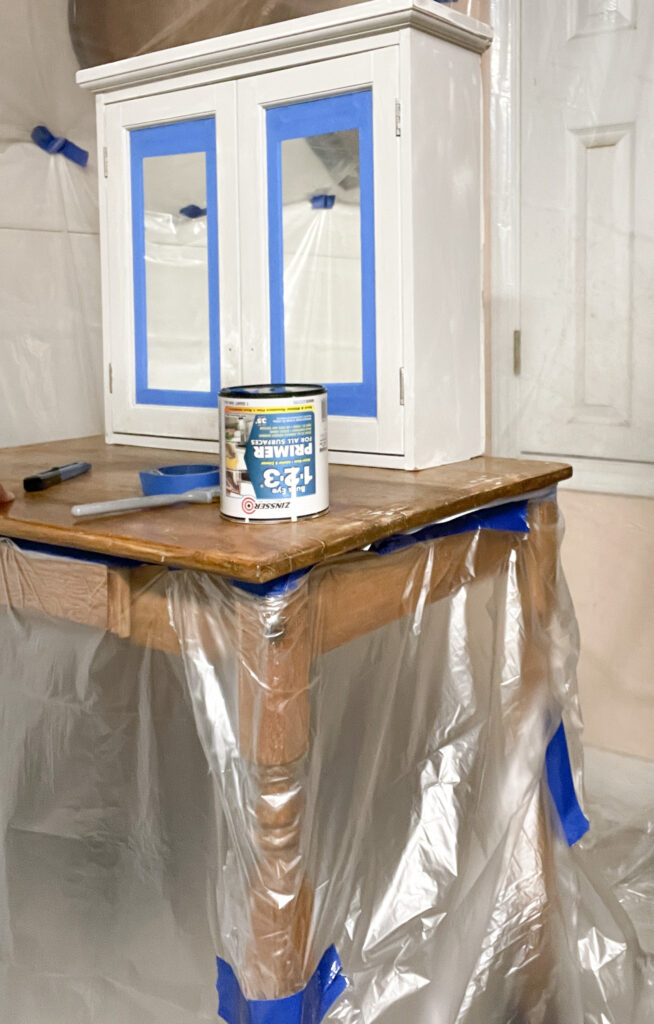
Since the design plan is to paint the medicine cabinet and top of the desk, I needed to cover everything else.
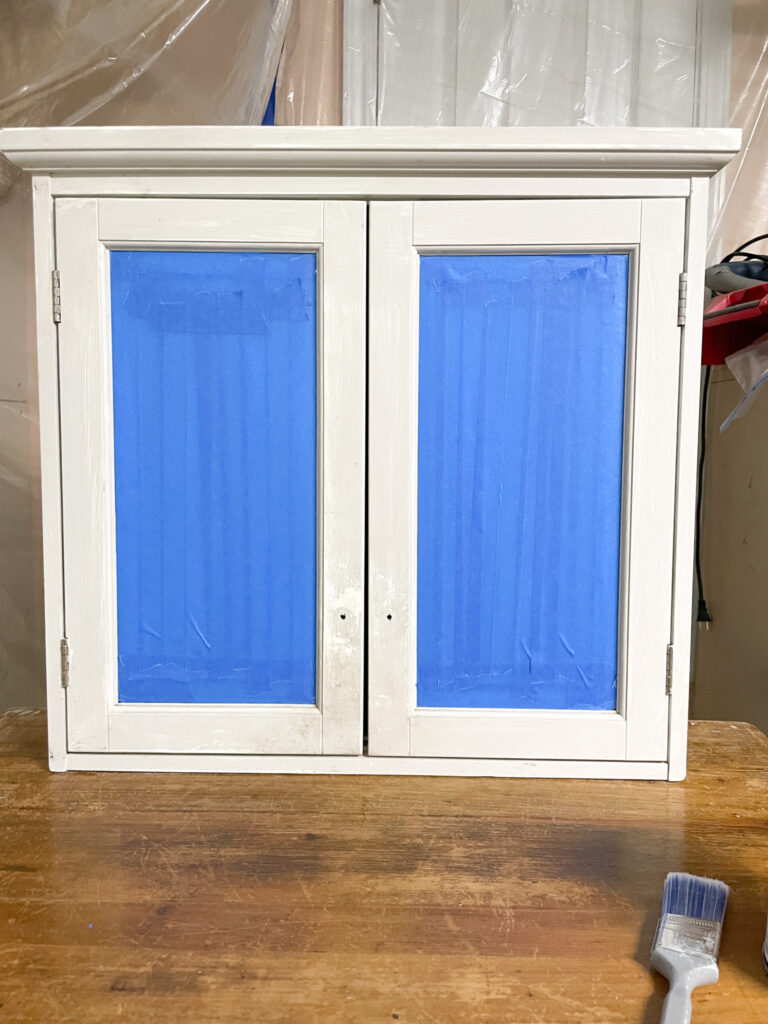
I chose to use painters tape to cover the mirrored part of the cabinet and a plastic drop cloth for the base of the desk.
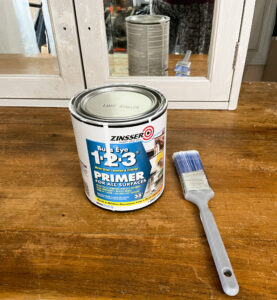
Applying Primer
The final step in preparing the surface is to apply primer. Primer helps to seal the surface and create a smooth, even base for the paint. Unless you have a glass top, primer is very necessary! To apply primer, follow these steps:
- Use a brush or roller to apply a thin, even coat of primer to the surface. You can spray the primer too, but I chose to use a brush.
- Allow the primer to dry completely according to the manufacturer’s instructions.
- Sand the surface lightly with a fine-grit sandpaper to remove any bumps or imperfections.
- Wipe down the surface with a clean cloth to remove any dust.
- Apply a second coat of primer if necessary.
I did apply two coats of primer because the medicine cabinet is a laminate surface (AKA paint doesn’t like to stick to it) and the desk needed two coats. After the first coat of primer on the desk, the tannins from the wood surface were already bleeding through.
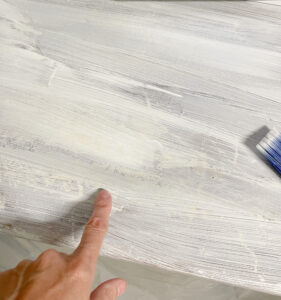
This desk definitely needed two coats of primer. After the first coat of primer I did sand it lightly.
Sanding the primer coat ensures a super smooth finish. After adding a second coat of primer and allowing it to dry, I moved on to painting.
Painting the Desk
When it comes to a DIY vanity desk makeover, painting the desk is one of the most important steps. It can transform the look of the desk and give it a fresh, new appearance. Here are some tips on how to paint the desk.
Choosing the Paint Color
The color should complement the room’s decor and reflect the user’s personal style. Some popular paint colors for vanity desks include white, black, gray, and pastel colors like pink, blue, and green.
My client’s daughter wanted a pale pink color. I decided to mix two colors I already had on hand for a muted pink color.
Applying the Paint
Once the paint color is chosen, it’s time to apply the paint. I used my Wagner paint sprayer. You can also apply the paint with a roller and angle brush if you wish.
Here are some steps to follow:
- Thin the paint before adding it to the sprayer (if necessary)
- Spray or apply thin even coats
- Allow paint to fully dry before adding another coat
- Two coats are most always necessary
I applied two coats of paint and let it dry overnight. Doesn’t it look better already!
Applying sealer
Sealer is a super important step for any furniture piece. Don’t skip this step! You can check out my list of the best clear coats for wood furniture here.
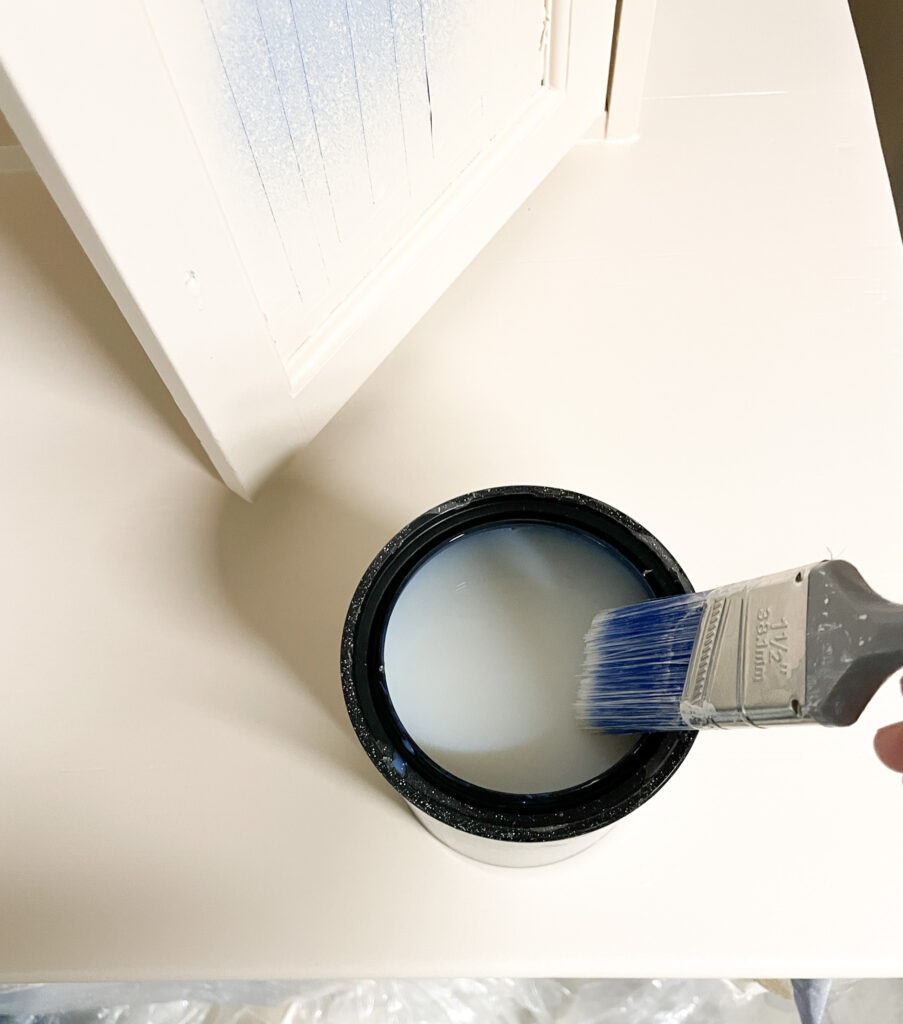
I chose to use the Minwax One Coat water based Polyurethane. I’ve had good luck with it in the past.
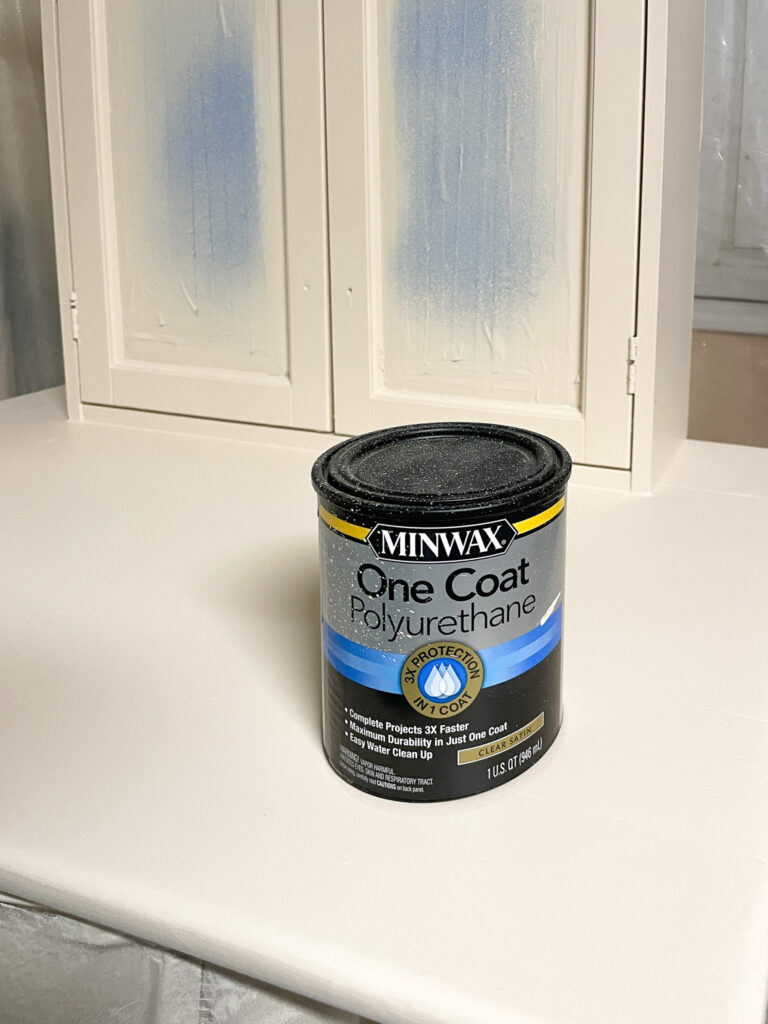
I applied it with a brush and did two coats. The biggest key is making sure to not have any drip marks.
Once the sealer coat (or coats) are dry, you can pull the painters tape and drop cloth off the desk.
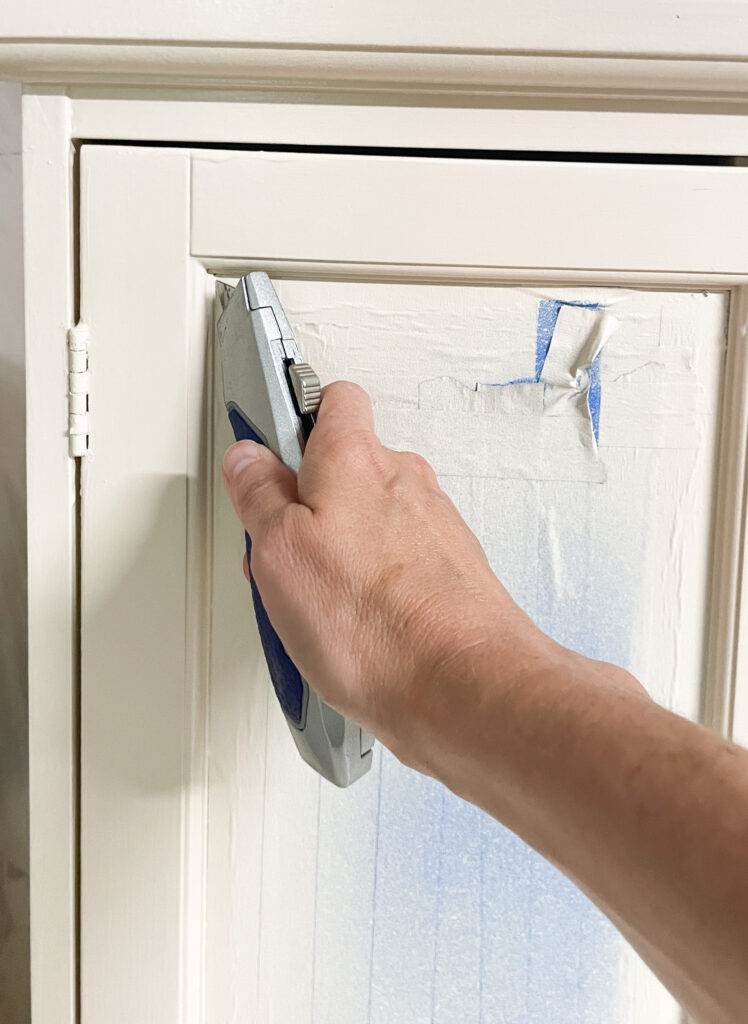
I always score the painters tape before pulling it off to prevent the paint from pulling with it!

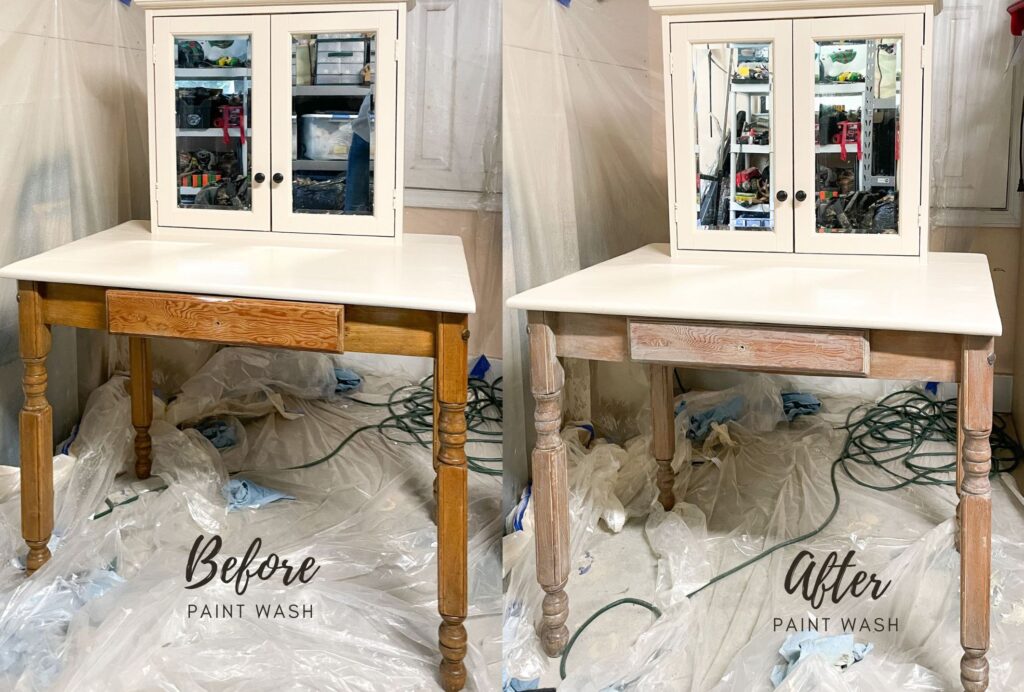
Applying Paint Wash
I’ll be honest, when I first looked at this desk, I figured I would apply a gel stain finish. I wanted to cover the orange wood tones without removing the pretty wood grain. I also thought a nice contrast between the light paint and dark wood would look great. But after I finished the painting process with the cabinet, my thoughts changed.
Rather than a dark wood finish, I decided to go with a lighter paint wash or white wash finish. I thought a paint wash would be the perfect way to get a lighter look. I recently did a full tutorial on how to create a paint wash with just paint and water. It’s similar to a white wash finish, but with a colored paint rather than white paint. Check out that post for more details on a color wash/paint wash technique.
The first step was choosing a color. I chose to use the same paint color and paint wash ratio (1:1) that I did with my previous cabinet makeover.
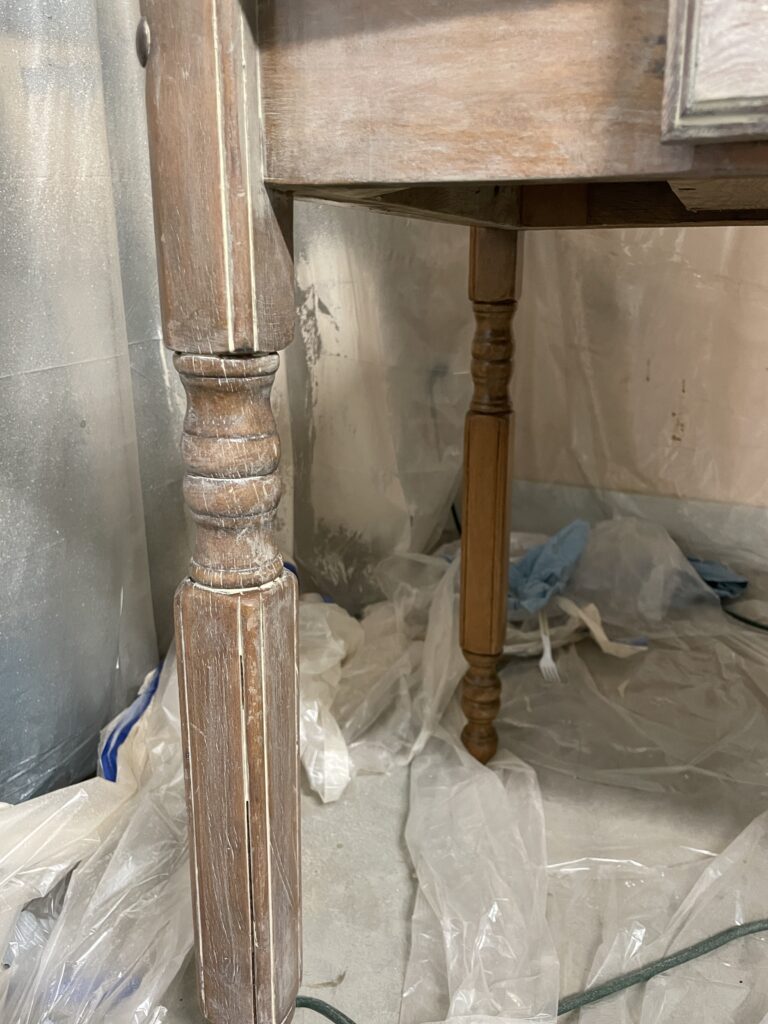
Once I mixed the paint wash, I grabbed a few lint free cloths and applied the wash liberally all over the wood working in sections. I applied it in the directions of the wood grain to one leg and then let it sit for a few minutes before wiping it off. This is one of the easiest ways to hide an ugly wood color or tone the color down. I started on the drawer fronts and around it and worked my way down the legs.
You can see above where I’ve applied the wash vs. where I haven’t.
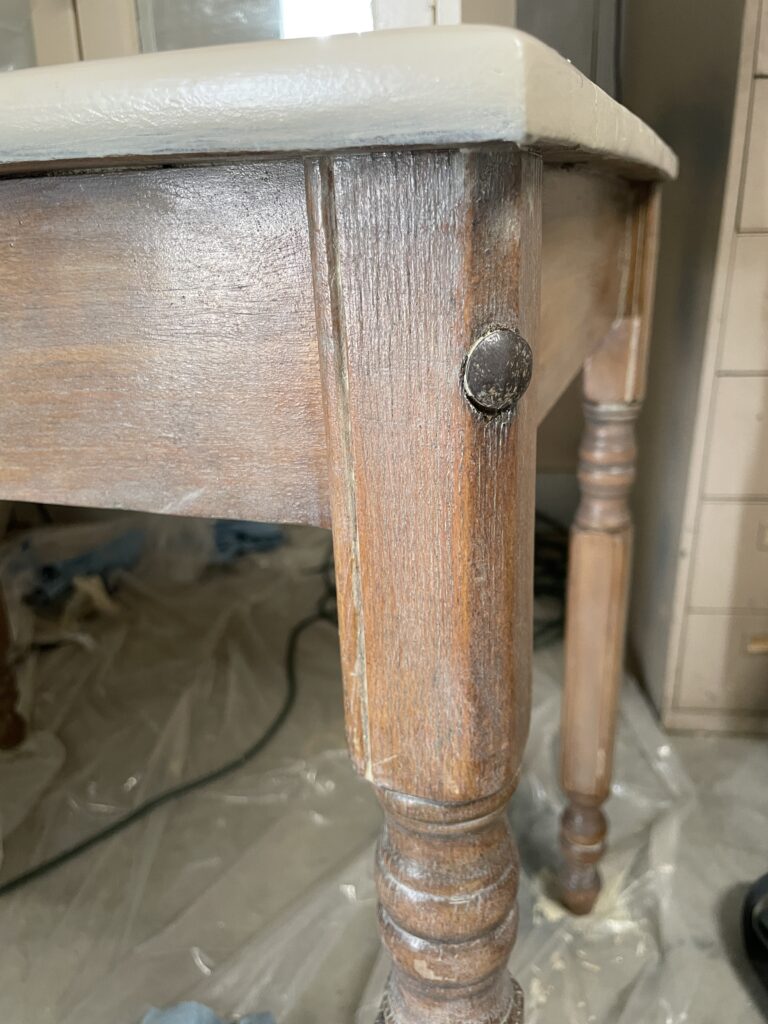
I love how the paint wash gets in the wood grain and highlights it. This will also create a similar finish to using a lime wax product. The only different is that you have to put a top coat on this and you don’t have to top coat the wax product.
Once the paint was dry, I added one coat of the same polyurethane I used for cabinet and top of the desk.
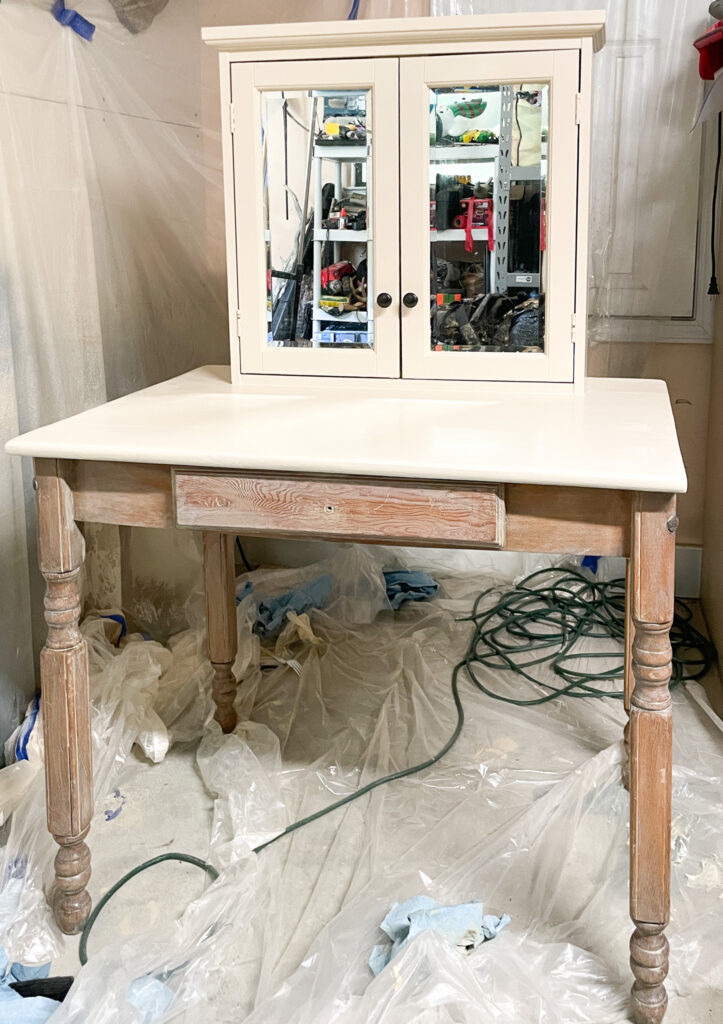
Almost done! Here’s a fun before and after the paint wash.
The Drawer Knobs
New hardware is an important part of the furniture piece. Hardware is like jewelry to a dress; It’s the last step but can make or break the finished look!
I originally wanted to paint the pulls an antique gold color. I quickly changed my mind when I realized it’s hard to get my go-to-gold, Rub N’ Buff, to stick to the silver pulls.
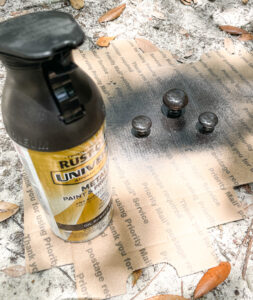
Instead, I used a regular old oil rubbed bronze spray paint. You can see more of my favorite metallic paints here.
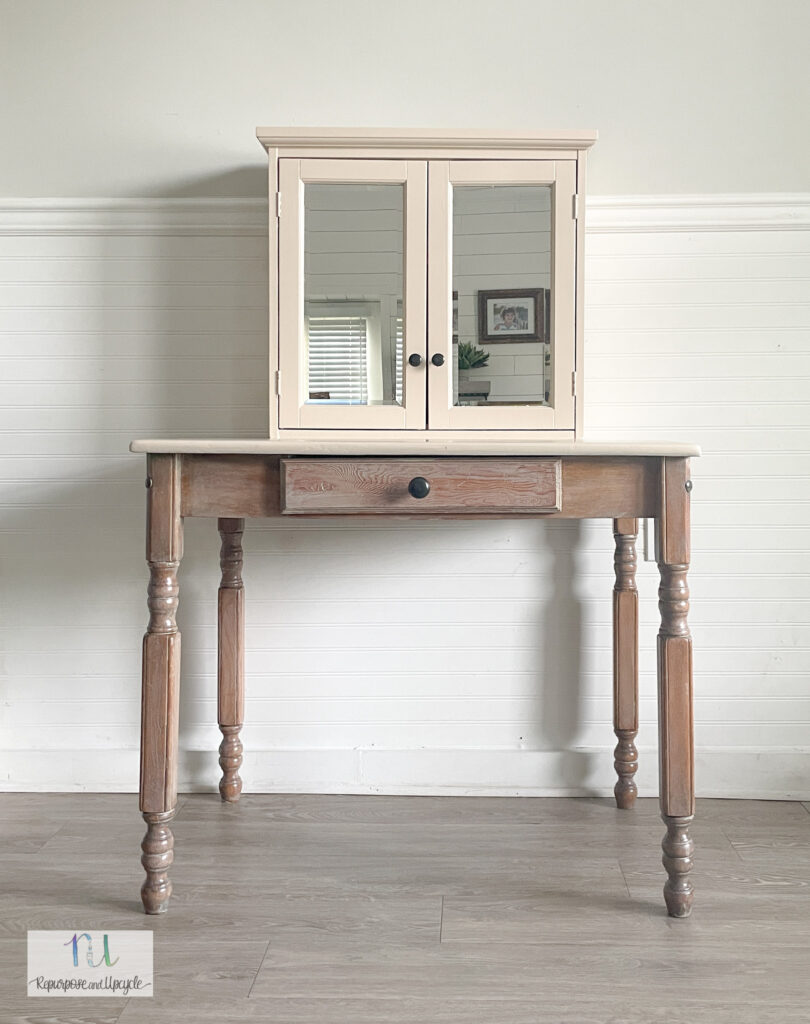
DIY Vanity Desk
I’m so pleased with how this desk turned out!
I hope my client is happy with this piece! She said it would match her home decor better!
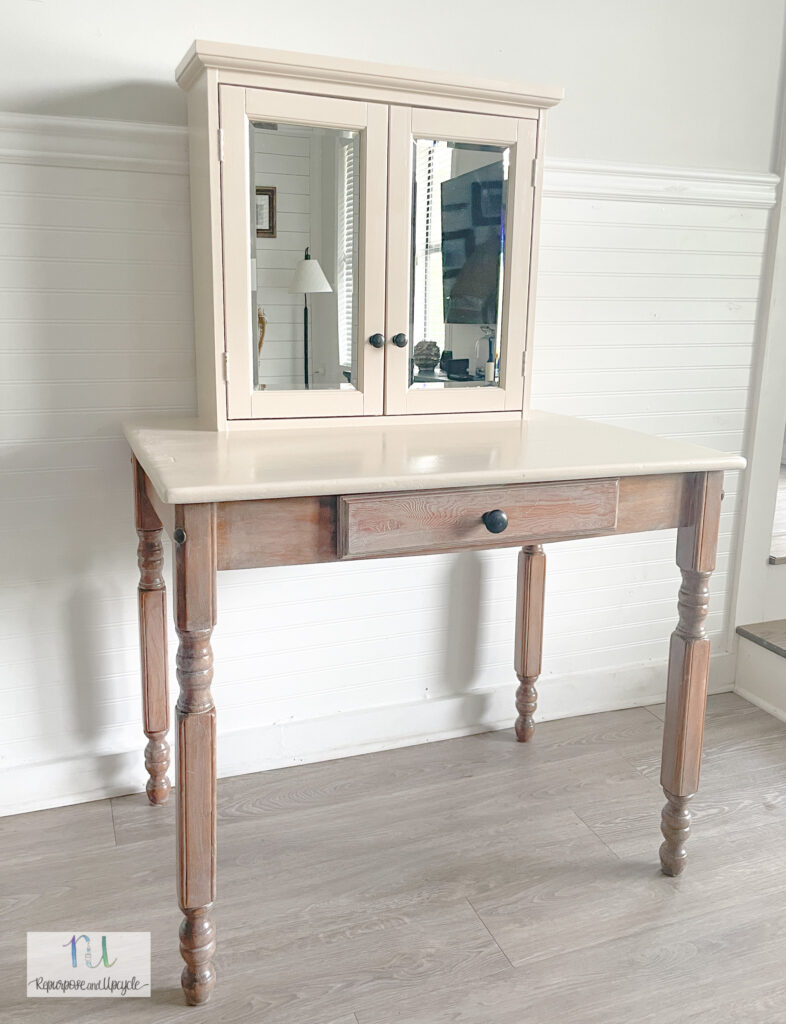
The vanity desk and medicine cabinet will not only look great but will also be super functional, especially for tight spaces or a small room.
I hope you can see how easy is it to create a stylish makeup vanity.
Lindsey**


