Watch as I remove wood rot from the siding of a 40 plus year old house and repair it with Minwax High Performance wood hardener and wood filler.
Did I ever tell you that we live in a 40 plus year old wood siding home in a very humid area? Sometimes I still wonder why we chose to buy this home. Don’t get me wrong, I love our rustic beach cottage, but it’s going to (and already has) need A LOT of wood maintenance soon. Who am I kidding, all the exterior wood needs to be removed and replaced like yesterday.
Until we are prepared to take on this huge expense, I’m going to have to continue to patch the rotted wood in hopes of stopping the wood rot until we can replace everything. Sigh…
I recently did a post on wood furniture repair with Bondo. I thought about using a Bondo product because I hear they have a good wood rot product that I could use with the Bondo wood filler that I already had on hand.
Disclosure; this post contains affiliate links. As an Amazon Associate I earn from qualifying purchases. This disclosure statement refers to the rest of the Amazon links in this post.
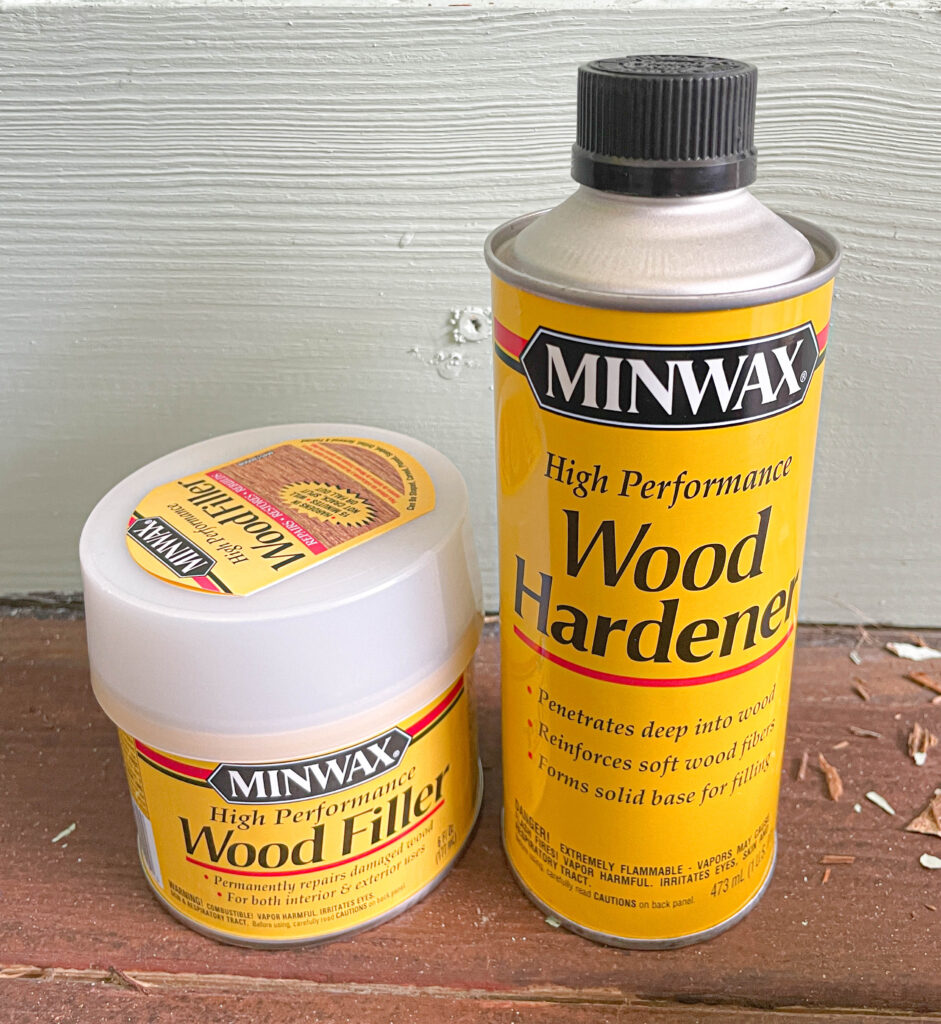
Minwax wood rot repair products
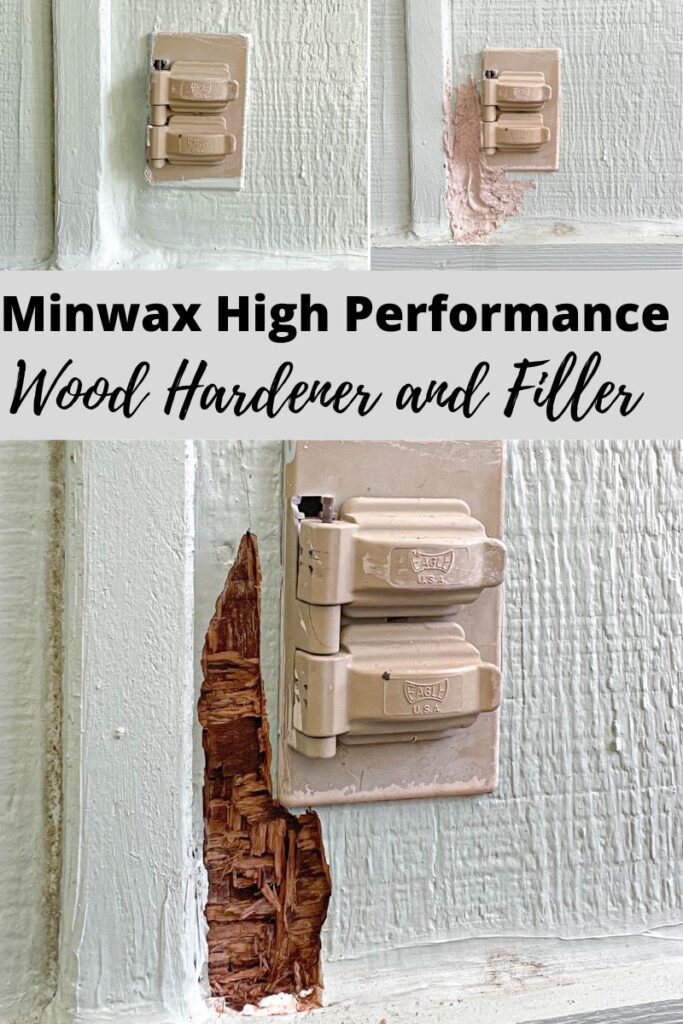
Ultimately, I chose to purchase a Minwax Wood Hardener product with a High Performance Wood filler. I read great reviews about both so I decided to give it a try.
Let me show you the wood rot I’m working with.
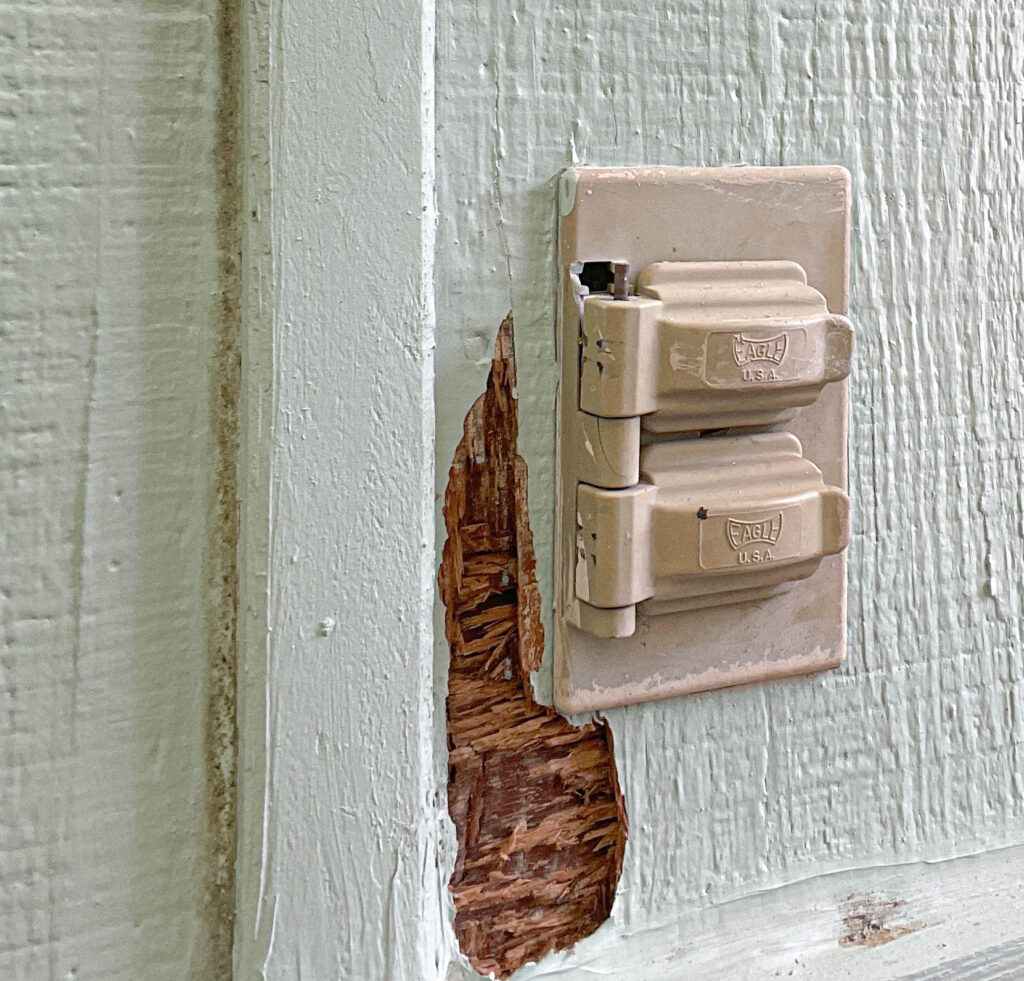
Using Minwax Wood Hardener with High Performance Wood Filler
The first thing I did was grab a soft scrub brush and “brush” away the loose pieces of rotted wood. The instructions on the wood hardener said to get it down to “soft wood” and make sure all loose pieces were gone.
I tried my best to remove all the “loose pieces” but to be honest, the wood isn’t in great shape. That being said, I did my best to remove all the flaky wood pieces but there might have still been a few pieces left that were attached pretty well to the base layer of wood.
Once I was down to the soft wood and the loose pieces were mostly gone, I used the Minwax Wood Hardener.
Applying Minwax Wood Hardener to soft exterior wood siding
The directions say to shake the can and then apply a generous amount (and possibly a few layers) of the solution with a bristle brush.

The dry time on the wood hardener is 2-4 hours.
I brushed a few different applications and then let it sit for 4 hours. The directions said it would leave a shiny finish. Because the wood was dark, I never saw that.
After it dried I began to prepare the Minwax high performance wood filler.
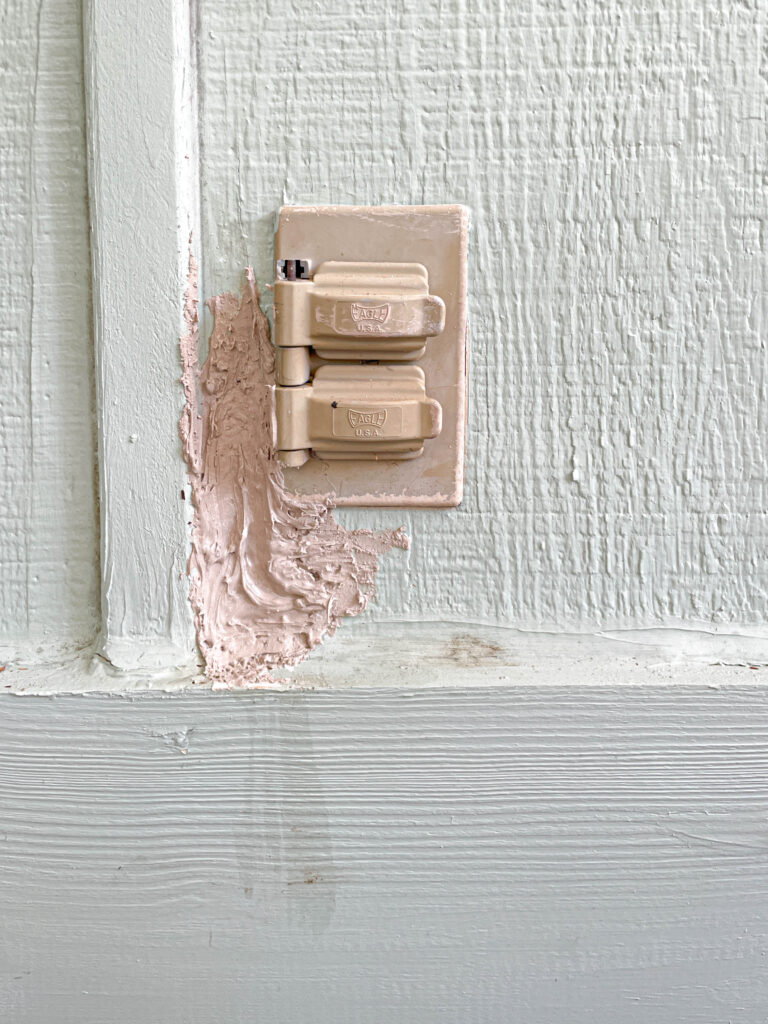
Applying Minwax high performance wood filler after wood hardener
Preparing Minwax wood filler isn’t difficult, you just need to work quick. The directions say to mix a 16:1 ratio of wood filler to wood hardener. This can be a little tricky. I used a plastic spoon to scoop out 4 large scoops of wood filler and then squeezed the wood hardener out onto 1/4 of the spoon and mixed both really well.
Make sure to apply the mixed solution immediately to the surface with a plastic putty knife. In my case, I didn’t have a putty knife small enough to fit in between the outlet so I used my mixing spoon to apply it to the surface. I did my best to smooth it out with that too.
Ideally, you need a plastic putty knife. Hindsight I probably would have made sure to purchase a smaller knife but you live and learn right?
This stuff dries fast! After only a few minutes it was almost rock hard!
I waited 30 minutes and then pulled out the dremel tool and started to sand. If the surface were more smooth, I probably could have gotten away with using a regular piece of sandpaper. Because I didn’t have the right tools to begin with, ie smaller putty knife (ahem, whoops), it was too hard to sand by hand. The dremel tool for the win.
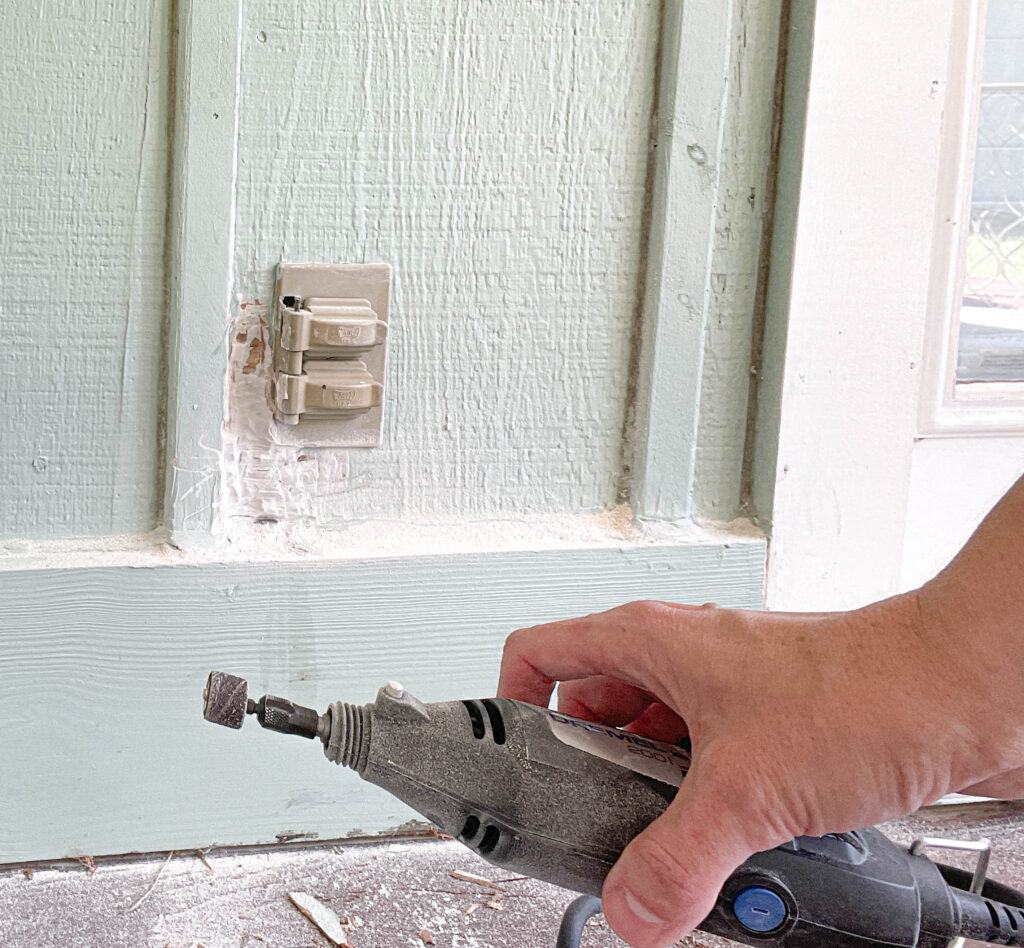
The great thing about this wood filler is that it sands really easily.
I used the Dremel tool to “smooth” out most of it, and then I went back with a 100 grit sandpaper by hand. I finished by sanding with a 220 grit sandpaper until I was pleased with how it looked.

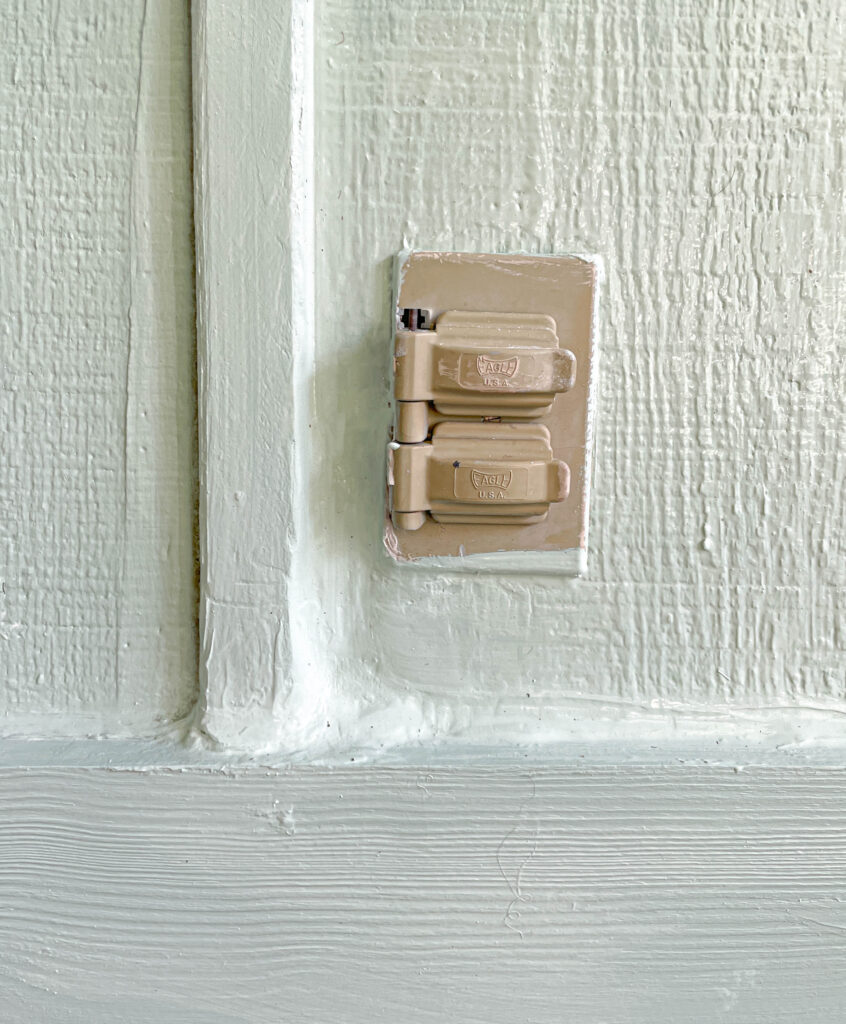
I know it doesn’t look perfect, but the wood isn’t perfect either so sanding until it’s totally smooth wouldn’t have looked right.
Time to paint!
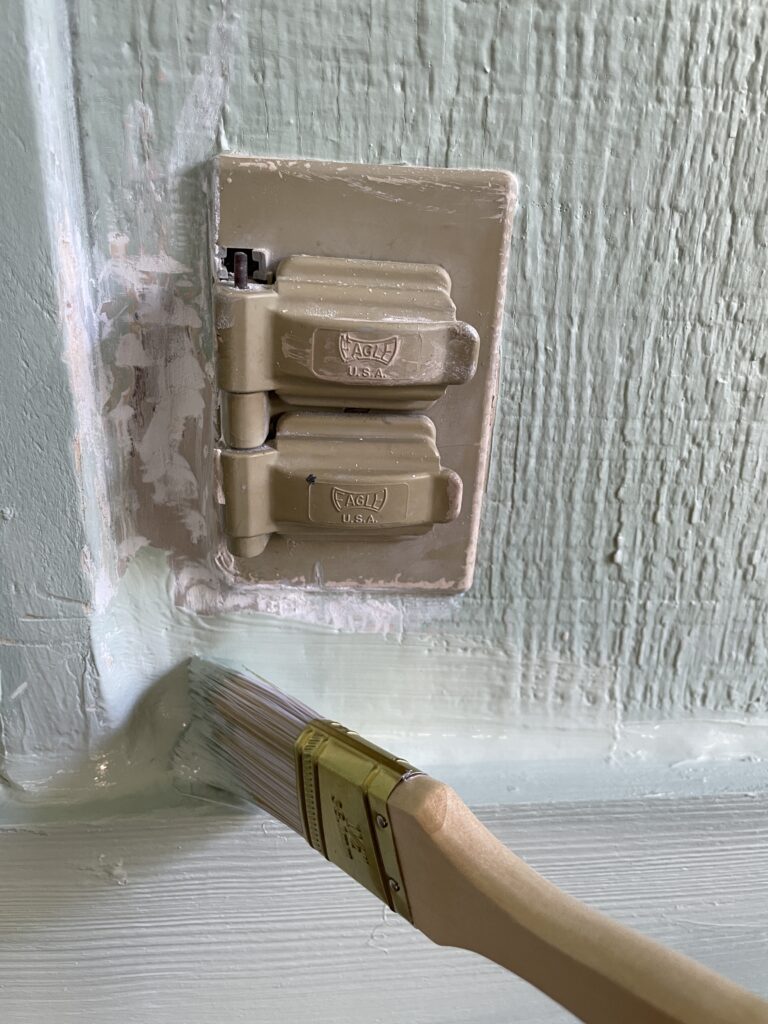
Overall I’m pleased with how this product worked. My biggest goal was to stop the wood rot from spreading and repair the wood. I can say it was successful!
Is it perfect? Nope but it got the job done! Could it have been perfect? Probably! Like I said earlier, I should have used the right tools (grrrr, I’m too impatient sometimes).
What I’ve learned:
The High Performance Wood Hardener worked great at stopping the wood rot and making the soft wood hard. I’m hoping this will prevent the rot from spreading. The product was easy to apply and dried quickly.
The High Performance Wood Filler was a bit tricky to mix together in comparison to say, Bondo Wood filler, because Minwax is a 16:1 ratio vs. Bondo’s 3 inch scoop and then 3 inch strip (refer to this post if you want more details).
The wood filler did dry fast and it left a rock hard finish. Score! It was very easy to sand and left a fairly smooth surface.
Overall, this was a very easy product to use and I will definitely be using it again.
If you enjoyed this post make sure to check out more paint reviews too!


