Check out this two toned furniture makeover with a fun tan wash (color wash) technique and Fusion Mineral Paint in the color Blue Pine.
It’s been a while since I’ve done a good furniture flip. As a matter of fact, I meant to give this old cherry cabinet a makeover shortly after we moved into our rustic beach cottage but time got away from me. So here we are four years later (gulp, time really did get away from me) and I’m finally ready to give this cabinet new life. Let me share this 2 tones step-by-step guide!
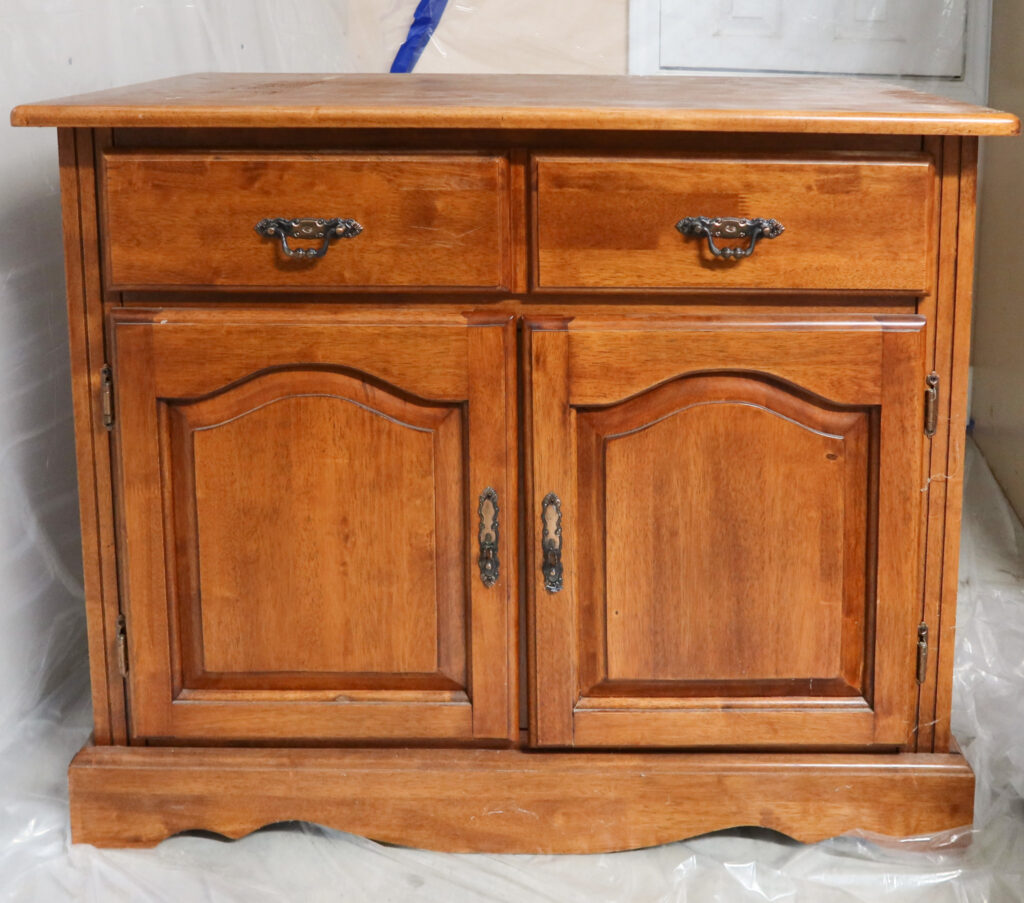
Here is the cabinet in all her red toned glory. This cabinet has nice lines and the size is great but the finish needed a little updating.
I knew I wanted to create a two toned look on this wood furniture cabinet when I first laid eyes on it. You know I’m all about furniture makeovers! This piece came from my husbands family. It’s probably a circa 1990’s cherry cabinet. It’s not the highest quality, but it does have some solid wood features. The cabinet doors, top drawers (drawer fronts) and top are solid wood but it obviously had some sort of a factory finish. Nothing a little elbow grease couldn’t get through!
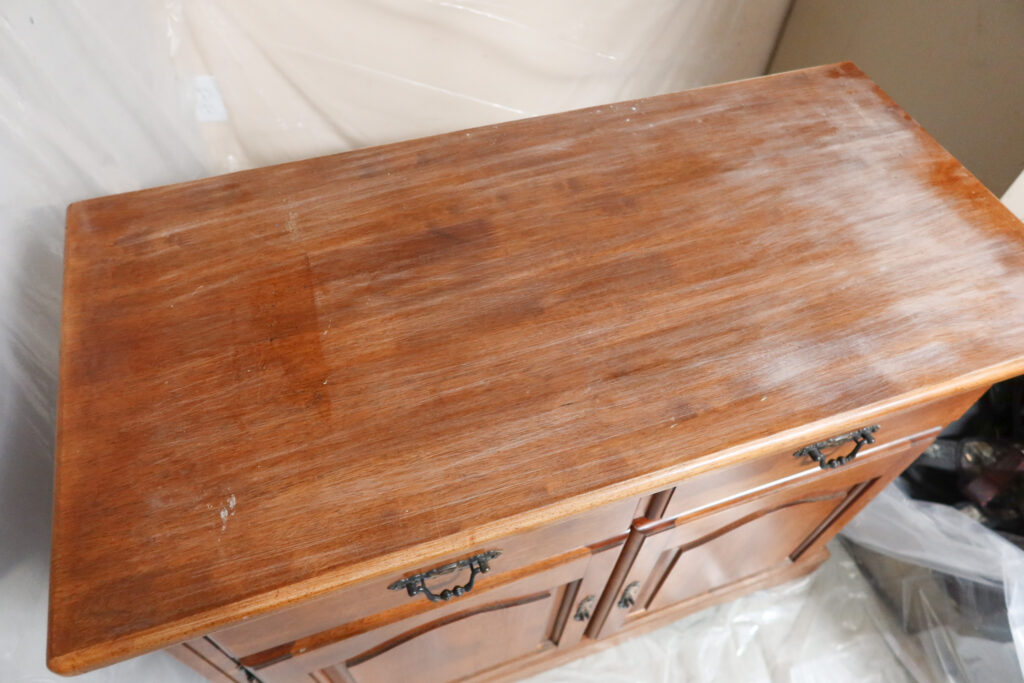
The poor top of this old dresser had seen better days. Shortly after we moved in (4 years ago) we shoved it in the back of our garage. Sadly that’s where it’s sat since then. Obviously we had something heavy sitting on top of it that severely scratched it. That’s where the tan wash will came in handy!
Disclosure; this post contains affiliate links. As an Amazon Associate I earn from qualifying purchases. This disclosure statement refers to the rest of the Amazon links in this post.
The cabinet makeover design plan
Like I said I wanted to give this a two toned makeover; The top and base of the cabinet will get a tan wash (color wash) finish while the doors, drawers, and sides will be sprayed with a Fusion Mineral paint in the color Blue Pine. I thought about using a chalk paint product, but my new go-to paint is Fusion Mineral Paint! It’s one of my favorite new paint brands today.
As far as hardware goes, the current old hardware is cheap plastic with a sprayed metal finish. I purchased wooden handles that will match the color wash perfectly and hopefully tie it all together.
Materials
- Fusion Mineral paint Blue Pine
- Primer
- Minwax One Coat Polyurethane in Satin
- Wagner Flexio 5000 paint sprayer
- QCS Stripwell Stripper
- Minwax Pre Stain Wood Conditioner
- Lint free cloths
- Synthetic paint brushes
- Drop cloth
- Painter’s tape
- Krud Kutter Degreaser
- Palm Sander
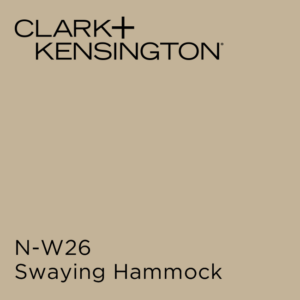
- Clark and Kensington Paint color Swaying Hammock
Cleaning and degreasing
Before you attempt to do anything to the surface of a piece of furniture, always clean and degrease it sufficiently. Especially since it had been sitting in my garage for years!
I used the Krud Kutter degreaser with a paper towel and wiped the entire surface (inside and out) until the wood was clean. You can also use a damp rag or soft cloth, just make sure it’s lint free! Another option is a tack cloth.
After the surfaces were dry and clean, I removed the hardware and doors and drawers.
Side note; I did leave the cabinet hinge hardware attached to the cabinet faces. I’ll explain why later in the post.
Preparing the surface for paint
Like I said earlier, there was a heavy factory finish on this cherry cabinet. I knew I needed to at least strip most of it off before applying paint or the color wash. I didn’t necessarily have to
Enter QCS Stripwell…
You know I’m all about trying new products- especially those that are VOC free and can be used INSIDE the house. Previously I’ve stripped furniture with Citristrip and saran wrap (yep you read that right) and then I did a little project where I tested three different stripping methods to see which turned out the best. Then I even wrote about the three best paint strippers on the market.
Needless to say I was excited to find a product that legit was safe for use. Most stripper say they are safe, but if you read the fine details you realize it’s not so. This stripper, on the other hand, can be used inside without a mask on. Gasp!

I followed the instructions and sprayed a light coat, let it sit 15 minutes, then applied another heavier coat and let it sit for 30 minutes. I grabbed my plastic scraper and went to town!
To my surprise the plastic like factory finish scraped away easily!
My intention with using this stripper wasn’t to completely remove the stain, but to remove that top coat. I can confidently say that the Stripwell was successful.
Once the top layer was removed, I grabbed the palm sander with a heavy grit and started to sand the entire surface.
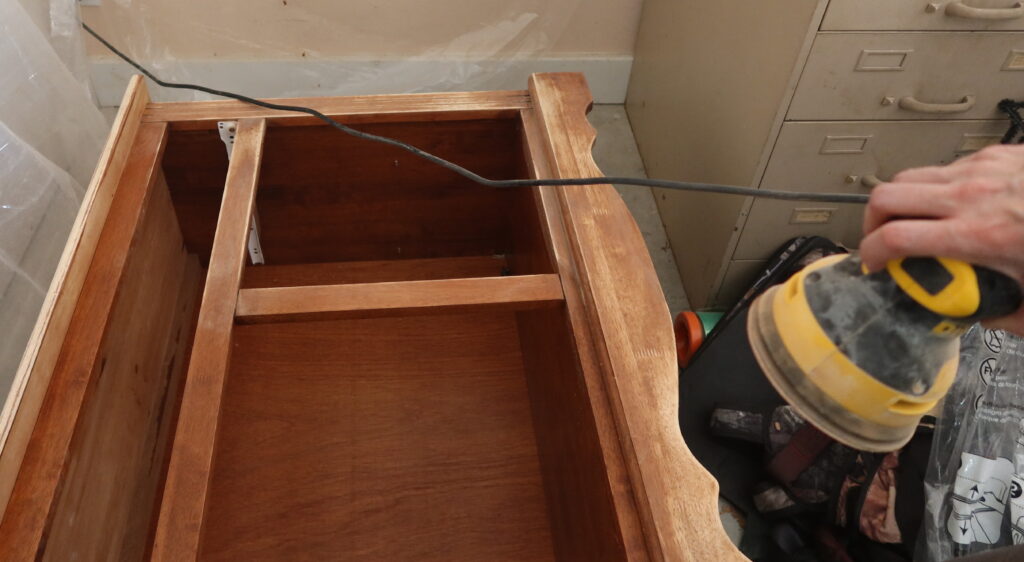
First thing, I started with a 120 grit sandpaper with my orbital sander and ended with a 180 to the top and base of the cabinet to get a smooth finish. If you want to use a finer sandpaper like a 220-grit sandpaper, I would suggest doing it between the primer and paint coat.
I lightly sanded the cabinet faces and drawer front with a 120 sandpaper by hand. When a surface has a lot of grooves it makes it hard to use the electric sander which is why I opted to sand those by hand. Since I knew I would be painting over the faces, I sanded just enough to give the surface a little grit to hold on to.
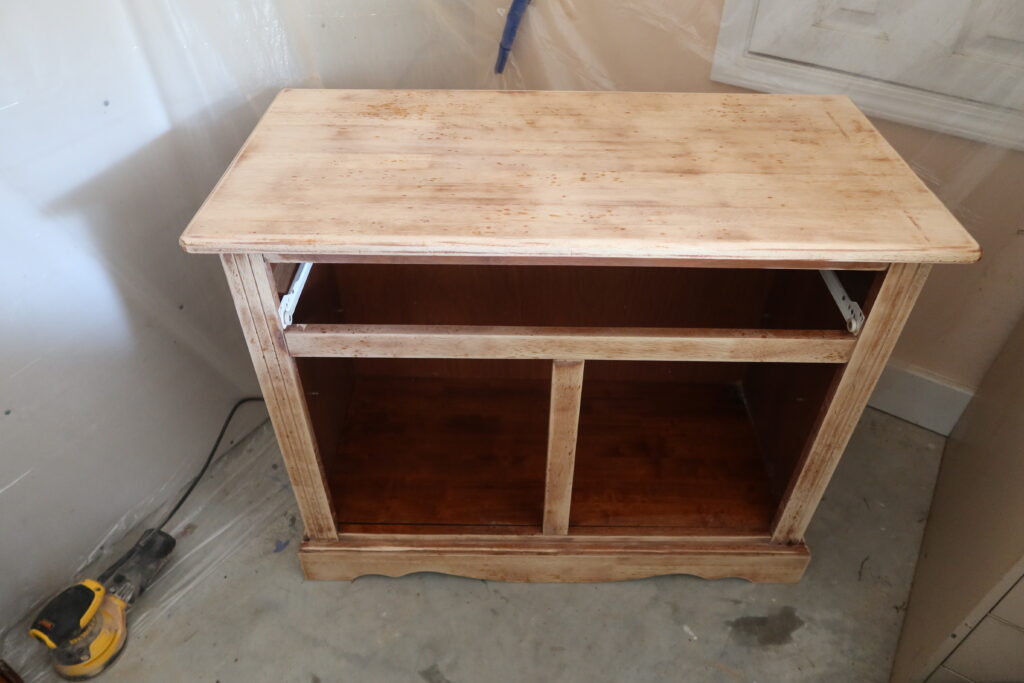
One mistake I made; If you look closely you can see small wet drops on the wood. This is the QCS weeping because I got a little impatient and started sanding the wood base before it was fully dry from using the stripper product. Danget Lindsey!
Moral of the story; learn from my mistake and be patient!
Once the surfaces were sanded, I prepared it for paint!
I did apply a wood conditioner over the raw wood to prepare it and prevent the tan wash from looking blotchy.

I covered all the bare wood with either painters tape or drop cloth. Once the raw wood was covered, I grabbed my paint sprayer and started first with a coat of primer and then with the first coat of paint (Fusion mineral paint). I love this darker color!
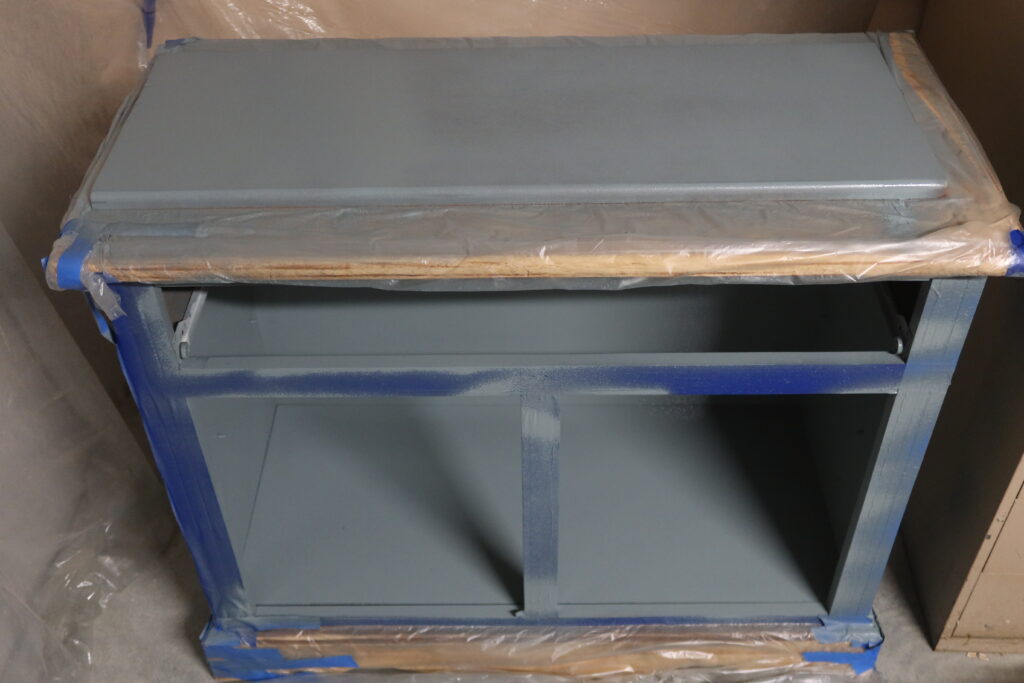
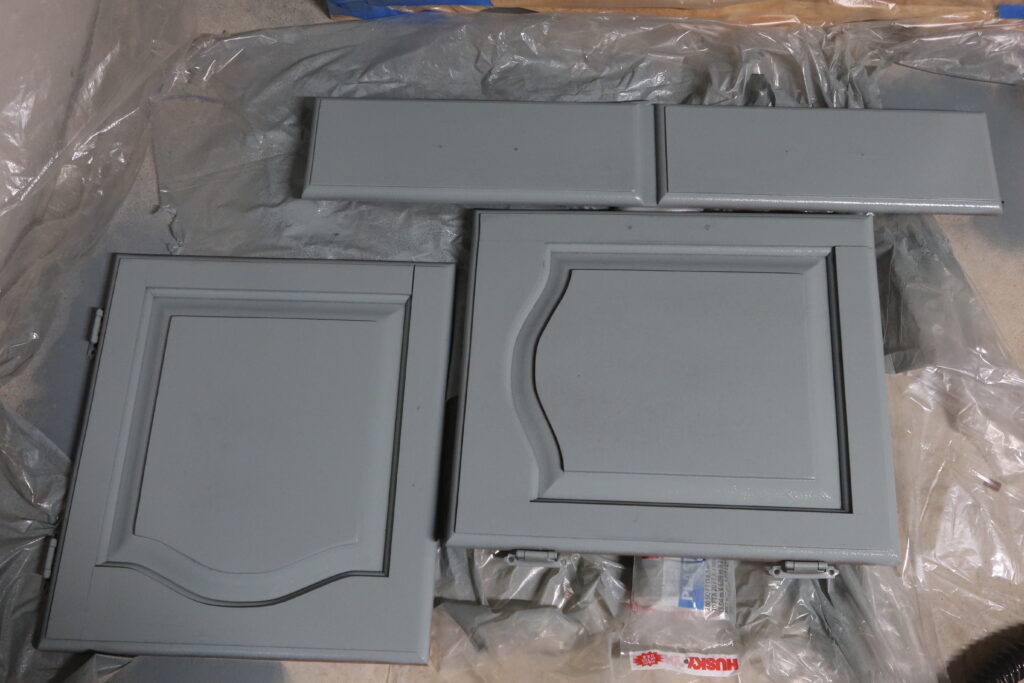
I applied two paint coats of Fusion paint to the cabinet.
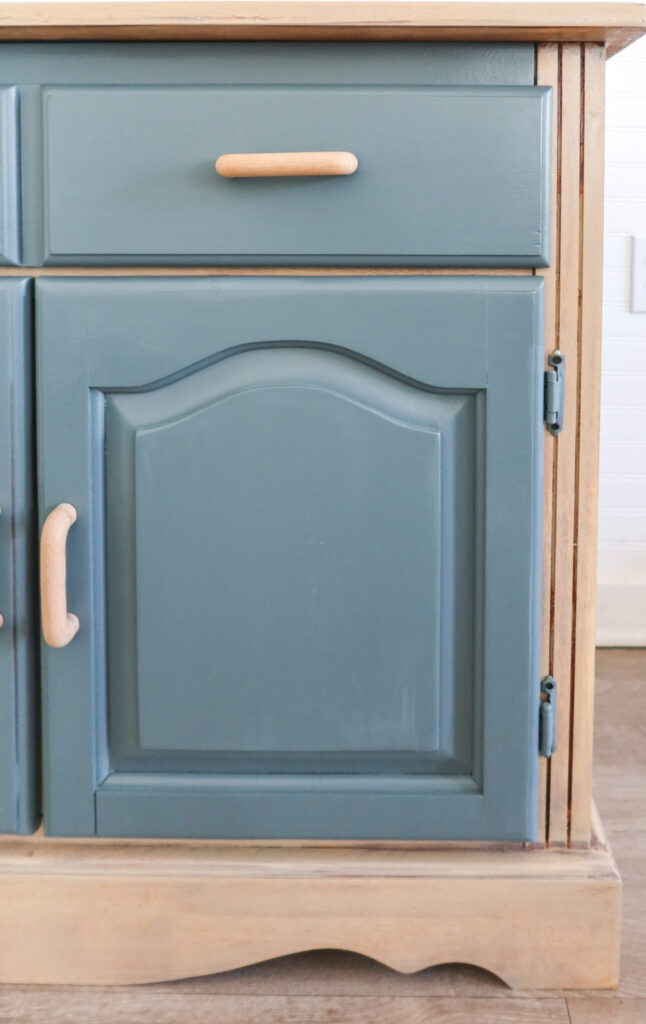
This will probably be an unpopular decision but I did apply paint to the hinges of the cabinet faces. The reason I did this was because I knew the pull hardware was going to be wood toned and I couldn’t figure out a way to refinish those hinges to blend well without painting them to match the paint color.
Tan Washing Wood (Color washing wood)
I won’t go into too much detail about how to tan wash or color wash wood because I’ve dedicated a whole blog post to that!
Here’s a short synopsis of it; mix whatever paint you want with either water or a solvent (based on if you are using either an oil based or water based paint). With a lint free staining rag, apply the wash to the wood in the direction of the wood grain continuously wiping it until you get the desired finish.
I chose to use the color Swaying Hammock by Clark and Kensington. It’s a light tan color that I thought would blend well with a red toned cabinet. I mixed 1:1 ratio paint to water and then applied it with a lint free rag.
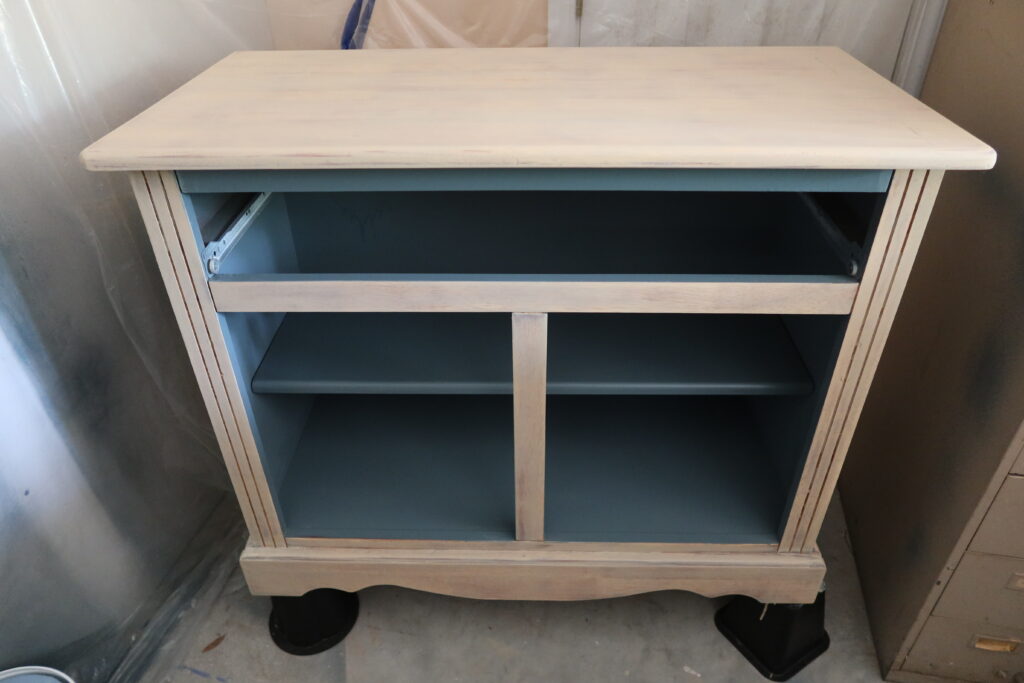
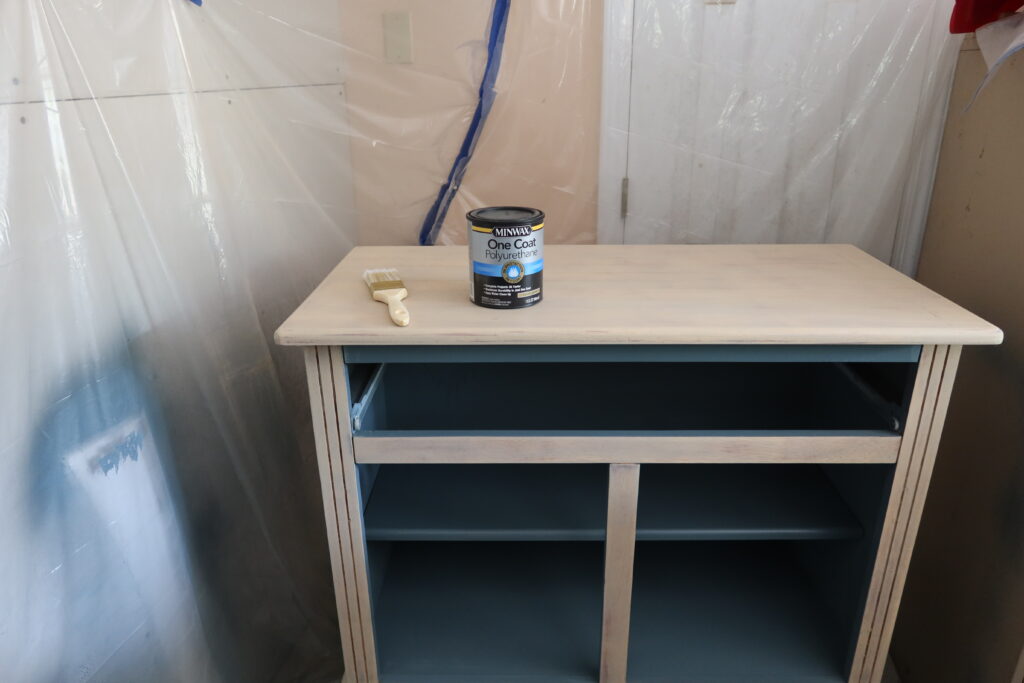
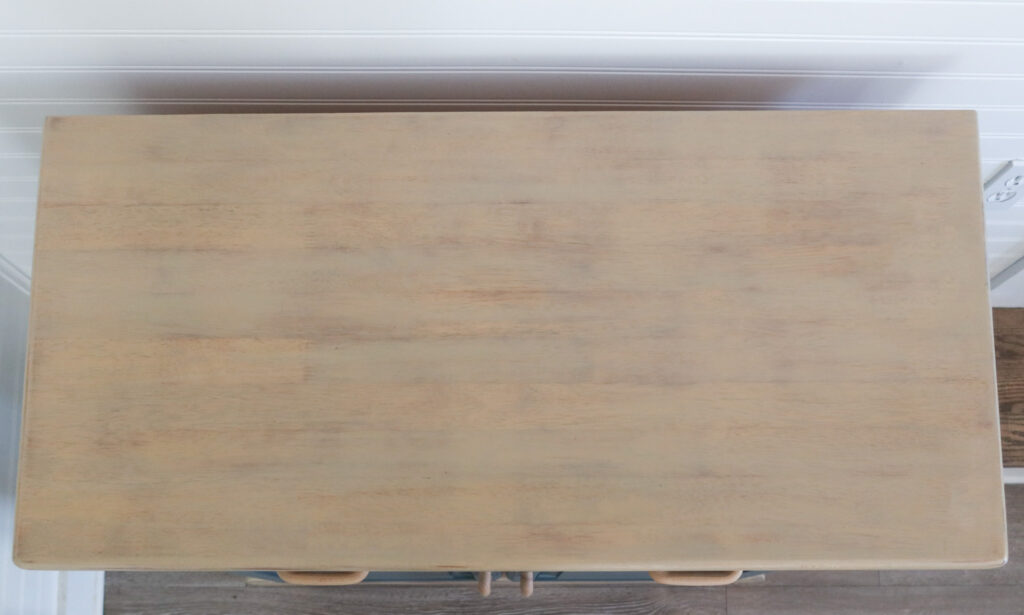
Below is the cabinet base after I applied the tan wash.
The last thing I did before putting the hardware and cabinet faces back on was apply Minwax One Coat Polyurethane over the tan washed wood. Always make sure to seal your furniture! Especially if it’s a surface that get a lot of use! I used one coat all over the base and two coats on the top for a durable finish.
If you want to see a list of some of the best sealers for furniture check out my post here!
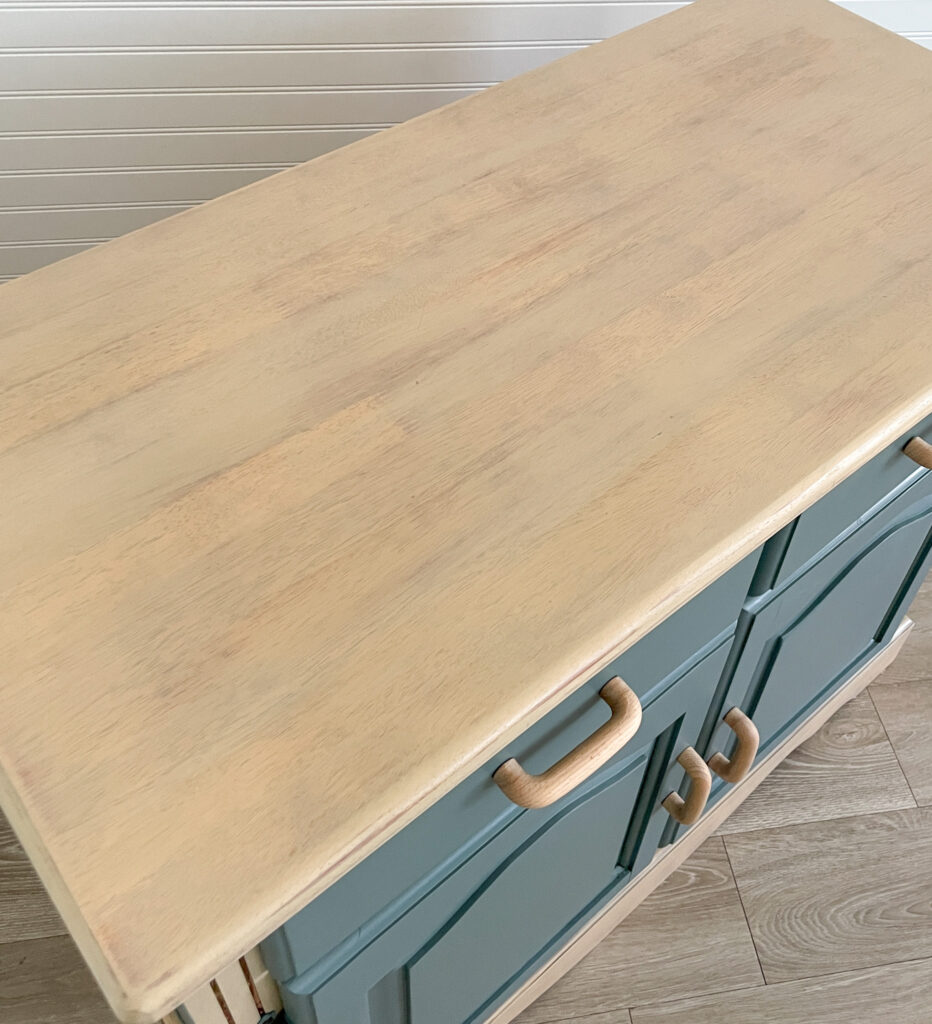
I love the way the tan wash lightens it up. I can’t believe that this was just a little bit of paint with water that I wiped on. White paint works well too.
Don’t you think the tan wash even makes some of the darker wood tones look a tad blue? Or maybe that’s just me. Either way I love still being able to see the natural beauty of the wood shine through.
I found some raw wood hardware that happened to match the tan wash perfectly. When I purchased the hardware I figured I would tan wash it, but I didn’t need to!
Two Toned Furniture Makeover with a tan wash and Fusion Mineral Paint
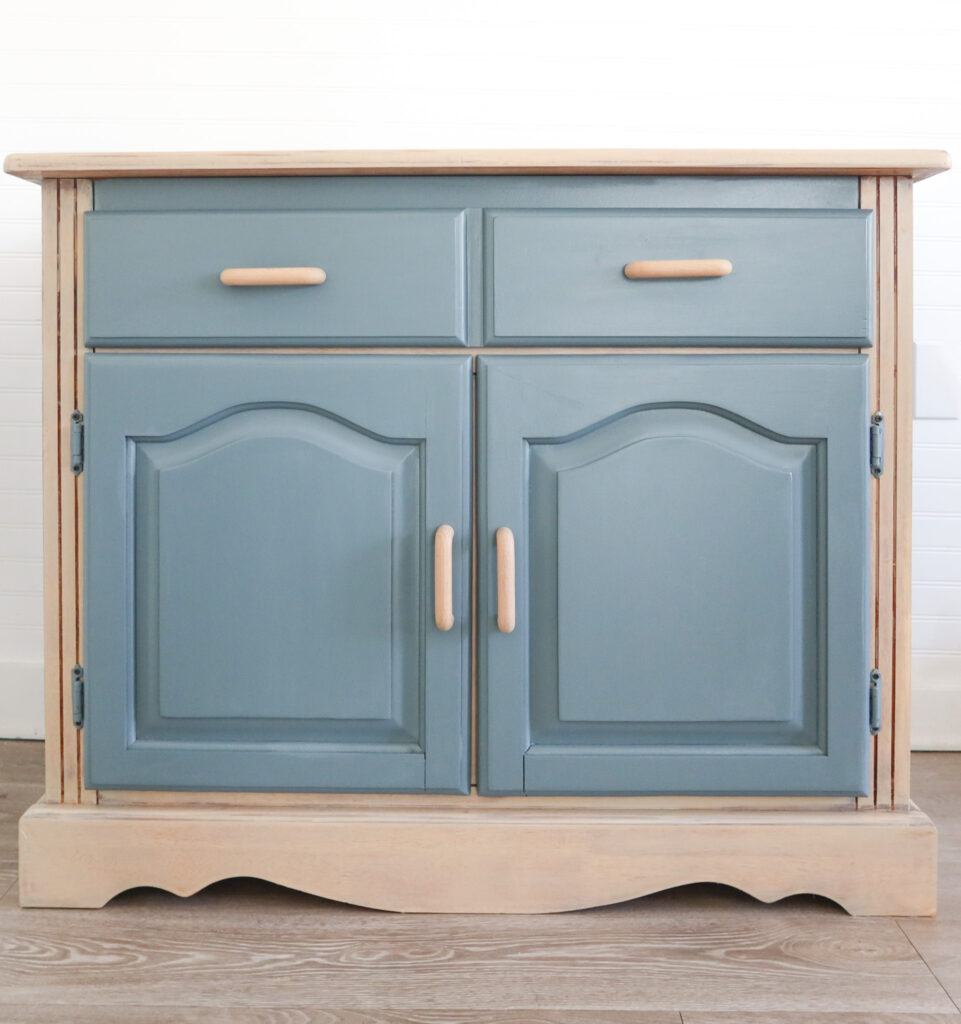
What do you think? I think the two-toned paint in complementary hues would look great in a baby boy’s nursery or boys bedroom don’t you? It would even make a great console table.
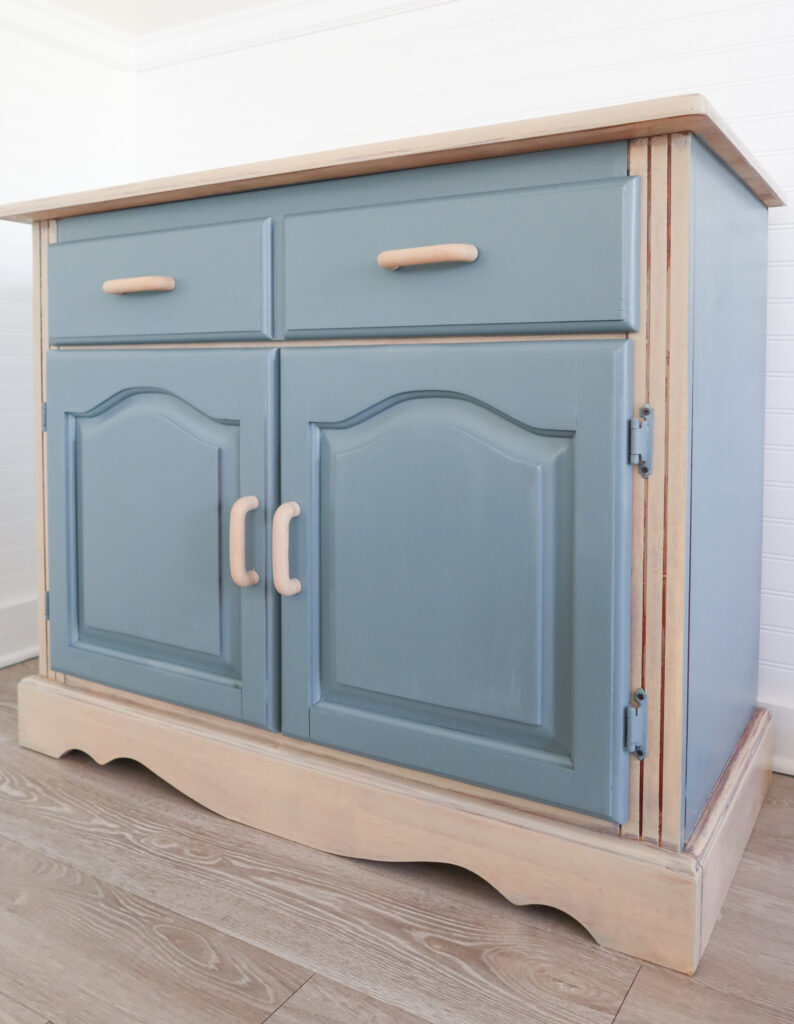
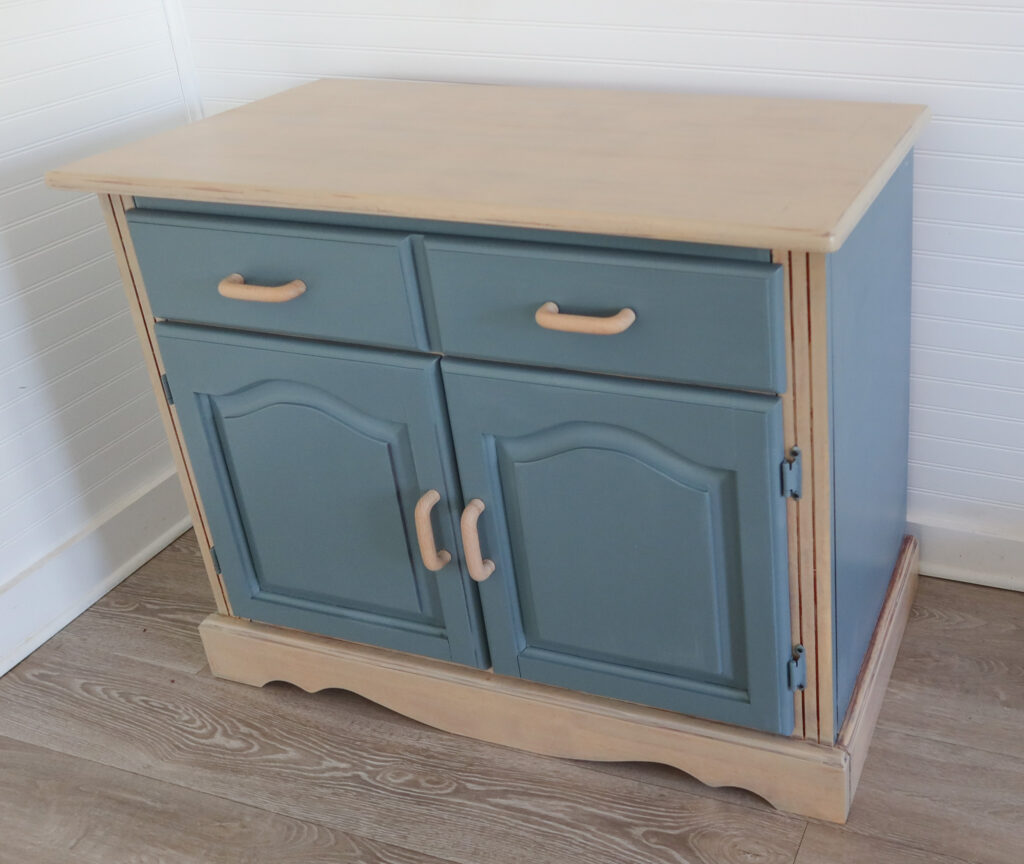
This furniture piece is officially done! I can’t decide if I will keep it or sell it. Do you have any two-tone furniture projects you’re working on?
See ya next time,
Lindsey**


