What is it with DIY wooden open shelves that makes it so popular? Why do we want to display our dishes out in the open just to collect dust? Was it the show “fixer upper” that started the craze? Either way, I’m hooked! I knew I had to have some DIY FLOATING DINING ROOM SHELVES.
I had a few ideas up my sleeve and no budget to purchase shelves, so that only meant one thing; time to DIY my own open shelves!

Open shelving
I’ve been wanting to create DIY FLOATING SHELVES for a long time now, and thanks to Shanty-2-Chic for their great free DIY plans, I decided to build their Floating Dining Room shelving. I made a few modifications, and some of the instructions were a little difficult to follow, so follow with me while I try to explain all my steps.
Here is the link for their DIY floating shelves. By the way, if you are looking for an easier tutorial that isn’t quite as involved, check out how to make these easy DIY Thin Floating shelves with pre-made shelf brackets. This is a good alternative if you aren’t quite ready for a full DIY project.
Like I said earlier, I did do a few things differently. This material list called to create pocket holes with a pocket hole jig (Kreg Jig) and pocket screws, none of which I had. So instead I just bought thick screws and used a drill bit made for “counter sinking” the wood.
Also, I had Home Depot cut the wood for me (it really wasn’t that many cuts) so all I had to do was assemble. This is a great idea if you don’t have the saws or tools to cut the wood yourself.
All the materials including screws totaled about $140.00 (2016).
Disclosure; this post contains affiliate links. As an Amazon Associate I earn from qualifying purchases. This disclosure statement refers to the rest of the Amazon links in this post.
Tools used:
- Drill
- Stud finder
- Tape measure
- Pencil
- Drill bits (including the “counter sinking drill bit)
- Circular Saw, table saw or miter saw
Materials with cut list: **this is for 1 shelf only***
- Pine boards (you can probably use another type of board or scrap wood, this is just what I chose to use)
- Quantity 1 Pine Board 2 by 4 by 71.5″ – frame
- Quantity 6 Pine Board 2 by 4 by 9 and 3/4″ – frame
- Quantity 2 Pine Board 1 by 6 by 11 1/4″ – shelf sides
- Quantity 1 Pine Board 1 by 6 by 73″ – shelf front piece
- Quantity 2 Pine Board 1 by 12 by 71 1/2″ – shelf top and bottom
- 1 -1/4″ by 8 coarse thread drywall screws
- 3-1/2″ coarse thread drywall screws
- finishing nails
- wood putty
- putty knife
- stain
- wood glue
How to make easy DIY wooden floating shelves
First thing; to build the “Shelf Frame” that sits inside the actual shelves: Use a 2 by 4 by 71.5″ and screw quantity 6 of the 2 by 4 by 9 and 3/4″ into it. Space them as equally as you can, but it doesn’t have to be perfect. See the picture below.
NOTE: Position the frame on the wall and find the wall studs before you attach the 6 2 by 4’s. Drill pilot holes first and then attach the 2 by 4’s around the studs, even if they aren’t spaced perfectly apart.
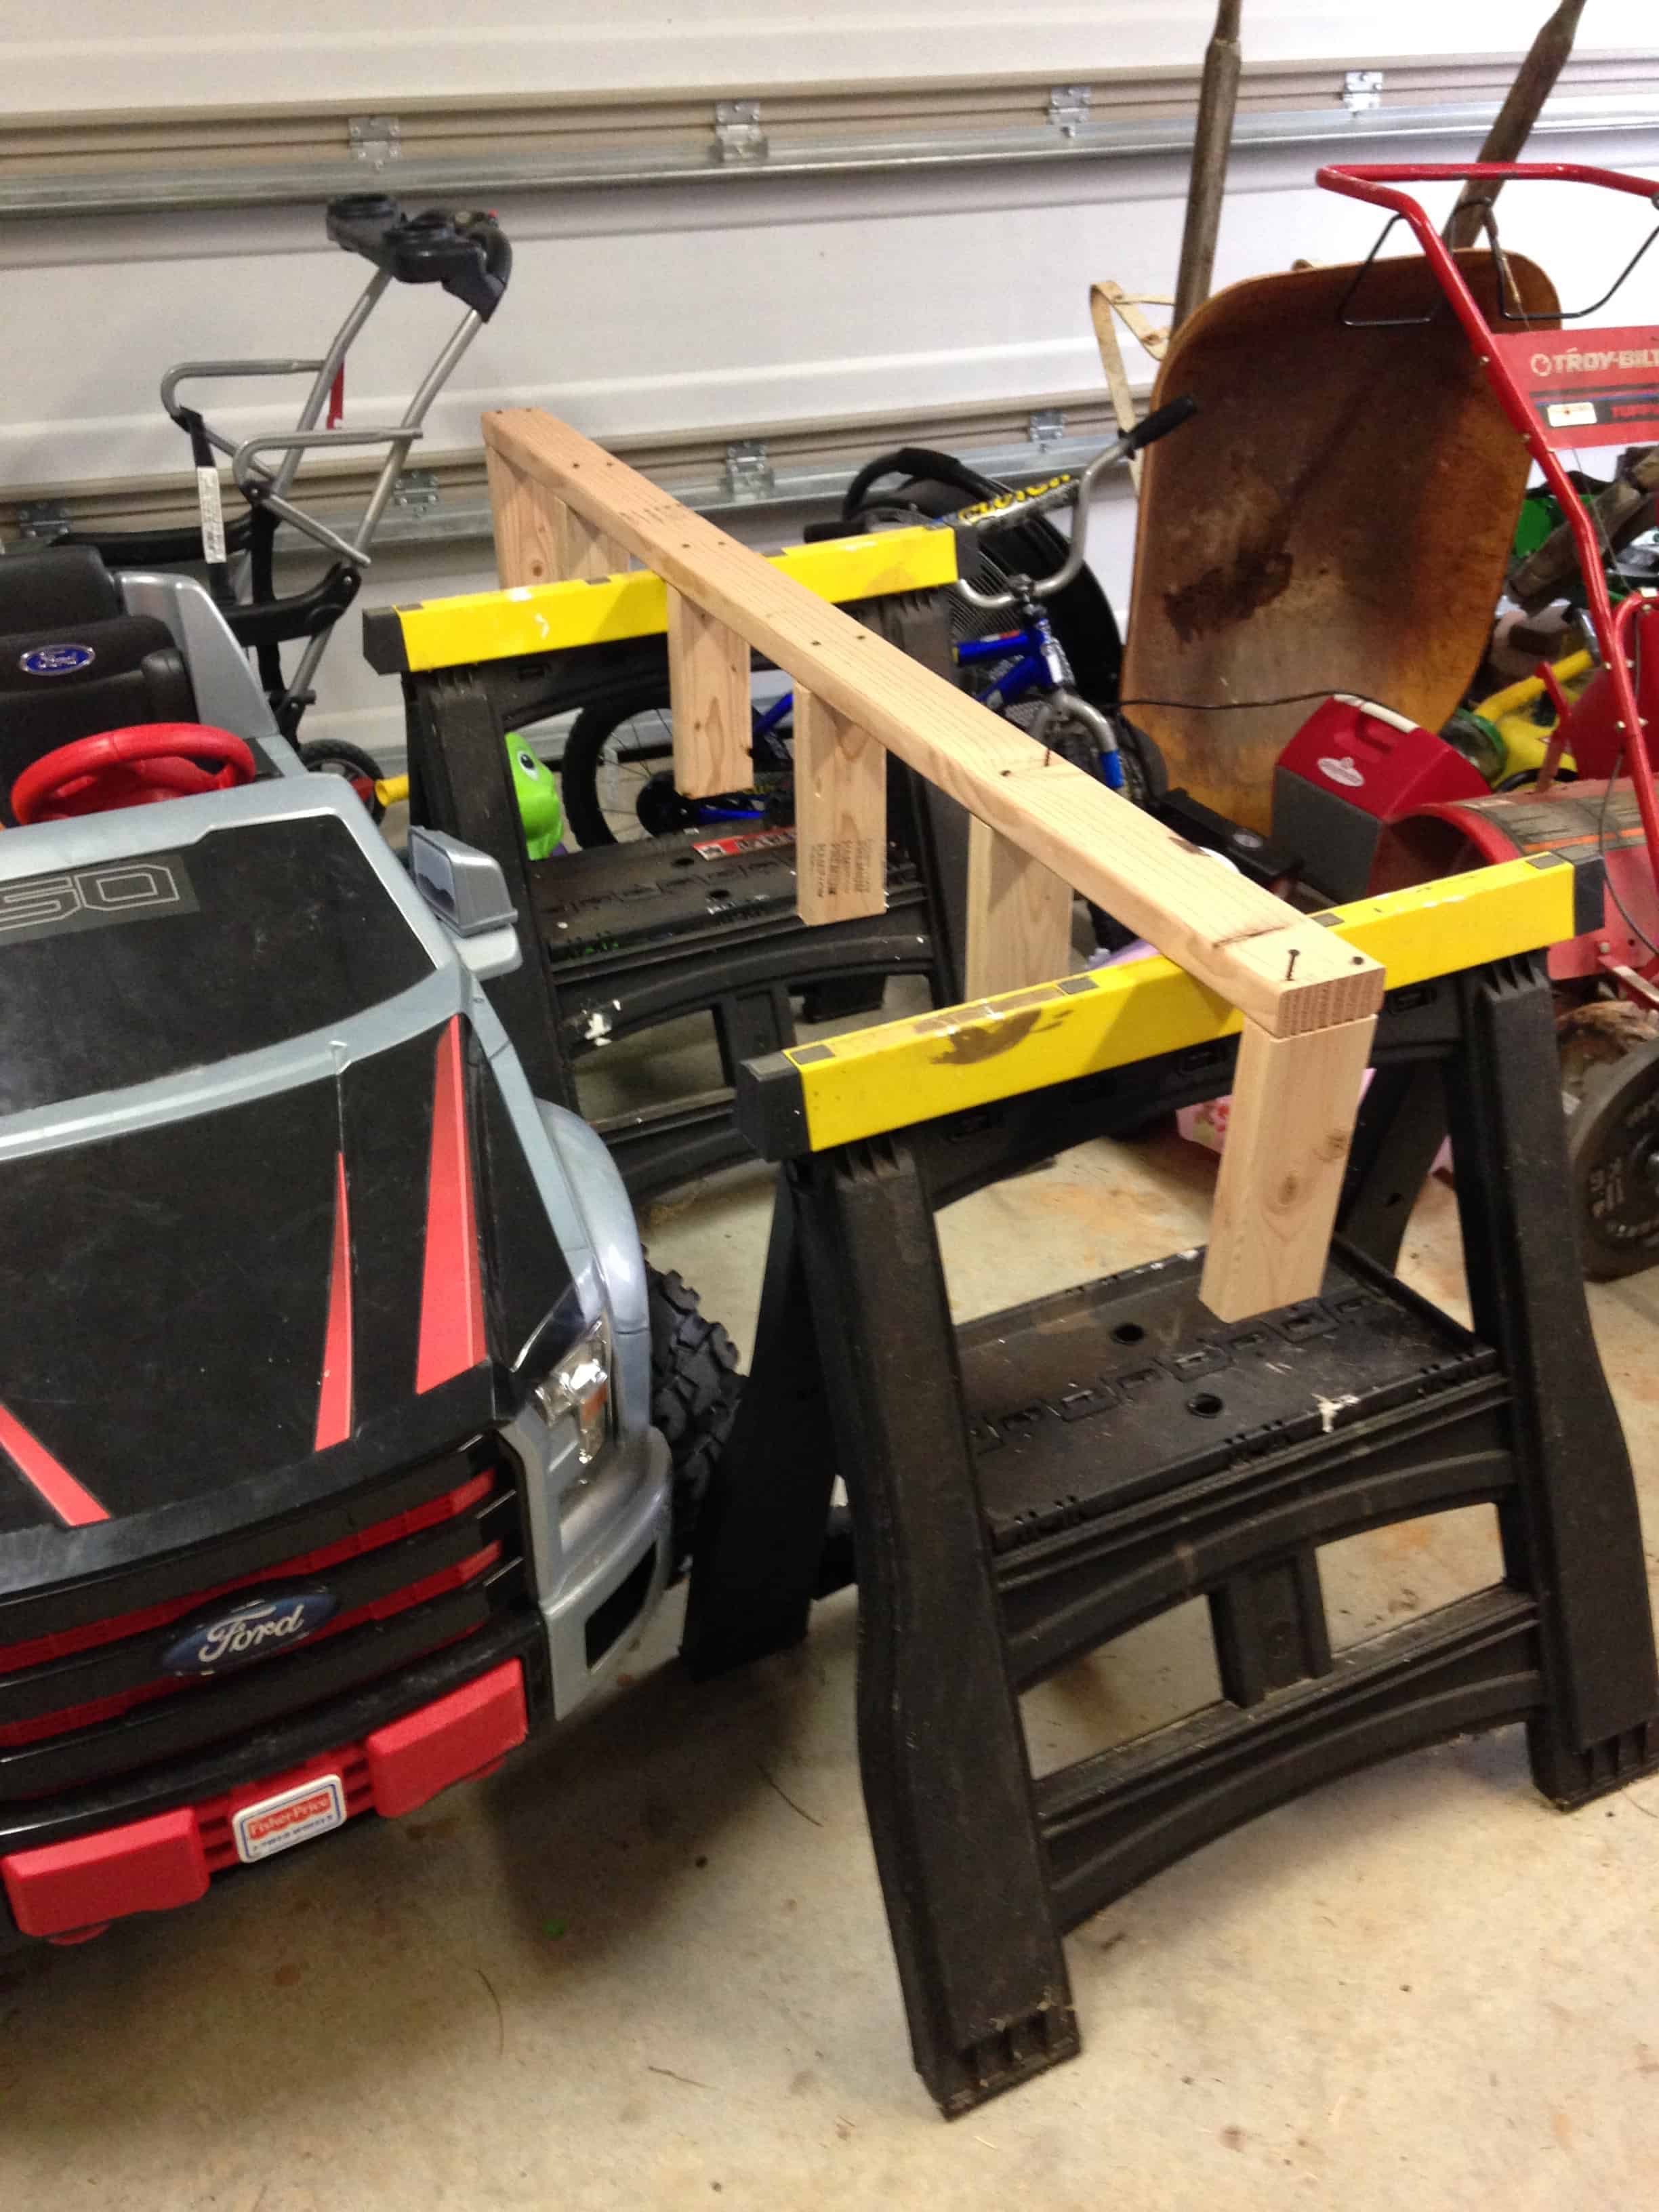
I used 4 large wood screws (3 -1/2″) to attach this to the wall by drilling into the studs. You could use as many as you want, but since I was drilling into 2 studs, I used 2 screws per stud.
Since these shelves are “floating”, you want to make sure nothing (not even an earthquake) will make these open shelves fall.
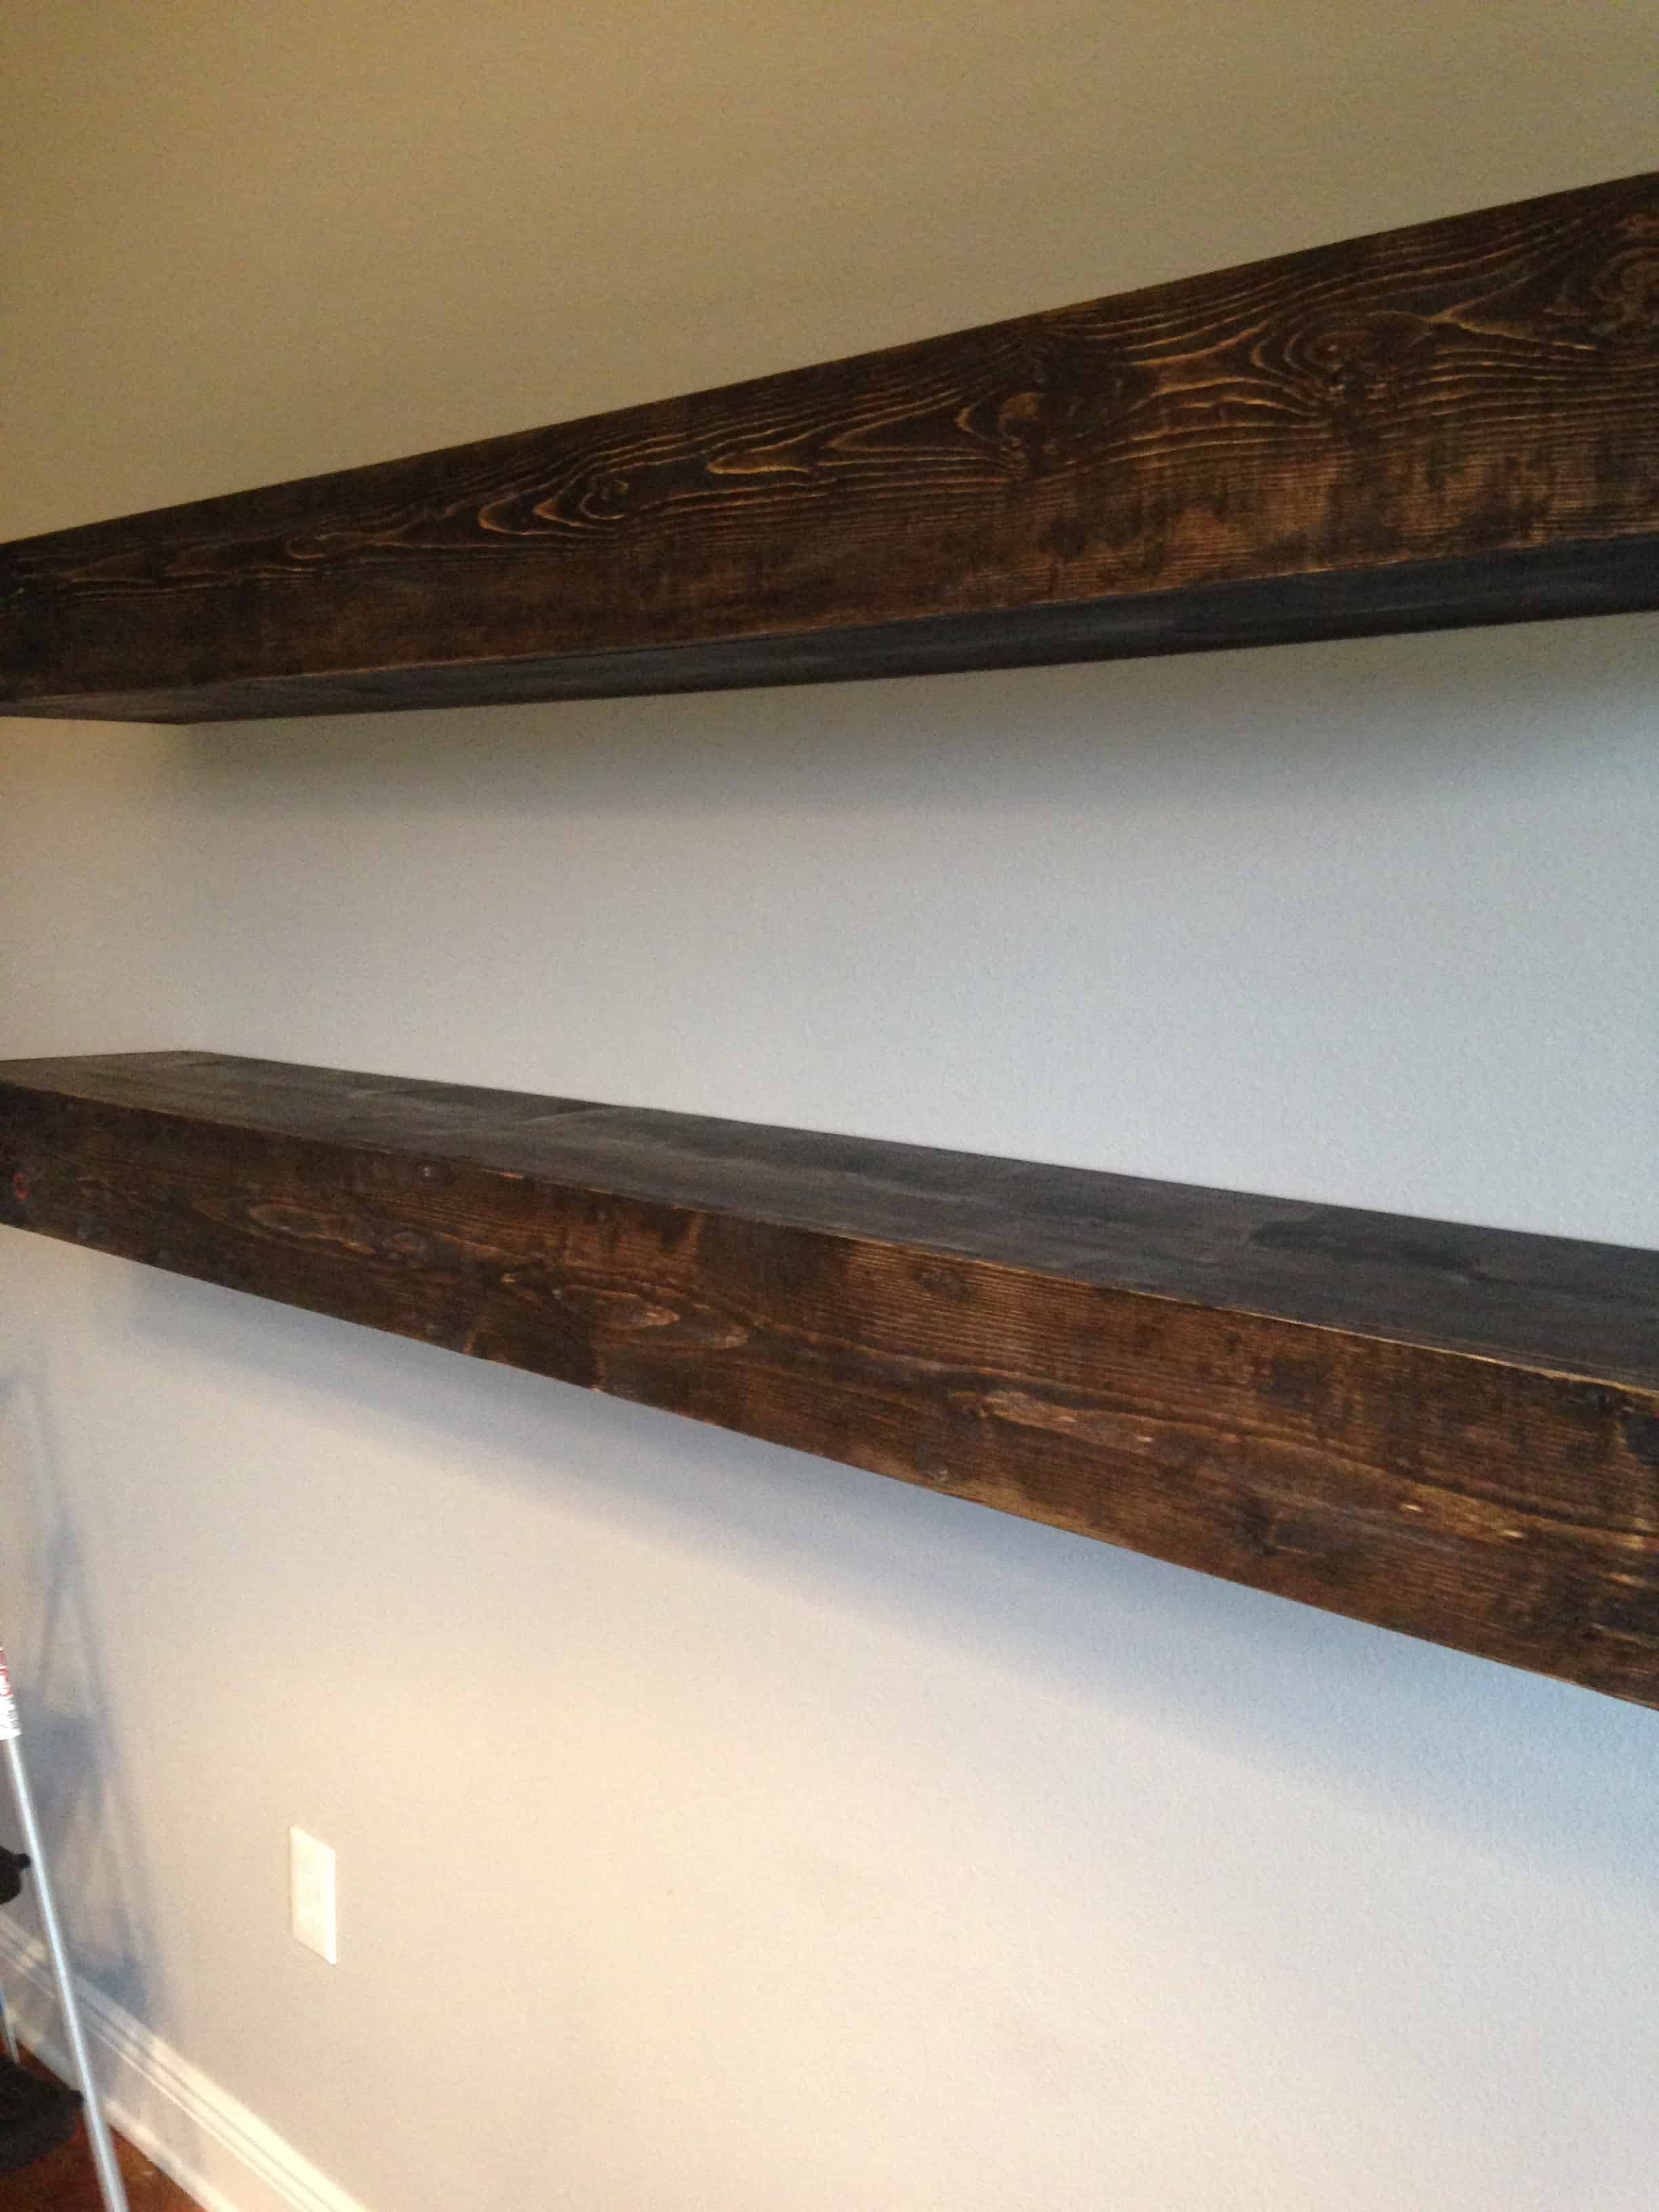
Next step and once you have attached the frame to the wall, stain or paint the wood that will create the “shell” that fits around the base. Note: I attached the base to the wall first before I finished the actual outer shelf part, but you can wait and do it after too.
Below are pictures of the staining process.
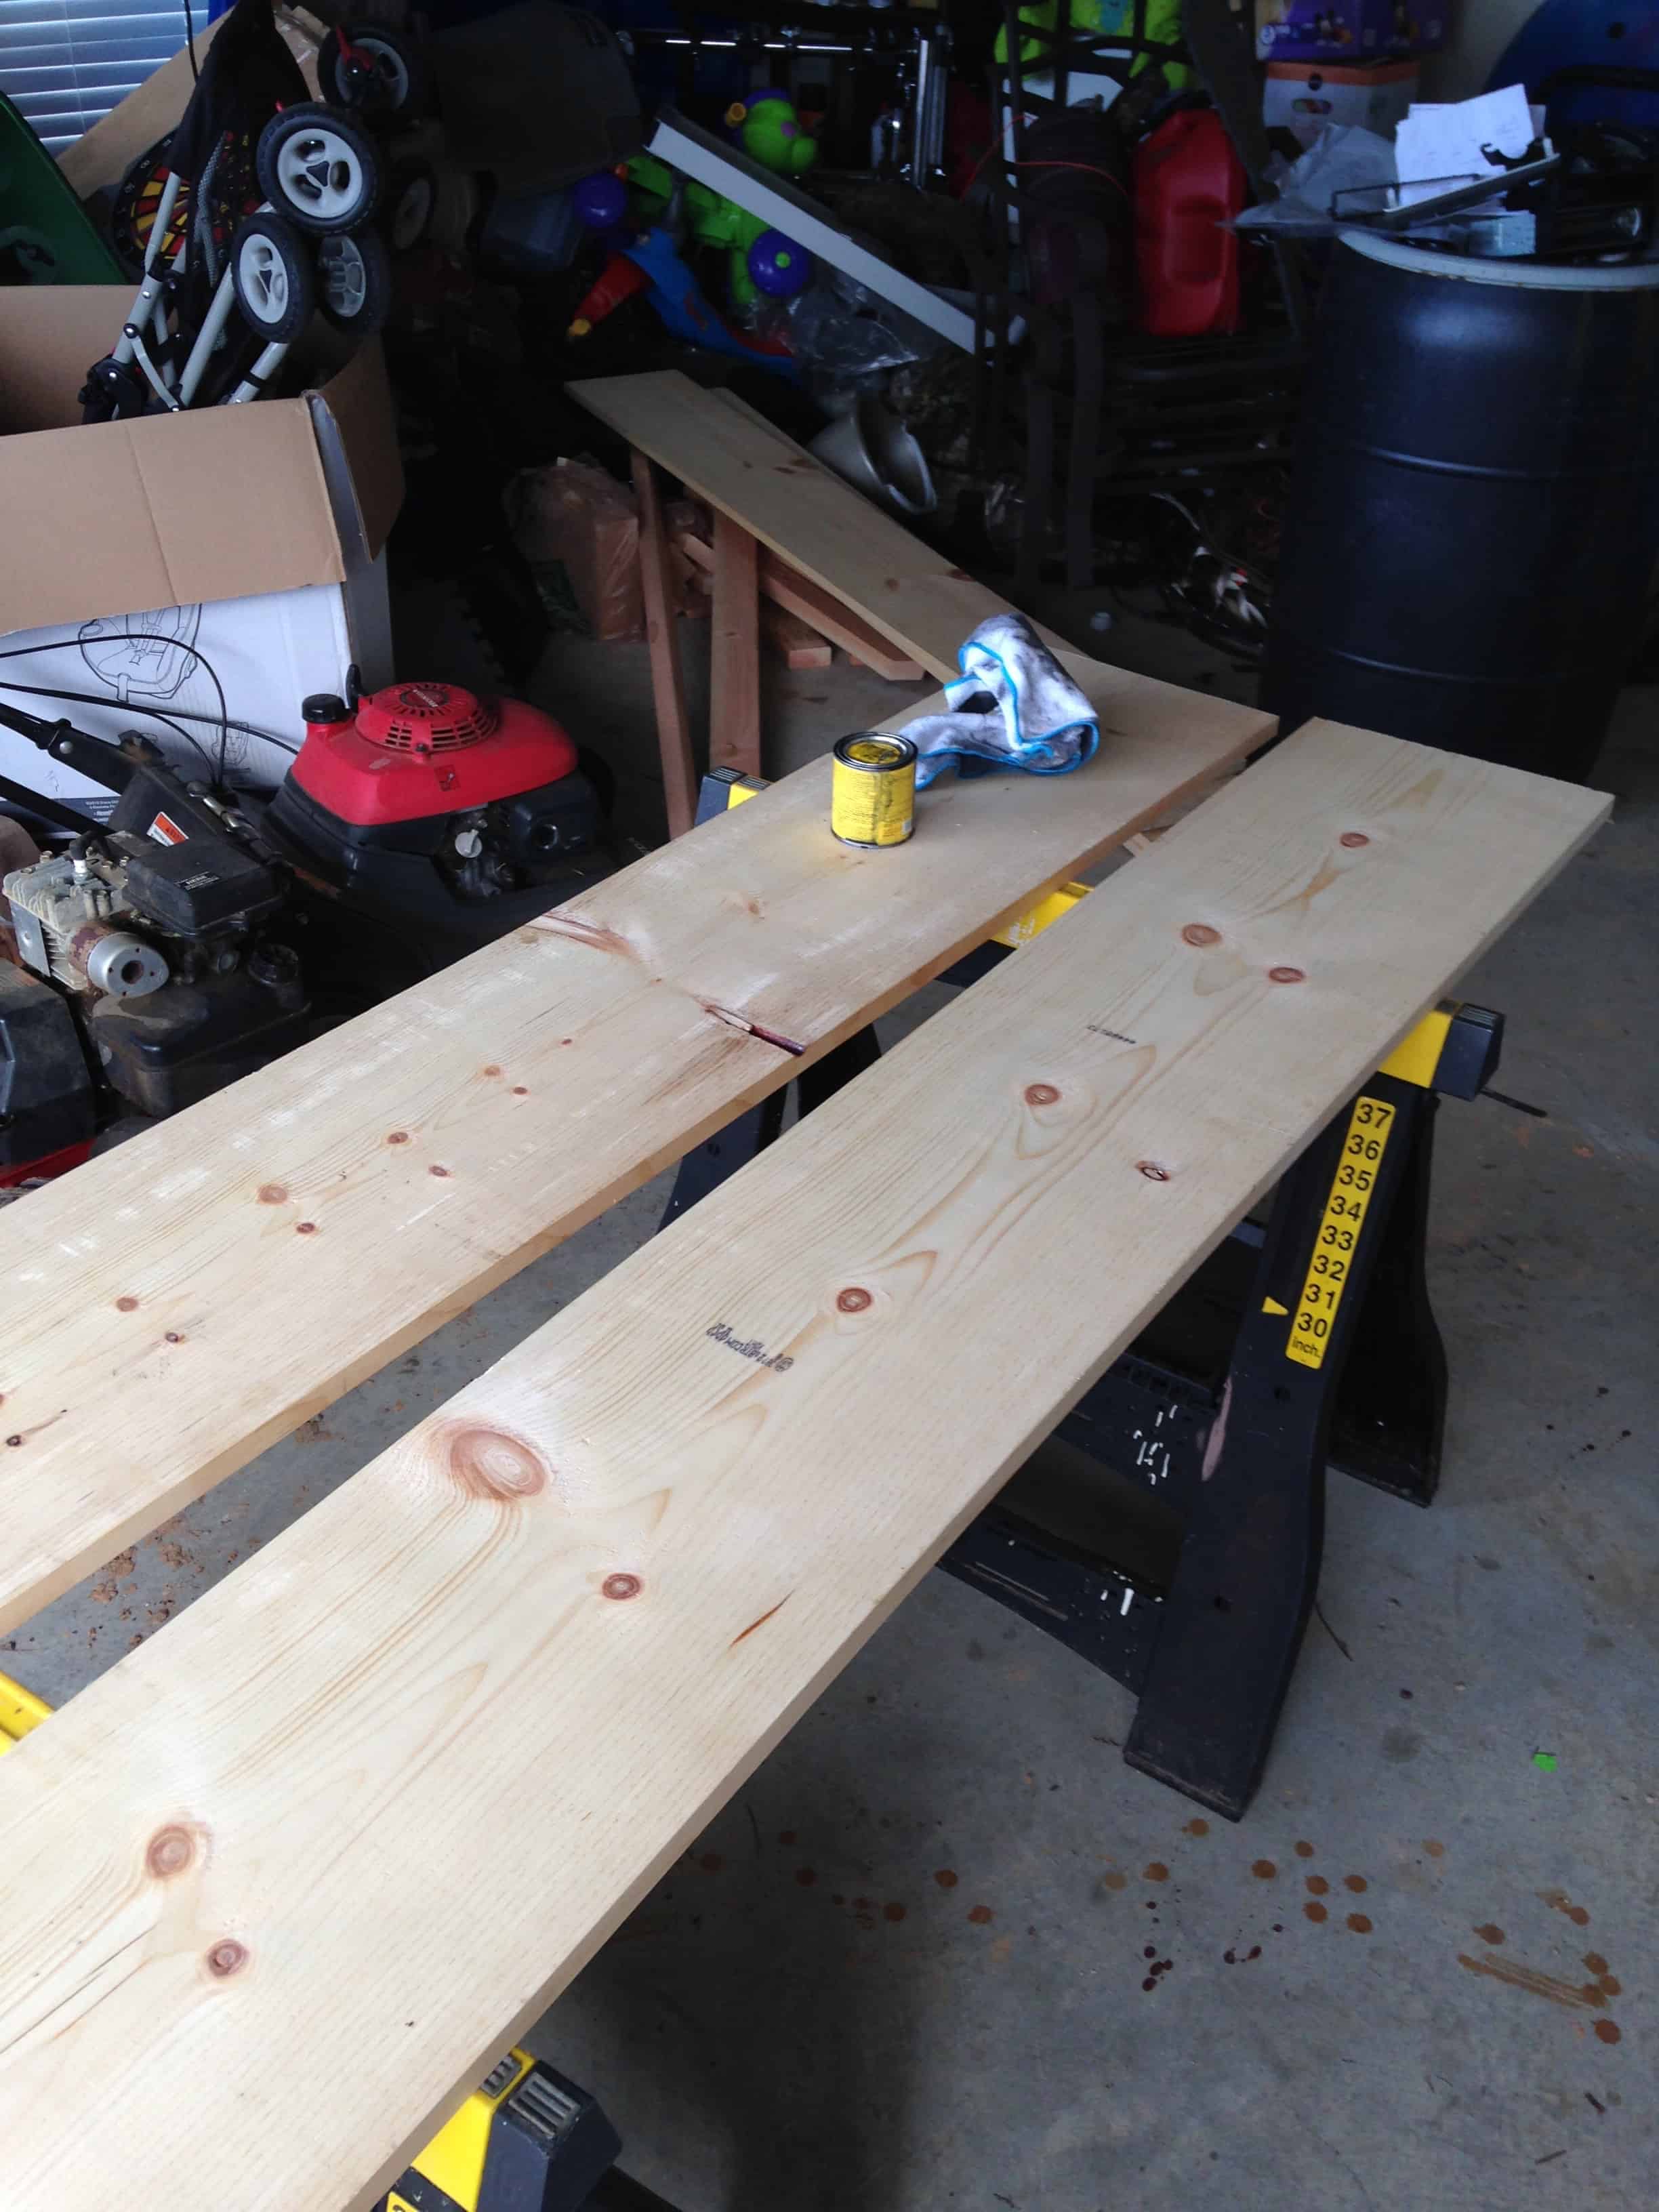
About to stain the pine wood.
Continuing to stain………..

Done staining…..now to assemble.
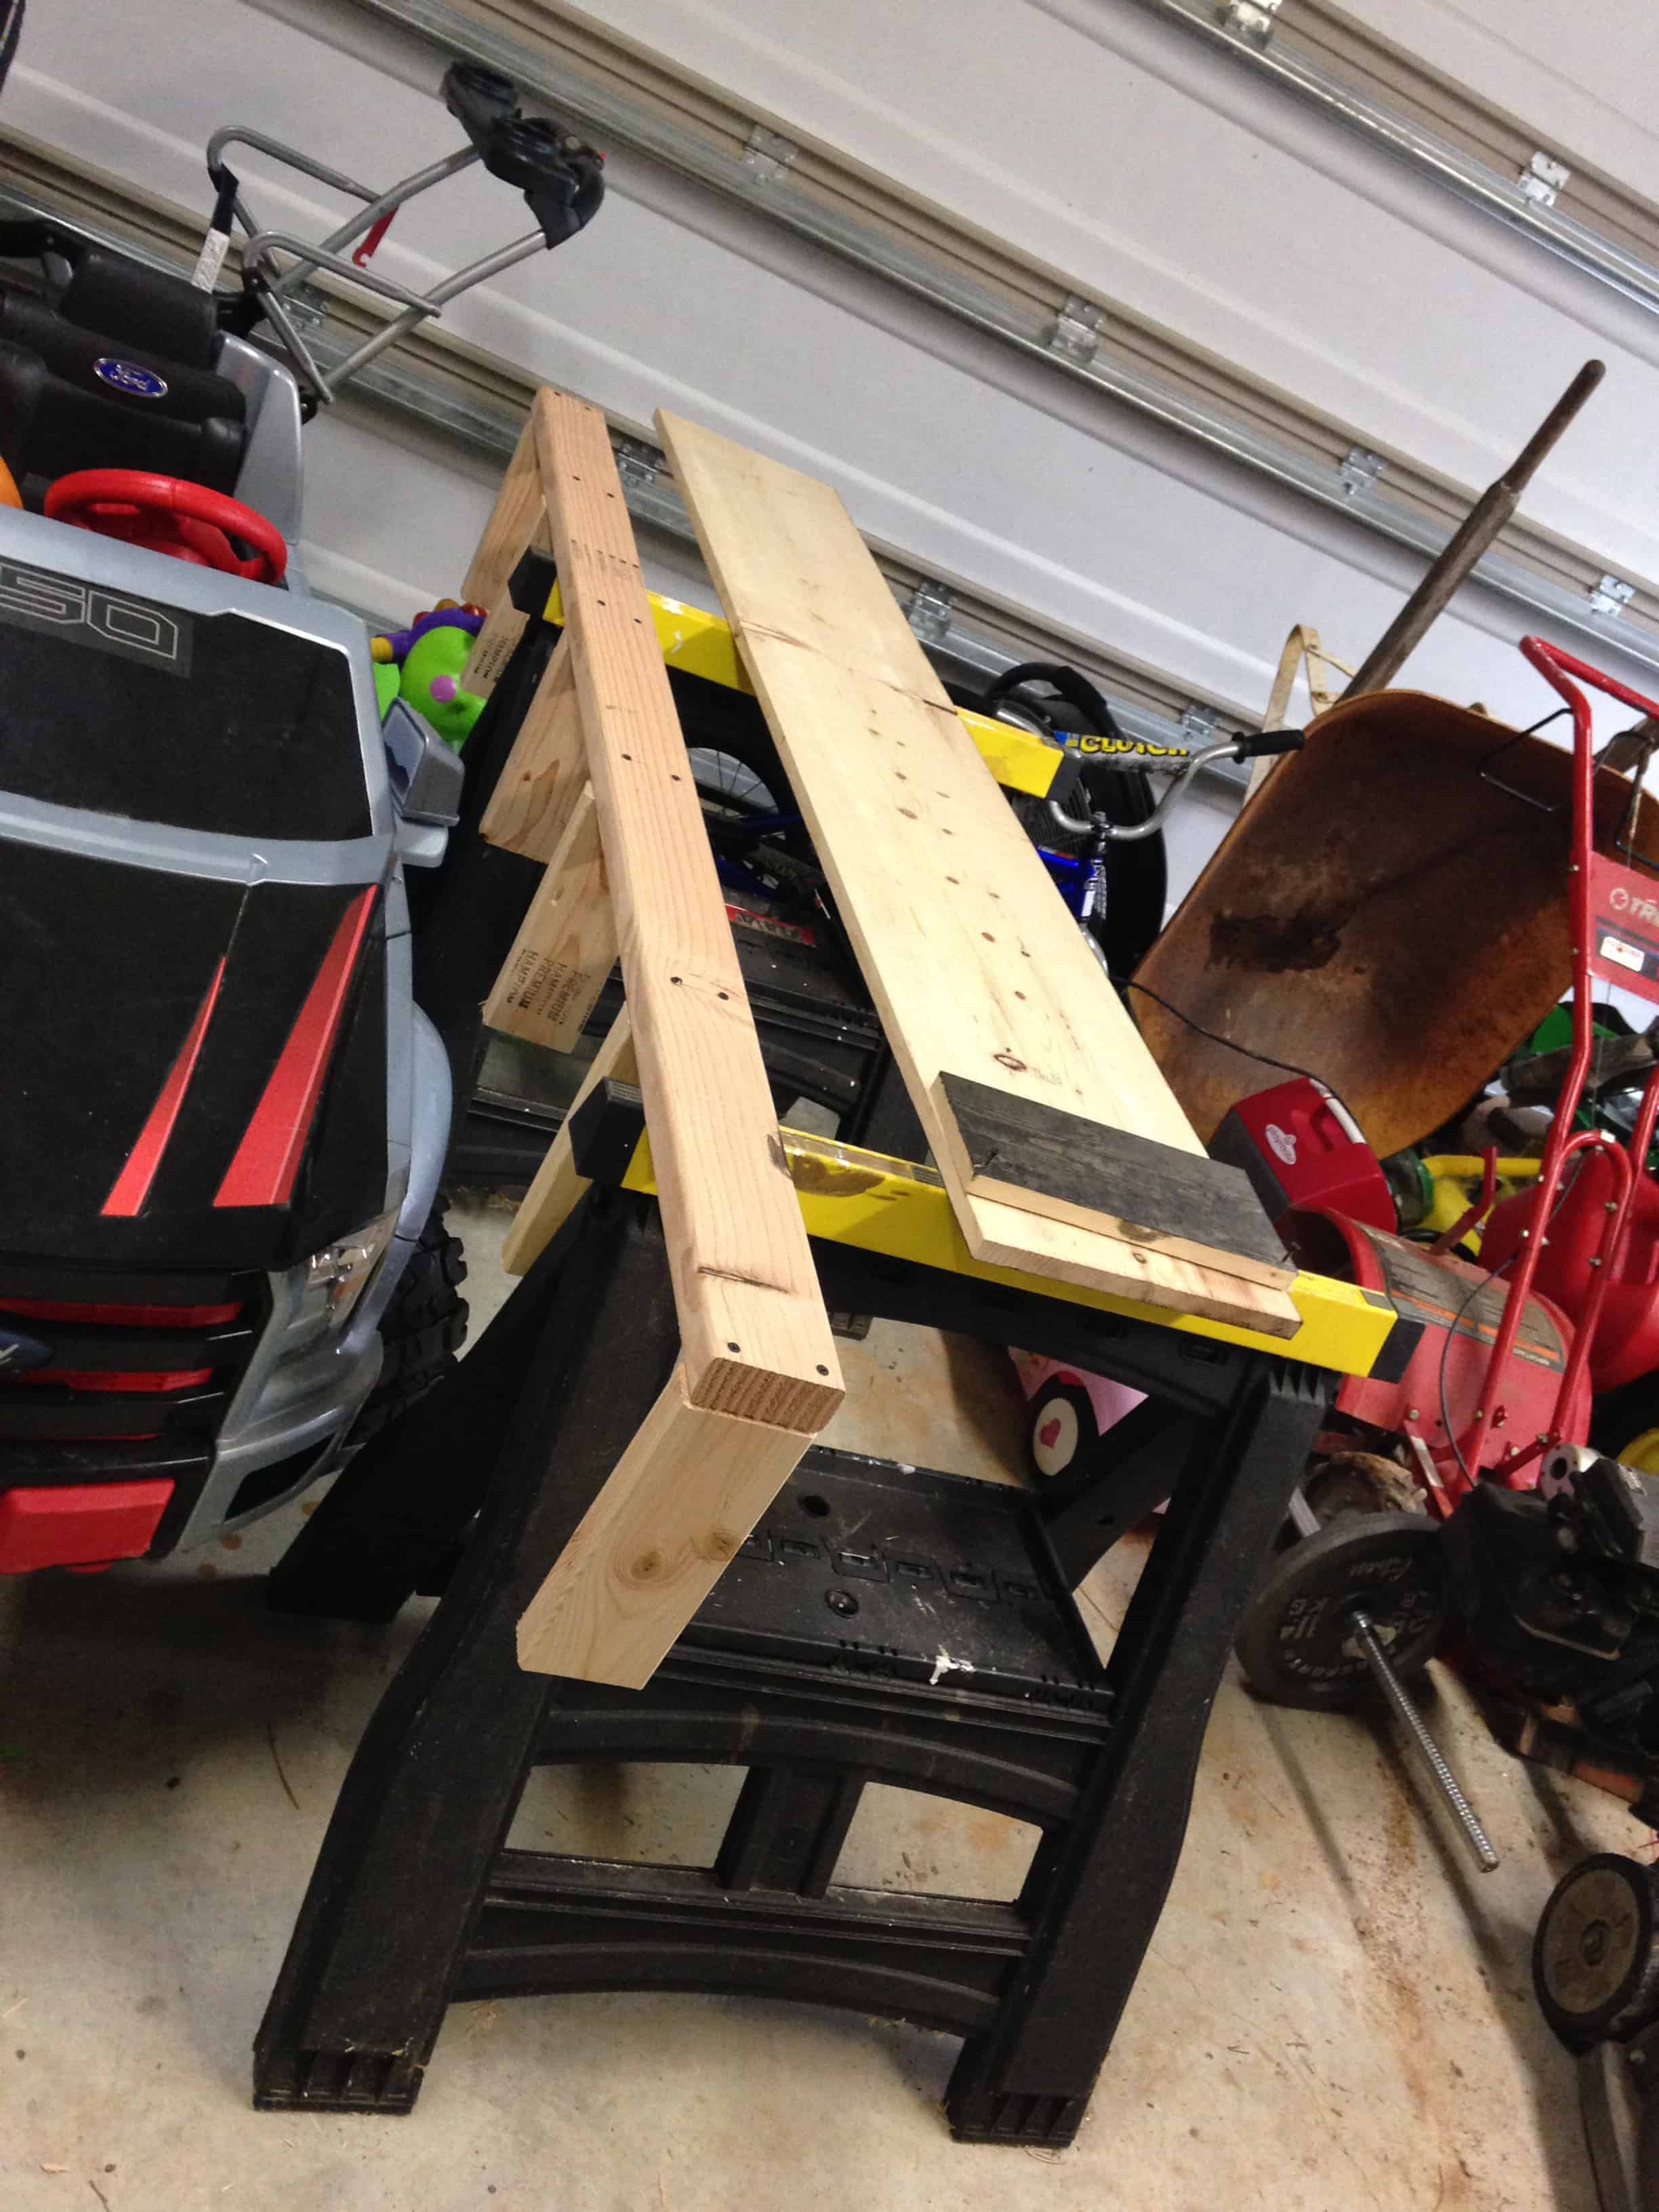
Use the counter sinking drill bit to counter sink the 1 by 1/4″ screws into the wood where any two pieces would meet. I started by screwing a side piece to the top and bottom part of the shelf. Once the top and bottom pieces of wood were screwed together to the sides, I attached the front part of the shelf.
Note; this is the step that you would use the Kreg Jig and create pocket holes if you choose to go that route.
Next, finish the wood by adding a small amount of wood putty on top of all the screws. After the wood putty or wood filler dries add a little more stain to make it blend.
Final step; attach the “outer shell” to the frame. The shell should slide into the frame with a tight snug fit. I chose to use a few finishing nails to nail the outer shell to the frame. Then I covered the nails with putty and stain to make it blend.
FYI: You need two sets of hands to assemble these shelves.
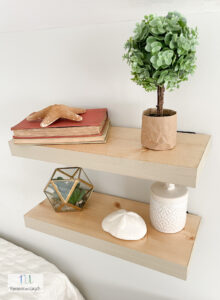
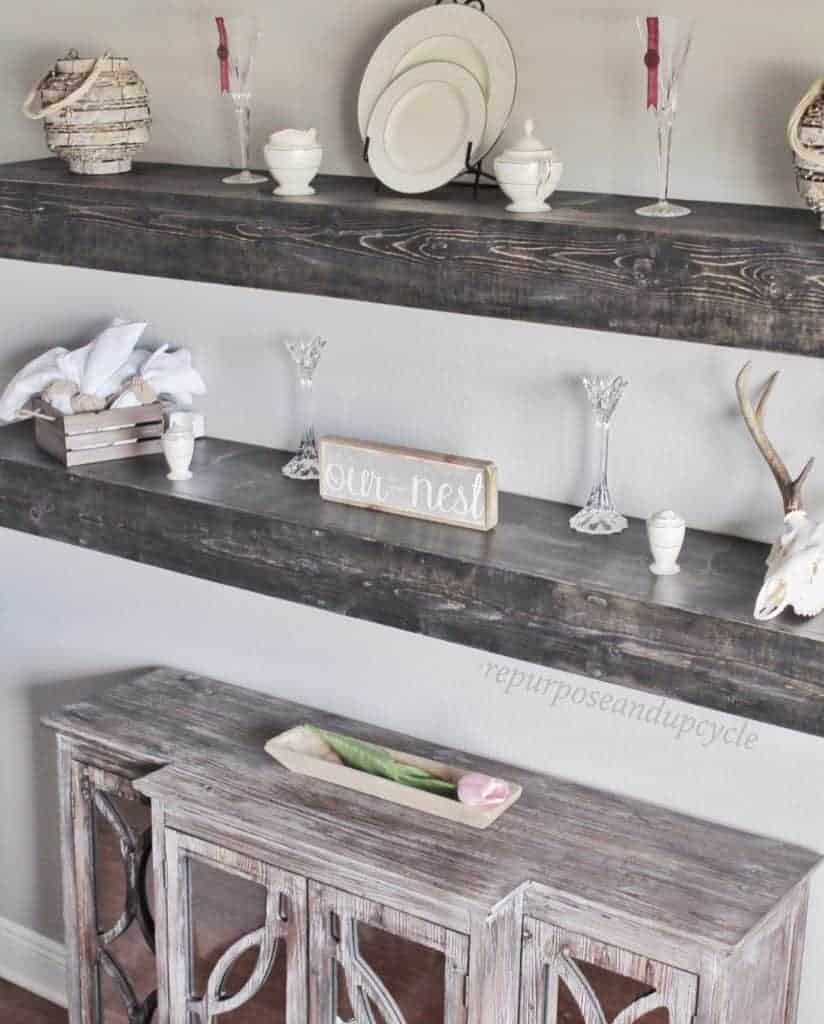
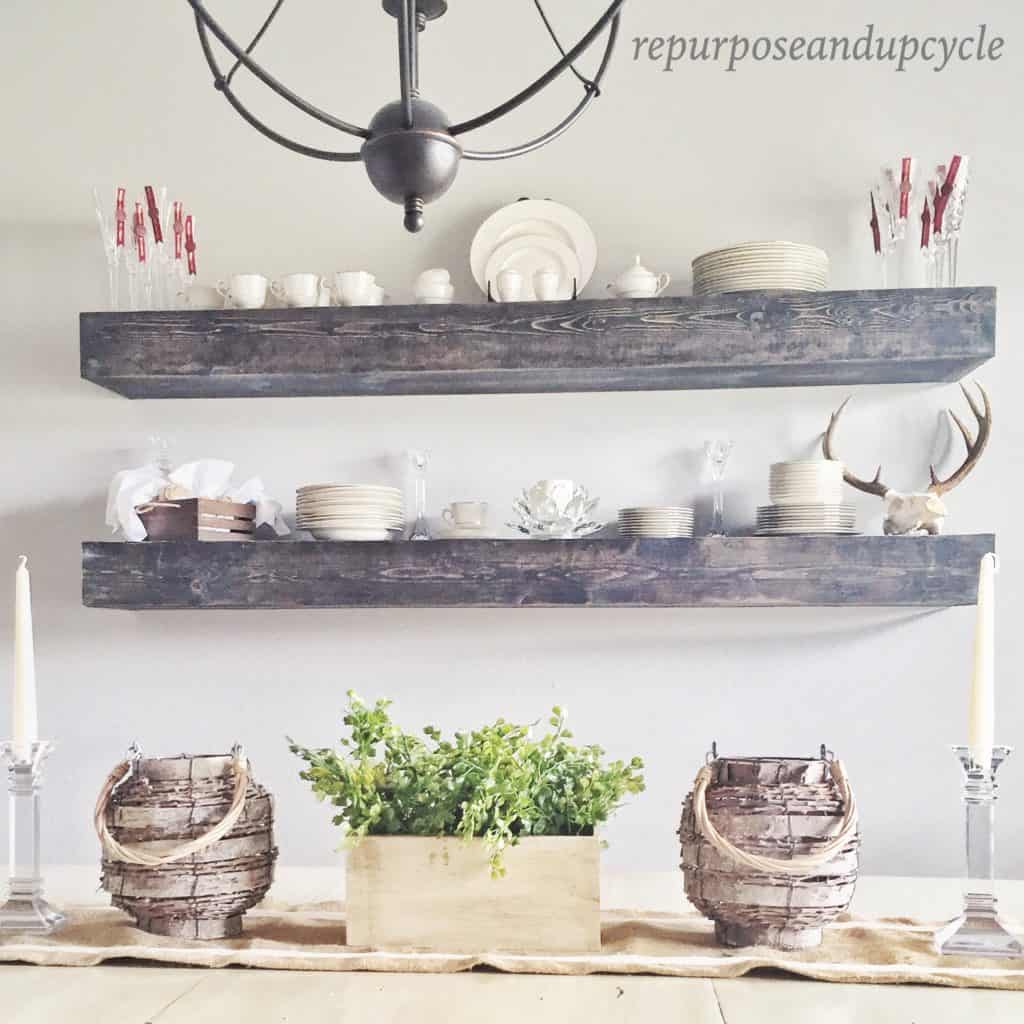
Here are my DIY wood floating shelves mounted on the wall in our dining room.
Super excited how these shelves turned out! Before, my china was tucked away in a cupboard for no one to see. Not anymore!
Isn’t it funny how the new trends (thanks Jojo Gaines) are for all sorts of open and industrial shelving?
Now lets just hope and pray my little ones don’t throw a ball and knock something over…
DIY wooden floating shelves
- Build the “Frame” that sits inside the actual shelves: Use a 2 by 4 by 71.5″ and screw quantity 6 of the 2 by 4 by 9 and 3/4″ into it. Space them as equally as you can, but it doesn’t have to be perfect.
- Use 4 large wood screws (3 -1/2″) to attach this to the wall by drilling into the studs. You could use as many as you want, but since I was drilling into 2 studs, I used 2 screws per stud.
- Once you have attached the frame to the wall, stain or paint the wood that will create the “shell” that fits around the base. Note: I attached the base to the wall first before I finished the actual outer shelf part, but you can wait and do it after too.
- Use the counter sinking drill bit to counter sink the 1 by 1/4″ screws into the wood where any two pieces would meet. I started by screwing the side pieces to the top and bottom part of the shelf. Once the top and bottom pieces of wood were screwed together to the sides, I attached the front part of the shelf
- finish the wood by adding a small amount of wood putty on top of all the screws. After the wood putty dries add a little more stain to make it blend.
- Attach the “outer shell” to the frame. The shell should slide into the frame with a tight snug fit. Use a few finishing nails if desired.

FAQ about wood open shelving
Here are some frequently asked questions about wooden open shelving:
- What types of wood are best for open shelving? Hardwoods such as oak, maple, and cherry are popular choices for open shelving due to their durability and resistance to warping and cracking. Other options include pine, cedar, and bamboo.
- How do I clean and maintain wooden open shelving? Dust the shelves regularly with a soft cloth or microfiber duster. For deeper cleaning, use a wood cleaner or a mixture of water and vinegar to wipe down the shelves. Avoid using harsh chemicals or abrasive cleaners, as these can damage the wood.
- Can I install wooden open shelving myself? Yes, wooden open shelving can be installed as a DIY project. Just know that it’s important to ensure that the shelves are properly anchored to the wall and can support the weight of the items you plan to store on them.
- How much weight can wooden open shelving hold? The weight capacity of wooden open shelving depends on the thickness and quality of the wood, as well as the type of brackets or supports used. Generally, hardwood shelves with sturdy brackets can hold up to 50-75 pounds per linear foot.
- Are wooden open shelves more expensive than traditional cabinets? The cost of wooden open shelving varies depending on the type of wood, the size and design of the shelves, and the installation method. In general, open shelving can be more affordable than traditional cabinets, as it requires less material and labor to install.
What are your thoughts on the new open shelving trend? Do you like them or not?
I know one thing is for sure, I’ve jumped on this floating shelving trend and my new DIY project is here to stay…for a while at least.
Lindsey***


