I recently wrote a post about how to age a clay terracotta pot with paint. To my dismay it didn’t create enough of the “antique vibe” I was looking for. I came to the conclusion that in order to really get that authentic “patina,” you need texture. After all, a true antique piece shows it’s age with more than just color, but texture and shape too. Guess what, I found a an easy way to age a pot with joint compound!
I found a few pots at the dollar tree. You can see I purchased a few plastic pots as well as terra cotta pots too. I had to make sure the joint compound would work on clay as well as plastic.
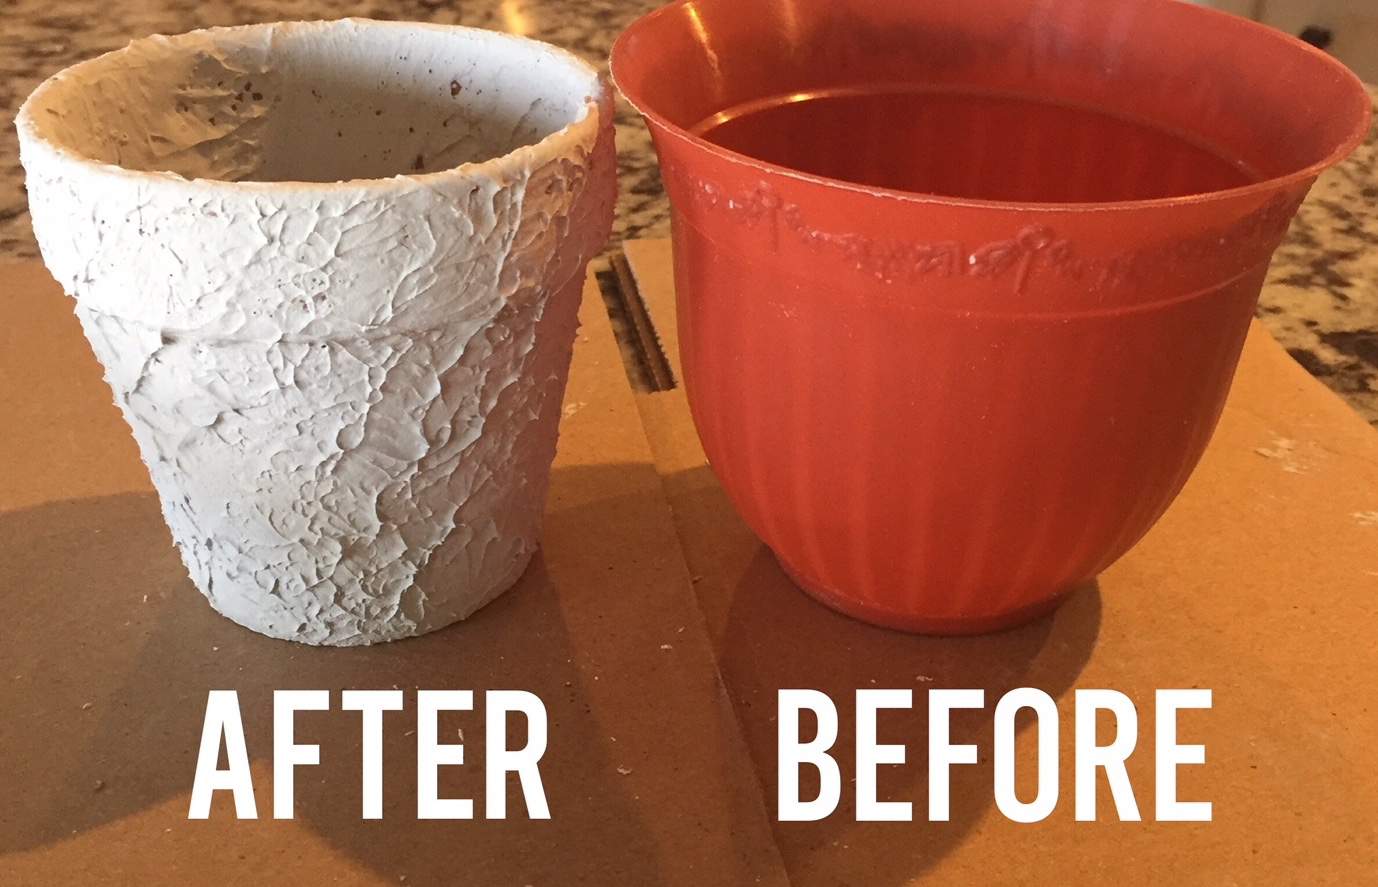
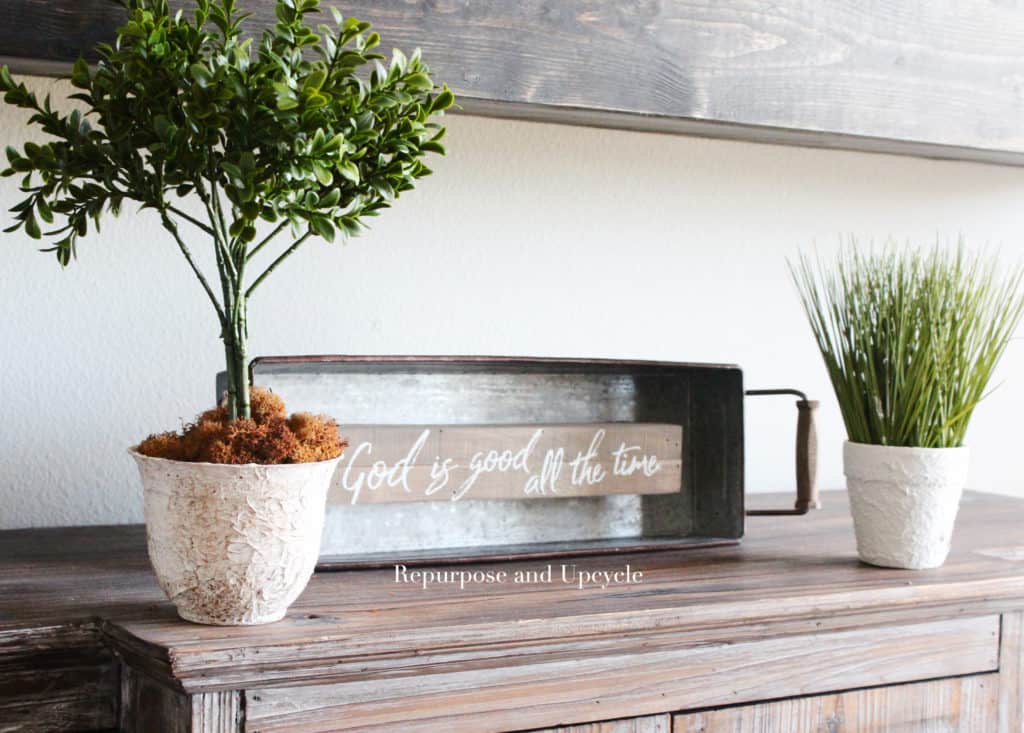
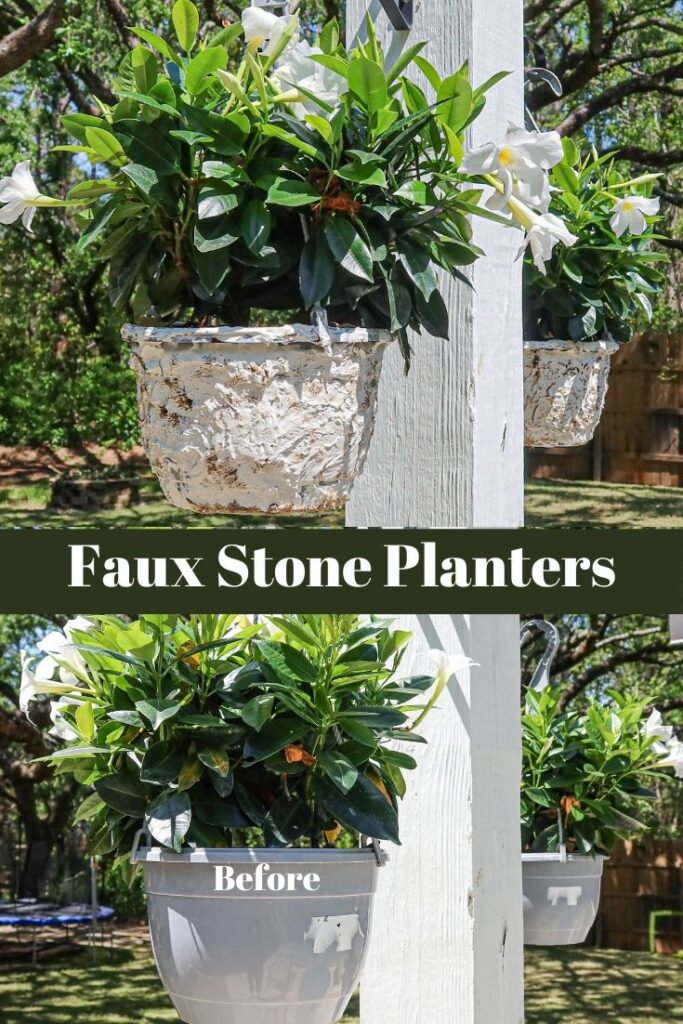
Can y’all believe the difference! I even painted a plastic pot and it looked perfectly aged.
So how did I get from the before picture on the right to the after picture on the left?
Disclosure; this post contains affiliate links. As an Amazon Associate I earn from qualifying purchases. This disclosure statement refers to the rest of the Amazon links in this post. See more on my disclosure page.
Best product to add texture to a terracotta pot?
Joint Compound!!
Joint compound is super easy to work with and quickly creates that vintage, antique texture that makes anything look aged.
I was super pleased to find an affordable product to help age my pots. I purchased a small can of joint compound at the local hardware store and it was only $3.
Those plastic pots were from the Dollar Tree! They come three for $1. I also purchased the clay pots too. Don’t ever underestimate the goodies you can find at dollar stores. I also created a few DIY hanging planters from these same pots from the Dollar Tree.
Materials to give a new pot vintage texture
- joint compound
- clay or plastic pots
- gloves (not necessary but this stuff is messy)
- paint or antiquing wax
How to give a new pot texture with Joint compound
- Apply gloves
- Open the joint compound and grab a decent clump of the product
- Start applying over the pot as you see fit while dabbing it in places to create more texture
- When you are done, let it sit at least 12 hours. This stuff needs to dry well.
- Paint or wax as you see fit
As far as painting goes, I prefer to use dark wax to give anything an aged look. A dab of green paint would have added a vintage touch too.
You can see where I’ve added the joint compound to a new piece of wood to also create this aged weathered look.
I think it would also add to the aged terra cotta look if you added a little moss. Has anyone else done this before?
Want to watch my quick video tutorial on How to age a new pot with Joint Compound? Check out my instructional YouTube video.
Now that I know how easy it is with joint compound, it’s going to be hard to keep myself from adding this stuff to everything! LOL, just kidding.

You can also see how I create a DIY faux stone hanging planters for outside with this same method. Side note, it’s been over a year since I created these and they have withstood the elements beautifully.
I hope you enjoyed this little project! Feel free to Pin the image below for future reference.

Lindsey**


