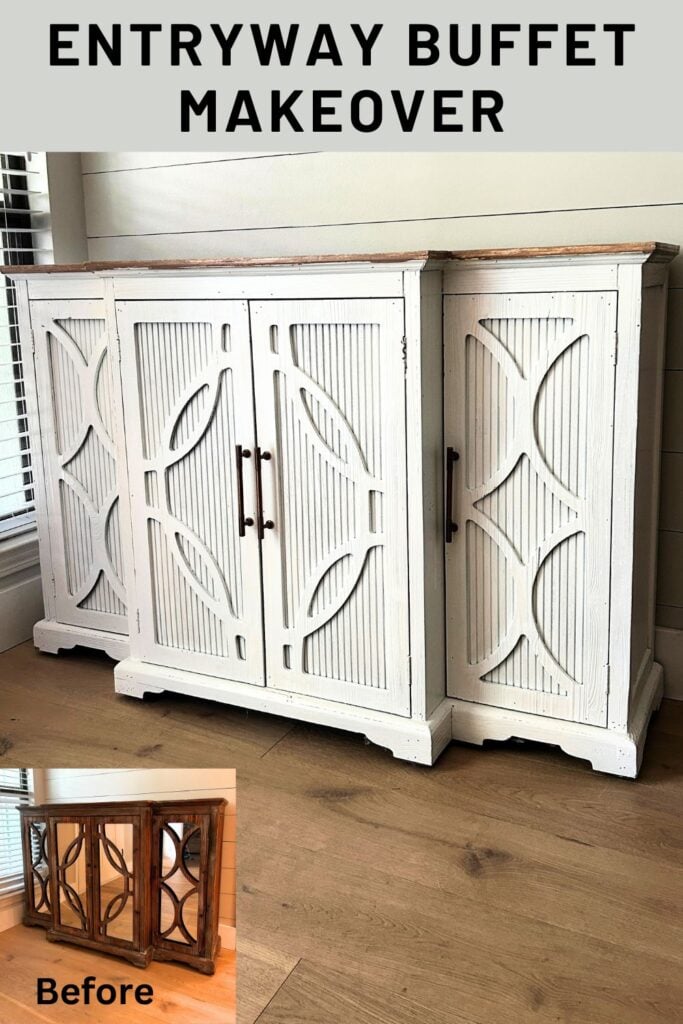
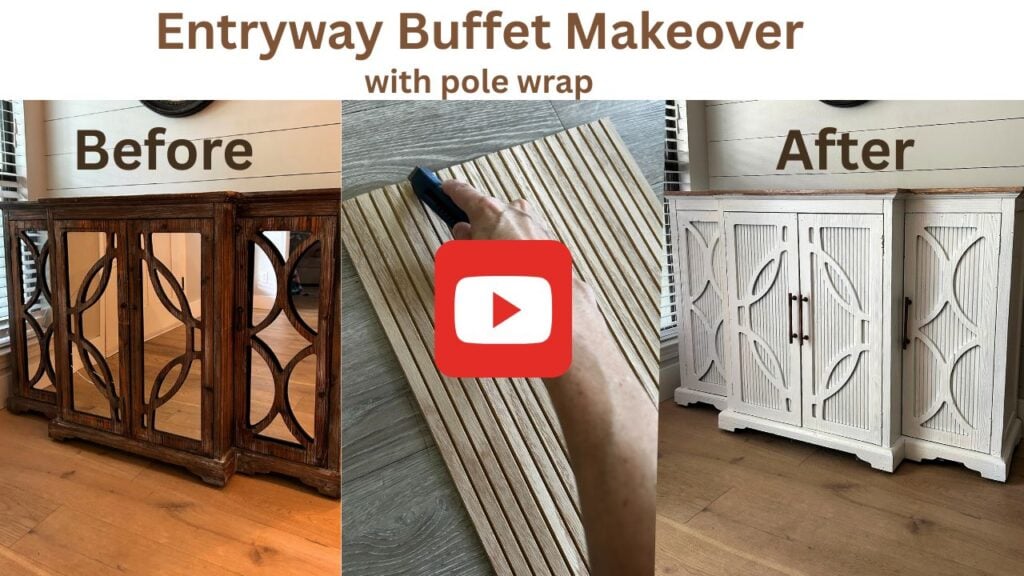
I recently decided to tackle a makeover on a buffet cabinet that wasn’t exactly high end, but I thought it would be a great project to share. Right away, I had to figure out what to do about the cracked mirrors and ended up using pole wrap as a replacement. It’s not the cheapest option, but it brought a fresh look and was surprisingly easy to work with.
After cutting and attaching the pole wrap, I painted the panels and the rest of the cabinet, experimenting a bit before settling on a finish I liked. To add a little something extra, I created a faux wood grain effect on the top. With some hardware added as a finishing touch, the final result was better than I expected.
Key Takeaways
- Planning and adapting are important for furniture makeovers.
- Using materials like pole wrap and paint can completely change a piece.
- Small details and textures add a polished, finished look.
Organizing the Buffet Refresh
Issues with Cheap Furniture
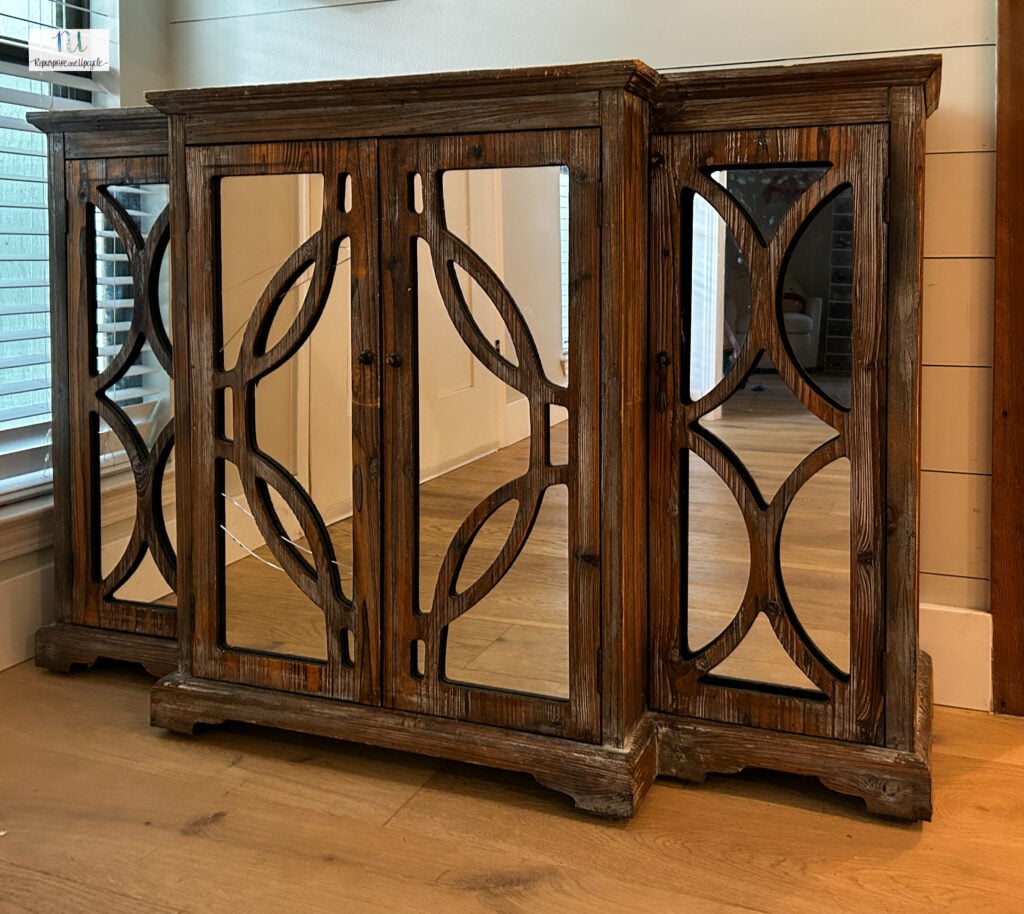
I quickly noticed that this buffet wasn’t a high-end piece—it had some cracks and the material wasn’t great quality. Because of its construction, my options were really limited. Some materials or techniques just weren’t an option because I didn’t want to risk damaging the buffet even more.
| Issue | Impact on Project |
|---|---|
| Visible cracks | Limited repair options |
| Low quality wood | Careful with sanding |
| Fragile backing | Attachment challenges |
Defining What I Wanted to Achieve
From the start, I knew I wanted to make the buffet look more updated, even though I had to work with what was already there. Swapping out the old mirrors for pole wrap was my main goal, even if it was a little pricey (85$ shipped for minimal pole wrap material). I also planned to repaint and try out a faux wood finish on top to make the surface more stylish and a bit more believable—even on a piece that wasn’t real wood.
My main goals were:
- Replace the mirrors with pole wrap for a trendy touch
- Pick paint colors that would freshen things up and work as a primer base if I changed my mind
- Experiment with a faux wood gel stain finish to give the top more dimension
- Avoid over-complicating things since the furniture was delicate
I hoped to get the most impact without putting too much stress on a not-so-solid piece of faux wood.
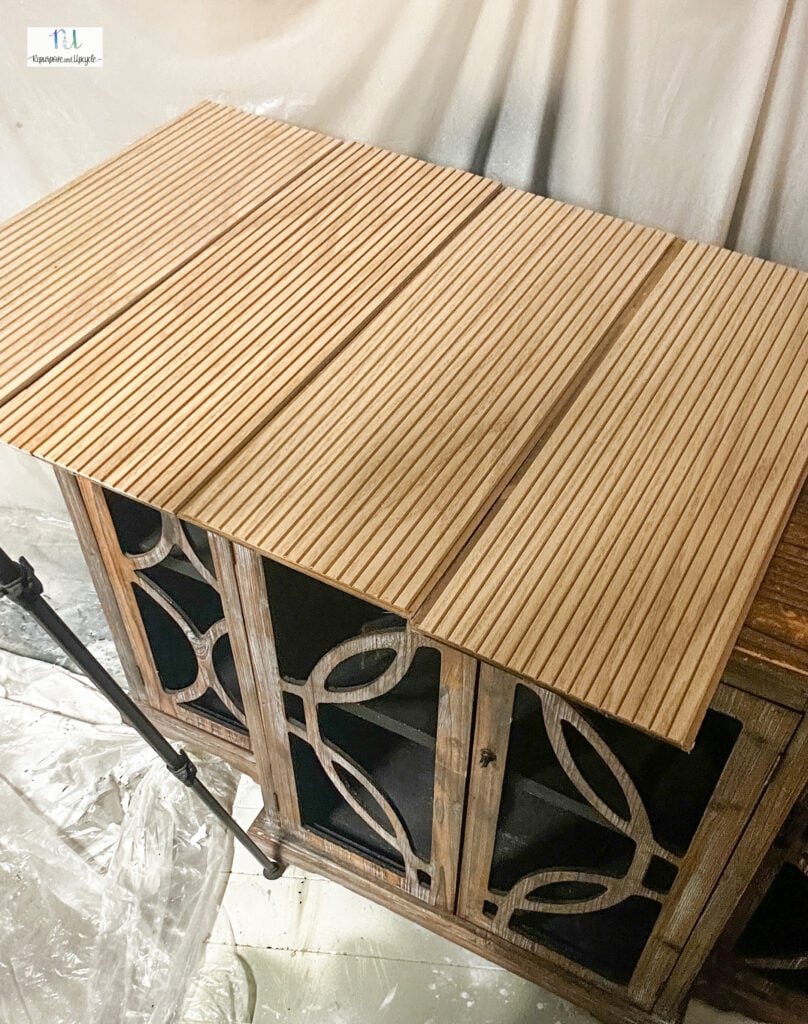
Taking Off the Mirrors
Once I got the mirrors off the buffet, I noticed there was a black backing behind them. The backing was handy to use as a guide and a support for the pole wrap.
Using Pole Wrap on a Buffet
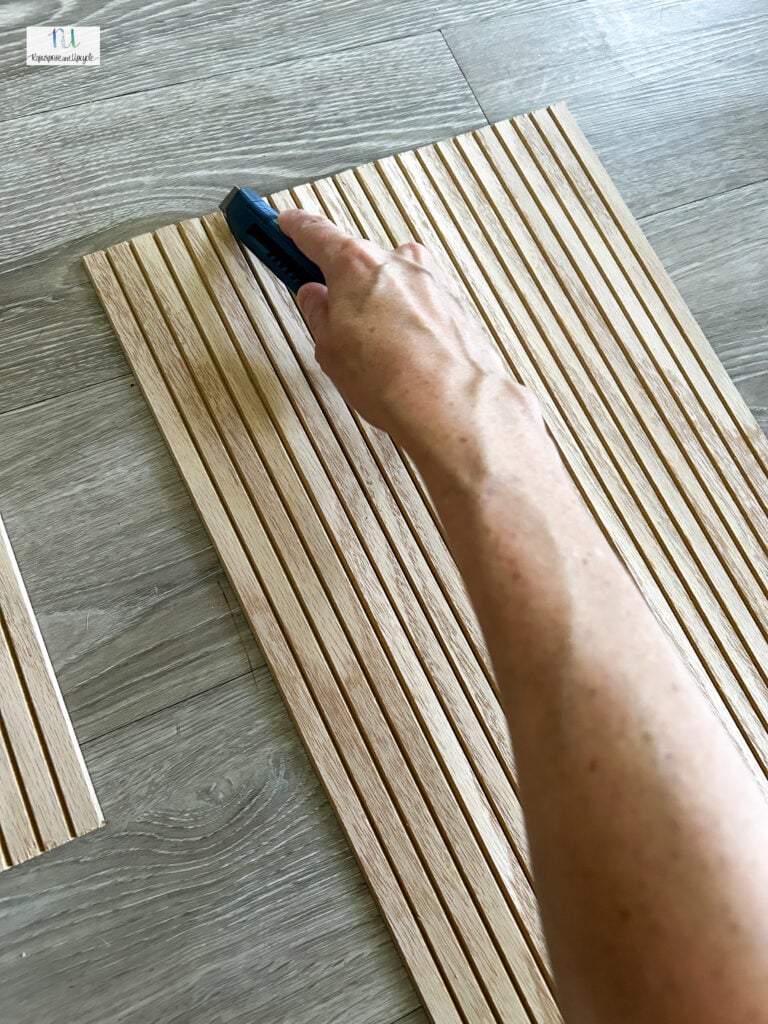
Ways to Cut Pole Wrap
When I needed to trim the pole wrap for the buffet, I started by cutting it horizontally with a miter saw. For the vertical cuts, I just used a standard utility blade. Here’s a quick tip: measure everything twice because pole wrap isn’t cheap and you want each piece to fit perfectly.
| Tool | Best Use | Notes |
|---|---|---|
| Miter Saw | Horizontal cuts | Quick and straight lines |
| Utility Blade | Vertical trimming | Good for precise details |
Securing the Panels to the Cabinet
To attach the pole wrap, I used the black backing that was already behind the old mirrors. I applied strong wood glue, but you can also use construction adhesive — either way works as long as it sticks well to the heavy-duty cardboard and holds up inside the buffet. After cutting, I made sure everything was in place before painting and reattaching the finished panels to the buffet.
Steps I Followed:
- Removed old mirrors and kept the black backing.
- Cut pole wrap to the right size.
- Glued pole wrap panels to the black backing (with wood glue).
- Let everything dry before moving on to painting.
Advice for Your First Go
This was my first time working with pole wrap, and honestly, it’s pretty easy to handle. Here are a few things I learned along the way:
- Budget: Pole wrap can be pricey, so plan carefully to minimize waste.
- Painting: I recommend painting the panels with a brush before installation. This makes it easier to get paint into the grooves, rather than trying to spray it on afterward.
- Priming: A paint-plus-primer combo worked for me, especially if you’re not sure about the final color.
- Finish: If you want a classic look, you really can’t go wrong with a basic white paint.

Giving the Panels a Fresh Coat
Hand-Painting or Using a Sprayer
When it came time to add some color to the panels, I had to decide if I wanted to use a brush or grab my paint sprayer. I actually chose to brush on the paint by hand for the first coat, especially so I could get down into all the grooves of the pole wrap. In the past, I tried to spray moldings like this and found that the paint didn’t always settle into the detailed areas.
Once everything was attached and dry, I changed things up and switched to my paint sprayer for the next round. For the sprayer, I thinned out the paint just a touch to avoid any clogs—you’d be surprised how quickly thick paint can jam things up.
Painting Method Advantages
| Method | Pros | Cons |
|---|---|---|
| Hand Brushing | Good control in grooves and details | Slower, may show brush marks |
| Paint Sprayer | Fast, smooth, even application | Can clog, misses fine details |
Picking Out the Right Primers and Paints
For this project, I used a paint that included primer in it. My thinking was simple: if I liked the color, perfect—I’d do two coats and call it finished. But if I changed my mind, that first layer would double as a base so I wouldn’t have to start over.
The first color I picked didn’t really work for me after all, so I ended up going with a basic white cabinet and trim paint. Whenever I’m spraying, I almost always add a bit of water to the paint so the sprayer doesn’t get blocked.
Here are a couple tips that helped me out:
- Primer-included paint can save time and give more flexibility if you want to change colors later.
- Always prep and thin your paint for the sprayer to get better results, especially if the paint’s thick.
Giving the Buffet Cabinet a Fresh Color
Putting Down the Initial Layer
To start, I went with a paint-plus-primer product for my first coat on this piece of furniture. I brushed it on by hand, especially where the pole wrap panels had grooves—this way, I could get the paint into all the little details. I wanted to see the color on before deciding if I’d stick with it or use it as a base for something else.
Here’s what I used for the first layer:
- Paint Type: Paint plus primer
- Method: Hand painting for better coverage in crevices
- Goal: Full coverage and a good foundation, no need to use extra primer
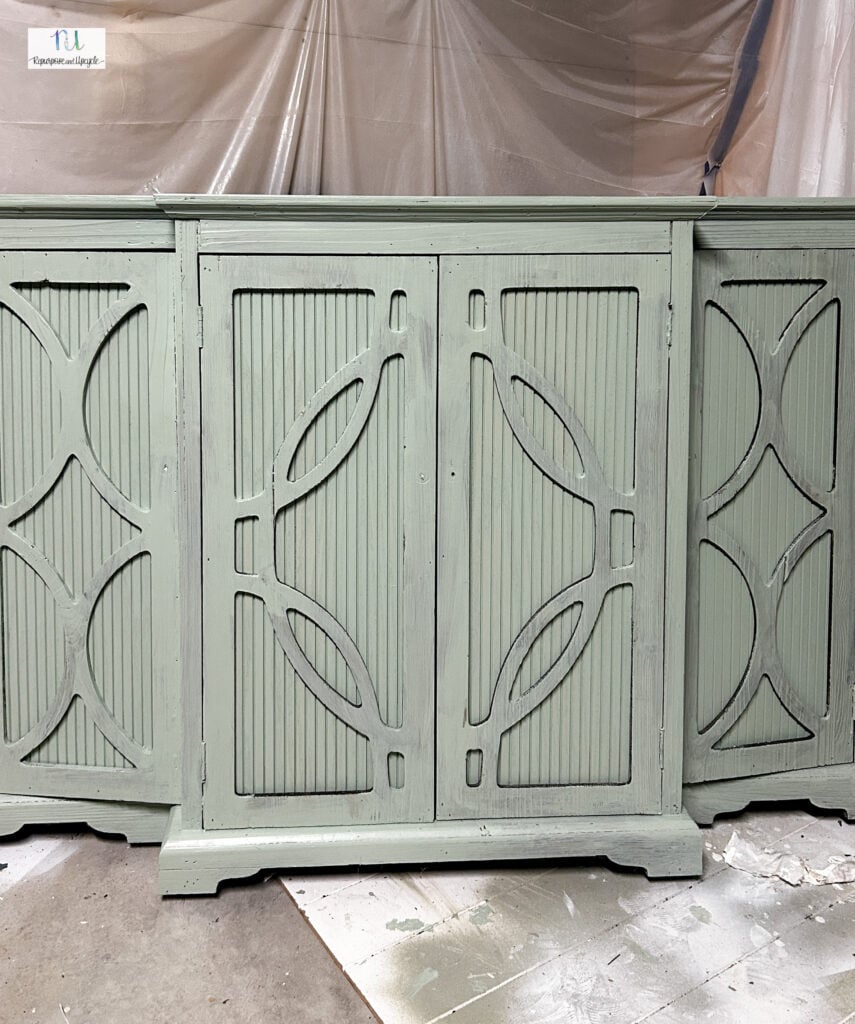
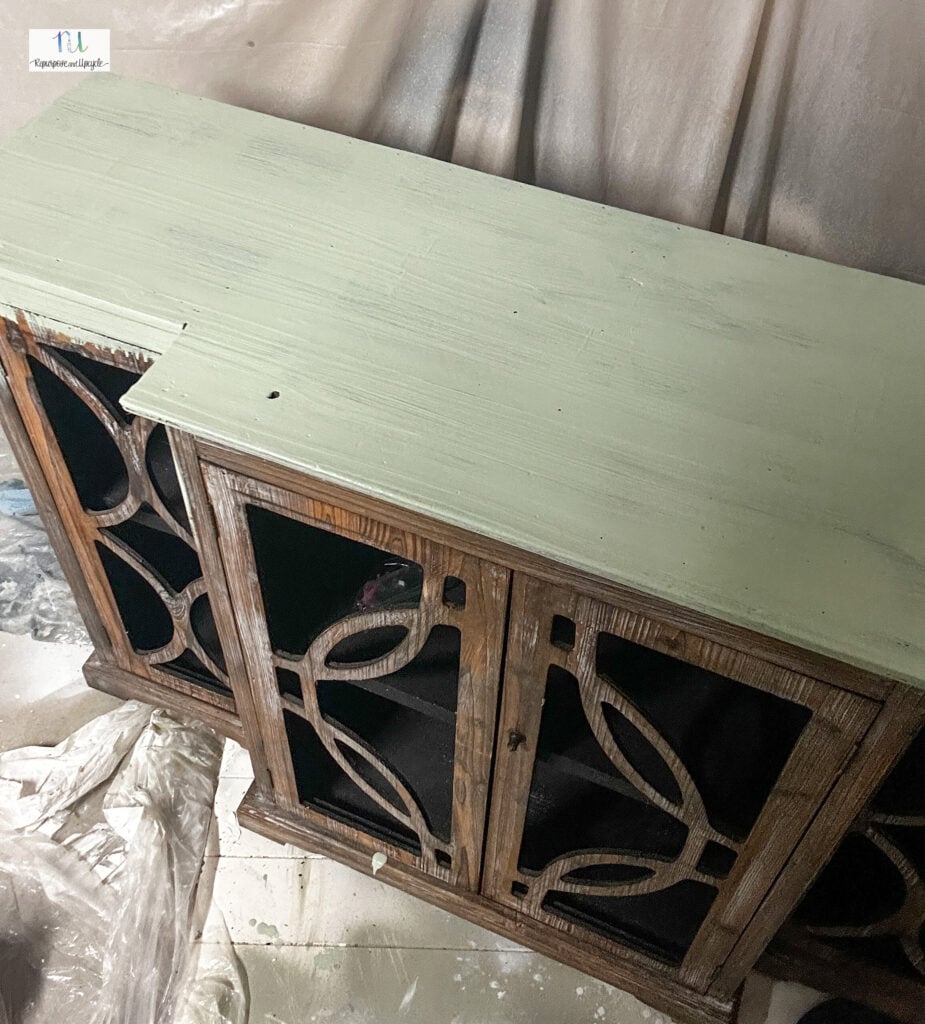
Changing Up the Color Choice
Once the panels and cabinet were painted, I stepped back and just didn’t love the color—so it was back to the drawing board for me. I decided to try a different color, switching to a plain white cabinet and trim paint. Before spraying, I watered the paint down to avoid clogging the sprayer since that’s been a problem for me in the past.
Spray Painting Methods I Used
When I got out the paint sprayer, I used smooth, even strokes to spray the cabinet. I always make sure to thin the paint first—it just helps everything flow better and reduces the risk of the sprayer getting clogged. In my experience, white paint is a safe choice for furniture makeovers.
My spraying tips:
- Always thin the paint a bit with water (unless the paint specifies not to)
- Test the spray on a scrap surface first
- Move in steady passes for even coverage
- Let each coat dry all the way before adding another. Since this was a second coat, I only applied one spray coat.
How I Made a Realistic Wood-Look Finish
Applying Gel Stain for a Wood Appearance
After the base coat dried, I grabbed my favorite gel stain, Toasted Oak from Heirloom Traditions. I went with this gel stain because even on a faux surface, it really gives that wood effect. I brushed on a coat, let it settle into the texture, and then decided to add a second layer. Looking back, one coat probably looked better, but I ended up with two anyway for the stained top.
Tools I Used:
| Product | Why I Picked It |
|---|---|
| Toasted Oak Gel stain | Realistic wood appearance |
| Lint-free cloth | For easy cleanup |
My Experience With Faux Wood Grain Tools
I wanted to pull out even more of that wood look, so I tried a wood graining tool. I’ve used these before on really smooth surfaces, and they can add convincing grain patterns. But on this cabinet, the texture wasn’t smooth enough, so the tool didn’t work as well as it usually does. I still managed to get some effect, but the uneven surface made it less defined.
Quick Tip:
Wood graining tools shine on smooth surfaces. If your piece is textured, don’t expect perfect results. You can always use wood filler to create a smooth surface if you want to use a wood grain tool.
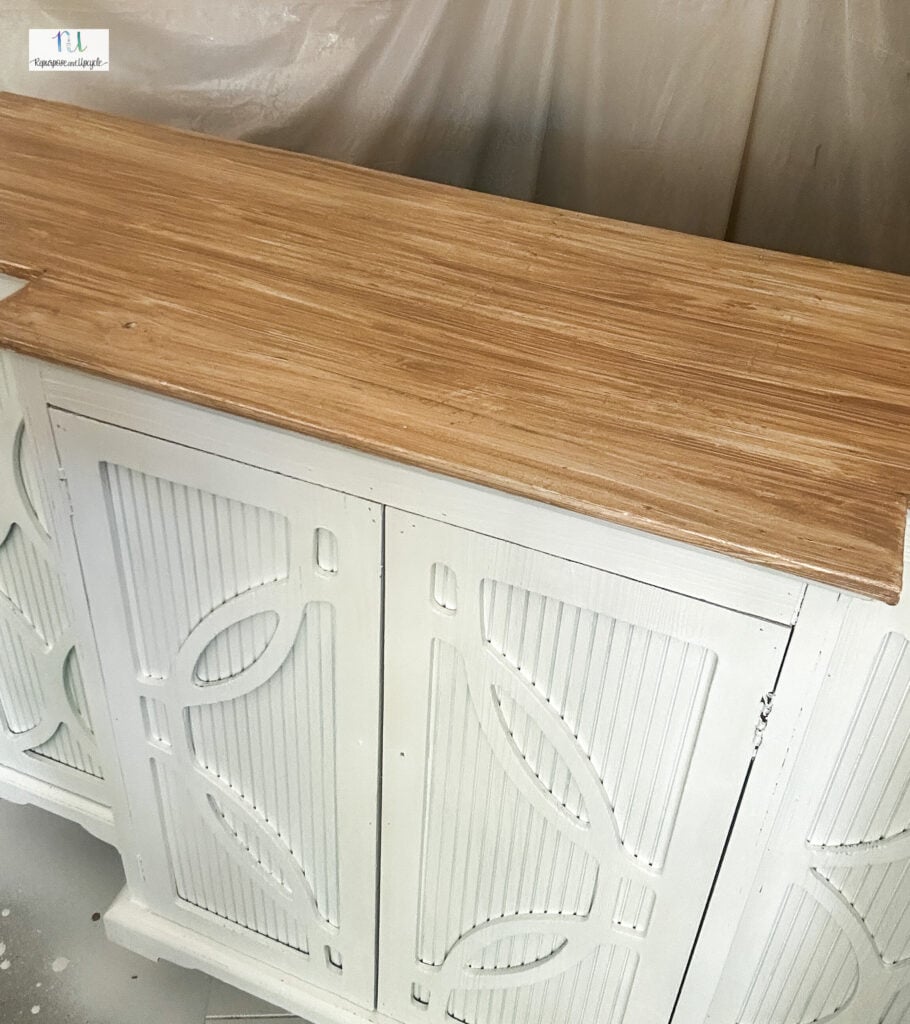
Scuff Sanding to Boost Texture
Once everything was dry, I went in with some scuff sanding to highlight the faux wood grain even more. I focused on gently sanding areas to let more of the base color peek through, giving it that slightly worn, natural wood vibe. Just a quick pass with the sander can really bring those textured details to life. This outdated buffet was quickly turning into a beautiful piece!
Putting On the Last Details
Picking Out and Attaching the Handles
The last step I always look forward to is picking and installing new hardware. I think handles and knobs really change the look of a piece and tie everything together. I replaced the old hardware with a fresh set, and instantly, the buffet felt updated.
This might be one of my favorite buffet makeovers to date!
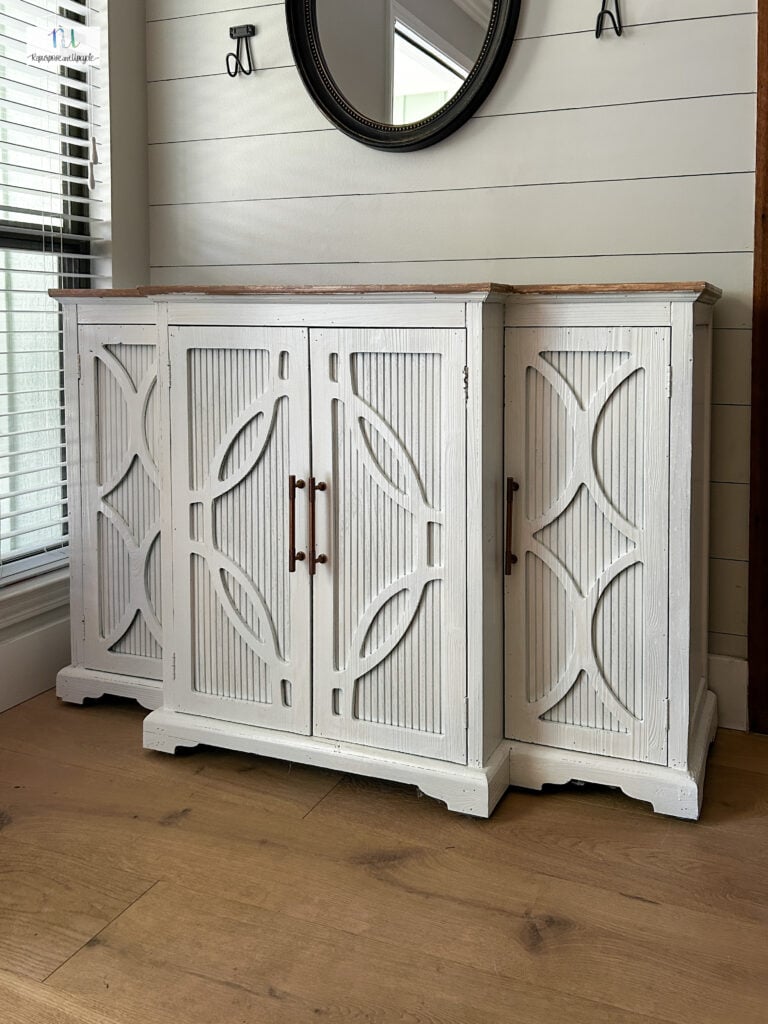
My Personal Take and the Full Makeover Look
After adding all the touches, I took a step back to see the finished piece. I honestly felt relieved because at the start, I wasn’t sure what direction this makeover would take, especially after applying the green paint.
The white paint, the pole wrap, and those new handles worked together much better than I expected. Even with a few changes along the way, everything came together and made the buffet feel completely refreshed.


