See how I gave an antique Steamer Trunk a makeover with a Unicorn Motif. I used Unicorn Spit Stain with acrylic paint to paint the outside and peel and stick wallpaper for the inside.
I have a fun project for you today. It does involve an antique piece of furniture but it doesn’t involve a hard antique restoration process.
Have you ever tried to restore a steamer trunk? Depending on the trunk’s condition, it can either be an easy task or super arduous.
A family friend reached out and asked if I could give this vintage steamer trunk a makeover for a two year old girl. Luckily she wanted it to be fun and something this little girl would love to put her toys in. She had no desire for me to restore it, but rather give it a full colorful makeover.
I guess I’ve had Unicorns and Rainbows on my mind lately because it’s been the theme for the past few blog posts.
Recently I gave a dresser a makeover in a Rainbow theme with Acrylic paint on wood. This dresser had been previously refinished with Stikwood Wood plans on the drawer fronts.
On my other website I did a quick tutorial for kids on how to draw a rainbow (with a free rainbow template).
Disclosure; this post contains affiliate links. As an Amazon Associate I earn from qualifying purchases. This disclosure statement refers to the rest of the Amazon links in this post.
Enough about that, It’s time to share how I painted a Unicorn on this vintage steamer trunk.
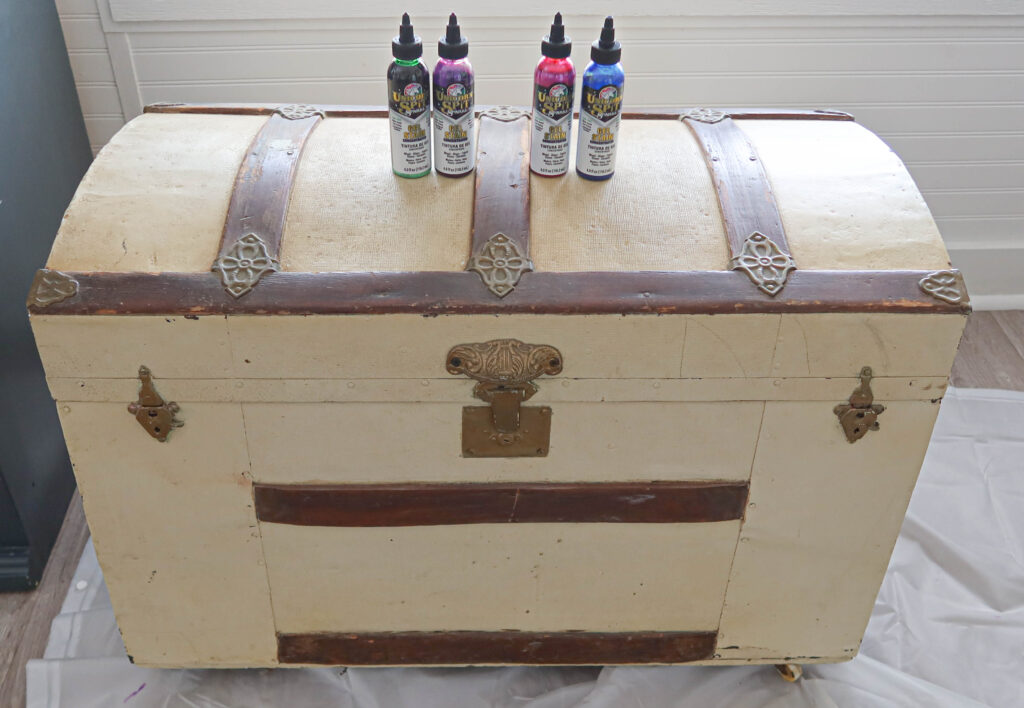
Steamer trunk in original condition
The trunk wasn’t in good shape, but not completely terrible either. It might have been painted in a light creme color at some point.

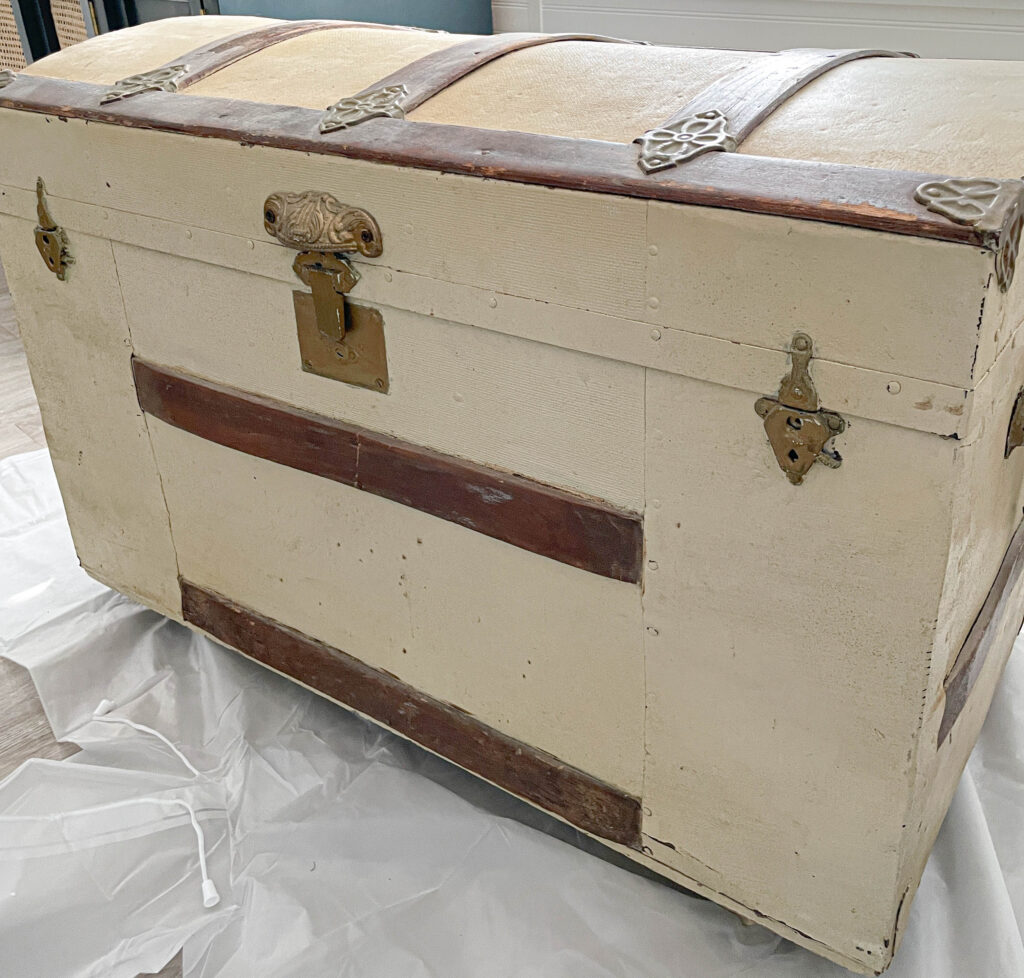
My client wanted the paper removed and redone with something a little more fun and colorful.
So we begin…
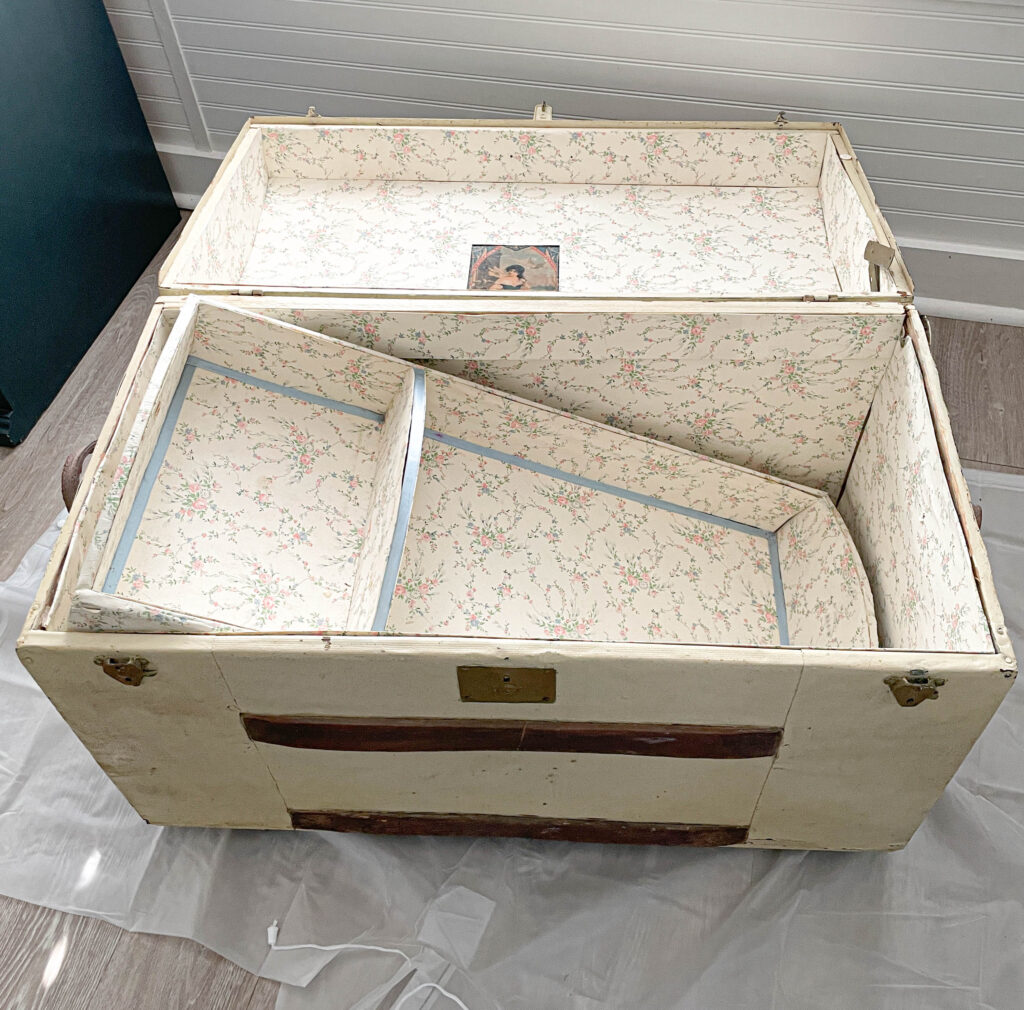
I started by trying to remove all the old paper from the inside. Let’s just say it didn’t go so well.
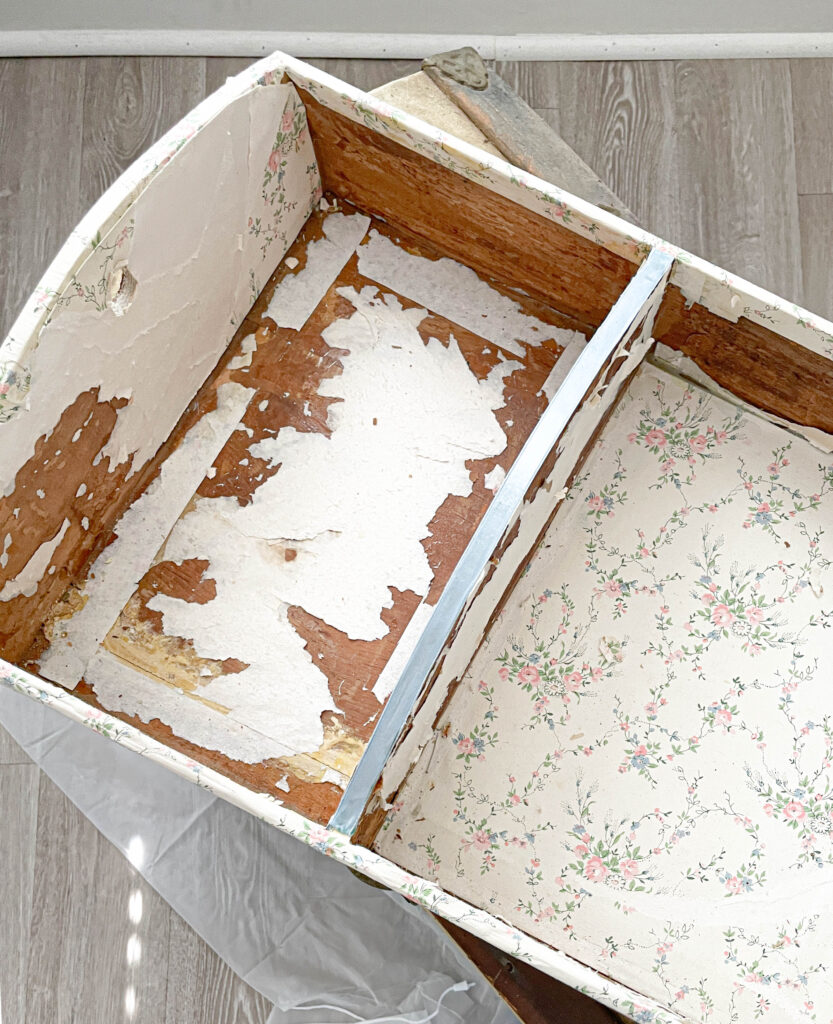
The wood is so old that the paper and adhesive was literally infused to the wood. When I pulled the paper out, it also pulled up part of the wood in some places too.
Ugh not good not good.
I removed as much of the paper as I could (which took about 4 hours by the way). There was lots of splintered wood when I was done which is never a good idea when you have little ones.
I ultimately decided that I would seal whatever was left with Decoupage or Mod Podge sealer and then place a pretty colorful peel and stick paper inside. By the way I did add a little color to the sealer just because. 🙂

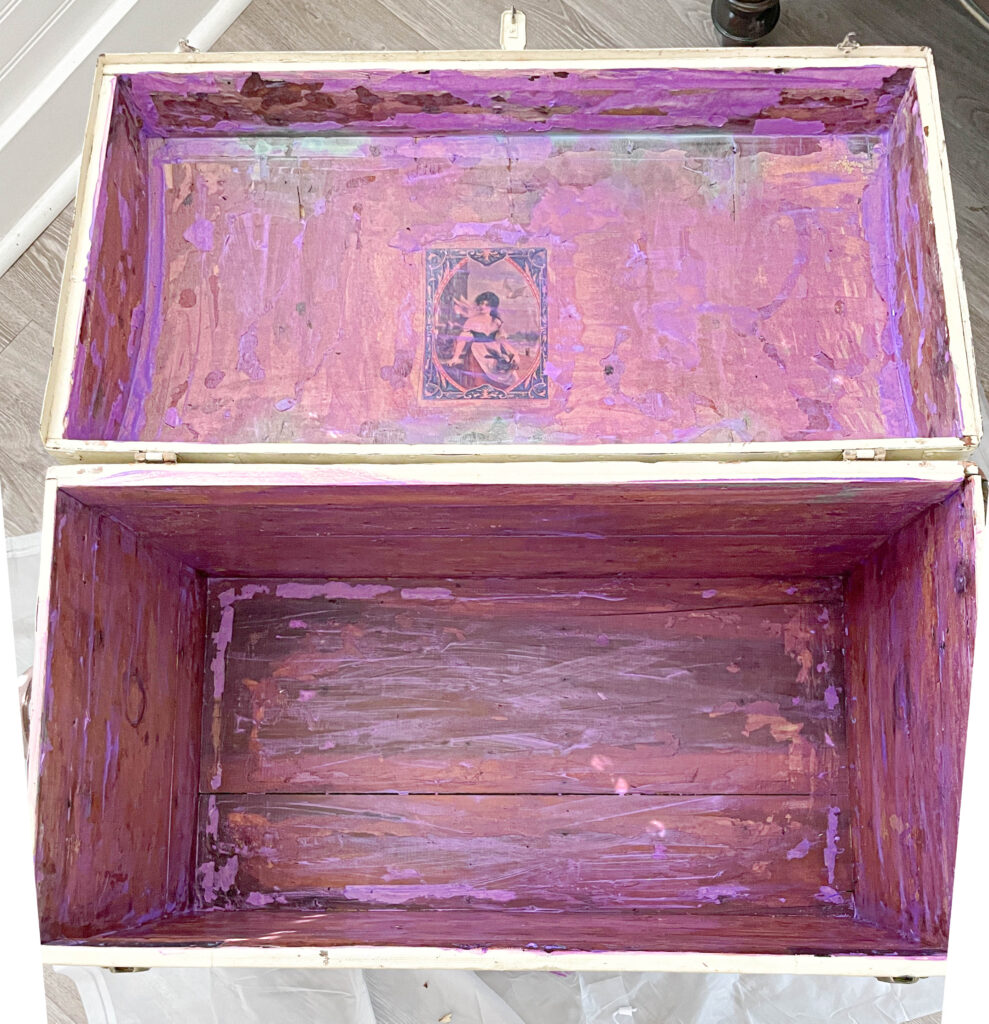
It’s not a pretty sight but it’s sealed and clean and ready for peel and stick paper.
I couldn’t leave the inside as it was because I was afraid of wood splinters.
Once I had a plan for the inside I moved on to the outside.
Materials for the steamer trunk makeover with Unicorn Motif
- Unicorn Spit Sparkle gel stain in the colors: Sapphire Swift, Violet Vulture, Lavish Lovebirds, Starling Sasha. You might be better off buying a set with more colors here.
- Acrylic White paint
- Small paint brush
- 2″ paint brush
- drop cloth
- Cleaner/degreaser
- Famowood Glaze Coat Epoxy
Below you will see the trunk with the four colors of Unicorn Spit Sparkle Gel Stain I used to create the Unicorn motif.
Speaking of Unicorn Spit, this is the third project where I’ll be using this product. It’s so versatile and I love it. Did I mention it’s got a fragrance to smell good too? Let me show you a few of my past projects below.
Unicorn Spit Projects
Using Unicorn Spit on slices of wood to make whimsical stepping stones
How to Give an Orange Toned Dresser set a New look with Unicorn Spit Gel Stain
Before I did any painting I gave the trunk a good clean.
Sometimes the best way to clean a piece of furniture is with a little dish soap and water. I scrubbed it down and then wiped it dry.
On to the painting!
Painting a Unicorn Motif on the Steamer Trunk
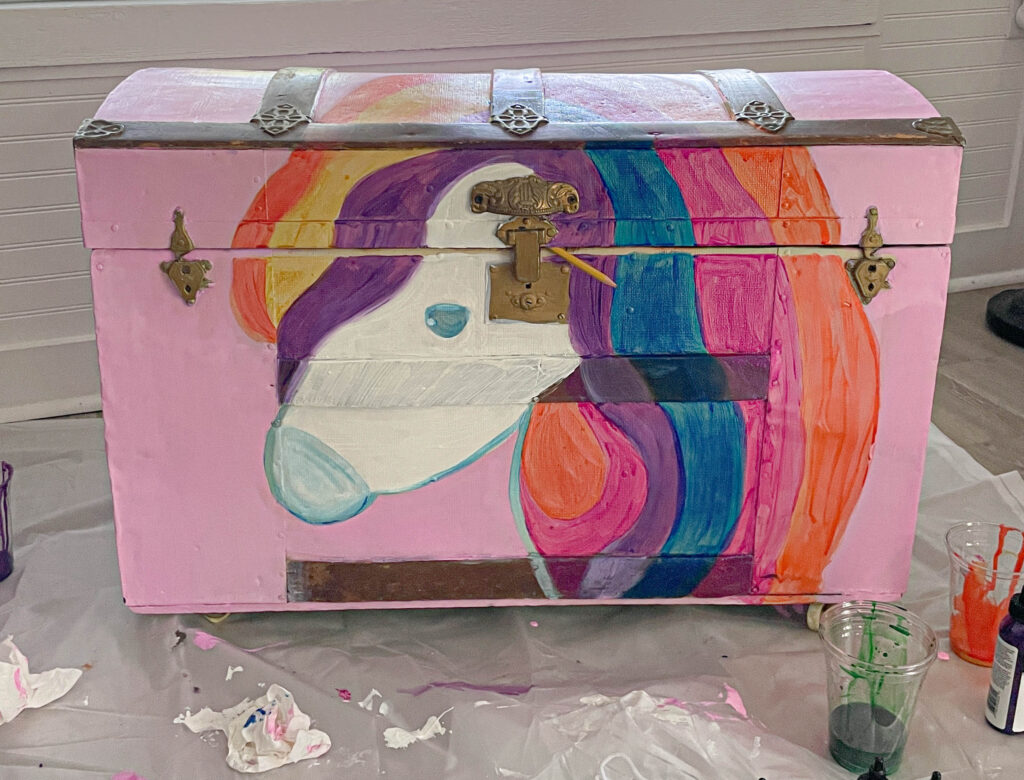
The first thing I did was use a pencil to freehand the shape of the Unicorn onto the front and top of the dresser. I wanted this picture to flow from the front to top.
Next I used the white acrylic paint and my small paint brush to outline and shade in the shape of the head. The acrylic paint took two coats of paint to fully cover the chest.
Next I used the Unicorn Spit Sparkle paint with the small paint brush to outline and color the different strands of Unicorn hair.
I mixed a 1/4 solution of white acrylic paint to pink Unicorn Spit to create the light pink color that I applied to the rest of the trunk.
I don’t have any step by step pictures as I did an entire video on the process so make sure to watch it below.
Below is the unfinished Unicorn Motif (with wet paint) without the epoxy sealer.
A few things about Unicorn Spit Gel Stain;
- It’s a gel stain so it’s going to have a semi transparent look.
- I used 3 coats of each color on the Unicorn.
- I doesn’t look “finished” until you put the epoxy sealer on it.
- The color will change and become more vibrant with the sealer.
Once the paint was dry and I was happy with the paint job, I applied some faux eyelashes (from a Unicorn Cake Topper set). I thought this might be a fun way to give the Unicorn a little more 3D dimension.
Now it’s time for the epoxy clear coat. The recommended clear coat for Unicorn Spit is Famowood Glaze Coat Epoxy. I’ve used this product before on top of Unicorn Spit and I really like it.
How to use Famowood Glaze Coat Epoxy Kit
- First pour equal parts of each solution into a plastic cup.
- Then pour the hardener into the resin and mix for 6 minutes. Make sure you mix for a full 6 minutes.
- Then pour the solution you just mixed into another clean cup and mix for another 6 minutes. Now you should be ready to pour.
- Pour the mixed resin onto the middle of the surface. Take a plastic putty knife and spread the glaze towards the edges.
- If you do see bubbles appear use a heat gun or a flame 8″ above the surface to make them disappear.

Applying the glaze coat is messy. There is no easy way to do it. It was especially hard to apply the glaze to the vertical surfaces. Make sure you have a large drop cloth in place because it will drip!
Epoxy Resin for Wood Projects
Here are a few of my past Epoxy Resin projects:
Applying resin to wood slices painted with Unicorn Spit
Epoxy Pour Ocean Art of Pallet Wood
Initially I didn’t intend to replace the hardware on the trunk. But after the epoxy dried, the hardware dried with it and fell apart.
I purchase a set of Stamped Steel Trunk Flap Hinges from Amazon to replace the old hinges with.

Since the rest of the hardware on the Steamer Trunk was gold, I used Rub’N Buff to transform the color to antique gold.


Restoring the Inside of the Steamer Trunk
Like I said earlier the inside of the trunk was in worse shape than I expected. After I sealed it with mod podge, I decided to purchase a peel and stick wallpaper product to cover it with.
I wanted a solid soft pink color to balance the vibrant colors on the outside.
I won’t go into all the details on how to apply it because you can see that in a post I created on How to apply wallpaper with peel and stick vs. regular wallpaper.
Below is a picture of what the steamer trunk looked like after I applied the pink peel and stick paper. It also came with this cute Unicorn sticker that I applied to the back.
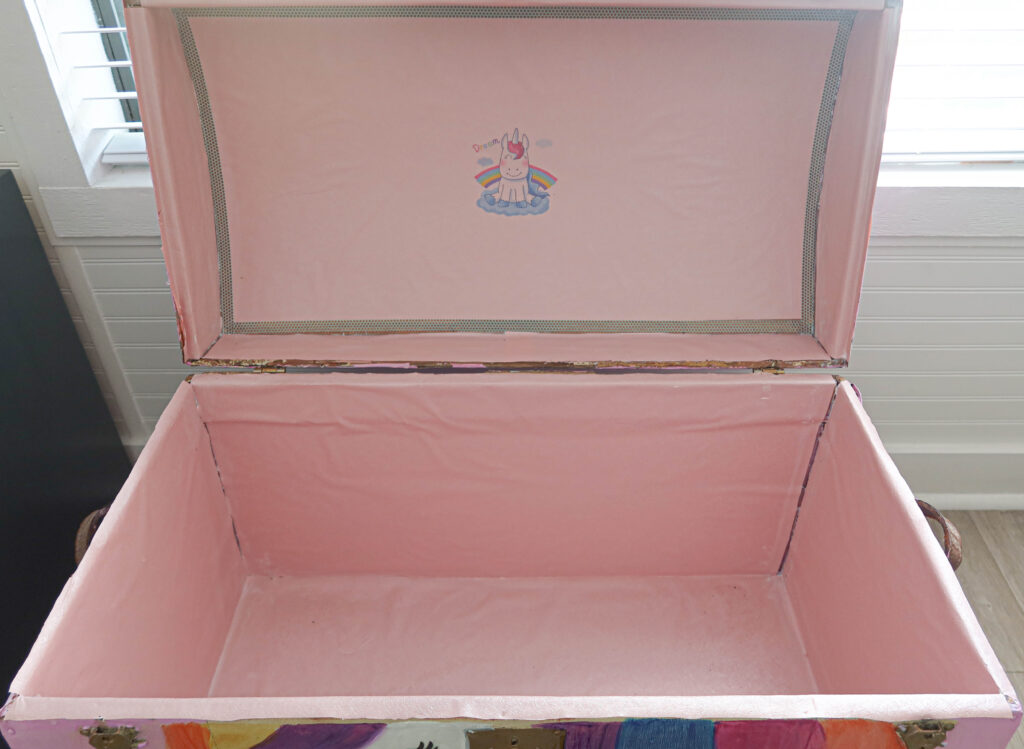
You can see I also applied a little Washi tape to the corners for an extra decorative touch.
Almost done!
Antique Steamer Trunk Makeover with a Unicorn Motif
Here it is! Even though the trunk didn’t turn out how I intended it to, (I was hoping to refinish the wood on the inside) I’m still pleased.

I love how bright and colorful it is now!

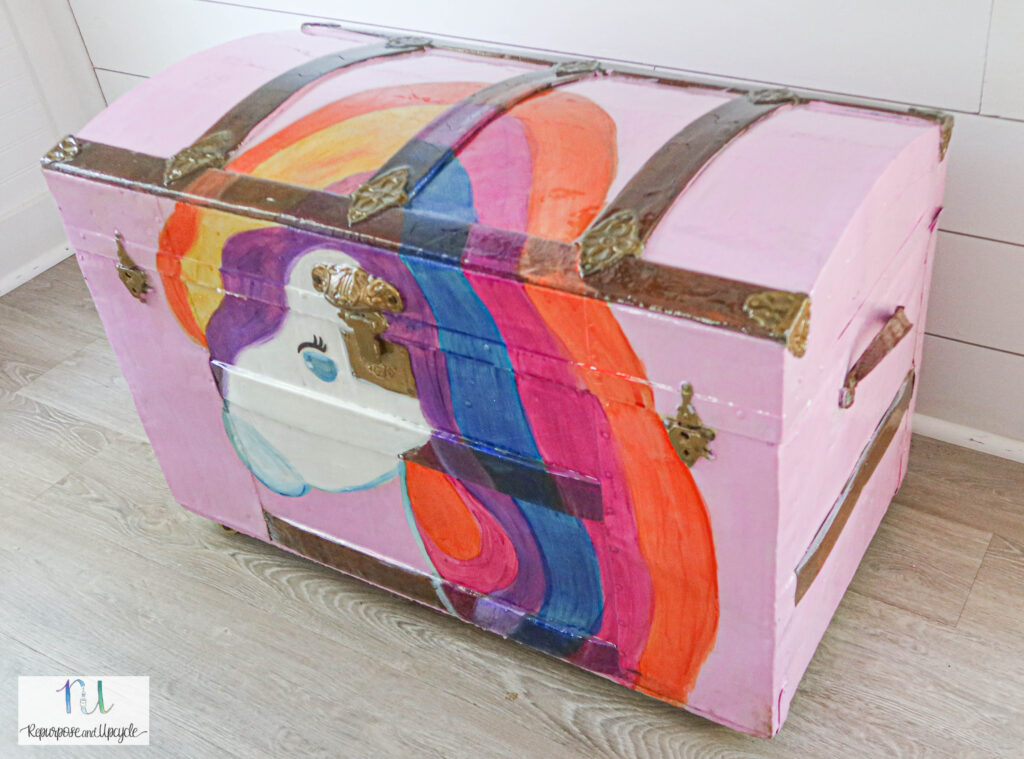


I sure hope the little girl will love it and get a handful of good use out of it!
Thanks for following along friends.
Lindsey**


