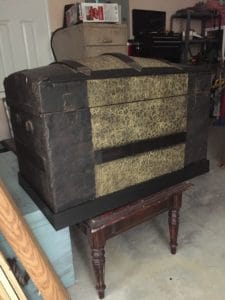
Do you know what an antique steamer trunk is? I had no idea what a steamer trunk was until a friend gave me his antique trunk to refinish. I knew it was old, but there were a few elements of this antique trunk that I hadn’t seen before.
It had pressed tin and old stamps on the inside with a paper like finish. I knew it had history. I would guess this steamer trunk dates back to circa 1880’s.
Honestly, this furniture flip was a little intimidating because I didn’t want to destroy the historical elements of this vintage piece. It took a little trial and error, but I learned a few tips and tricks on restoring an antique steamer trunk.
Let’s talk about the sad state of this steamer trunk when I received it. Granted, it is over 100 years old, but the bottom was about destroyed. I’m sure over time little mice, or rats or maybe even just lots of elements, ate away at the base of it.


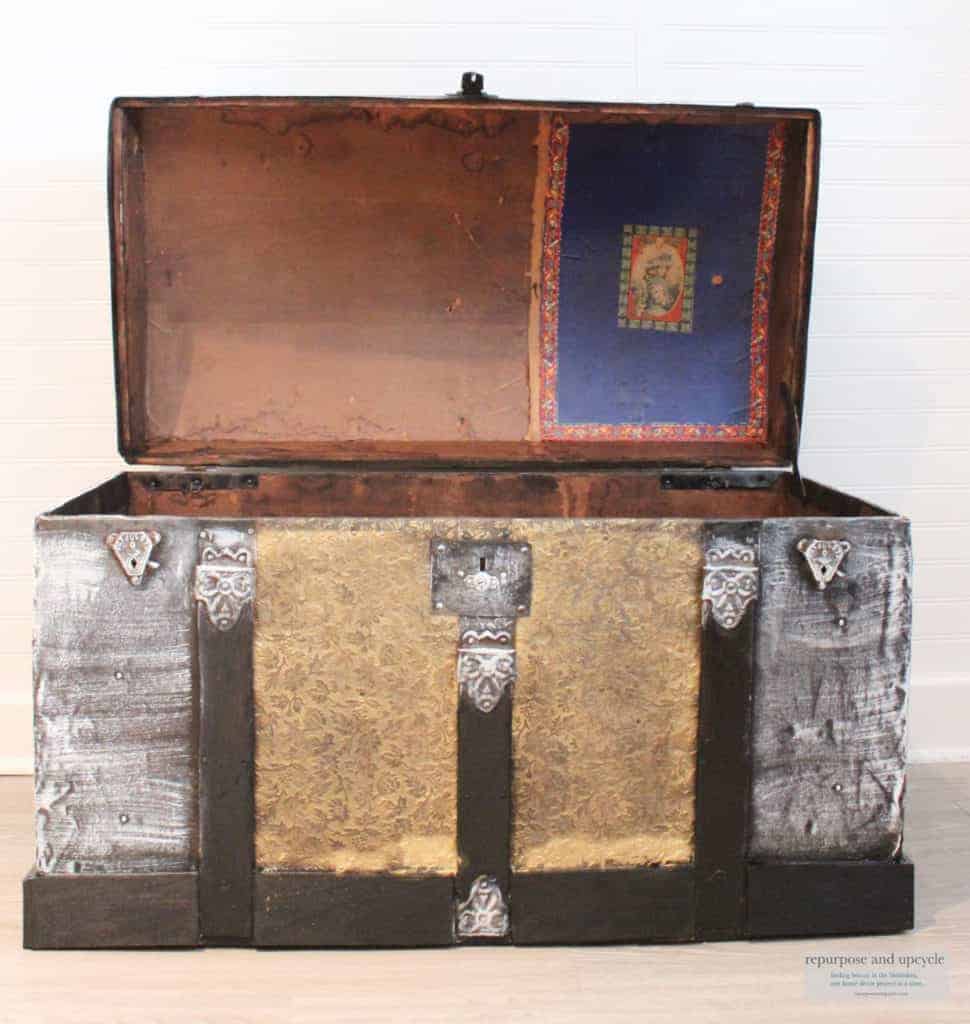
Pictured above is the inside top of the steamer trunk. I would love to know the history and story behind this picture.
What is a steamer trunk?
Wikipedia says a Steamer trunk is
“a trunk named after their location of storage in the cabin of a steam ship.”
It also says these trunks appeared from the 1880’s-1920’s. The stories this vintage piece of furniture could tell!
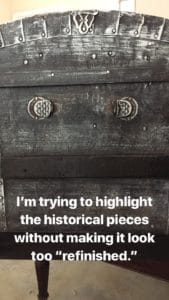
I stated above that this trunk intimidated me. I love to refinish furniture, but I also like to keep the historic value and charm somewhat intact. This made me a little nervous to even touch it with a paint brush!
Materials used to restore this antique steamer trunk
Disclosure; this post contains affiliate links. As an Amazon Associate I earn from qualifying purchases. This disclosure statement refers to the rest of the amazon links and other affiliate links in this post.
Materials:
- steamer trunk
- wet cloth
- shop vac
- gold spray paint
- black paint
- polycrylic spray paint
- nail gun
- jigsaw
- Poplar 1/2″ by 4″ by 3′ board
- white paint
- paint brush
How to restore the antique trunk
Before we get into restoring or painting, I needed to clean up the trunk.
The best way for me to clean all the nooks and cranny’s is with a shop vac.
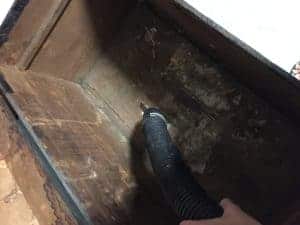

Once the inside was clean of debris, I decided to spray it with a coat of polycrylic to help preserve the old wood and paper finish.
Once the inside was sealed, I had to decided how to restore the outside of the steamer trunk.
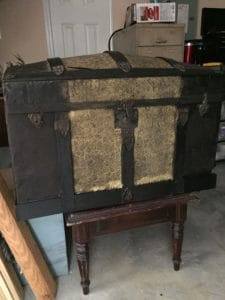
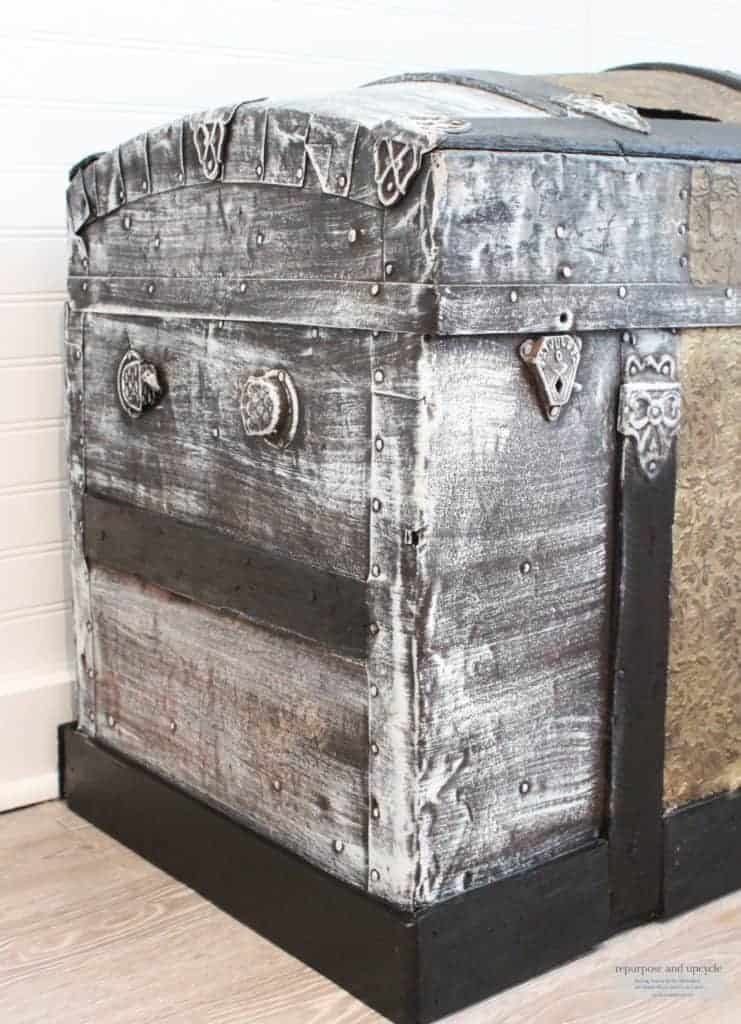
Like I said, I wanted to keep as many of the historic elements the same if I could. One of these elements was the pressed tin.
I could tell from the top of the trunk that the tin used to be a shiny gold color. I knew I wanted to restore it to that color again and I’d heard that using nail polish remover could work!

I scrubbed, and scrubbed, and scrubbed for about an hour with no luck. I guess after 100 years of use, the old dirt and grime wouldn’t budge.
I decided that spray paint could again come to my rescue! As much as I didn’t want to add anything to the tin, I knew I was limited with options.

Since I wanted to restore the gold color of the tin, I thought my gold leaf spray paint would work beautifully.
I used painters tape to tape off the wood around the tin. After I finished using the gold spray paint, I took a wet rag and dabbed lightly over the spray paint to make it look “aged.”


You can see the difference the spray paint made.

Done with restoring the tin!
Now it was time to cover up the rotted base of the trunk.

I used pre cut wood pieces (poplar 1/4 by 3 by 4) around the base of the trunk to cover up the rotten areas.
Originally I had the great idea to stain the new wood to match the existing wood. But when I tried to match the stain with no luck, I decided it would be best to paint all the wood black, especially since I needed to caulk around the new wood.

I used a jigsaw to cut the pieces to fit perfectly around the trunk. I applied the wood to the steamer trunk with a nail gun.
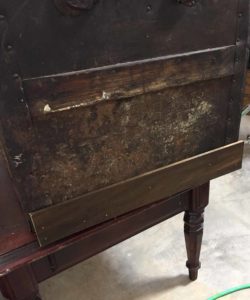


After I was done applying the wood to the base, I caulked around the trunk to make the wood look seamless.
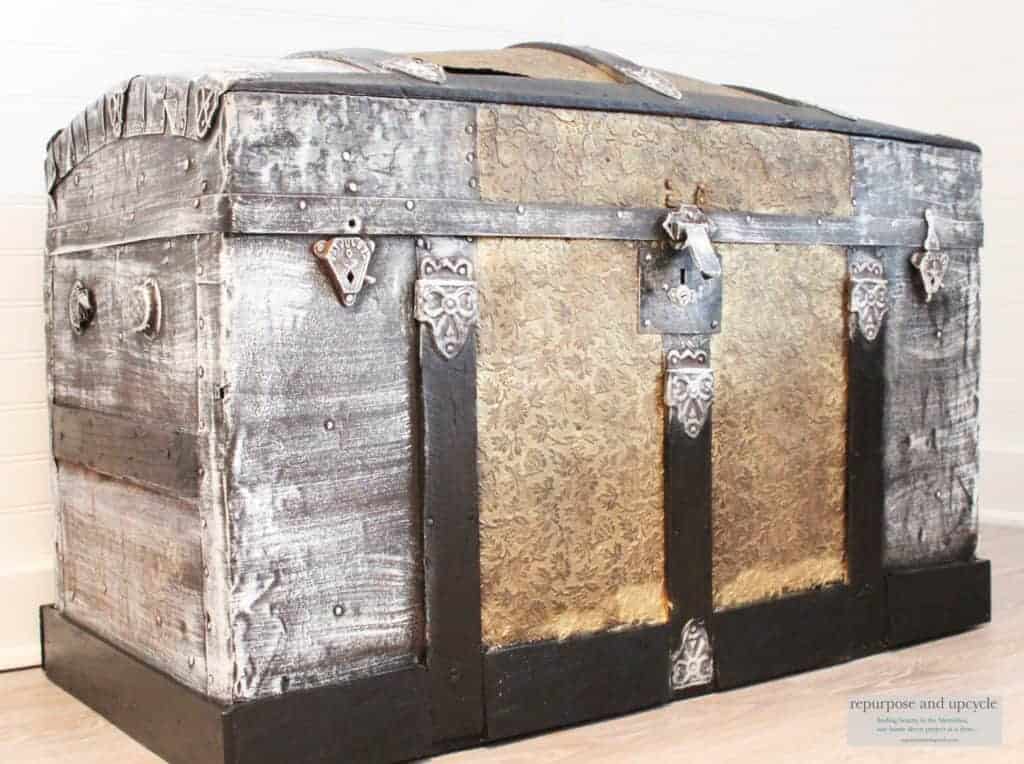
Now it was time to paint! I used a flat black paint. I went with a black color because I thought it would contrast the gold without taking away from the historical elements of the trunk.
Next on the list to finish this historical trunk is the metal sides. I thought and thought and thought about how to restore it. I kept thinking “how could I add a finish that would highlight the handles and brackets without completely “refinishing” it.”
I finally decided to lightly “whitewash” it.

Once the sides of the steamer trunk were white washed, it was technically finished!
By the way, make sure to check out another antique steamer trunk makeover where I painted the trunk with a Unicorn Motif.

Antique Steamer trunk restored


Did you enjoy this post? Maybe you would enjoy a few of my other furniture flips?
Now it’s time for some furniture flipping fun! Ready to see a few more flips by some crazy talented bloggers!
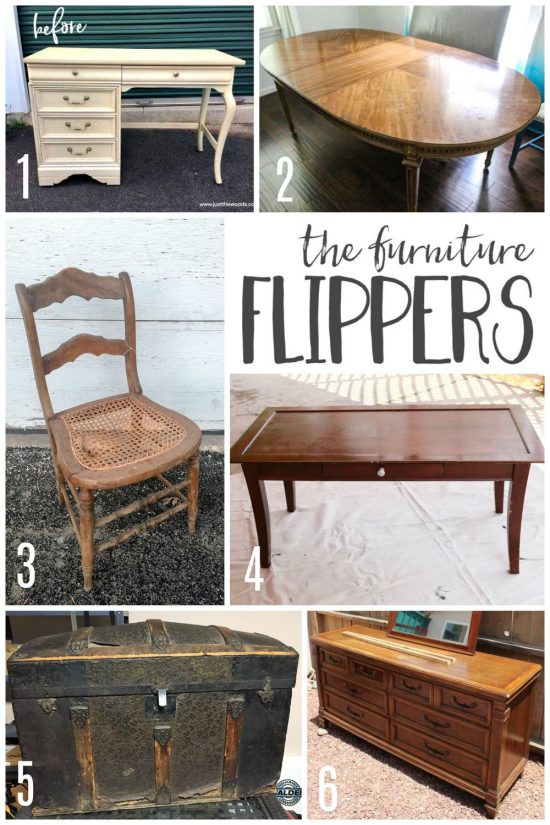
- How to Create Fabulous Painted Furniture with Cutting Edge Stencils by Just the Woods
- How to Refinish a Worn Out Dining Table by Lovely Etc.
- How to Fix a Chair with a Broken Seat by Refresh Living
- The Coffee Table Flip That Did Not Go As Planned by A Fresh-Squeezed Life
- The Best Way to Get Cheap Rustic Furniture by Thirty-Eighth Street
Thanks for stopping by guys! I hope you’ve been inspired.
Lindsey**


