Learn how to give an orange toned dresser a makeover with Unicorn Spit Gel Stain. See how easy a gel stain is to apply to already finished wood.
How do you remove that orange stain finish without stripping the wood and completely refinishing it? I hate to be cliche but you know the old saying, “they just don’t make them like they used to?” Yep, I’m talking about furniture.
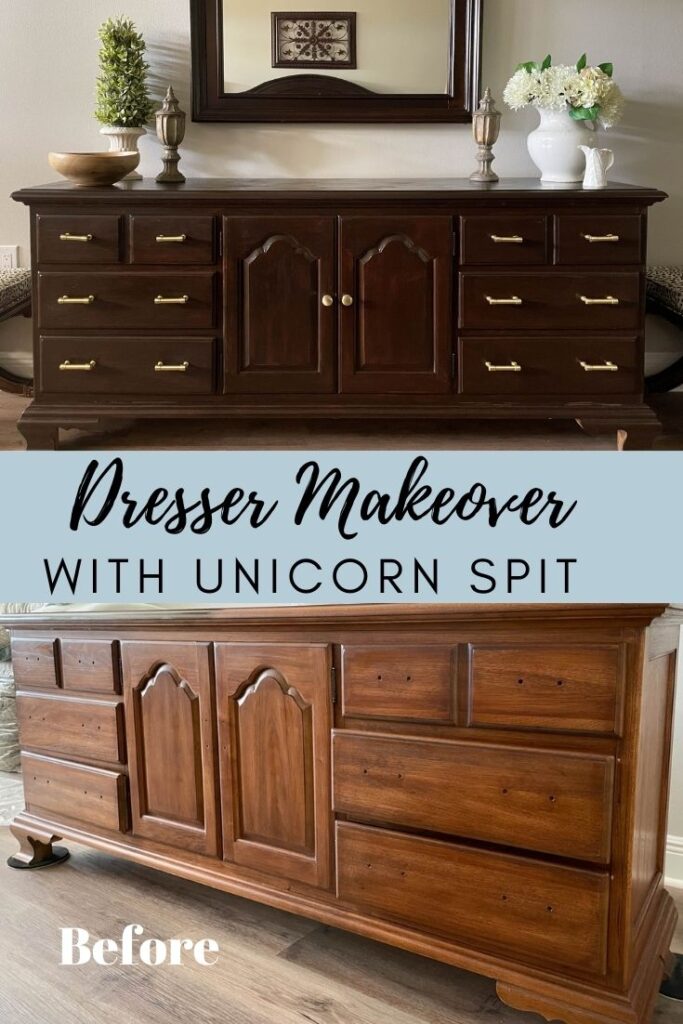
Unfortunately most older, solid wood furniture has that orange stain finish on it that isn’t real popular today. I’m going to show you a wood furniture makeover with Unicorn SPiT gel stain in three easy steps!
When my mother in law asked me to redo her old solid wood bedside tables and dressers, my first thought was I would paint them. The more I thought about it, the more I thought “I don’t want to paint over solid beautiful wood.” The main complaint she had about her furniture was the orange yellow stain color didn’t match her current gray/dark wood colors in her home.
I get it. This is why most people are sending their solid wood furniture to thrift stores. It seems like too much trouble to refinish the wood and it costs just as much to pay someone to do it as it does to buy new. I’m going to show you how to easily darken stain without stripping it.
I’ve got an easy three step process on how to remove that orange wood finish without completely refinishing the wood!
Let me show you my mother and father in laws bedroom set before I got my hands on it.
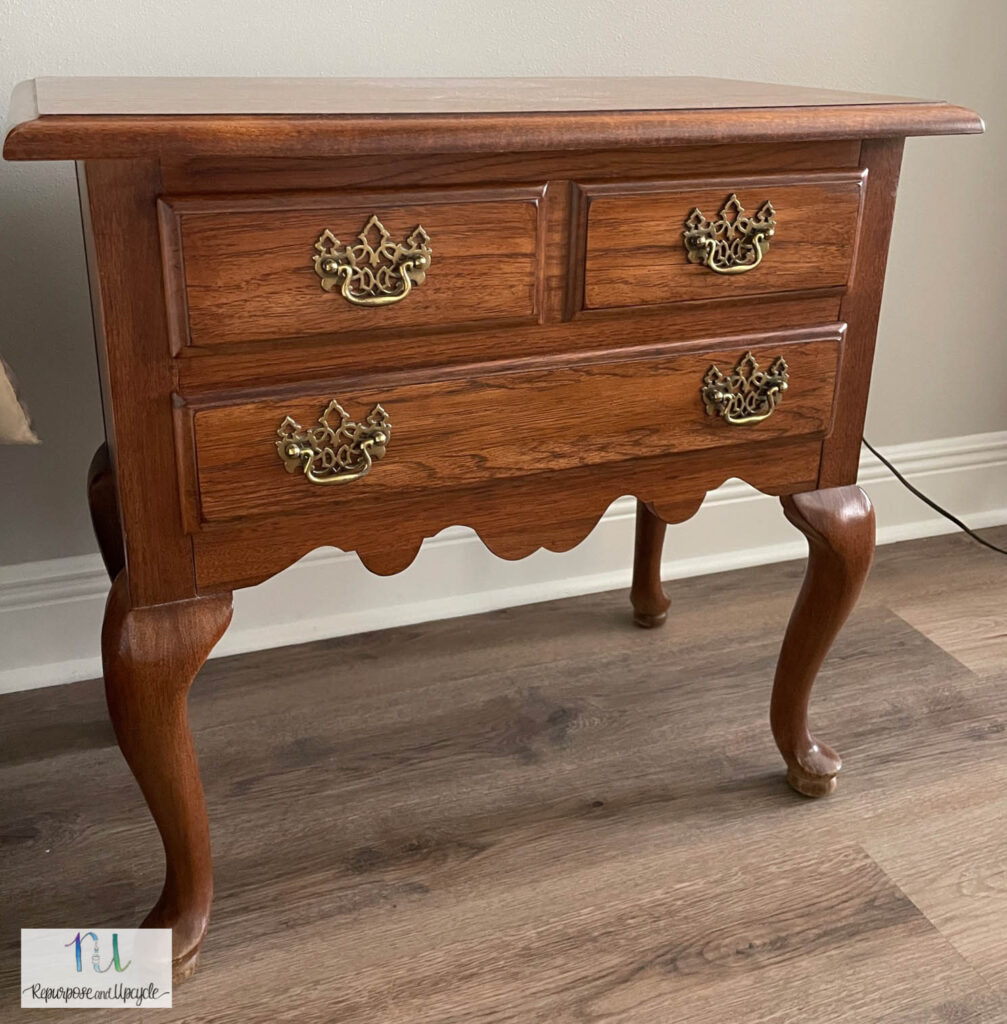
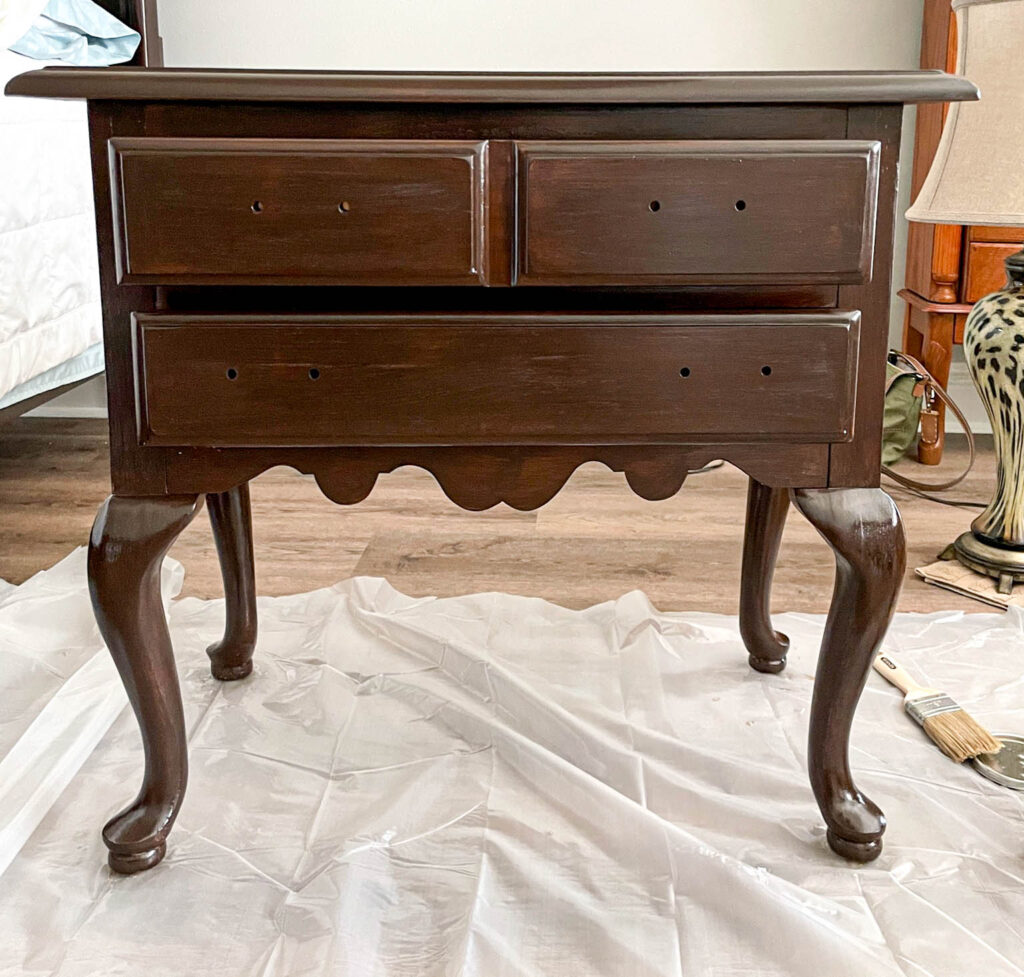
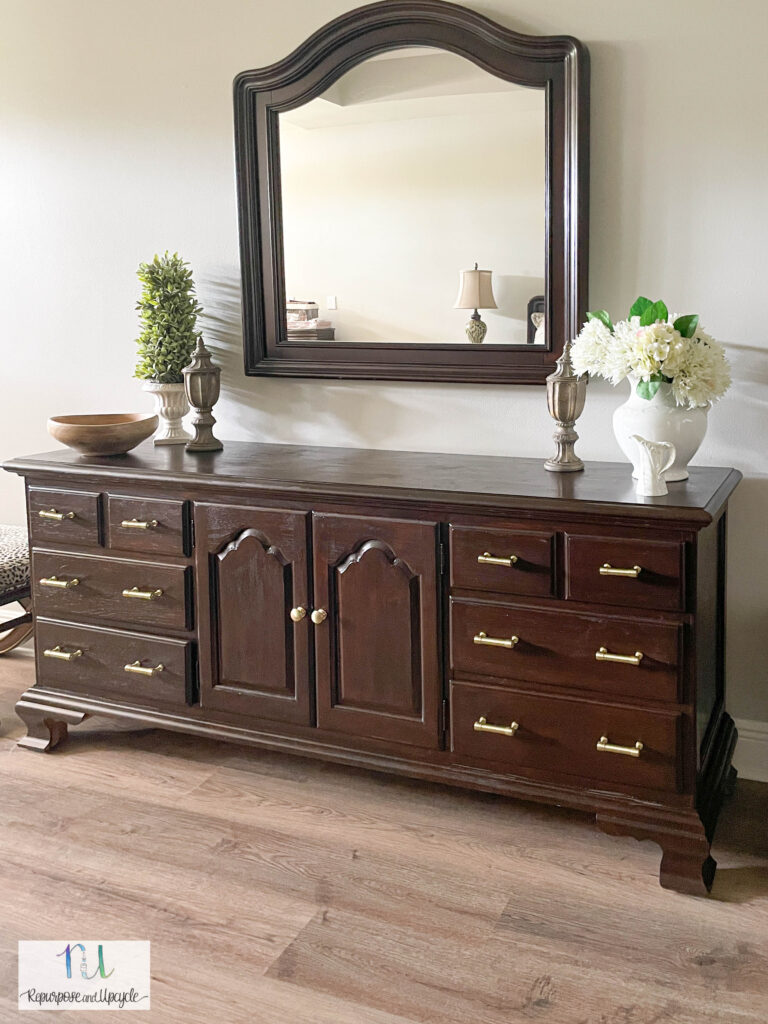
Check out this solid wood bedroom furniture with orange and yellow wood tones below.
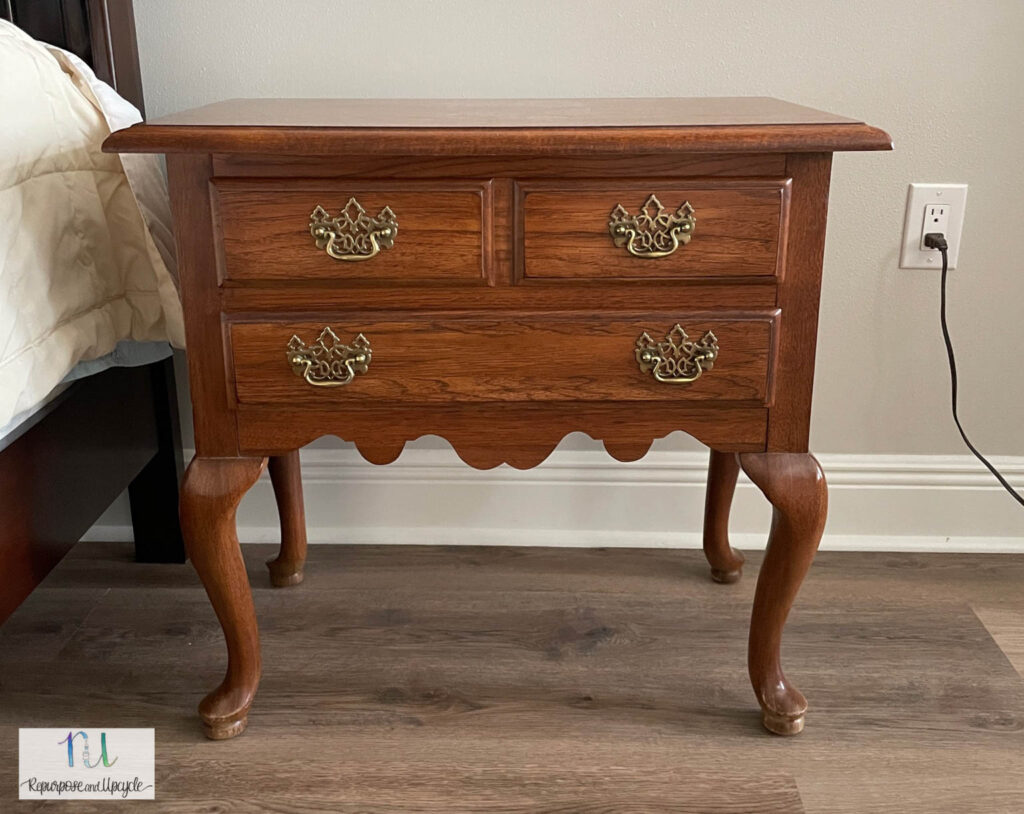
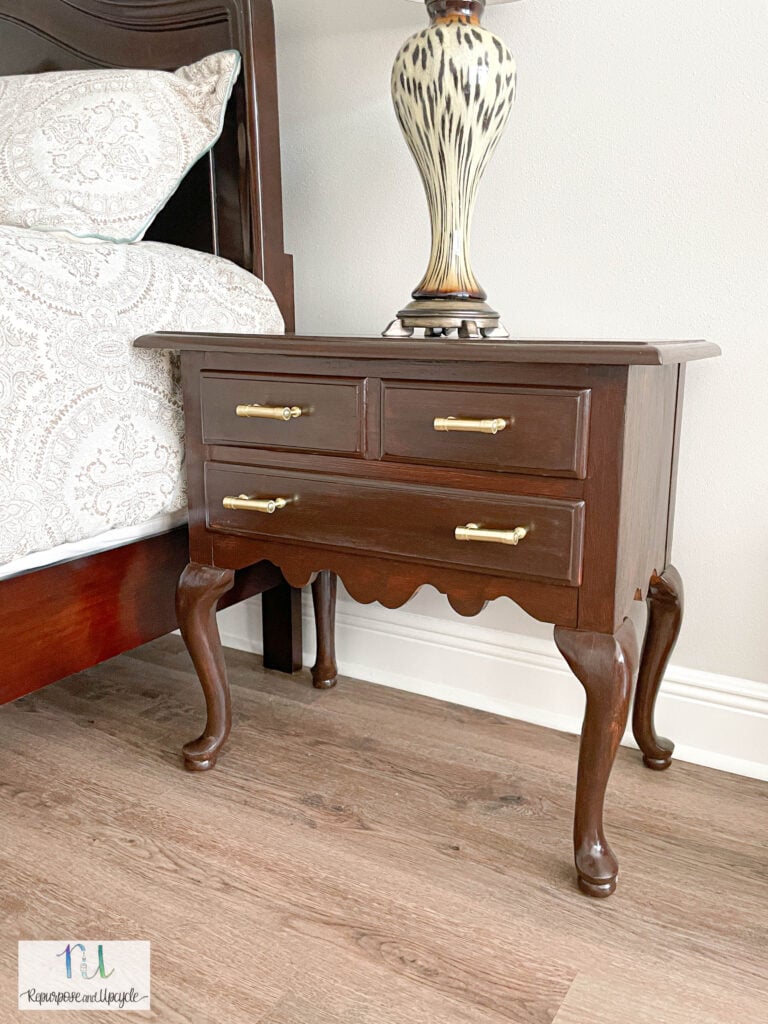
This is one of the two bedside tables. I love the french farmhouse style of the furniture, minus the wood tone.
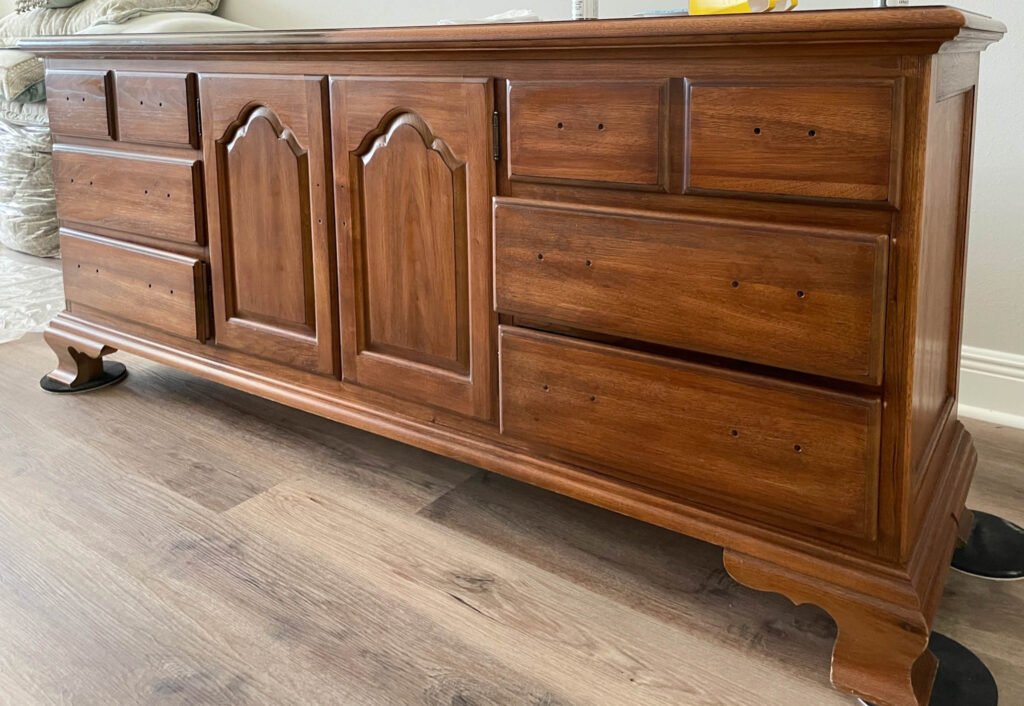
Below is a picture of the large dresser. You can see I already removed the hardware.
My mother in law recently purchased new furniture and bought a new king size bed. The color scheme for her new furniture is dark wood with gray and light accent colors. The orange wood tones stuck out like a sore thumb.
My goal with this project was to remove (or hide) the orange/yellow wood tones without completely stripping the wood or hiding the wood grain. This seemed like a daunting task but I knew I could figure out how to do it!
How do you refinish solid wood furniture without stripping it?
There are a couple different ways restore wood furniture without stripping it. You can use a primer and then paint the wood piece. Chalk paint and milk paint are great furniture painting products that claim to bond to wood without sanding or primer. If you don’t want to cover the wood grain, you can apply a gel stain to a piece that already has a previous finish on it. It’s best to lightly sand the previous finish or use a liquid sandpaper product first.
Since I still wanted to highlight the wood grain and change the orange tones without stripping the furniture, I decided a gel stain was my best option!
What is a gel stain?
Gel stains are thicker stain products that sit on top of the surface while traditional stains sink in. Gel stain’s are applied to the surface similar to how you would apply a paint product. You generally don’t rub a gel stain into the wood like you would a normal stain. This makes gel stains a better option if you want to cover an existing finish without completely removing it. Gel stains also have more transparency than paint but less than traditional stains.
Why Unicorn SPiT gel stain?
There are a lot of gel stains on the market today. That being said, there aren’t a lot of color variations to gel stains (not yet at least). This is why I chose to use a Unicorn SPiT gel stain product because they come in a large variety of colors and I could mix my own. I wanted to create a dark wood color with a hint or undertone of gray.
Also, I previously did a wood slice makeover project with Unicorn SPiT and absolutely fell in love with it! Then I painted a beautiful Unicorn Motif on an Antique Steamer Trunk with Unicorn Spit for a fun makeover.
Disclosure; this post contains affiliate links. As an Amazon Associate I earn from qualifying purchases. This disclosure statement refers to the rest of the Amazon links in this post. See more on my disclosure page.
Products I used:
- Unicorn SPiT in Rustic Reality and Weathered Daydream. I used four bottles of the Rustic Reality and 2 bottles of the Weathered Daydream for two nightstands, one large dresser and one tall dresser.
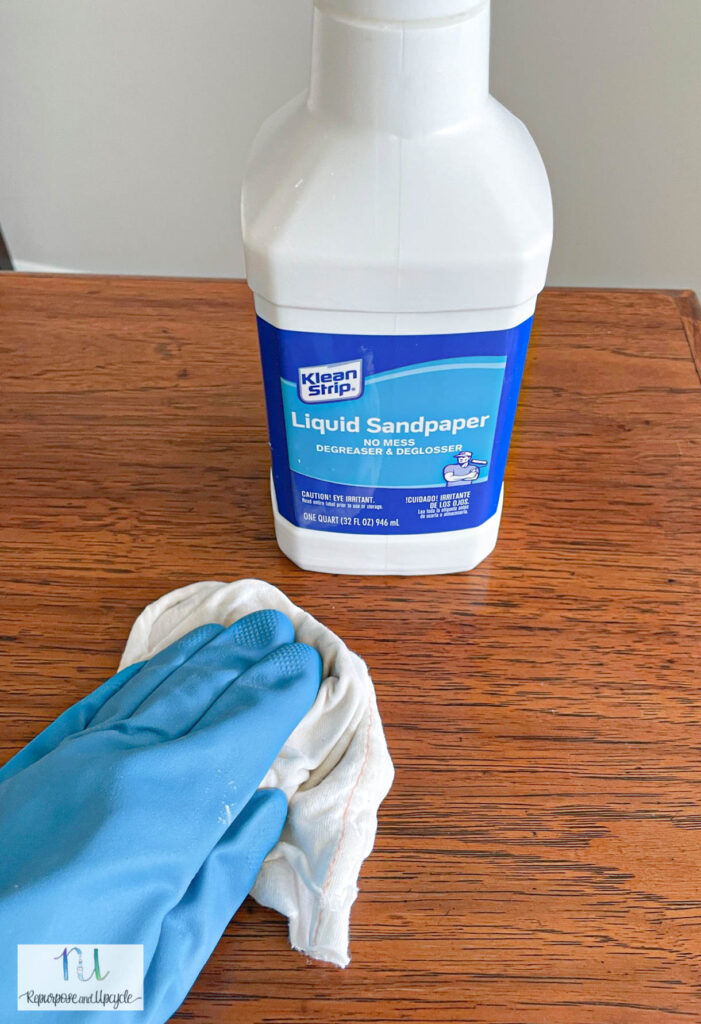
- Liquid Sandpaper
- Lint free cloths
- Synthetic brushes
- Varathane oil based polyurethane
How to apply Unicorn SPiT gel stain to cover orange stained wood in three easy steps
- Prepare the wood for gel stain by either lightly sanding it or using a liquid sandpaper product. Because gel stain sits on top of the wood, you don’t have to worry about stripping the furniture piece entirely (even if it has a previous finish on it). That being said, you do need to prepare the surface with a light sanding or liquid sandpaper product so it has a little grit to attach to. If you use a liquid sandpaper product make sure to follow all the instructions. If you are sanding the piece, use a fine grit sandpaper (like 360 or finer) and then remove all the dust with a tack cloth or lint free cloth.
- Once you have prepared the surface, decide how you want to use the Unicorn SPiT gel stain. You can dilute it in water to make it more transparent or use it right out of the bottle for a more opaque look. I mixed together two of the colors to get a custom color and applied 1 coat of stain with a paint brush. Let it dry completely and make sure you’ve covered the entire surface. Apply another coat if desired.
- Once the Unicorn SPiT gel stain is dry (30-60 minutes dry time), apply a non-water based clear coating. I applied one coat of an oil based polyurethane product with a synthetic brush for a beautiful durable finish.
Note; It’s not absolutely necessary to prepare the wood by sanding or with a liquid sandpaper product. The instructions say no pretreating wood necessary. Because this wood furniture had a stain and sealer finish, I wanted to make sure the new finish was durable, so I decided to use a liquid sandpaper product.
Before I did any surface prep, I removed all the hardware.
Next I dabbed a bit of liquid sandpaper in a lint free cloth and started wiping all the surfaces down. After it dried you can see where it really does remove the very top layer and gives it a “grittier” finish.
Once the entire surface was dry, it was time to paint!
This took a little trial and error to get the desired color. At first I mixed too much gray in with the brown. I used the back of one of the night stands to test the colors. Of course you can’t get a real idea of what it will look like until the sealer is applied, but I had a good idea.
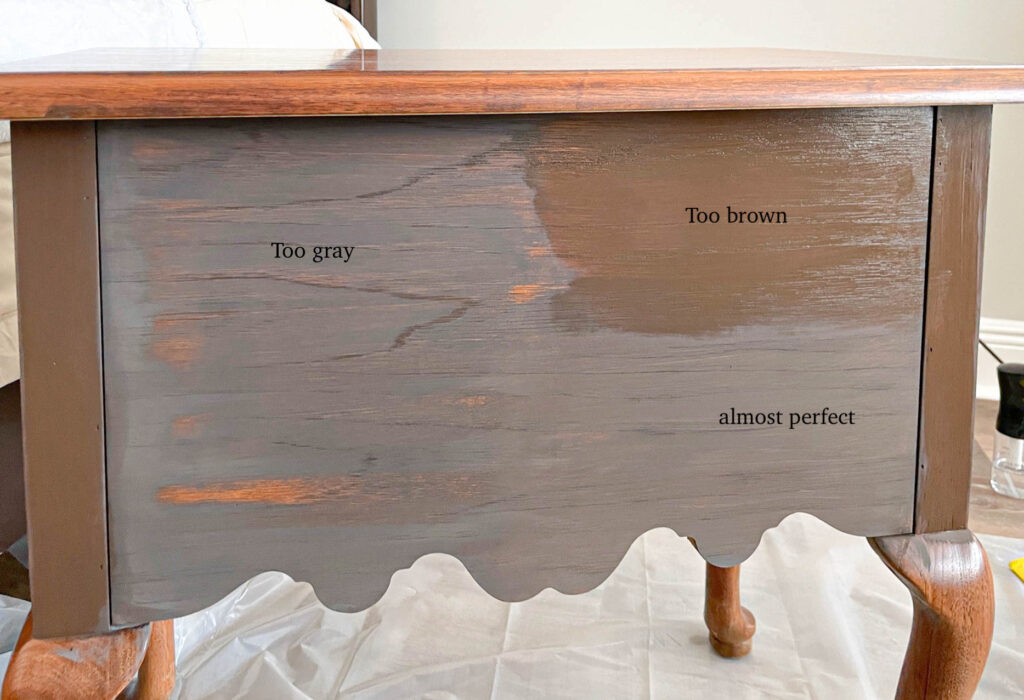
I decided to go with a 1:5 ratio of gray to brown.
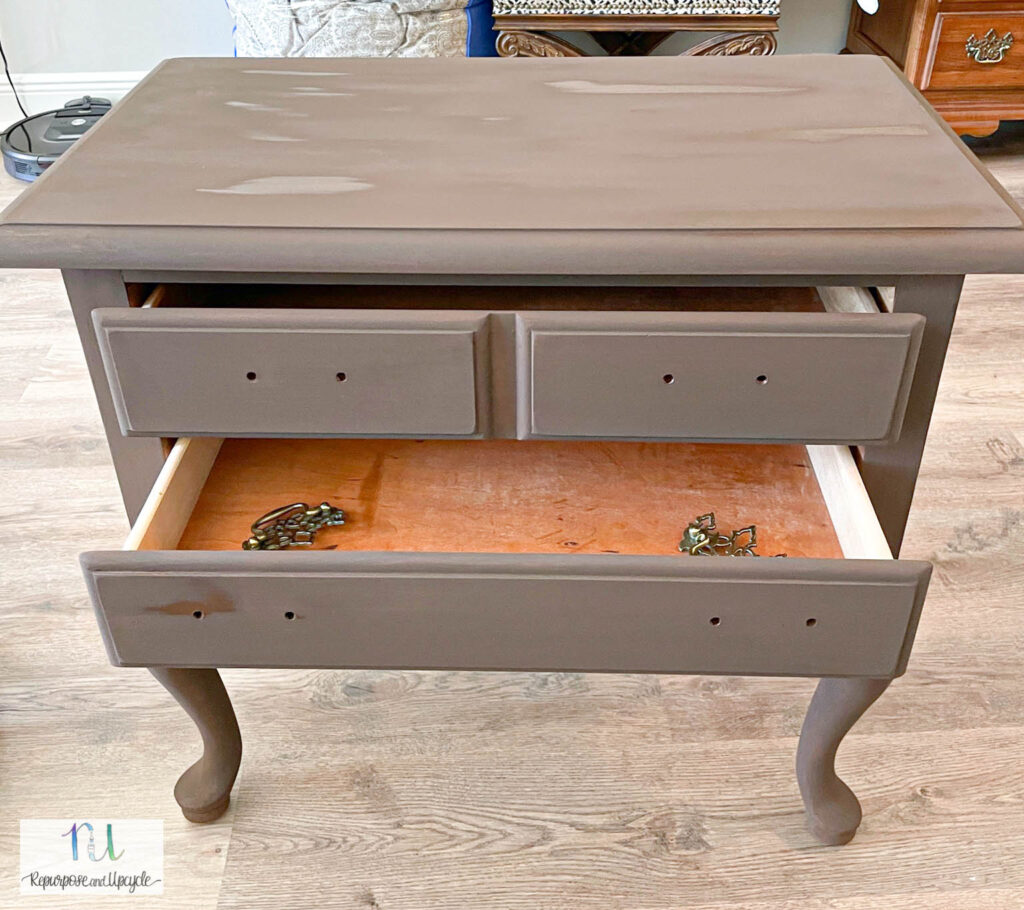
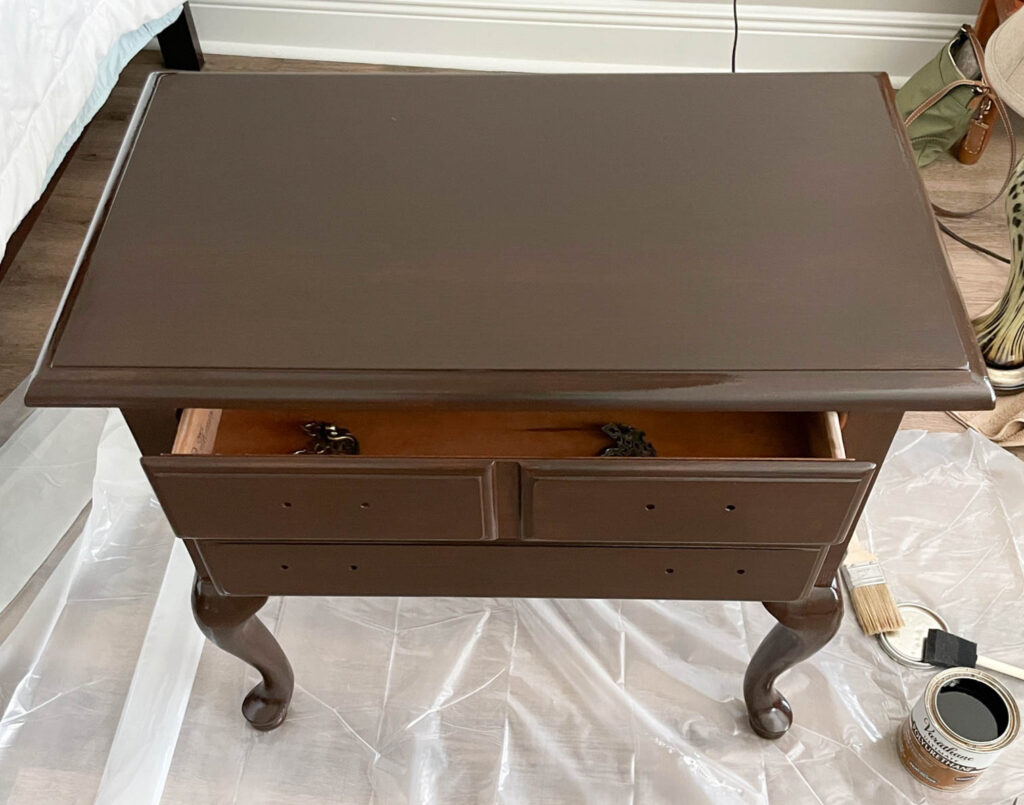
Next to apply the Unicorn SPiT gel stain! I love the way this product smells. It brushes on so easily. Below is what it looked like with one coat of dried Unicorn SPiT. Remember, I wanted the old wood grain to show through so I only applied one coat of gel stain.
Once the stain was dry (it only took 30 minutes) I started to apply the Varathane polyurethane. It’s crazy how the color really changed!
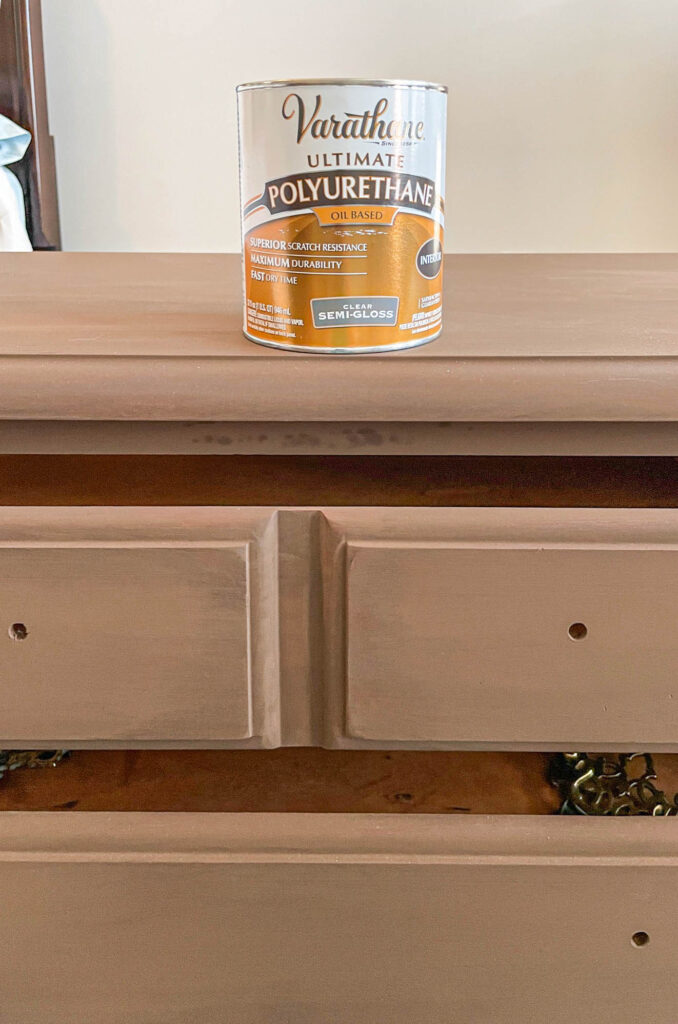
The sealer really makes the wood grain show! I’ll be honest, I didn’t expect the poly to darken the gel stain as much as it did, but I love it!
Below is a picture immediately after I applied to Polyurethane.
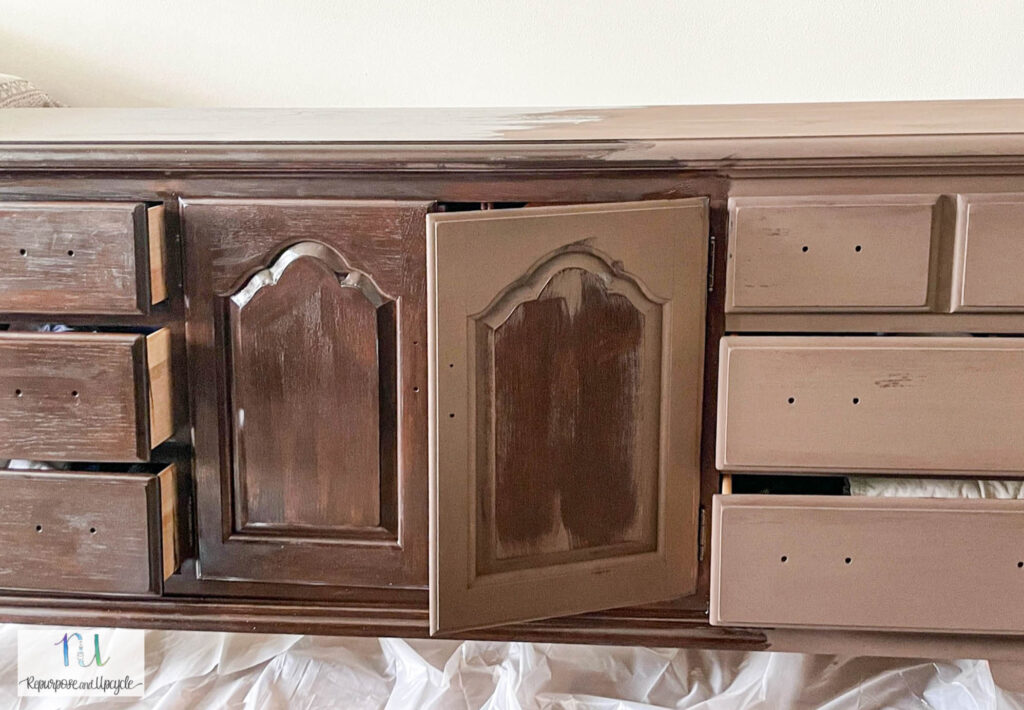
Look how the wood grain is showing through once the sealer dries!
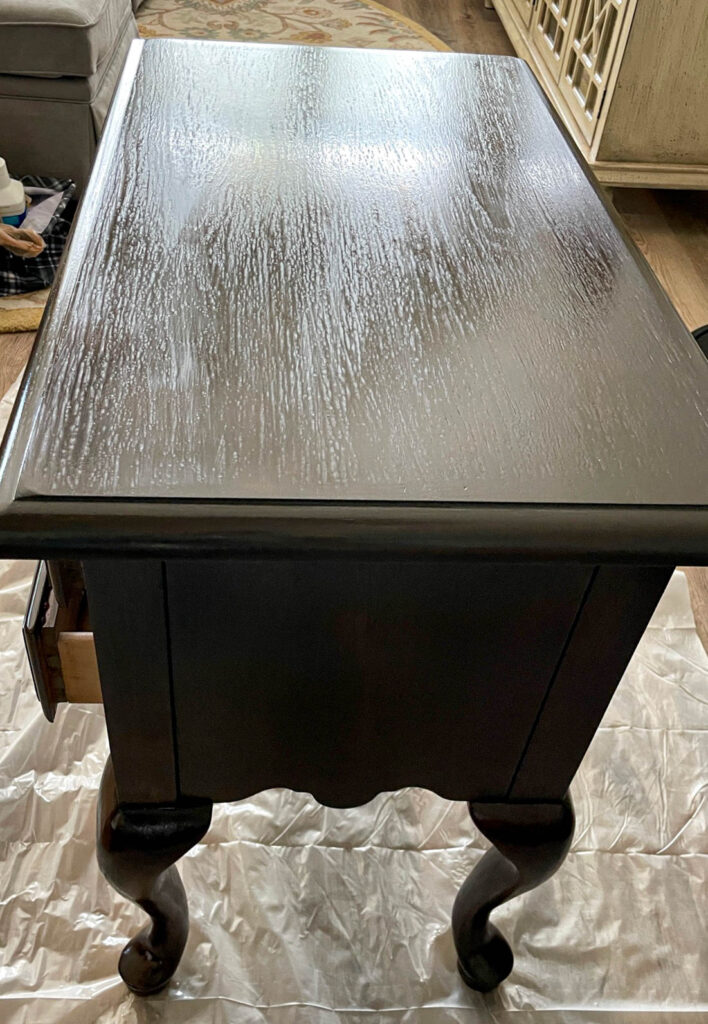
If you look at the wood furniture in a certain light you can see a hint of gray!
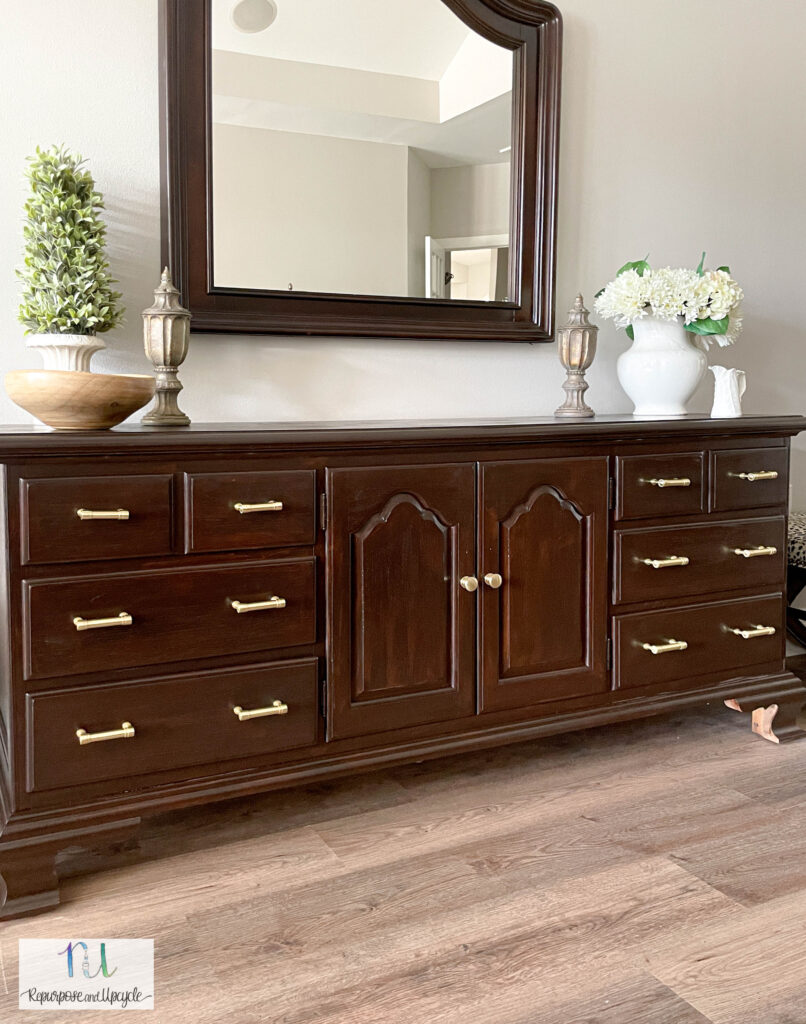
Dresser Suite Makeover in Unicorn Spit Gel Stain
I love how they turned out!
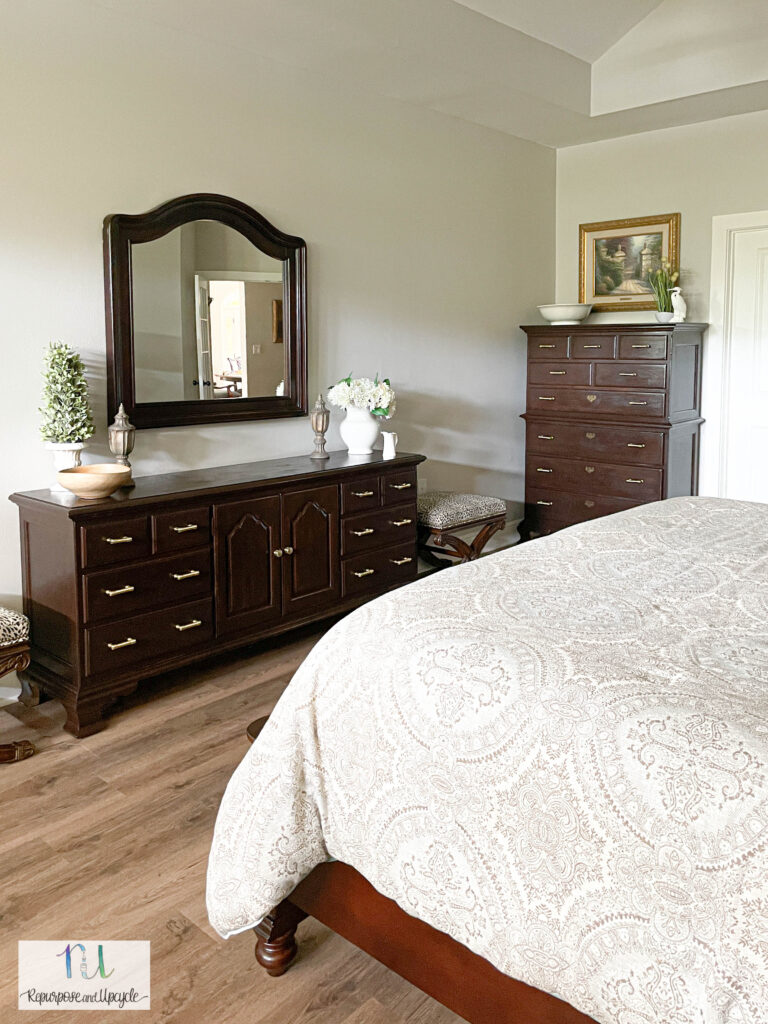
The crazy part is that the bed frame and the mirror match perfectly now!
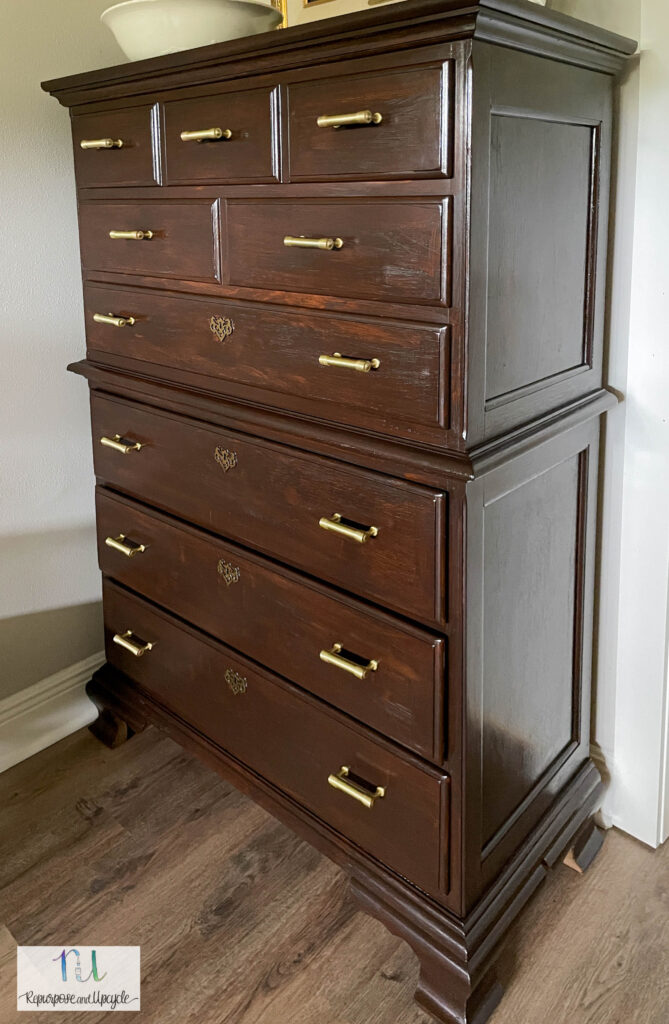
I love the gold pulls my mother in law found to match the existing gold decorative piece on this tall dresser.

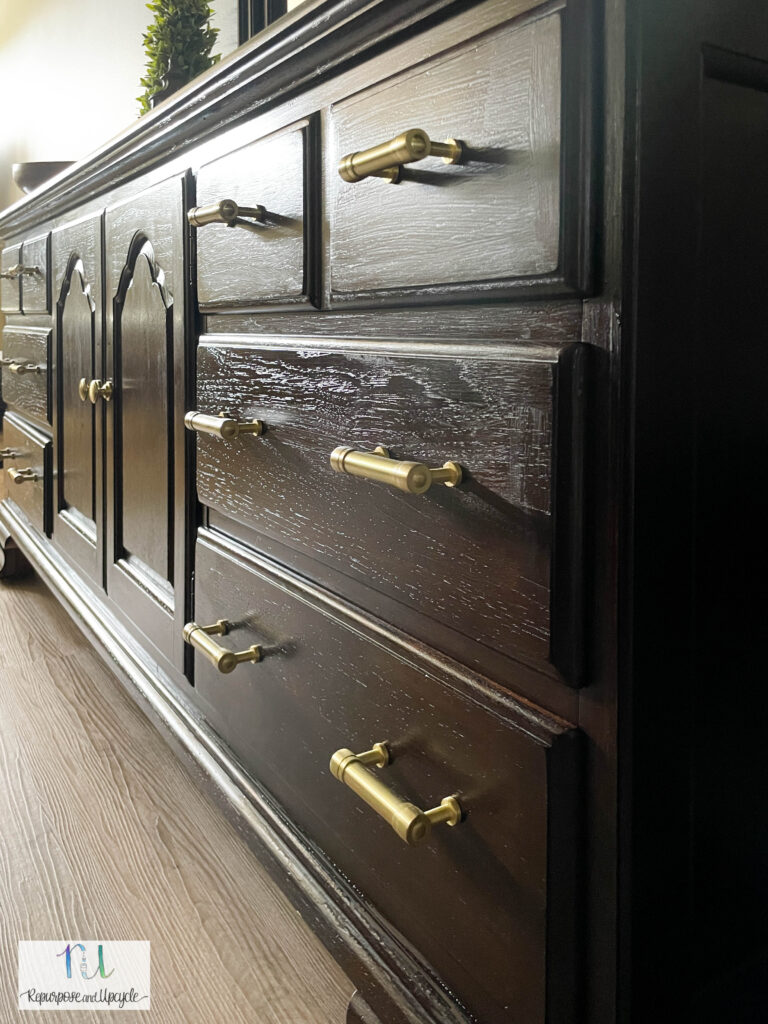
Look how the wood grain is still showing through!
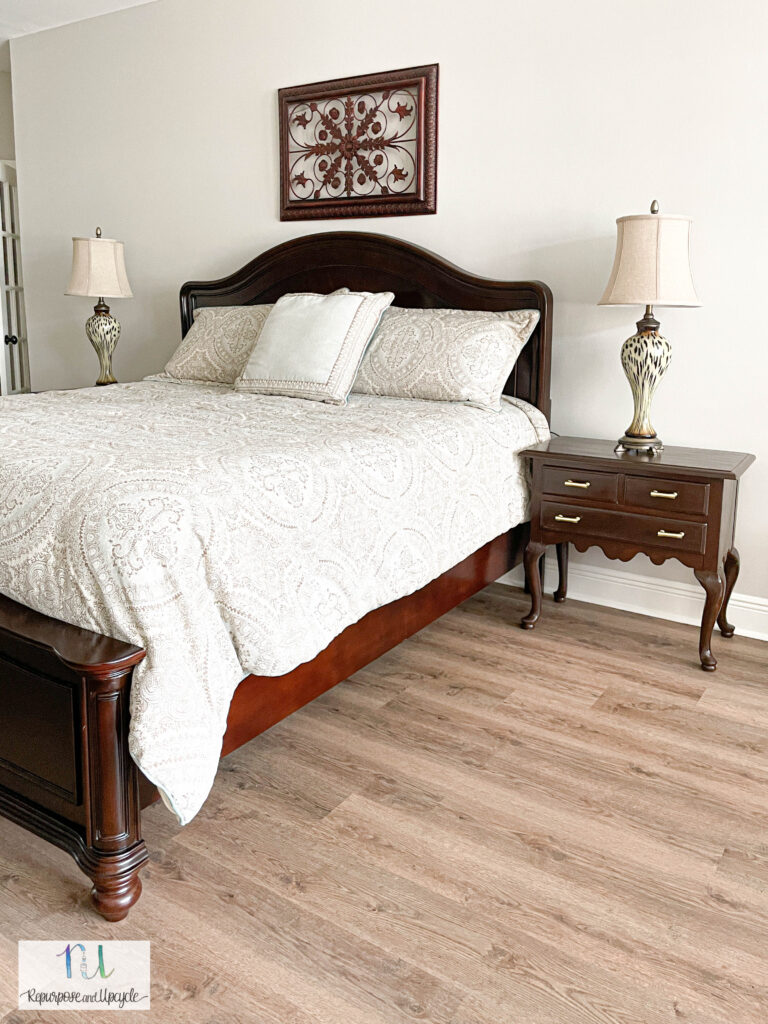
I’m so pleased with how this bedroom furniture makeover turned out! The most important thing- my mother and father in law are please too.
So what do you think? I hope I’ve shared the tools and knowledge you need to transform a dated piece of furniture easily with Unicorn Spit.
Thanks for stopping by,
Lindsey**
How to use Unicorn Spit Gel Stain

Learn how to give an orange toned dresser a makeover with Unicorn Spit Gel Stain. See how easy a gel stain is to apply to already finished wood.
Materials
- Unicorn SPiT Gel Stain in the colors Rustic Reality and Weathered Daydream
- Liquid Sandpaper
- Lint free cloths
- Synthetic brushes
- Varathane oil based polyurethane
Tools
- Electric sander (not necessary though)
Instructions
- Prepare the wood for gel stain by either lightly sanding it or using a liquid sandpaper product. If you use a liquid sandpaper product make sure to follow all the instructions. If you are sanding the piece, use a fine grit sandpaper (like 360 or finer) or electric sander and then remove all the dust with a tack cloth or lint free cloth.
- Next decide how you want to use the Unicorn SPiT gel stain. You can dilute it in water to make it more transparent or use it right out of the bottle for a more opaque look. Apply 1 coat of stain with a paint brush. Let it dry completely and make sure you’ve covered the entire surface. Apply another coat if desired.
- Once the Unicorn SPiT gel stain is dry (30-60 minutes dry time), apply a non-water based clear coating with a synthetic brush for a beautiful durable finish.
Notes
It’s not absolutely necessary to prepare the wood by sanding or with a liquid sandpaper product. The instructions say no pretreating wood necessary.


