This little project was done mainly by our contractor but the finishing touches were done by me. This is part of a bigger project to replace the old double doors with a beautiful indoor faux fire place. Adding stone veneer to a DIY fireplace surround doesn’t have to be difficult. I mulled over what to do with this fireplace for months. Let me show you what we came up with!
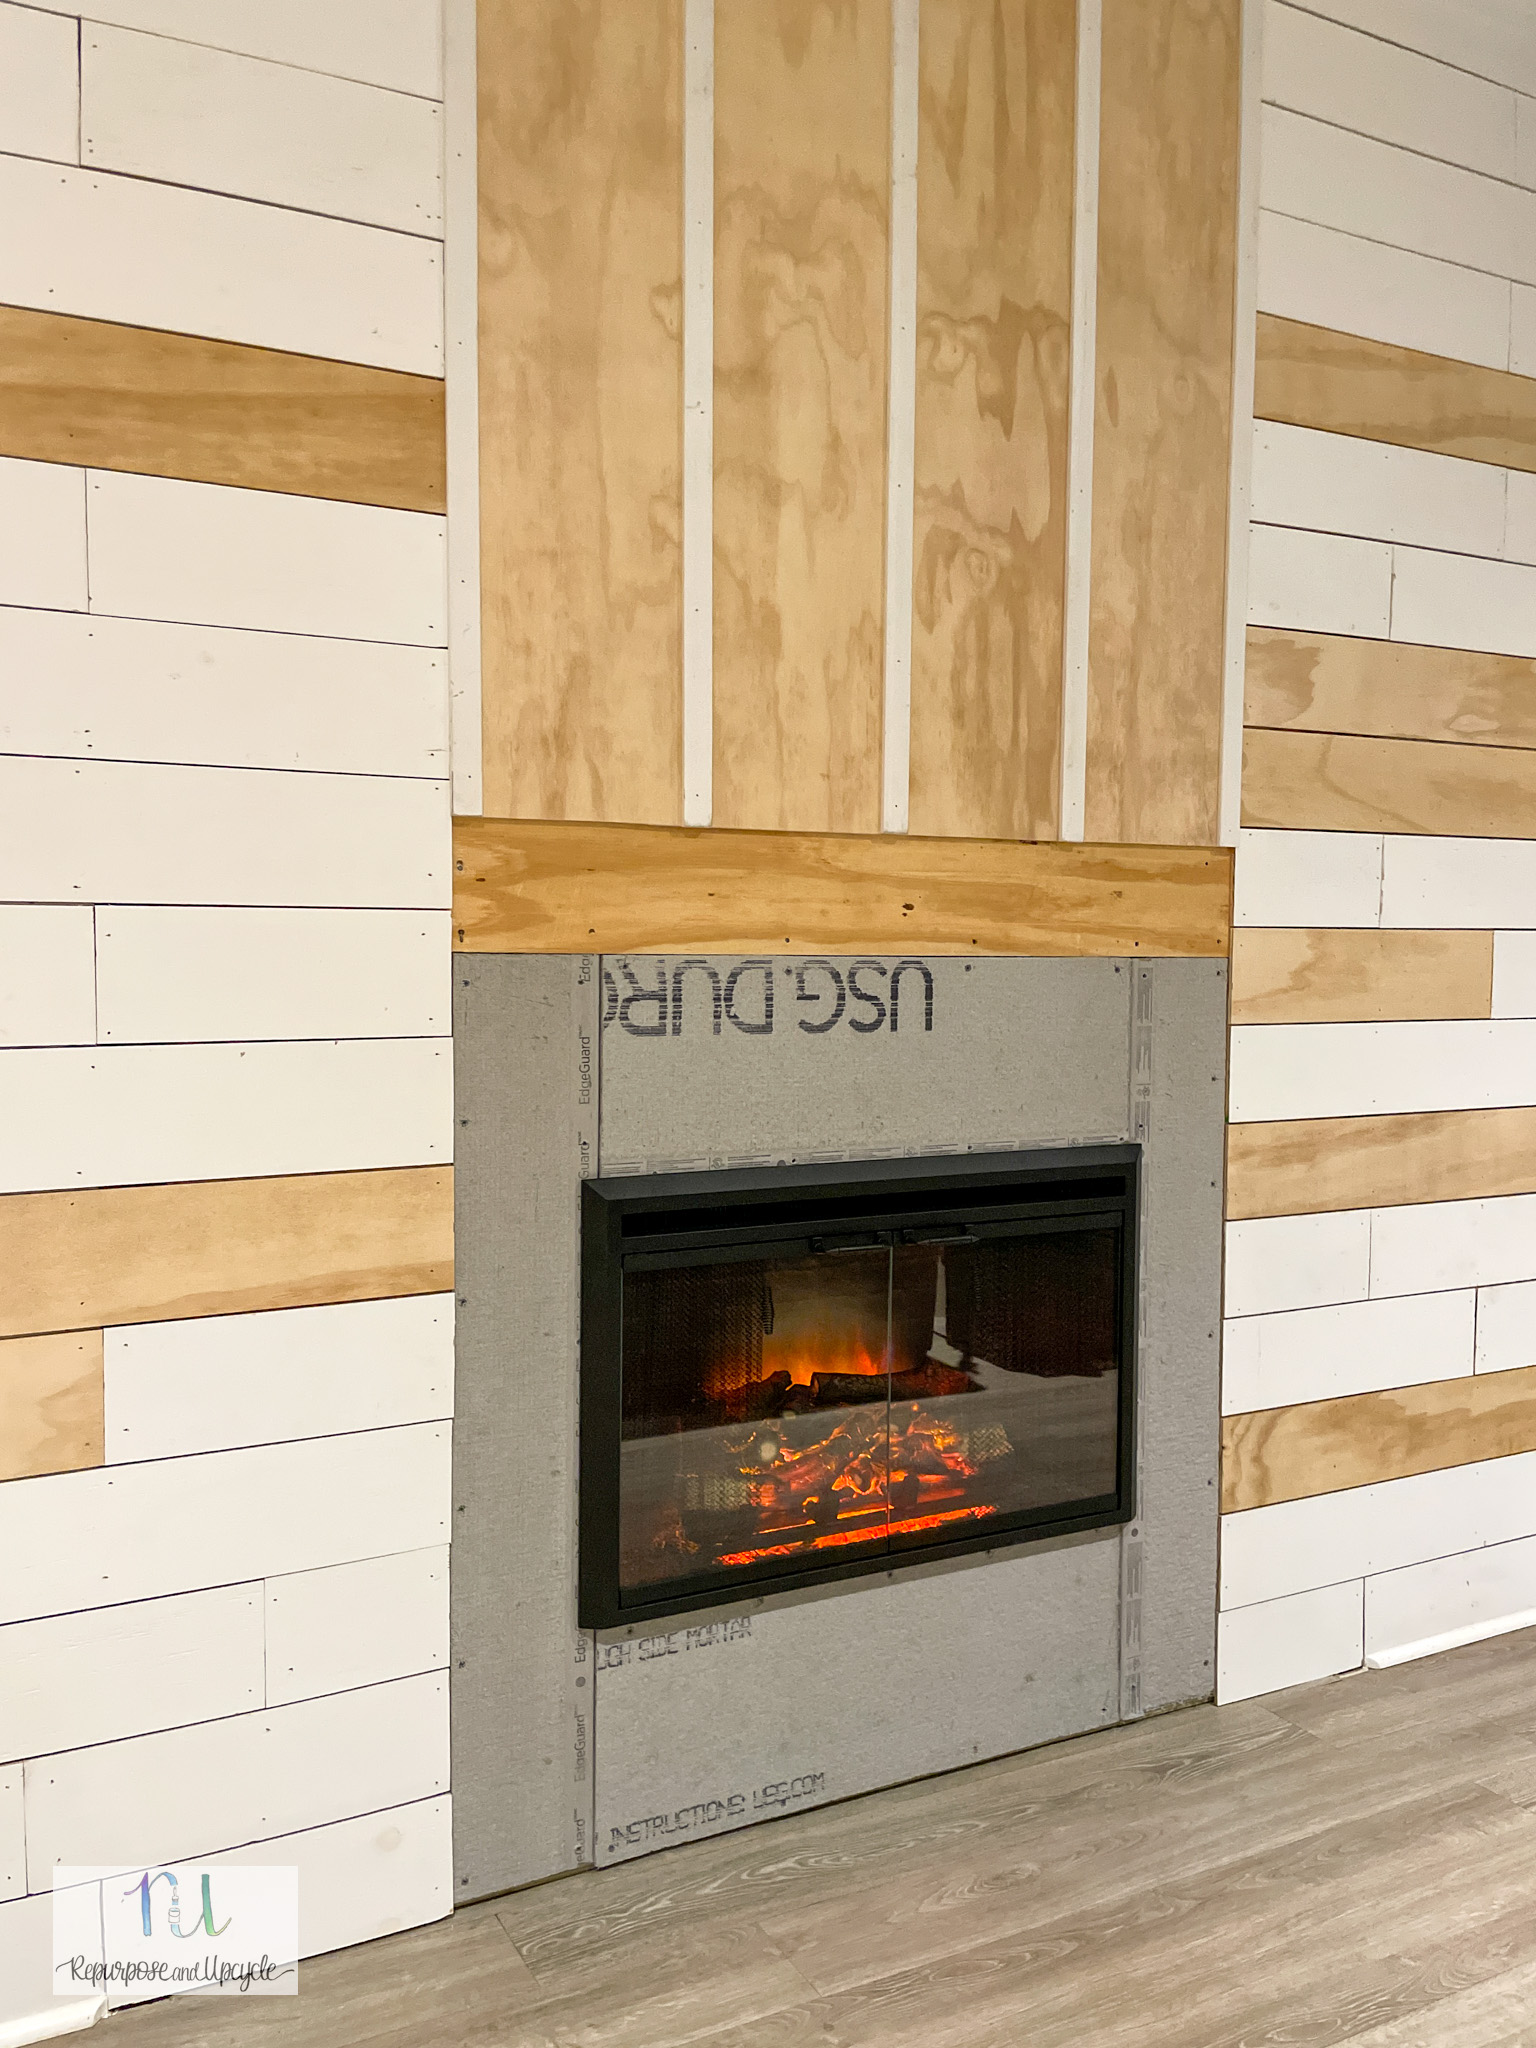
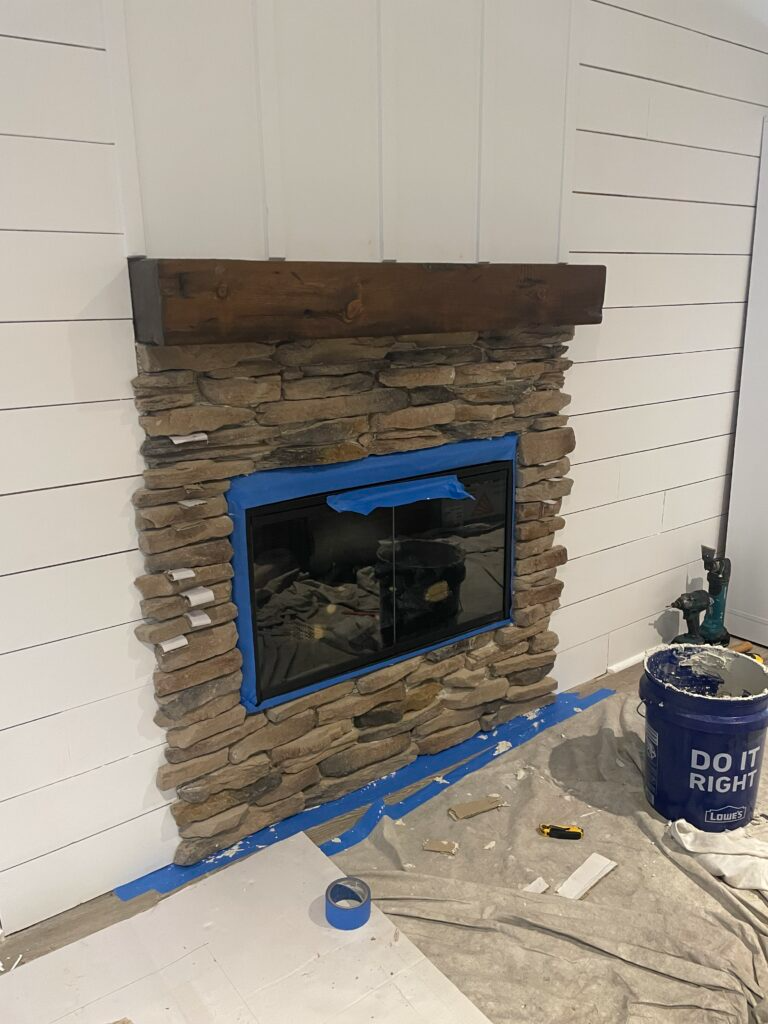
Below is what the surface looked like before attaching the brick. He used durock and attached the mantel before we started.

Full disclosure, neither of us are a stone veneer expert. All that to say, I think it came out pretty good!
Applying the Stone Veneer to the surface
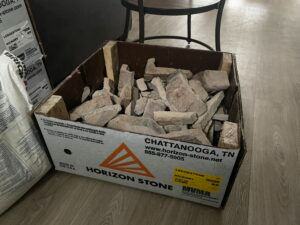
The first step in creating a stunning stone veneer fireplace surround is choosing the right materials. I got our stone on facebook marketplace but it came from a stone store called Acme Brick. It’s from the manufacturer Horizon Stone from their Ledgestone line in the color Hickory. I debated between faux stone panels and natural stone, but ultimately went with the real stone. If you’re updating an old brick fireplace or adding a new feature wall behind a wood-burning stove, stone veneer is a great way to add warmth and texture without the heavy weight of full stone.
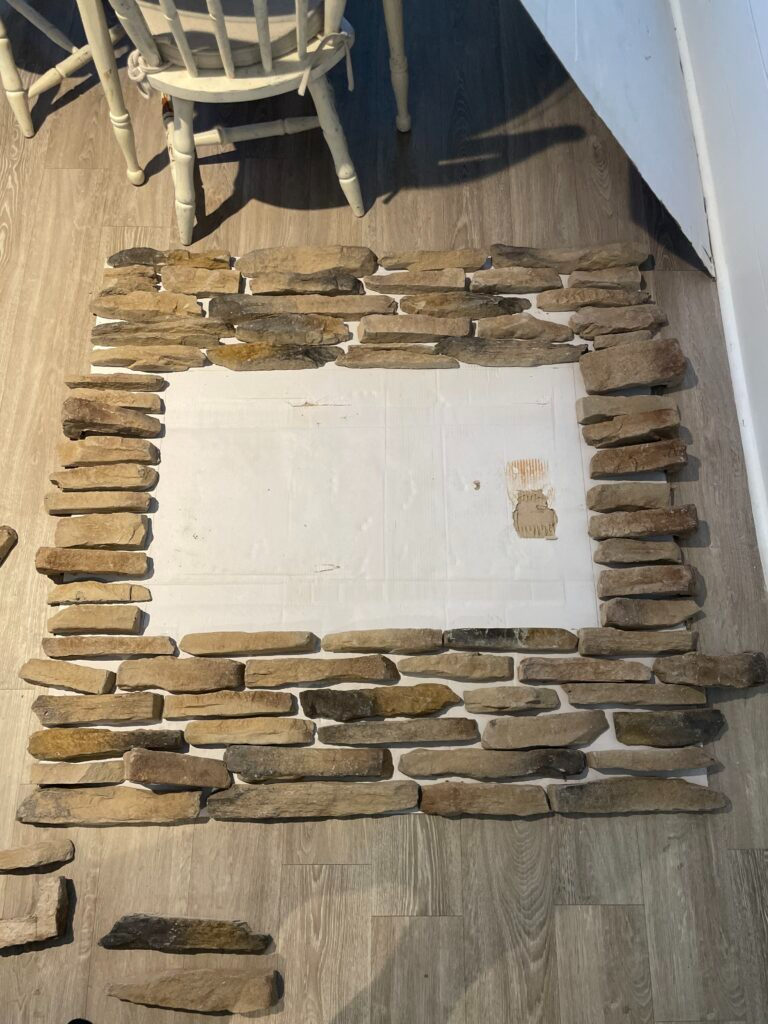
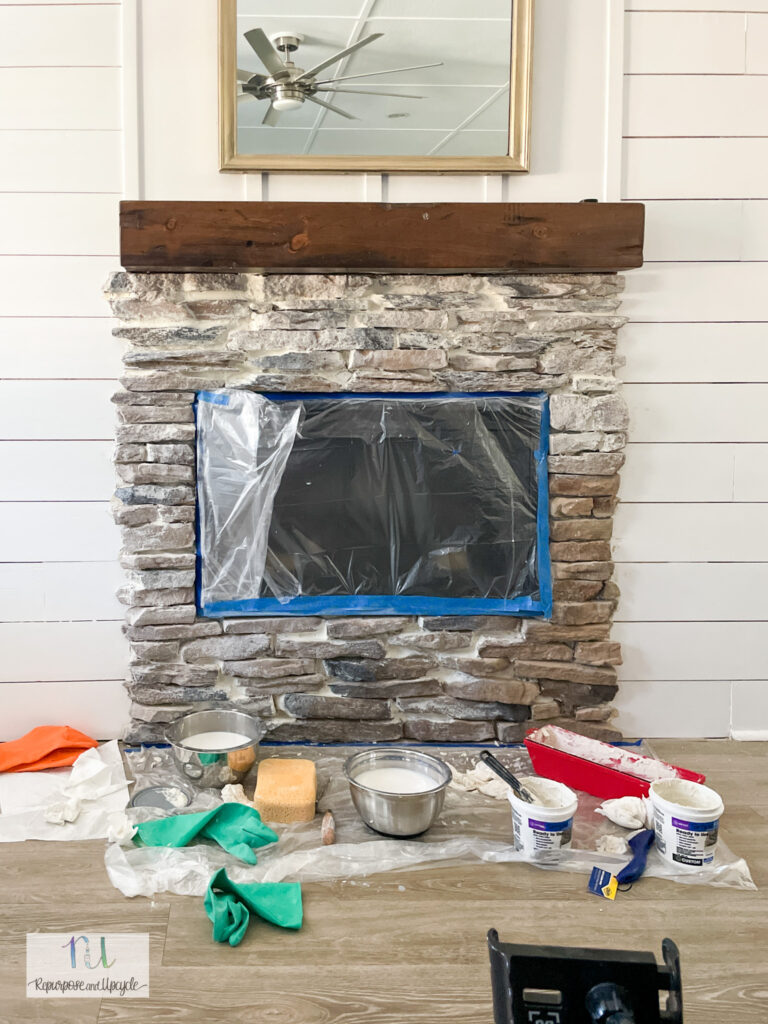
Our contractor had the good idea to use a large piece of cardboard to layout the stone pattern and make sure we liked it before attaching it to the wall. We worked on filling it in with the pattern of rock that fit the best. This was genius. If you’re installing stone veneer panels and not individual stones like us, ensure they’re level and dry-fit them first to plan your layout. This step helps you visualize how your corner stones and corner pieces will align.
Disclosure; this post contains affiliate links. As an Amazon Associate I earn from qualifying purchases. This disclosure statement refers to the rest of the Amazon links in this post. See more on my disclosure page.
Materials used:
Once we liked the way it looked, it was time for the installation process. First thing, applying a scratch coat over the durock.
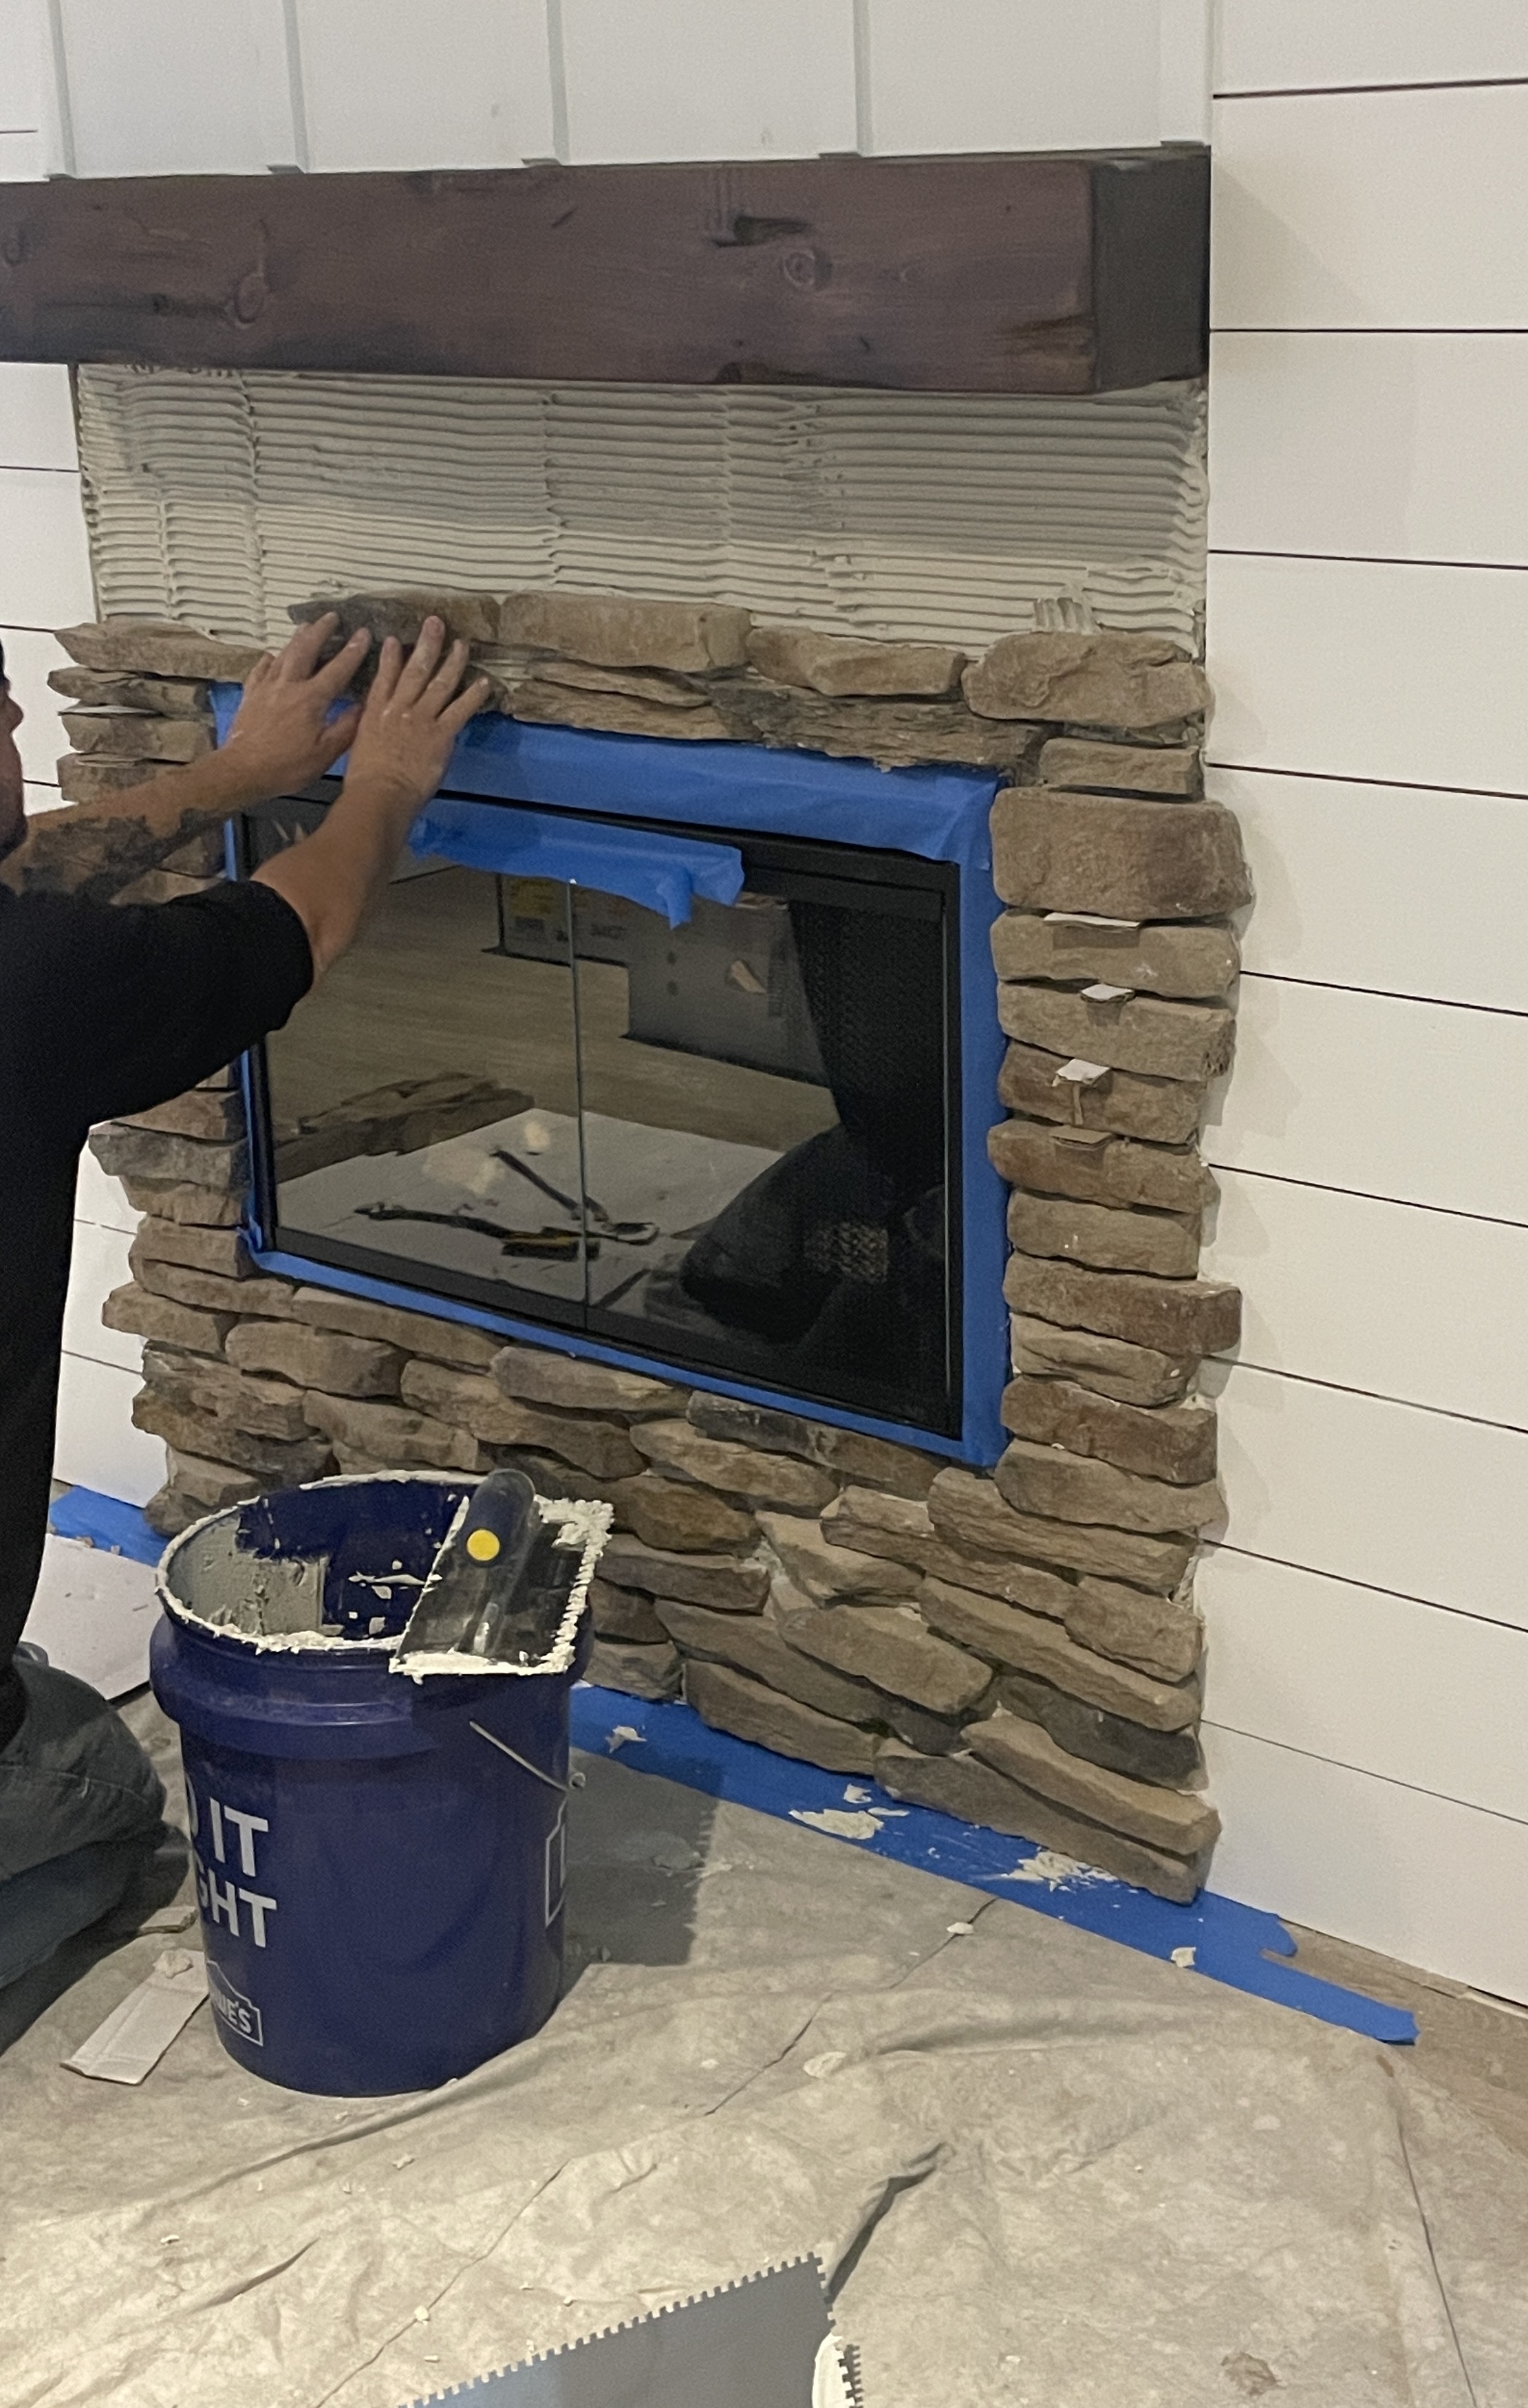
During installation, our contractor applied a grout mix to the back of the stone and the durock and pressed each piece firmly into place. He worked from the bottom up, alternating between large and small sections to create a natural pattern.
Whether you’re using thin stone veneer or faux stone panels, pay attention to the joints and corners for a realistic appearance. Don’t forget to use corner pieces to wrap edges smoothly and maintain a consistent texture around the entire stone veneer fireplace surround.
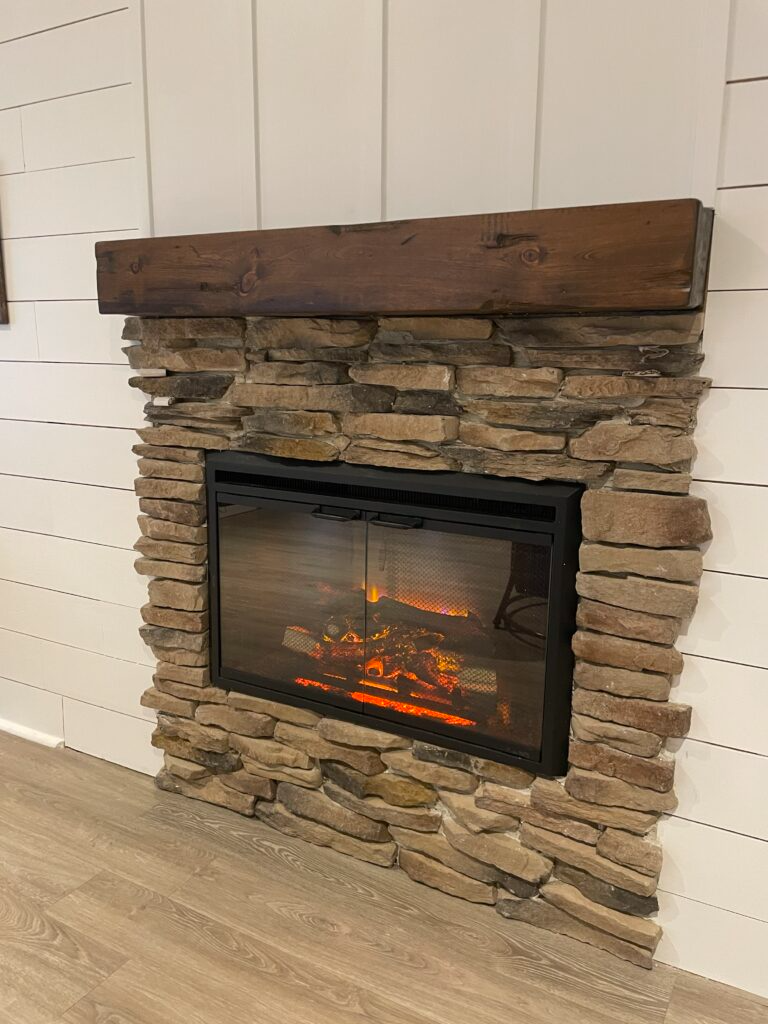
I was OK with the way it looked, but because I can’t leave well enough alone, I decided to tweak it a bit. I didn’t love how the stones were stacked straight on each side of the fireplace insert. So I removed a few of them and replaced them with two stones to create variety.
You can see where I started experimenting with the grout in certain places (and making some mistakes). I took a hammer to a few of the stones too, LOL. I ended up using a crow bar to remove a few of the stones to replace them with other stones I thought looked better.

After a little tweaking I was starting to be satisfied with the fireplace wall. I could see my vision coming to life and it was going to be the centerpiece of the living room.
I also decided to fill in the grout. Once I was happy with the stone placement, I bought some grout. So here goes another project!
Over-Grouted Stone Process
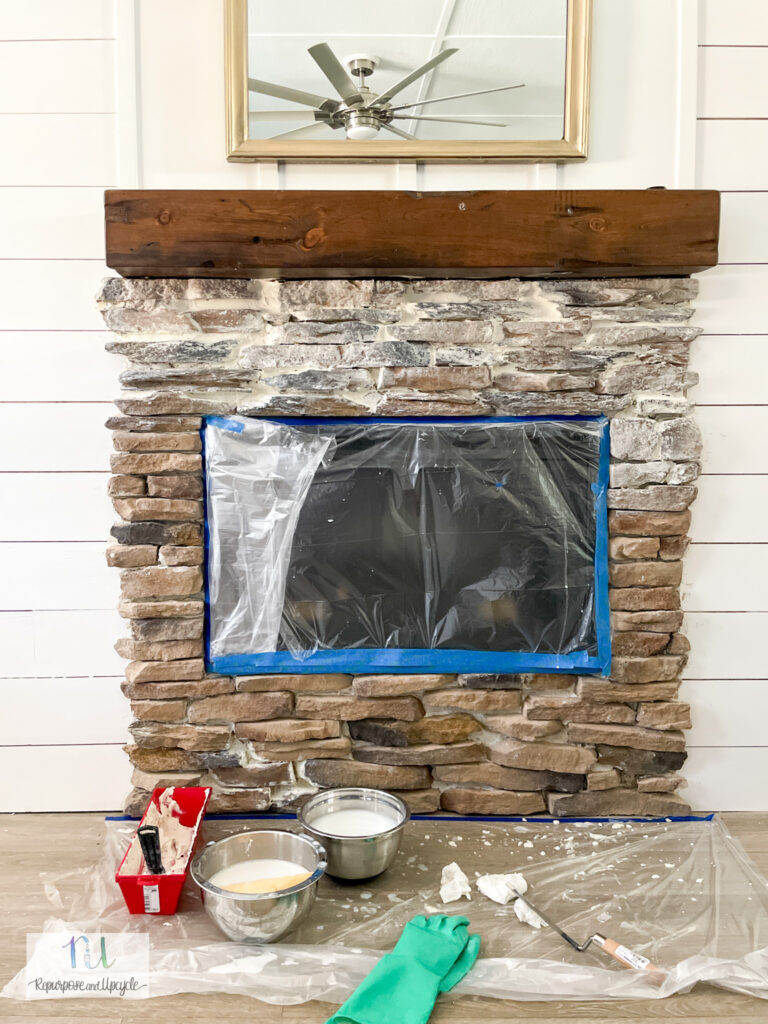
I’m not going to lie, this was a messy project and I went in blindly not knowing what I was doing (sort of like most of my most popular projects LOL).
I started with a grout float tool and tried to apply lots of grout over the stones hoping to pack it into the crevices. Because the stones aren’t flat, it just didn’t work. Next I took a small plastic putty knife to see if this worked better….maybe a little but not much.
Finally I put on gloves and got my hands dirty. I quickly found that using my fingers worked the best to push grout in between the stones because of the tiny little crevices and spaces. Once I placed the grout where I wanted it, I quickly took a large damp sponge and sponged the surface to not only “whitewash” the face of the stones, but to also smooth out the grout in between.
I could finally see my vision coming to life! Check out the video to see all the over-grouted details!
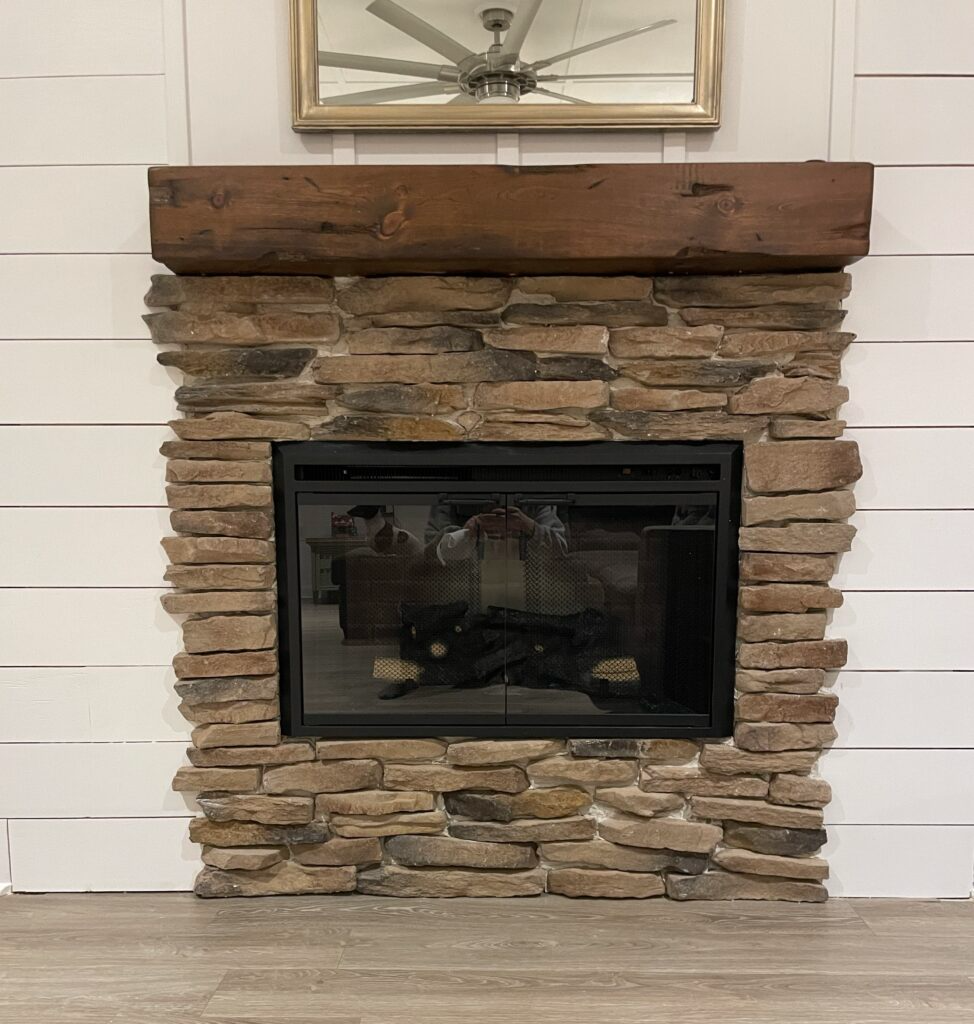
Over-grouted fireplace reveal
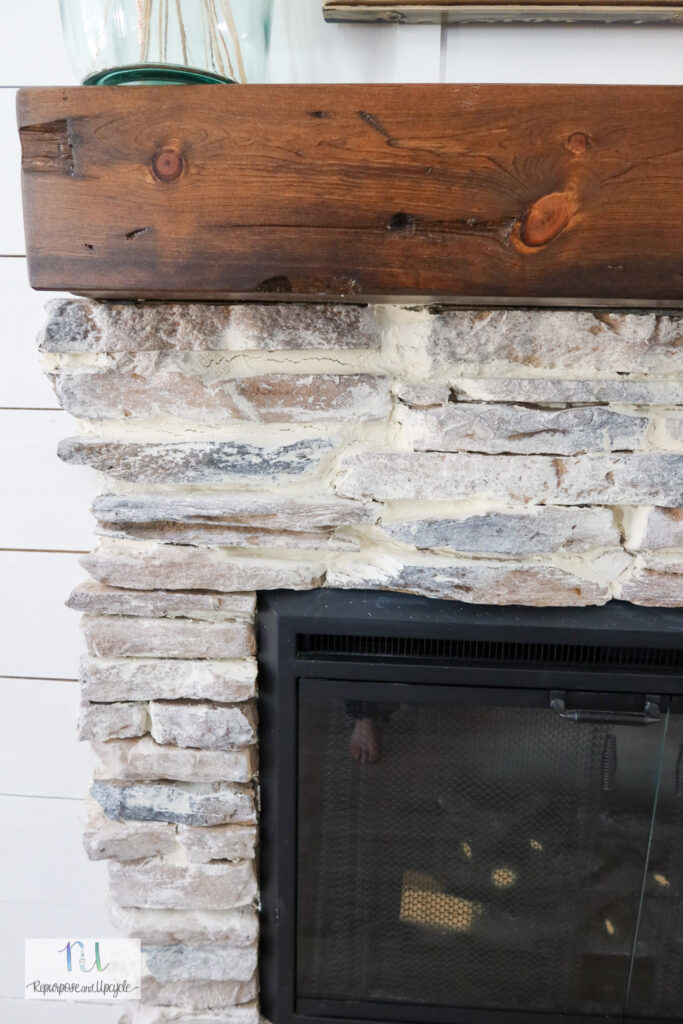
It’s not perfect but the end result was better than where I started. What do you think?

Did you like it before or after the over grouting? I think this way matches the rest of the house better. Thoughts?


