Yes, you can totally paint over lacquer furniture or a lacquer finish—but you’ve gotta prep it right if you want that new paint to actually stick. The trick is to lightly sand off that shiny finish, wipe away all the dust, and slap on a good primer before you even think about paint.
If you skip those steps, well, your paint’s probably going to peel right off. Lacquer is slick and sealed, so it kind of laughs at paint unless you rough it up first.
When you know what kind of lacquer you’re dealing with and pick the right primer and paint, you’ll get a finish that actually lasts. This works for cabinets, dressers, or pretty much any lacquered piece you want to update.

Understanding Lacquer Furniture
Lacquer furniture has that super smooth, glossy look. It’s durable and looks fancy, but it’s a pain to refinish unless you know what you’re doing.
What Is Lacquer Furniture
Lacquer is a clear or colored finish that dries hard and protects wood. Unlike paint, it really soaks in and gives you a slick, shiny surface.
It’s pretty tough—resists moisture, scratches, heat, and all that. Usually, it’s sprayed on in thin layers, building up that glossy or satin sheen. It dries fast, so you’ve got to move quick when applying it.
Because it hardens tight over the wood, it shows off the grain and texture underneath. That’s part of the charm, honestly.
Challenges of Painting Over Lacquer
Lacquer’s super smooth, so to top coat it with paint just won’t work. If you don’t prep it, expect peeling or chipping.
It dries hard and fast, which can trap solvents from new paint or primer and cause bubbles or weird patches.
Sanding is tricky—you need to scuff it up, but not go crazy and damage the wood. Picking the right primer and paint brands are huge, too, or you’ll get chemical reactions that ruin your finish.
So yeah, painting lacquer is definitely more work than painting plain wood.
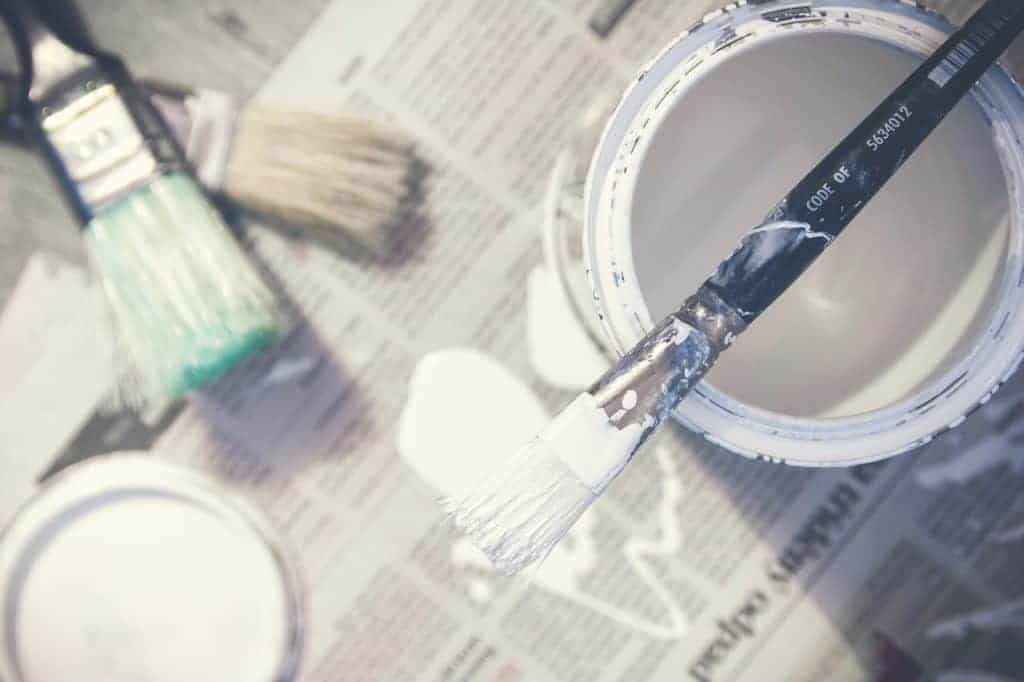
Materials and Tools Needed
You’ll need a pretty specific set of stuff if you want that paint job to last on lacquer. Here’s what you’ll want to have handy.
Disclosure; this post contains affiliate links. As an Amazon Associate I earn from qualifying purchases. This disclosure statement refers to the rest of the Amazon links in this post.
Let’s make a quick chart for your shopping list:
| Item | Why You Need It |
|---|---|
| Liquid deglosser or 220-320 grit sandpaper | Knocks down that shine |
| Clean cloth & tack cloths | Wipe off dust and grime |
| Painter’s tape | Keep paint where you want it |
| Drop cloths/plastic sheeting | Protect your floor (and sanity) |
| Good brushes & rollers | Smoother finish, fewer streaks |
| Mixing sticks | So your paint isn’t lumpy |
Recommended Paints and Primers
Picking the right primer and paint is everything. Here’s another quick chart for you:
| Type | Details |
|---|---|
| Bonding primer | Made for glossy/lacquer surfaces |
| Shellac or oil-based primers | Stick like glue, but open a window! |
| Acrylic latex or oil-based paint | Acrylic is easy to clean, oil is tough as nails |
| Semi-gloss or satin topcoats | Look good, hold up to wear |
Seriously, don’t skimp on primer. It’s what keeps your paint from bubbling or peeling off.
Safety Equipment Requirements
Lacquer and paint fumes can be nasty. Here’s what you need to stay safe:
- Respirator mask: Not just a dust mask—get one for organic vapors.
- Chemical-resistant gloves: You don’t want this stuff on your skin.
- Goggles: Because paint in your eye is the worst.
- Ventilation: Open windows, use fans, or work outside if you can.
Don’t skip this stuff. You’ll thank yourself later.
Preparation Steps
If you want paint to stick to lacquer, prep work is everything. Clean the existing finish, fix any damage, and sand the surface just enough to give the paint something to grab onto.
Cleaning and Degreasing Surfaces
First up: get rid of dust, oil, and grease. Use a mild soap or a degreaser with warm water and wipe down the whole thing.
Get into the corners and cracks with a soft cloth. Rinse with clean water and let it dry all the way.
Skip the harsh chemicals—they can mess up the lacquer. You want a clean, slightly tacky surface for paint and primer to stick.
Sanding Techniques for Lacquer
Sanding is all about giving the paint a fighting chance. Use fine sandpaper—220 to 320 grit is perfect.
Sand with the wood grain, not against it, or you’ll see scratches later. You just want to dull the shine, not sand down to bare wood.
After sanding, wipe off all the dust with a tack cloth. Don’t skip this—dust will ruin your finish.
Priming Lacquer Furniture
Priming is what makes paint stick to lacquer. Pick the right primer, put it on right, and let it dry as long as it needs to. See all about why you NEED to use primer in another post.
Selecting the Right Primer
Use a bonding primer that’s made for glossy stuff. Oil-based or shellac-based primers are your best friends here—they really grip lacquer.
Latex primers? Only if you’ve sanded the heck out of the surface first. Make sure your primer works with the paint you’ll use on top. Oil-based primers play nice with both oil and latex paints. Just make sure you let it CURE COMPLETELY.
If your furniture has stains or watermarks, go for a stain-blocking primer.
Application Methods for Primer
Sand the surface lightly to kill the shine, then wipe away dust with a tack cloth or damp rag.
Use a good brush or foam roller. Brushes are better for details, rollers for flat spots. If you have a spray primer or spray paint, that’s awesome for fancy shapes—no brush marks.
Don’t glob it on. Thin, even coats are the goal. Thick coats drip and dry weird.
Drying and Curing Times
Primer drying times are all over the place. Oil-based ones usually dry in 4–6 hours, but can take a whole day to fully cure and sometimes longer. Shellac dries way faster—sometimes in under an hour.
Read the label and follow the directions. If you rush it, your paint may not stick right or look smooth.
Also make sure the room’s got good airflow and isn’t crazy hot or cold.
Painting Over Lacquer
Now for the fun part. Picking the right paint and applying it right makes all the difference. You’ve got options, but not all paints work on lacquer.
Choosing Compatible Paint Types
Lacquer’s slick, so not every paint will work. Oil-based and solvent-based paints usually stick best.
Water-based or latex paints? You’ll need a really good bonding primer first. A high-adhesion primer made for glossy stuff is pretty much required.
If you use the wrong paint, it’ll peel or flake. Double-check the label—some paints are made for furniture and will last longer.
Best Practices for Smooth Coverage
Always sand the lacquer first with fine-grit sandpaper (220-320 grit). Don’t go crazy—just a scuff sand to dull the surface.
Clean up all the dust with a tack cloth or vacuum. Any leftover dust will mess up your paint job.
Start with a thin, even coat of primer. Then, do several light coats of paint instead of one thick one. Let each coat dry before adding the next.
If you want a pro finish, lightly sand between coats. It’s a little extra work, but it’s worth it.
Brush Versus Spray Application
Brushes give you a lot of control, especially for smaller or more detailed spots. Grab a good synthetic bristle brush—it really helps keep streaks and brush marks to a minimum.
Spray painting, on the other hand, is way faster and leaves a smoother finish. It’s awesome for big, flat areas, but you’ll want to make sure you’ve got good airflow and everything you don’t want painted is covered up.
If you’re spraying, thin the paint as the label suggests and go for several light coats instead of one heavy blast. Spraying takes a bit of practice, but you do get fewer brush marks and a really even look once you get the hang of it.

Brush vs. Spray Chart:
| Brush | Spray |
|---|---|
| Best for details & small spots | Best for big, flat areas |
| More control | Faster coverage |
| Can leave streaks | Smoother finish |
| Minimal setup | Needs masking & ventilation |
Finishing Touches
If you want your painted lacquer furniture to actually last and look good, the finishing steps matter a ton. A protective layer and a bit of polish can make the difference between “meh” and “wow.”
Adding Protective Topcoats
Once the paint’s dry, slap on a protective topcoat. Polyurethane or water-based clear coats are solid picks—they’ll keep scratches and daily wear at bay.
Use a high-quality brush or spray for thin, even layers. Let each coat dry all the way (that’s usually 2-4 hours, but check the can). Two or three coats is usually plenty.
You can go matte, satin, or glossy—totally up to you. Just make sure your topcoat and paint play nice together, or you might end up with weird cloudy spots.
Troubleshooting and Tips
The secret to a good finish on lacquer furniture? Prep and picking the right paint. A little troubleshooting now saves you a lot of regret later.
Preventing Peeling and Chipping
Peeling and chipping usually means your paint didn’t stick—probably because the surface was too slick or greasy. Clean with a degreaser or liquid deglosser to get rid of anything that might block the primer or paint.
Lightly sand with fine-grit sandpaper (think 220-320) so the primer has something to grab onto. Don’t skip a bonding primer for slick surfaces. If you do, the paint will probably peel off in no time.
Stick to thin, even coats and let each one dry. Thick coats trap moisture and just make peeling more likely. Oh, and never put latex paint straight onto lacquer—use a primer first.
Peeling & Chipping Chart:
| Problem | Solution |
|---|---|
| Peeling/Chipping | Clean, sand, use bonding primer |
| Thick coats | Apply thin layers, let dry |
| Latex on lacquer | Always use primer first |
Correcting Common Mistakes
Blisters or bubbles? That’s usually moisture or not prepping enough. Sand the spot, let it dry out, and try again.
Runs and drips happen when you lay it on too thick. Let it dry, sand it smooth, then go lighter with the next coat.
Patchy spots? A little light sanding helps the next coat stick better. Sometimes you’ll need to touch up the primer, too.
If you spot peeling or chipping later, carefully scrape off any loose paint, sand the edges to blend, then re-prime and repaint just that area.
Frequently Asked Questions
Painting over lacquer is all about prepping the surface, picking the right paint, and following a few key steps. Don’t skip sanding, priming, or picking paint that’ll actually stick.
Can you paint over lacquered furniture without sanding?
Honestly? Not a good idea. Lacquer’s slick, glossy surface just doesn’t let paint stick well. You’ll end up with peeling or chipping for sure.
Give it a light sand or scuff to help the paint grab on.
What are the necessary steps for prepping lacquer furniture before painting?
First, clean the surface to get rid of dust, oils—basically anything gross. Then, sand it lightly to dull the shine.
Wipe away all the dust with a tack cloth or vacuum. After that, use a primer made for glossy or lacquered surfaces before you paint.
Which type of paint adheres best to a lacquered surface?
Oil-based and acrylic latex paints do well, as long as you use the right primer. Specialty primers for slick surfaces are a must.
Skip paints that need lots of flexibility or moisture unless you’ve prepped for them.
What is the process for transforming lacquer furniture to a white finish?
Sand the lacquer smooth, then use a bonding primer. Go for a good white paint—semi-gloss or satin acrylic latex is a safe bet.
Do a few thin coats, letting each one dry before the next. For extra durability, top it off with a clear protective coat.
How can you achieve a professional-looking black finish when painting over lacquer?
Sand and prime with a stain-blocking primer. Use a black acrylic or oil-based paint made for furniture or cabinets.
Keep your coats even, and sand lightly between them if you need to. A final clear coat will help keep it looking sharp.


