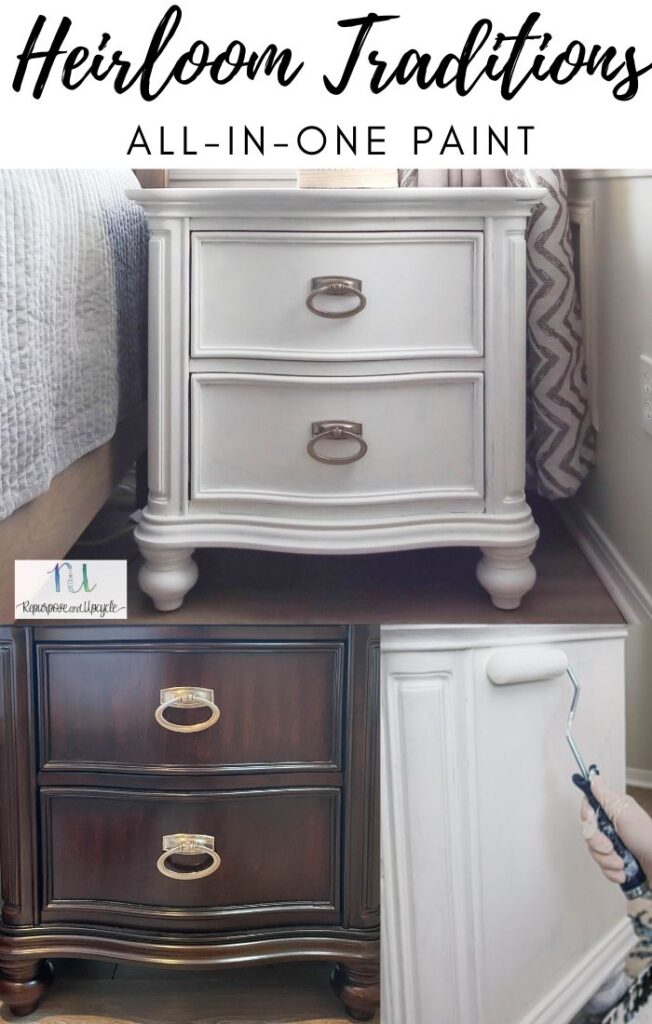
See how I transformed a dark dated bedside table with Heirloom Traditions ALL-IN-ONE paint in Cashmere. I’ve also shared my thoughts (and mistakes) about how to use this product with an easy to follow tutorial.
All in one paints are the “thing” today and when you walk the isles of the hardware store you will notice many of these. I’ve been intrigued for a while by this particular all-in-one paint so I decided to give Heirloom Traditions paint a try.
They offer a free sample (8 oz sample-covers approx 35 sq feet) which is great if you are wanting to give it a try before diving in to a big project. Read on friends, for an easy Heirloom Traditions paint review.
What Defines Heirloom Traditions Paint?
Heirloom Traditions Paint integrates primer, paint, and top coat into one product, simplifying the painting process. It is appreciated for its versatility and ease of use. The brand also offers complementary antiquing gels and stains for added finishing options.
Important Considerations Before Starting with Heirloom Traditions ALL-IN-ONE Paint
Initial Thoughts on Using Heirloom Traditions ALL-IN-ONE Paint
Heirloom Traditions ALL-IN-ONE paint is a water-based product that dries relatively quickly, typically within 30 to 60 minutes. This fast drying time means users need to watch for drips and apply paint evenly to avoid visible marks. The paint offers durability similar to enamel finishes but is non-toxic, low in VOCs, and cleans up easily with water, making it suitable for both interior and exterior use.
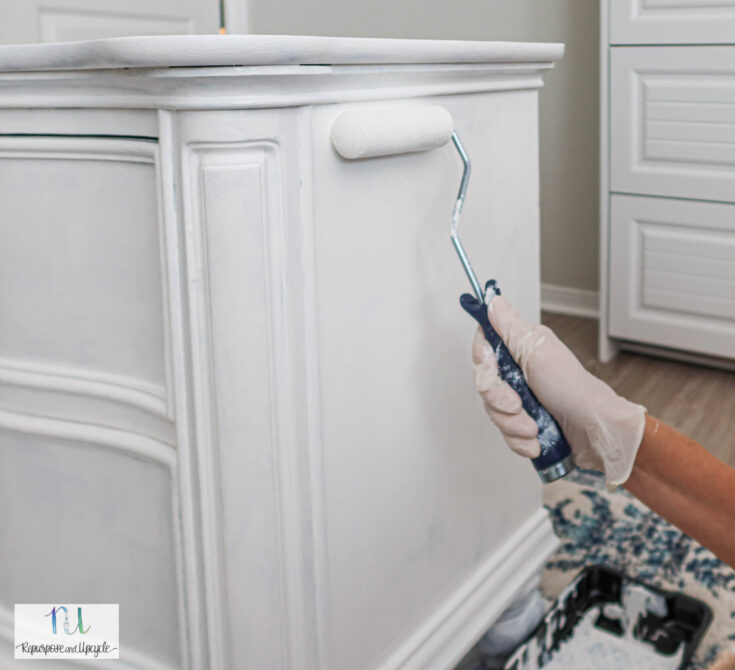
This paint is notably thick, so it tends to reveal brush strokes if not applied properly. To achieve a smooth surface, it is important to apply a full coat with a brush and immediately follow with a foam roller or stipple sponge, combining these tools to minimize texture from brush marks.
Make sure to use the “brush and roll” or “brush and stipple” technique; Apply a full coat of paint on the surface and then immediately roll it with a foam roller or stipple it with a foam pad.
No priming or top coating is necessary, which can reduce total project time. Be aware that this requires careful application on the first pass. The product works well on a variety of surfaces, including cabinets, front doors, and garage doors, thanks to its built-in bonding primer and finish.
| Feature | Details |
|---|---|
| Drying Time | 30 to 60 minutes |
| Durability | Comparable to enamel |
| Cleanup | Water-based, easy to clean |
| Application | Brush + foam roller/stipple pad |
| Surface Compatibility | Cabinets, doors, furniture, more |
| Top Coat Needed | No |
| VOC Level | Low |
Related Post:
Check out five great All In One paint reviews post here!
Painting Cabinets Black with Heirloom Traditions All in One Paint

Bedroom furniture makeover with ALL-IN-ONE paint
For this paint project I’m going to start with a bedside table makeover. We inherited this bedroom suite from a friend and the dark brownish red wood color contrasts the rest of my cottage style bedroom style.
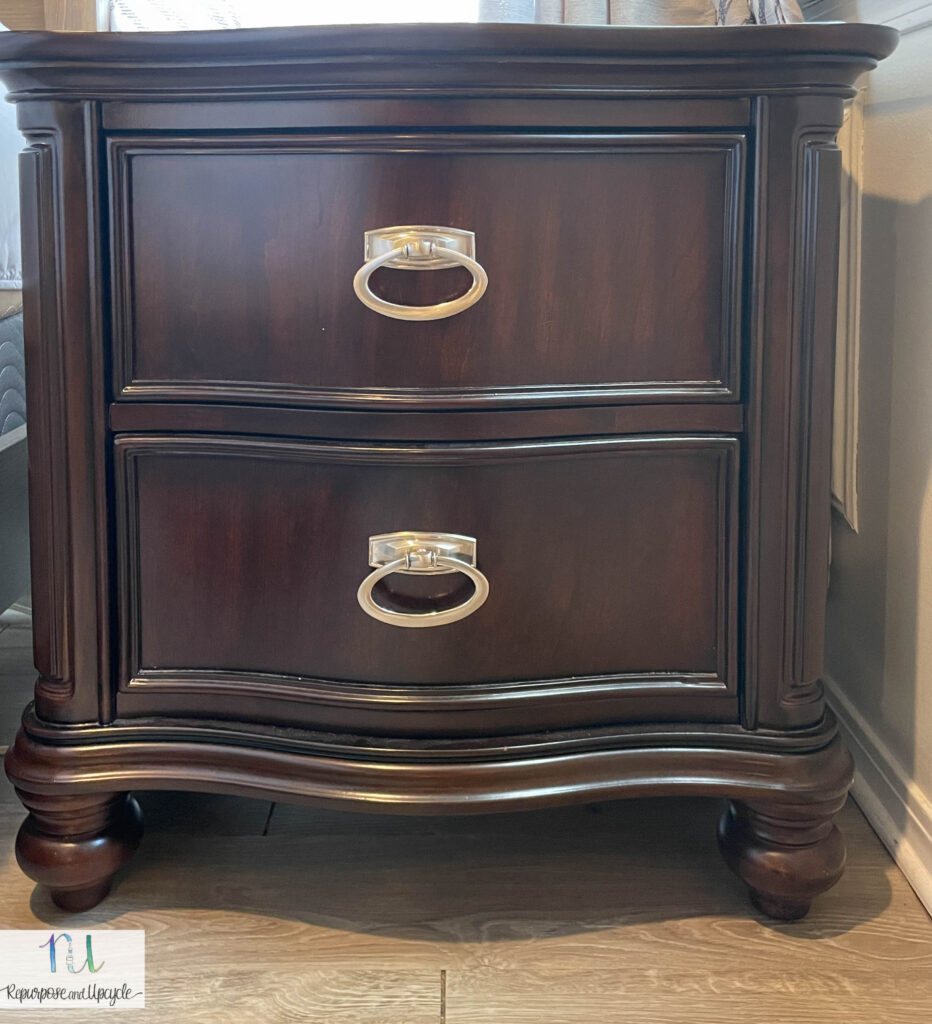
Before I started this project I thought hard about using primer first. I decided I would try the first table without primer because the paint states “all-in-one.” I figured worse case scenario I could always paint over it with primer and start over if I needed to.
Disclosure; this post contains affiliate links. As an Amazon Associate I earn from qualifying purchases. This disclosure statement refers to the rest of the Amazon links in this post.
Essential Materials for Furniture Refresh
| Item | Purpose | Notes |
|---|---|---|
| Paint Brush | Application of paint | Recommended to select high-quality kits |
| Foam Brush or Sponges | Applying paint in detailed or smooth areas | Paint sponges preferred over foam brushes |
| Degreaser or Cleaner | Surface preparation and grease removal | Crucial for proper paint adhesion |
| Lint-Free Towel | Drying and dust removal | Helps maintain a clean surface |
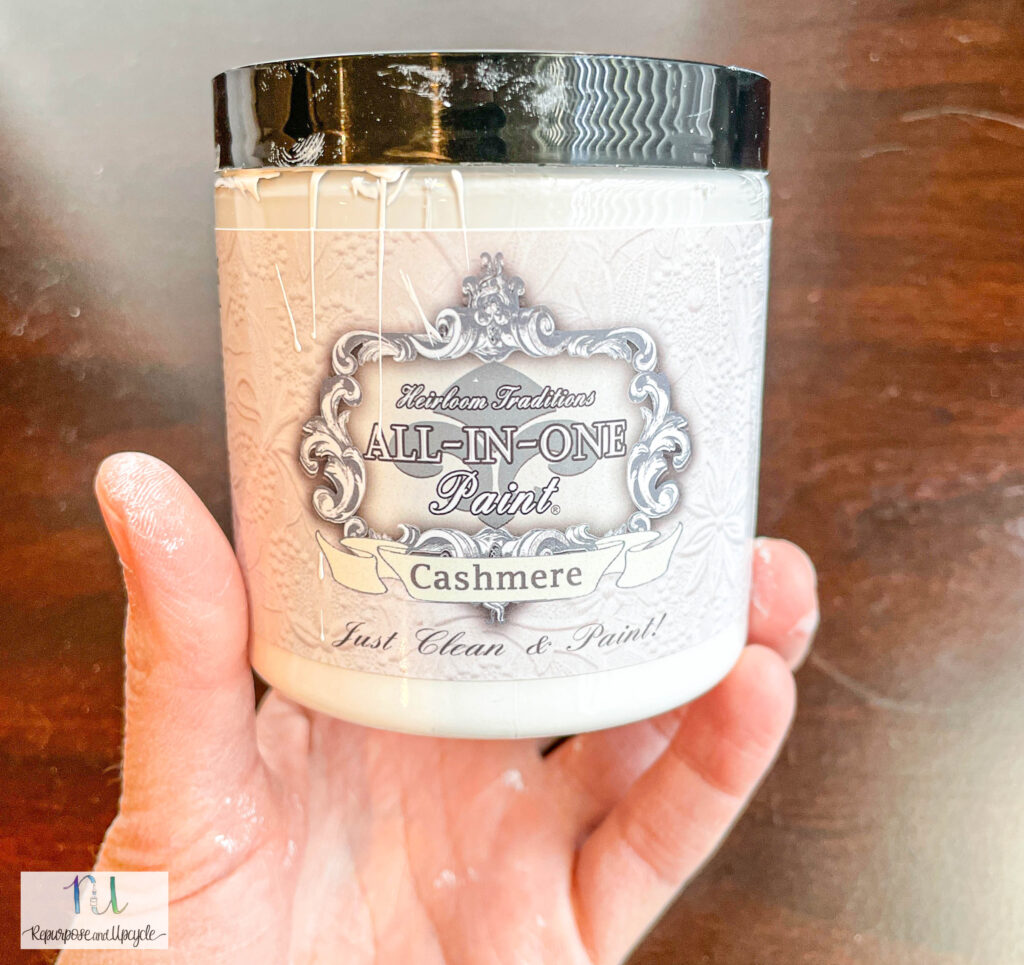
| All-in-One Paint | Paint, primer, and sealer in one product | Color example: Cashmere |
| Drop Cloth | Protecting surrounding area | Avoids unwanted paint stains |
Heirloom Traditions website states “just clean and paint.” So that’s what I did!
I started by cleaning the surface real well with Krud Kutter to degrease the bedside table. Once the surface was dry and clean, I began my paint project.
How I messed up when I first used Heirloom Traditions ALL-IN-ONE paint
Here is where I screwed up (I always try to be real with y’all, even when it shows my stupidity, LOL.)
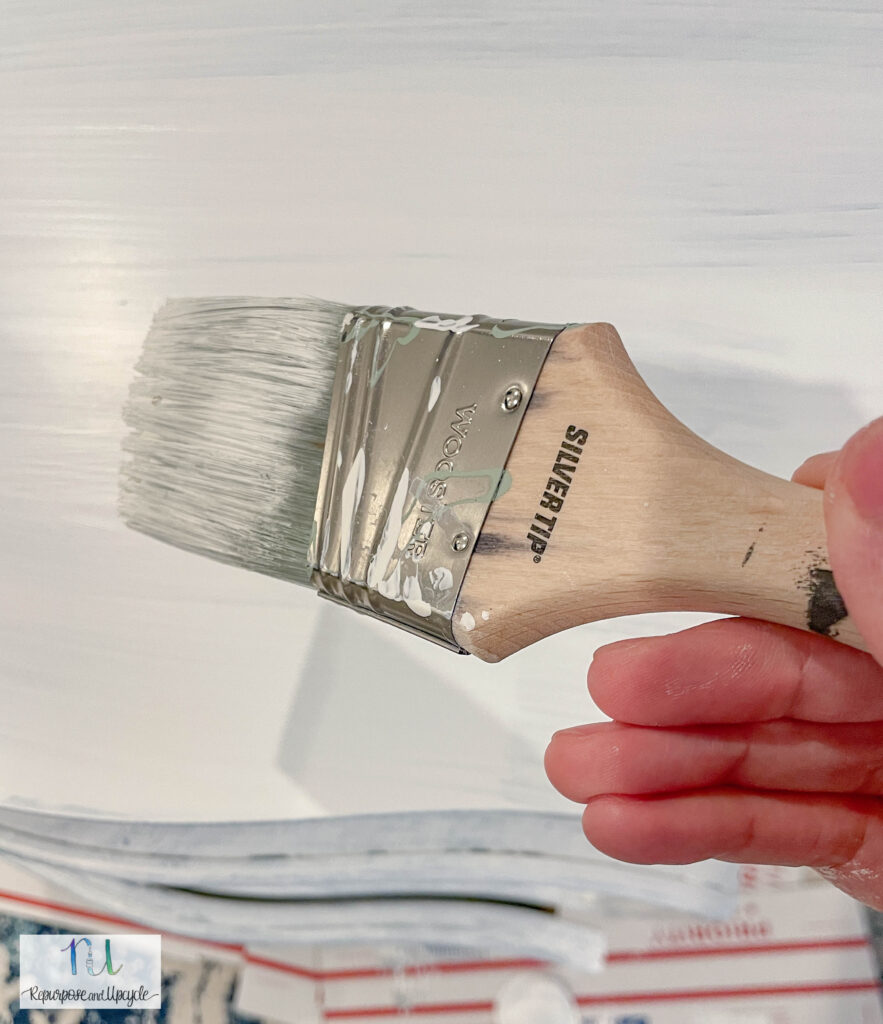
Like I said before, I used a paint brush for the first coat and this is where I went wrong.
I’ve painted a lot of furniture and I guess I got a little over confident that I could use my own methods and not follow the recommended instructions for this paint product.
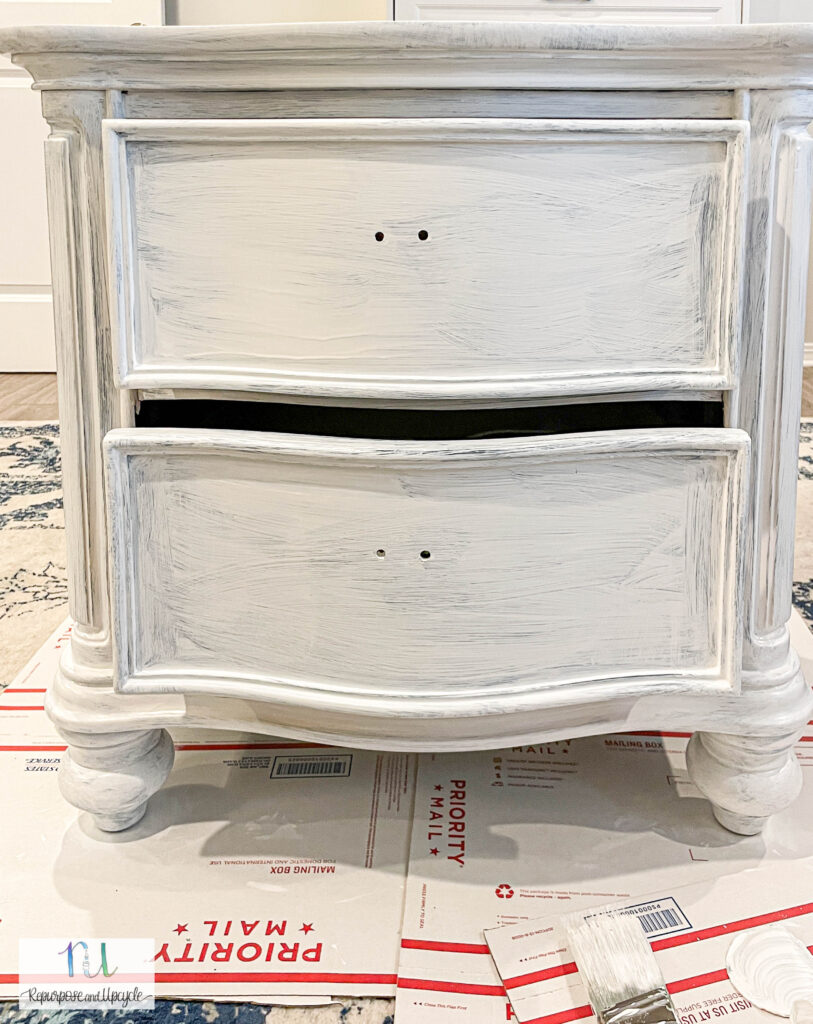
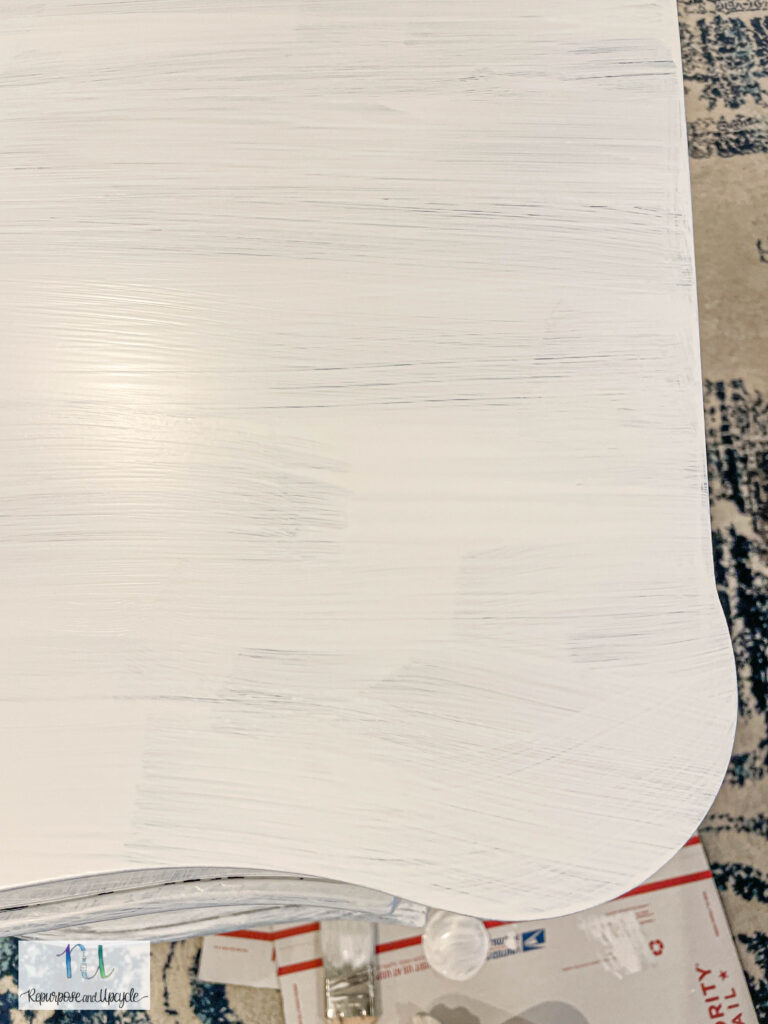
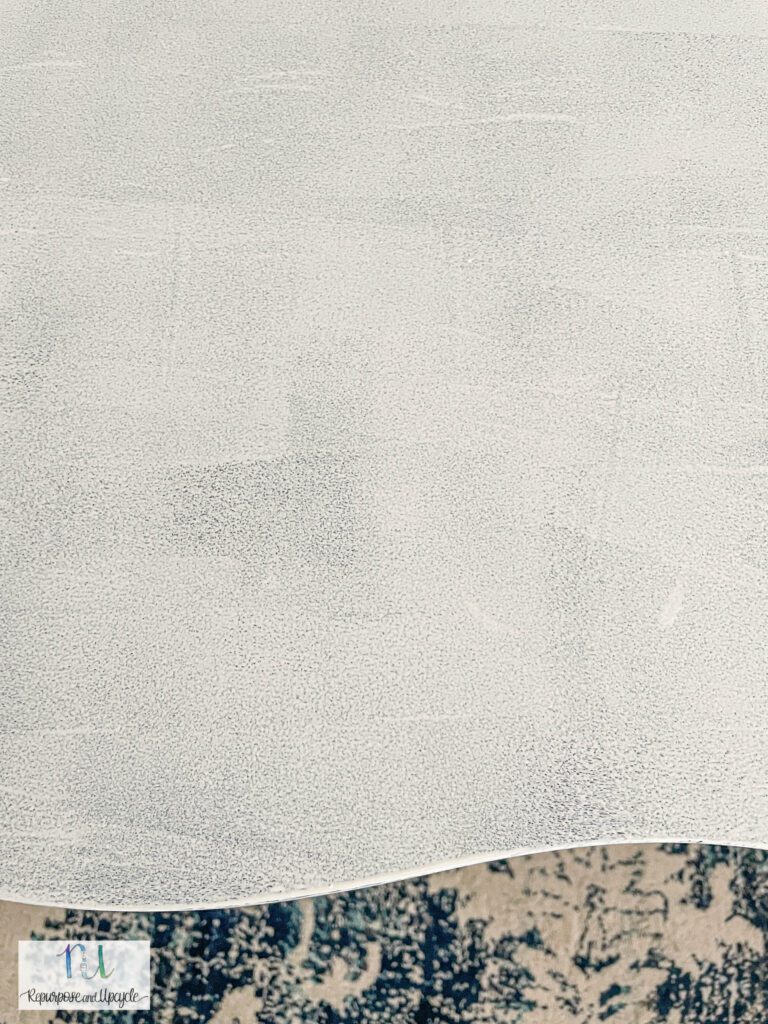
Pictured above is after the first coat of paint. It doesn’t look terrible, but what you can’t see is a heavy texture that the paint leaves. This isn’t necessarily a bad thing although in this case it is because the texture makes it hard to cover up the brush strokes.
This is why the paint directions state to use a “brush and roll” or “brush and stipple” technique.
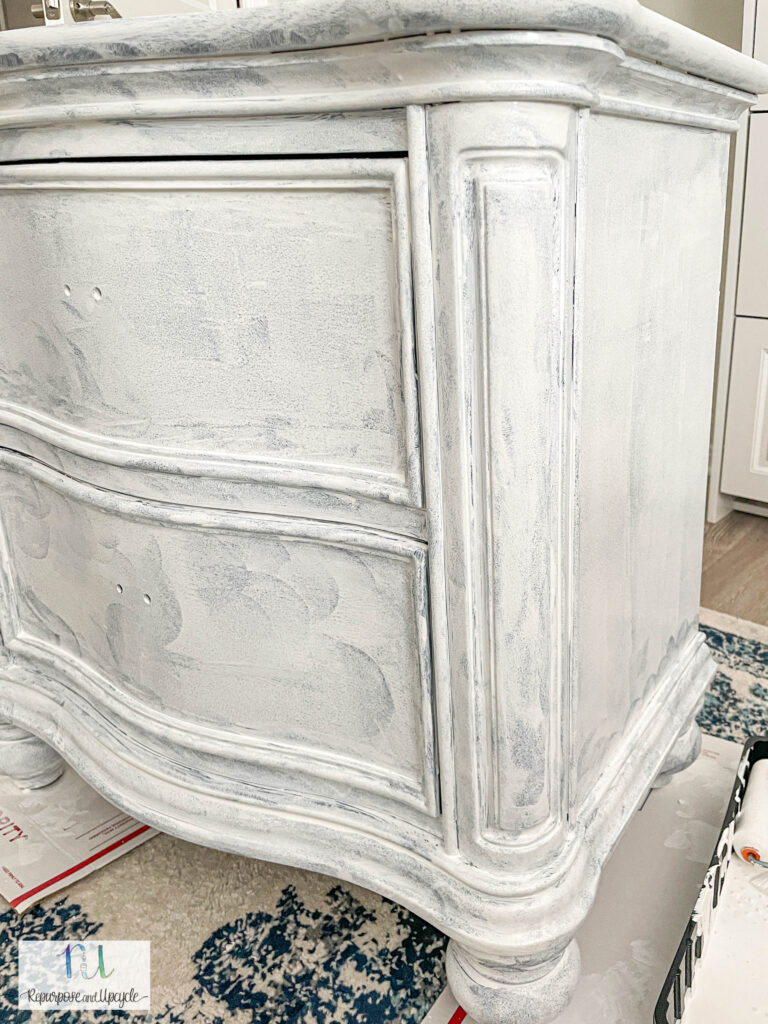
Once I realized that I needed to even out the texture from the brush strokes, I sanded the entire table down with 220 grit sandpaper.
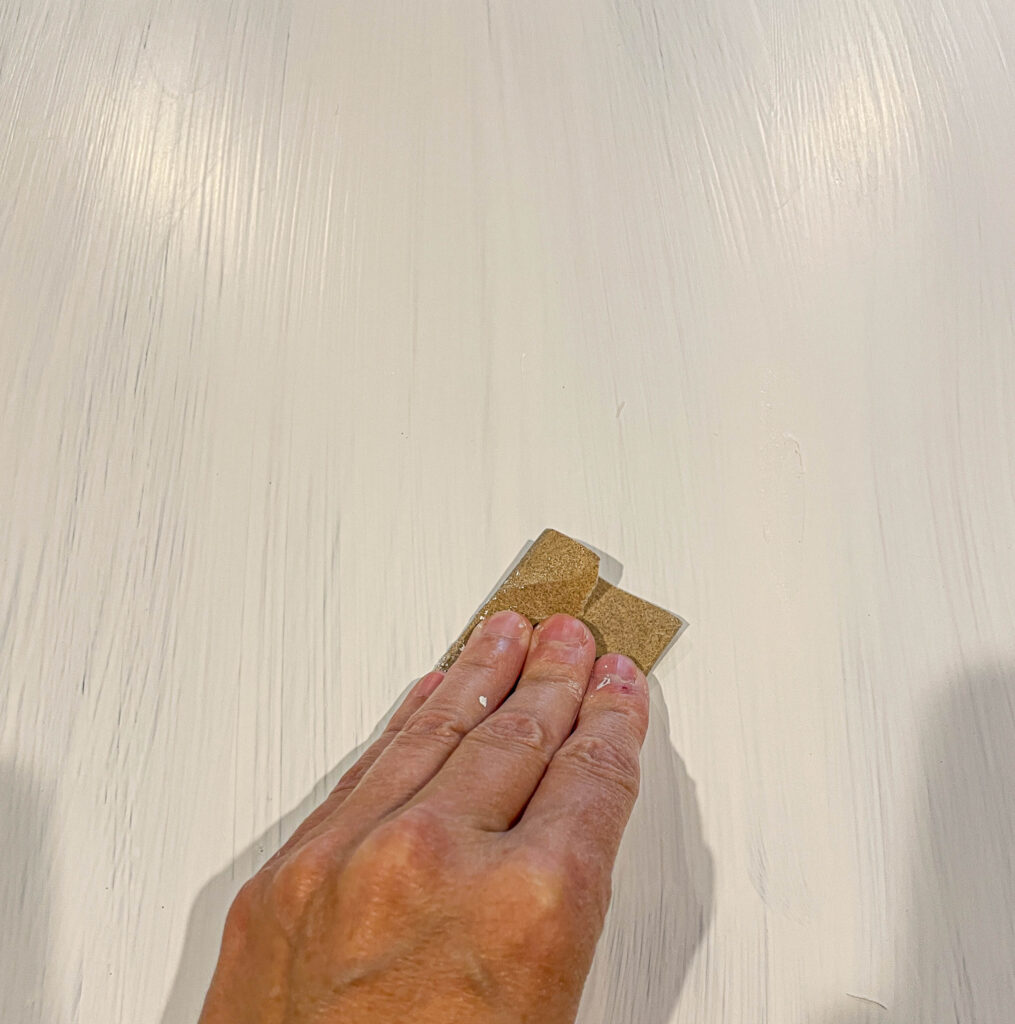
Once I lightly sanded and cleaned the surface, I pulled out the foam brush to see if I could smooth out the paint job.
Look how much smoother it looks already by using the foam brush!
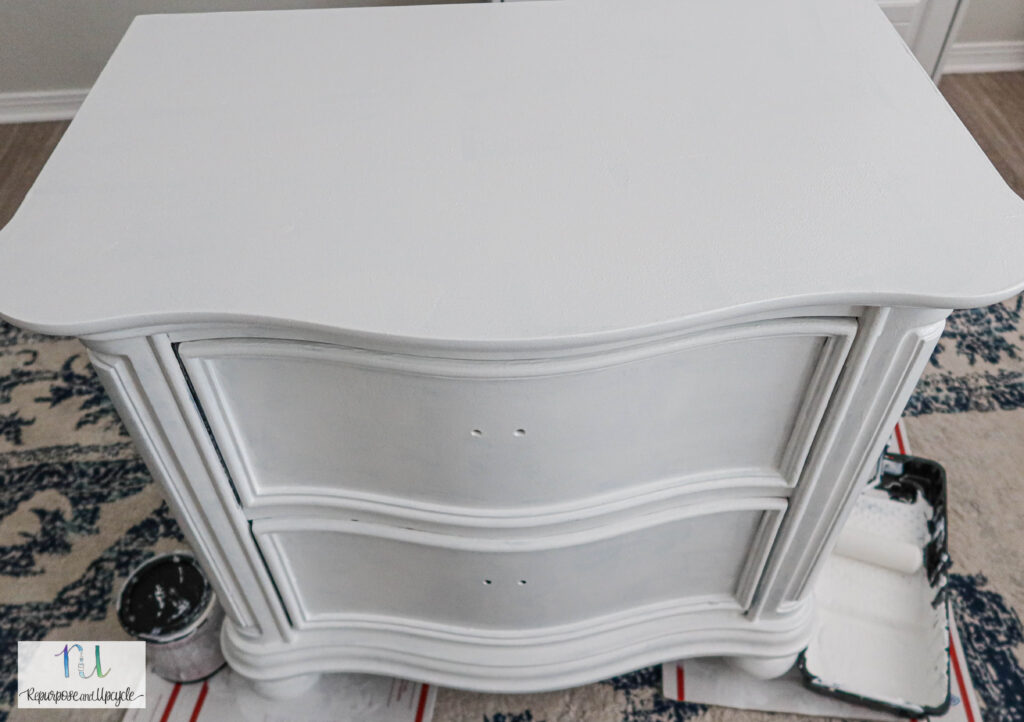
I applied the second coat of paint with a foam brush and here is what it looks like now (I actually went over a few spots with three coats).
It definitely still needs a full third coat and you can still see brush strokes. In my experience with painting furniture, a third coat (including primer) is almost always necessary when going from a dark color to a light color.
At this point I wondered if I should have used primer. What I should have done is start with the “paint and stipple” or “paint and roll” technique, especially with the additional coats of paint and it would have looked much smoother. Live and learn from my mistakes folks!
| Key Errors | Corrective Steps |
|---|---|
| Used only a regular paintbrush | Sanded surface with 220-grit sandpaper |
| Ignored “brush and roll/stipple” | Switched to foam brush for subsequent coats |
| Applied insufficient coats | Added multiple coats, especially over dark base |
Coverage Capacity of the ALL-IN-ONE Paint
The ALL-IN-ONE paint covers approximately 35 square feet per 8-ounce container. This makes a small sample can suitable for projects like a single bathroom vanity. For larger areas, a 32-ounce quart typically covers around 140 square feet, which is enough for kitchen cabinets in an average apartment. Meanwhile, a gallon can cover close to 500 square feet, roughly the size of an 8 by 10-foot room.
Coverage depends on the number of coats and application method. Two coats are often sufficient, but improper technique may require an additional layer for an even finish. Using tools like painting sponges can help achieve better results.
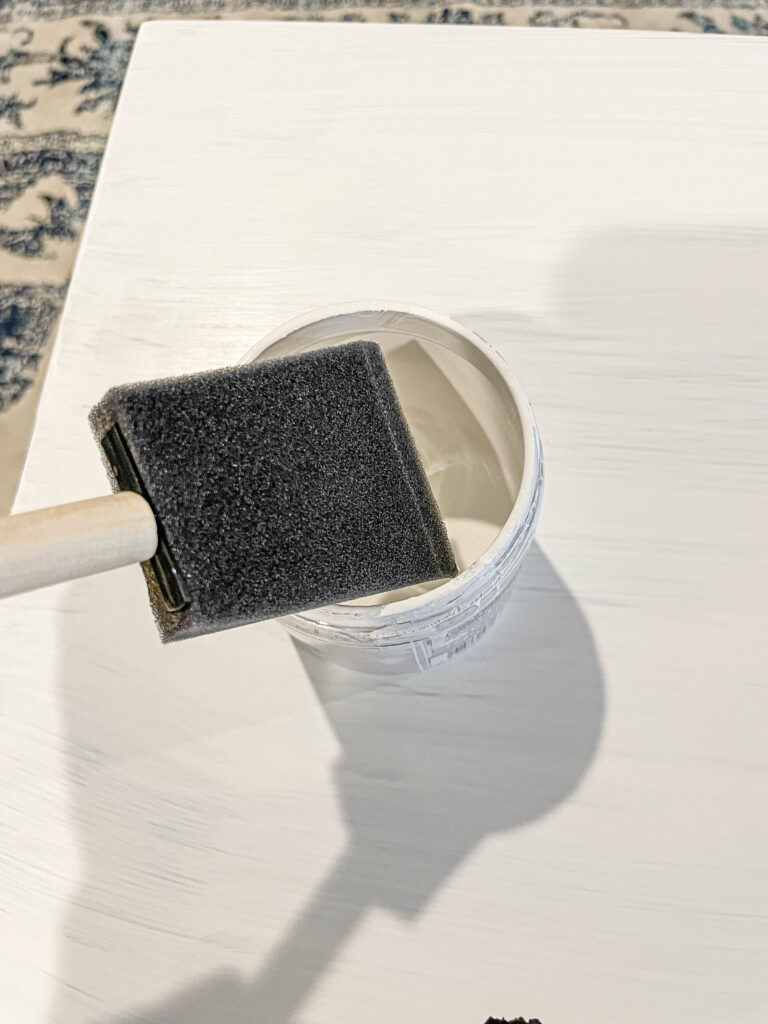
I got smart and ordered a few painting sponges to complete the third coat of paint. It looked much better after that (see below).
Now that I’ve shown you the WRONG way to apply this paint, It’s time to share the RIGHT way to do it.
Like I said before, the recommended technique to apply this paint is a “brush and stipple” or “brush and roll” technique.
Make sure to watch my video where I explained in real time how to apply the paint.
Is Heirloom Traditions All-in-One Paint Suitable for Outdoor Use?
Heirloom Traditions All-in-One Paint includes a built-in exterior-grade topcoat. This makes it appropriate for use on outdoor surfaces, providing durability and protection against weather elements. It supports various exterior projects without extra sealing.
How to apply Heirloom Traditions ALL-IN-ONE paint the right way
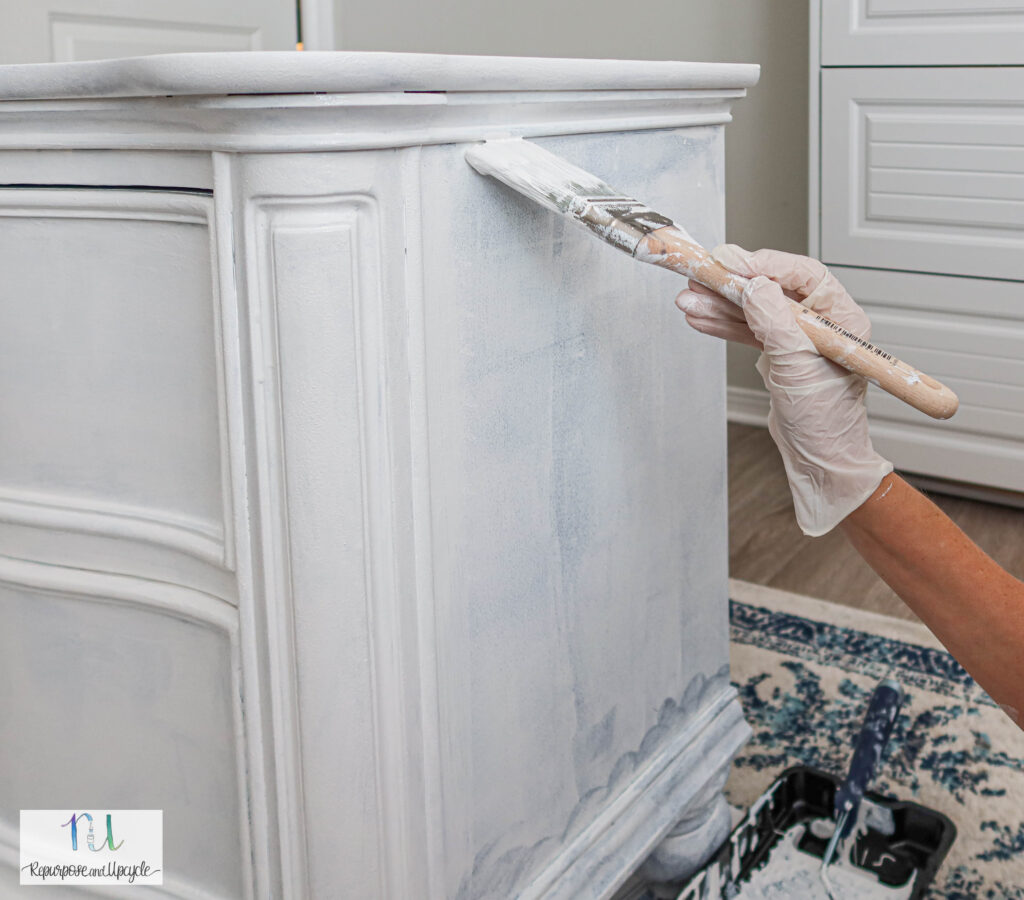
In a nutshell, you dip a heavy amount of paint on your brush, apply it generously on the surface and then use a foam roller or foam pad to either “roll” the surface or “stipple” the paint evenly. This prevents brush strokes and creates a smooth finish.
| Step | Tool | Purpose | Tips |
|---|---|---|---|
| Apply generous paint | Brush | Lay down paint on the surface | Fully load brush, coat liberally |
| Even out paint | Foam roller/pad | Smooth brush strokes | Use light pressure, roll or stipple |
| Reach tight spots | Foam sponge | Paint curves and detailed areas | Dab gently, don’t spread with sponge |
| Drying | N/A | Let paint cure between coats | Wait 30 to 60 minutes |
| Re-assess coverage | N/A | Check for thin or uneven spots | Apply extra coats as needed |
For bedside table #2, I used the right method! Let me show you.
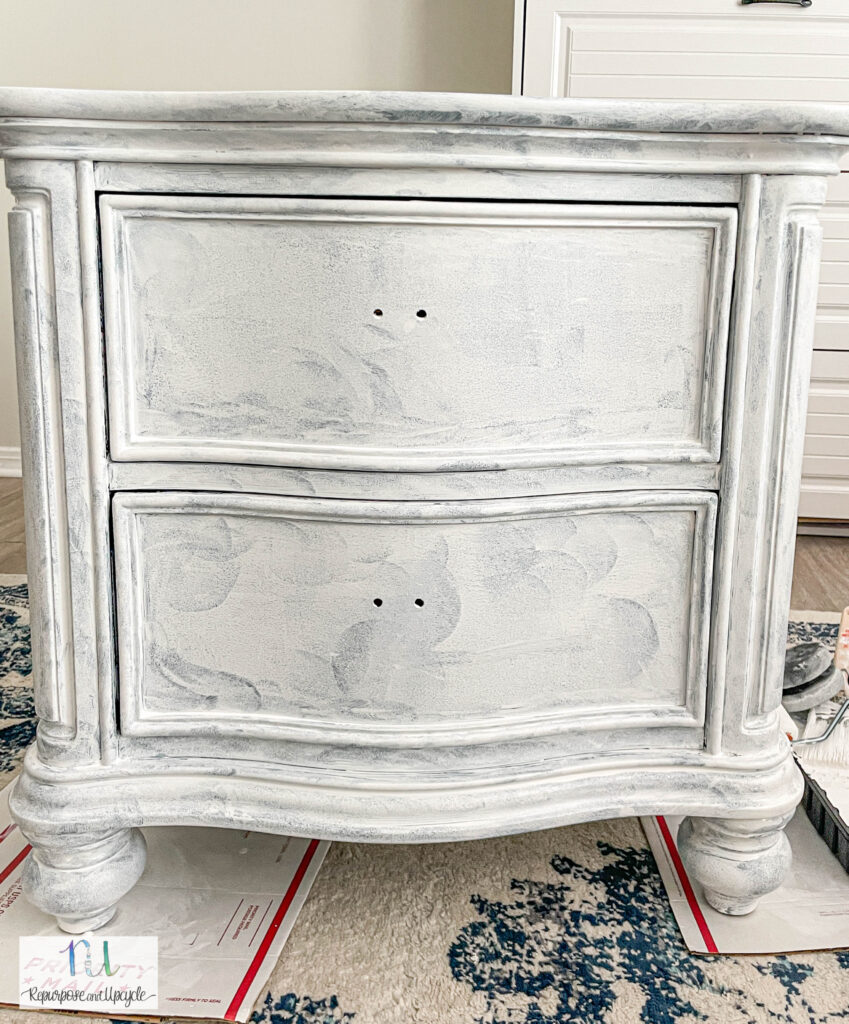
You can see above where I’ve already applied the paint and used a roller and a foam pad for the first coat.
The first paint coat is never pretty, but the most important (in my opinion). I know it looks like a hot mess, but it feels smooth to the touch and using these methods creates very little paint drips. Did I mention that this paint dries fast? You have to work quick to eliminate drips. As a matter of fact, it’s best to work in sections.
I rolled as much as I could but due to the curves and lines in this dresser, I had to mainly use the paint sponge.
Once the first coat was dry (dry time is only 30 minutes to 1 hour), I applied the second coat the same way as the first.
You can see where I’m using the brush to get the paint on the surface.

Next I used the sponge to stipple the corners and edges where the paint roller won’t get to.
Then I applied more paint to the surface with the brush and used the roller to even the paint out.

The point in using the roller isn’t to apply the paint, but to even it out and prevent brush strokes. Don’t apply too much pressure when you are using the roller. If you have to apply pressure, you don’t have enough paint on the surface.
After the second coat is dry, asses the piece and see if you need a third coat. Since I was painting a dark wood dresser white, I did apply a third coat to the table tops and front parts of the tables.
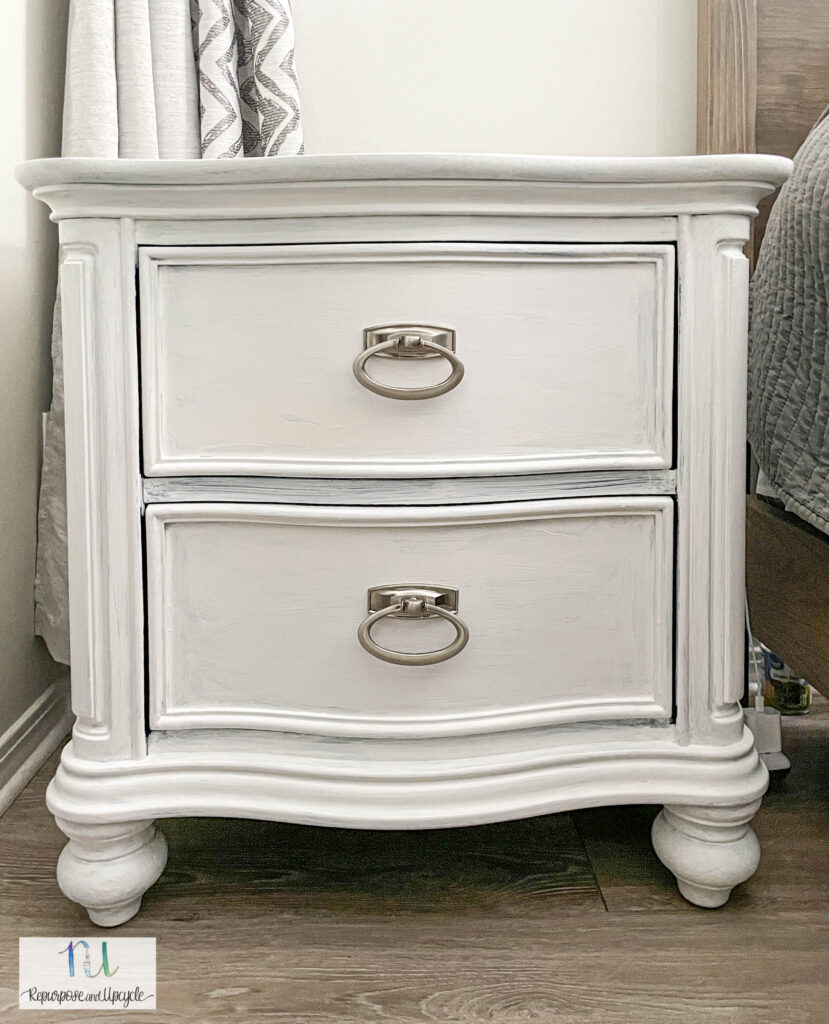
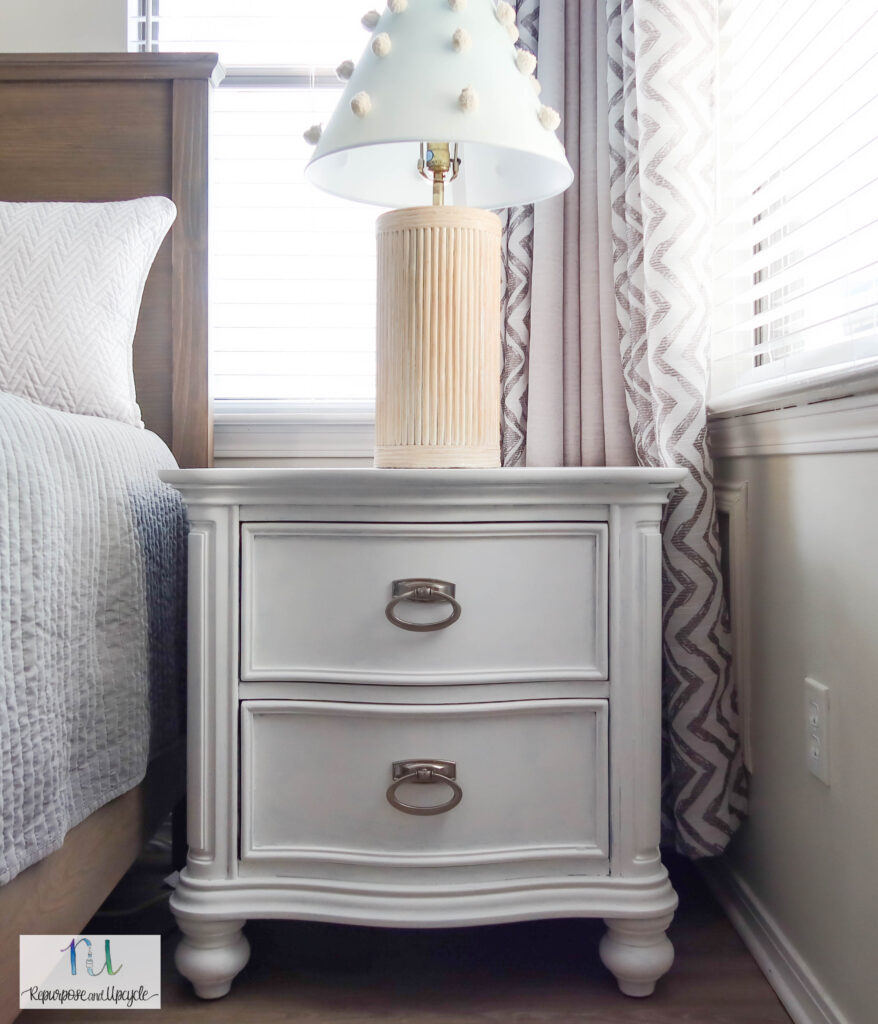
Look at my new bedside table now! I love the low luster matte sheen that it creates! This DIY project might have started out a bit rocky (my fault), but I’m pleased with how it ended.
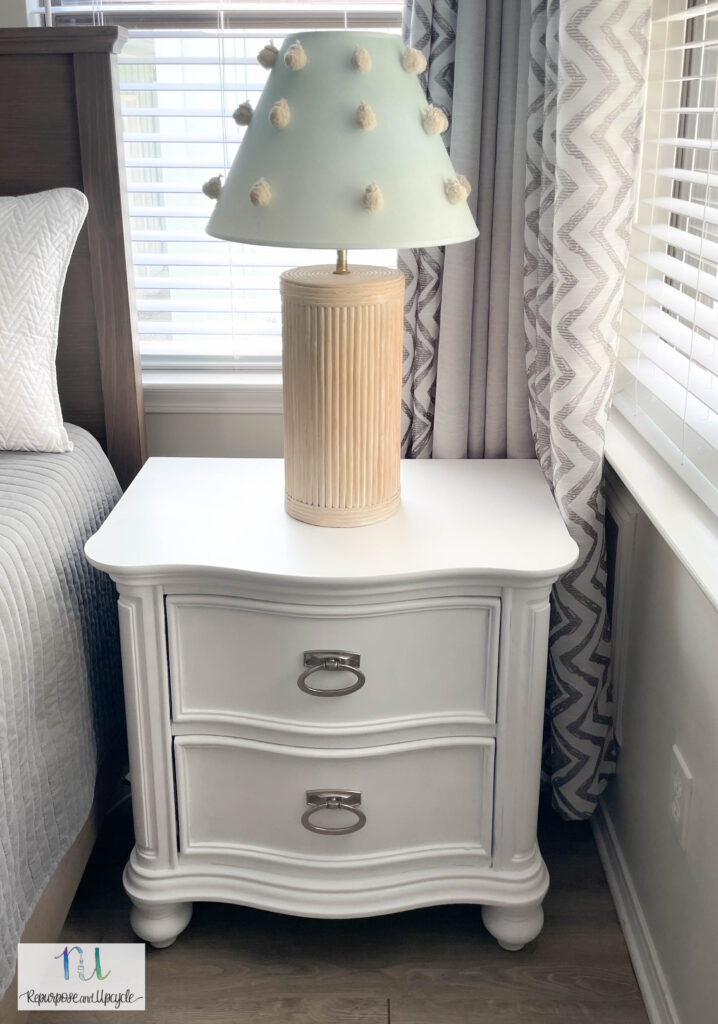
Look how much better this dresser matches the room! No more dark dated wood. If you are a novice painter looking for professional results, this paint works well.
Is Heirloom Traditions ALL-IN-ONE paint durable?
It’s been a week since I painted the first dresser and I can honestly say that yes this paint is very durable. I can take my fingernail and apply decent pressure to the surface without any scratches.
I would definitely recommend this paint if you want a quick, easy and one step paint product. I even used it to paint the top of the bed frame where I had to repair the wood with Bondo after my dog chewed it.
I hope I’ve give you an easy tutorial on how to successfully use this ALL-IN-ONE paint. I really do believe it’s a great paint product. As long as you follow the recommended instructions, your project should turn out beautifully. One more thing, did you know that you can even use this paint on smooth fabrics? I haven’t tried it on fabric yet, but apparently it works well!
Lindsey**
Things to know Before Using Heirloom Traditions All-In-One Paint
Thinking of using Heirloom Traditions ALL-IN-ONE paint? This is a very durable paint, primer and sealer in one paint product. There is a technique you need to know before applying this paint. See an entire bedside dresser makeover tutorial and how I transformed a dark dated dresser with Heirloom Traditions ALL-IN-ONE paint.
Materials
- Paint brush
- Foam brush or Paint sponges (I would suggest the sponges over the foam brush)
- Degreaser or cleaner
- lint free towel
- ALL-IN-ONE paint in cashmere
- Drop cloth
Tools
- fine finish roller
Instructions
- Clean the surface with a degreaser and a lint free cloth
- Using a paint brush, apply a generous amount of paint to the surface
- Use either a paint roller and roll the paint evenly across the surface or a paint sponge to stipple the surface
- Work in sections making sure to eliminate paint drips
- Apply either 2 or 3 coats of paint to the surface
- Dry time is 30 minutes to 1 hour
Notes
This is a fast drying paint. Be mindful of this and work in sections to eliminate paint drips.
The point in using the roller isn't to apply the paint, but to even it out and prevent brush strokes. Don't apply too much pressure when you are using the roller or the sponge. If you have to apply pressure, you don't have enough paint on the surface.


