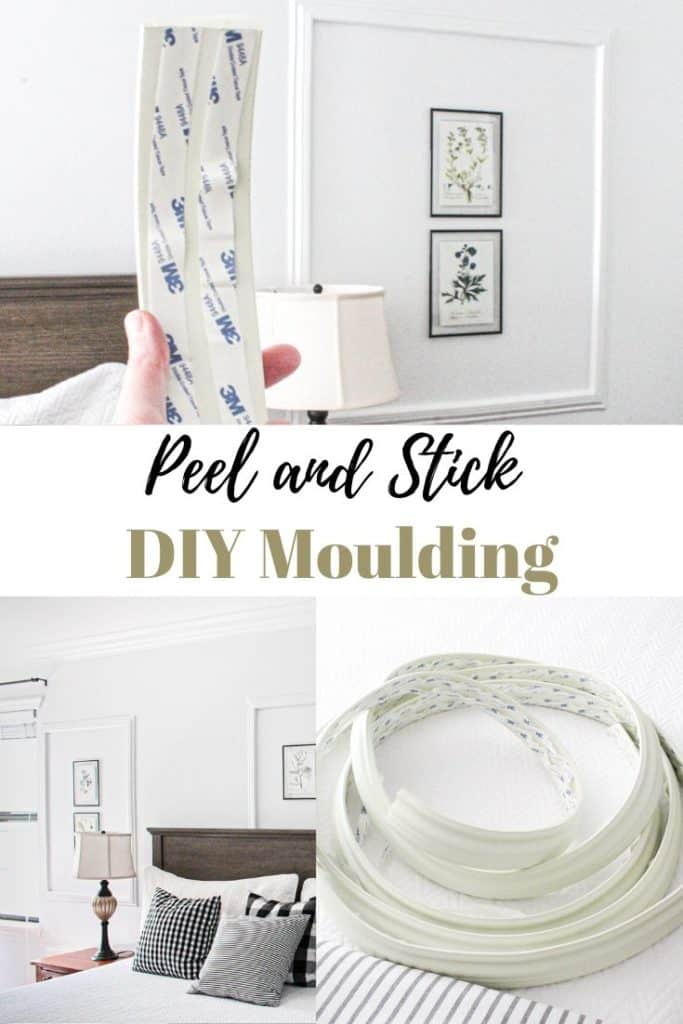
Learn how to create your own DIY picture frame moulding with peel and stick foam moulding. This is so affordable and easy, all it takes is scissors!
You know that time I created my own shiplap without any power tools? Let’s just say I used a similar process for this DIY moulding. Except rather than using peel and stick vinyl flooring, I’m using peel and stick picture moulding! You won’t believe how easy it was. The best part? Anyone at any skill level can apply peel and stick picture moulding with scissors.
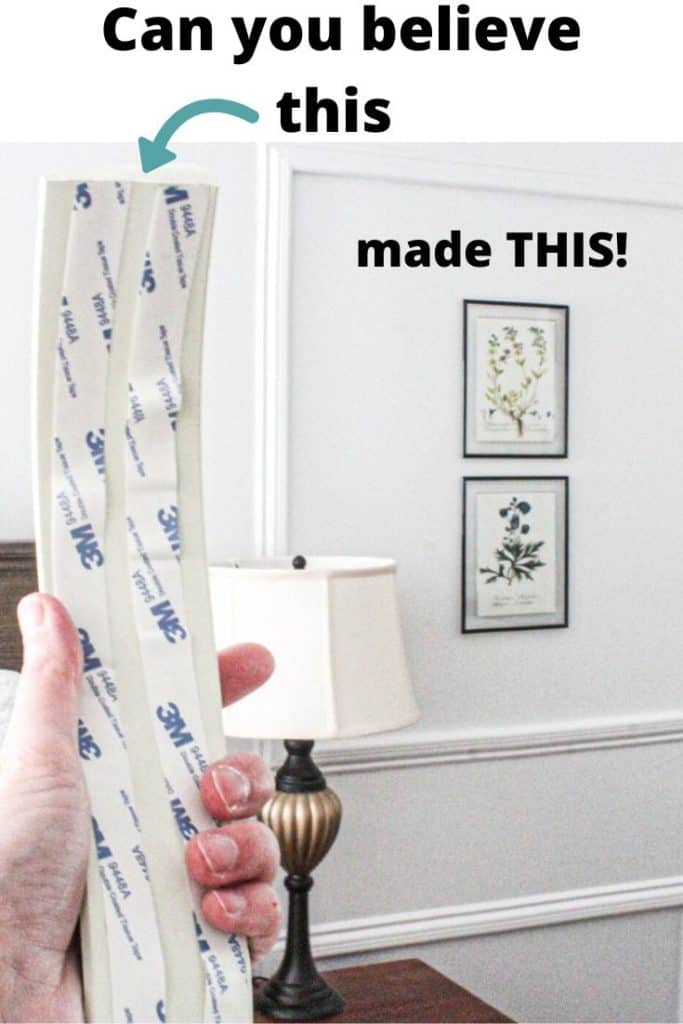
Do you think I’m crazy yet? I don’t know whether I’m always up for a challenge or I’m just a lazy DIYer. No joke, I would rather cut and peel a few foam pieces to a wall rather than deal with a miter saw and lots of wood pieces.
That being said, this DIY peel and stick picture moulding isn’t for every project. I’ve shared MY OPINIONS below of where and where NOT to use this stuff.
Where to use peel and stick crown moulding:
- Decorative accents on a wall (like picture frame moulding)
- For a semi permanent or temporary project (like a nursery because we all know nursery’s just last a few years)
- It’s a great option for people who rent and can’t do anything permanent to the walls
- DIY picture frames (hmmmm, future project?)
Where NOT to use peel and stick moulding:
- As a baseboard or crown moulding (it’s foam, enough said)
- For a permanent wall project (it could be permanent I guess, but if you know that it will never be replaced then I would invest in the real stuff)
Once again, those are just my opinions!
Disclosure; this post contains affiliate links. As an Amazon Associate I earn from qualifying purchases. This disclosure statement refers to the rest of the Amazon links in this post.
Where to buy peel and stick wall moulding
I purchased my product from Wish, but I found a similar item on Wayfair! The one on Wayfair isn’t peel and stick but it’s a high density foam similar to what I purchased. They also had a few more decorative moulding options.
Let’s take a look at this moulding product.

Once the product came in the mail it was wrapped up in a coil. It took about 2-3 weeks to arrive.
The way it was packaged created a problem because the moulding wrapped tightly in the center had been stretched. It looked like this;

I obviously could not use the pieces that looked like this, so I ended up discarding about 1/6 of the product. This product was very affordable, so I wasn’t too upset about it. After all, I knew that this project would be a huge experiment so I didn’t expect too much from this simple picture frame moulding wall.
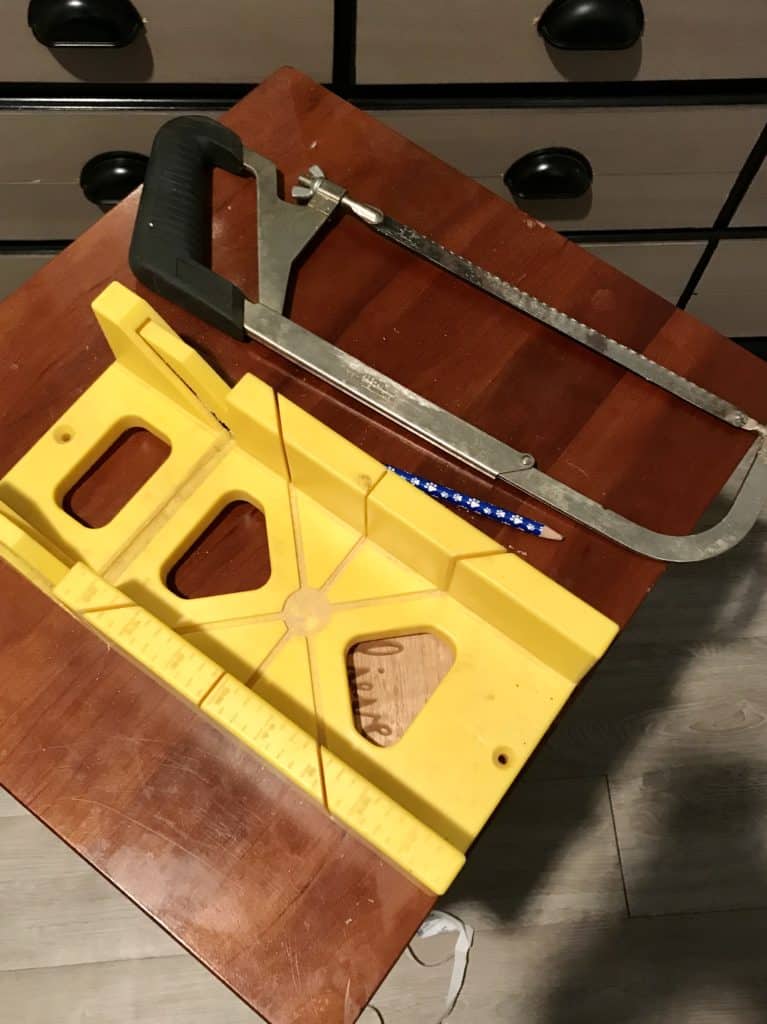
Materials needed to apply peel and stick picture moulding:
- Moulding
- Ruler
- Scissors (good sharp scissors)
- Pen
- Miter box (not necessary but very helpful to draw lines before cutting)
- Caulk
- Paint
How to apply peel and stick picture moulding (foam moulding);
- Mark where you want the moulding to be applied on the wall
- Measure the peel and stick moulding
- Lay your moulding in the miter box and make a mark (45 degree angle) where you want the first cut to be made
- Cut the moulding with scissors on the line
- Repeat steps 3 and 4 for the other end of the moulding
- Create a box with your moulding
- Make sure the edges meet as closely as possible
- Once you’ve applied the moulding, caulk around all sides
- Sand the caulk once it’s dry if necessary. Note; you can sand the caulk but not the foam
- Prime and paint!


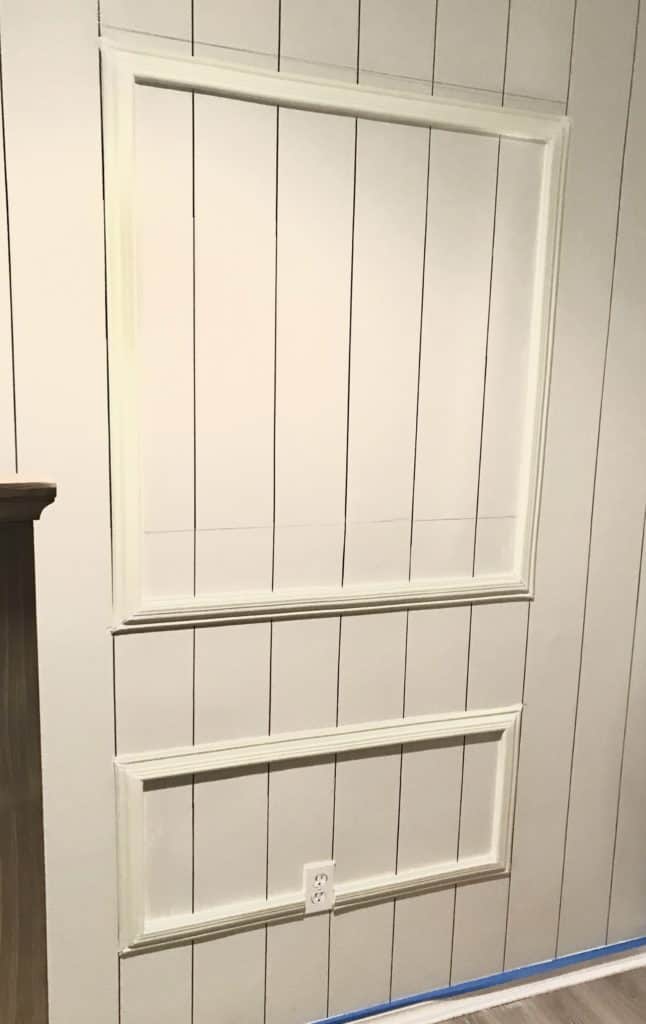
Note; you can see above where the bottom pieces look a little crooked.I had to readjust it a few times and make a few more cuts to get it to fit correctly.
The hardest part about applying the foam moulding is creating a perfectly straight line.

Look! I can’t believe it’s actually working! Or should I say I can’t believe this foam moulding might look decent. LOL.

Ta Dah! A job nearly done. Now it’s time to Caulk.
Caulking the foam moulding was tricky because it’s not like real moulding where you can sand down the wood. I had to be extra careful to just get the caulk (or wood filler) in the open space between the ends. Otherwise, once the caulk dries on the foam it’s really hard to remove.
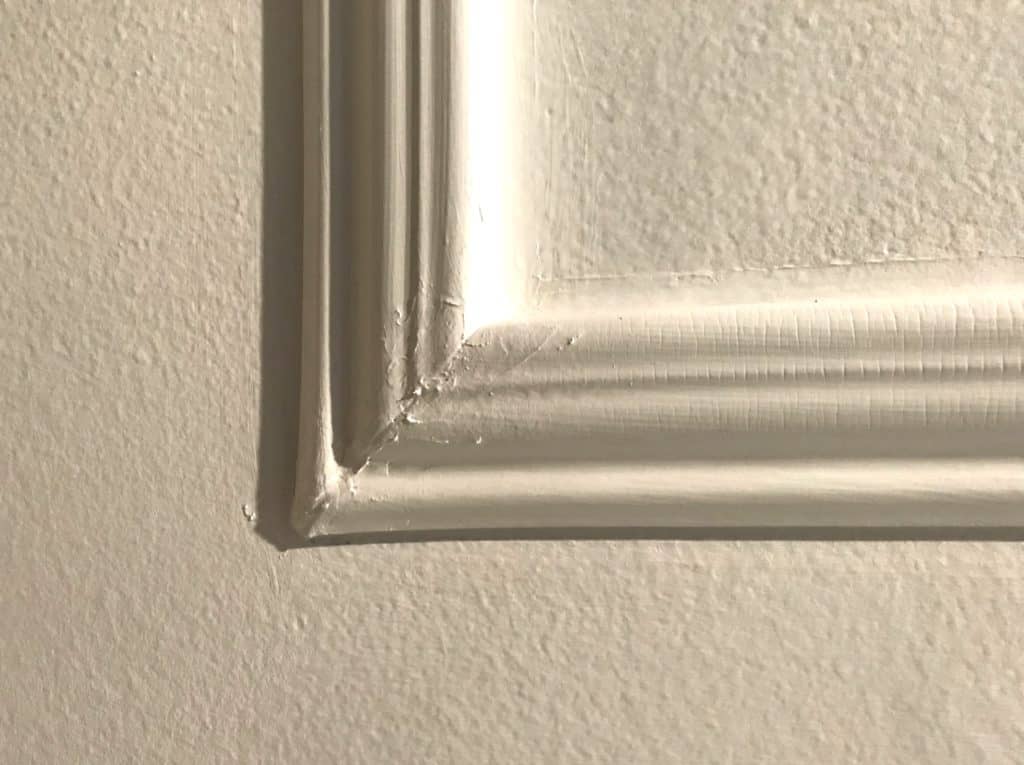
This is what one of the ends looked like with caulk. This was BEFORE I lightly sanded to remove the extra caulk pieces.
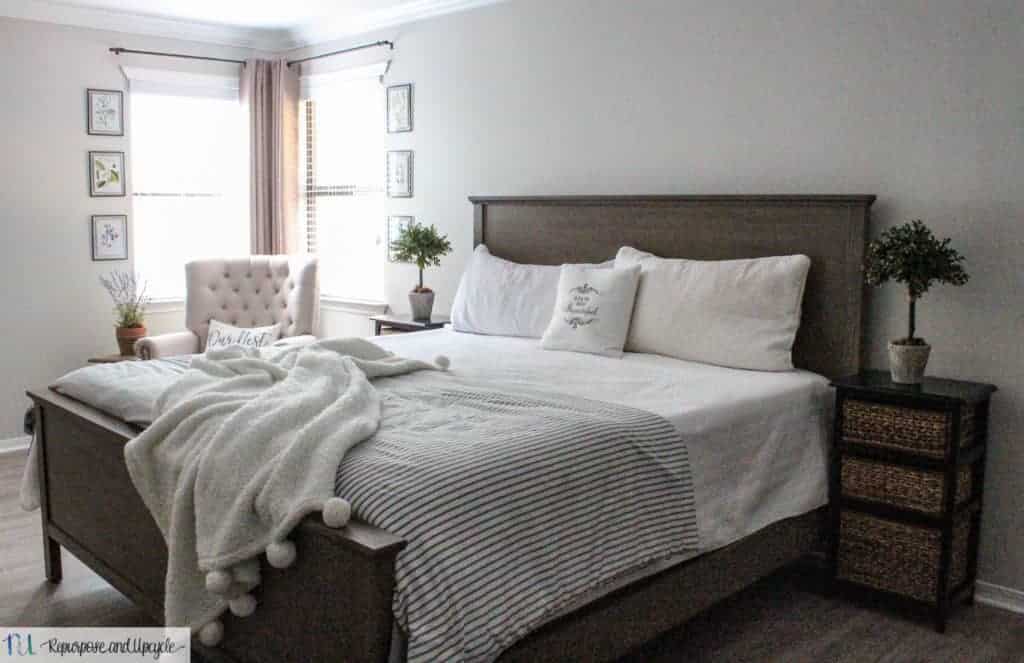
Oh, by the way; I went back and forth about paint colors. I ultimately decided on a plain white. I’ve got some dark colors in the room with the black and wood tone dressers, so I didn’t want to compete with those.
Below is BEFORE paint.
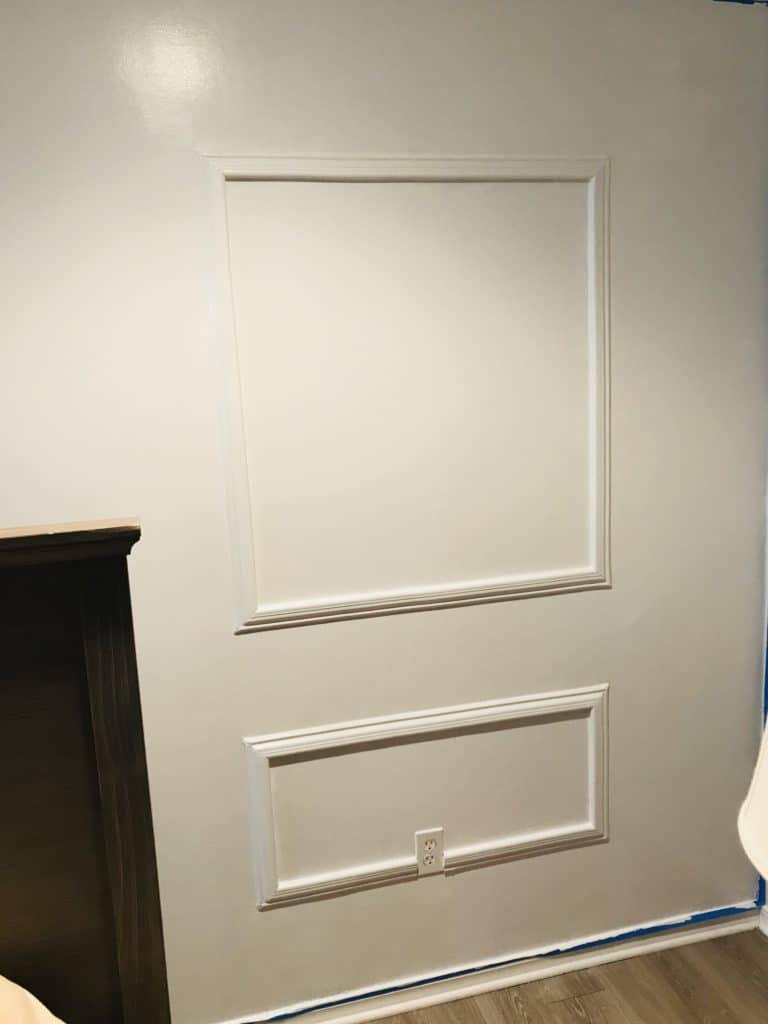
The next picture is after two coats of paint plus primer. I only needed two coats. Check out all my best painting tips and tricks here.
Ready to see it!
DIY foam picture frame moulding


Not too shabby for a job with only scissors! I have to say it turned out much better than I ever expected.
By the way, this is a great renter friendly wall treatment option.
On to the next project….
Update 09/2022;
You know me, I can’t leave well enough alone. A few years after living with the peel and stick moulding I’ve decided to remove it. Let me show you the damage it created.
Removing peel and stick moulding
Let me first say that I think the wall would’ve had minimal damage if I had NOT caulked the moulding. Note to all the renters or folks who only want a temporary fix- don’t caulk it.
That being said, I’m glad I did caulk it because it hid the imperfections better and made it look more “real.”
Below is what the wall looked like once I removed the panels.


The wall will either need to be patched with drywall or something applied over it. In this case, I’ve installed Shiplap panels over it. Here’s what it looks like now.

Also, below is what this room looked like before the “sharpie shiplap.”
Let’s do a little side by side for comparison, shall we?

By the way, if you want to see more molding ideas, check out my list of 10 great wall molding ideas here!

What is your favorite? I think my DIY moulding is mine!
Lindsey**