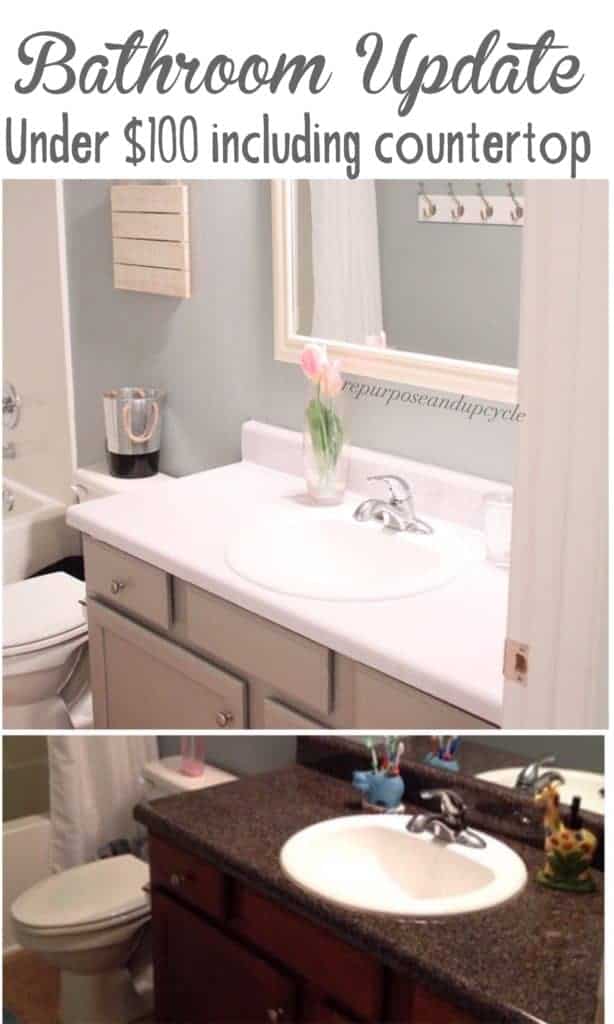
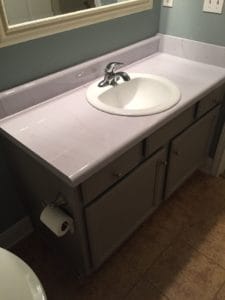
I wanted to see if I could give my bathroom a fresh new look without spending a lot of money. Turns out, it’s totally possible to change most surfaces, even the countertop, for under $100. With a little effort, I turned a dull, old formica countertop into a stylish faux marble version for less than $50. I also painted the old laminate cabinets to make them look more modern and polished. This is the easy way to update a bathroom vanity without a major renovation.
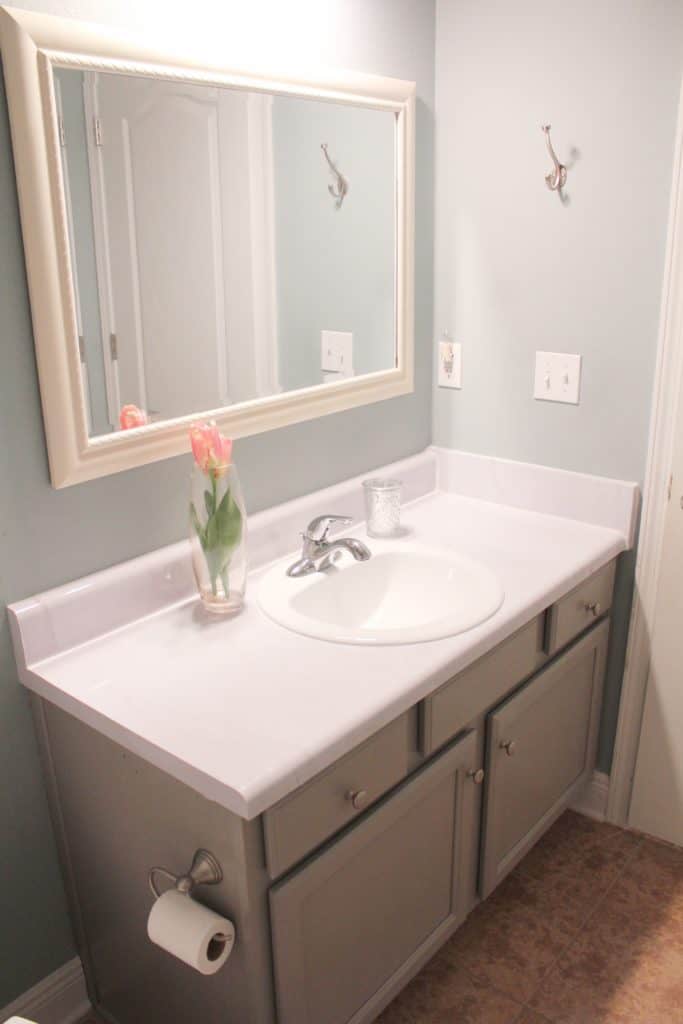
This DIY bathroom vanity makeover started with swapping out the plain mirror for a framed one. That tiny change made a big difference in how the space felt. These small, budget-friendly projects came together and gave my bathroom a whole new vibe.
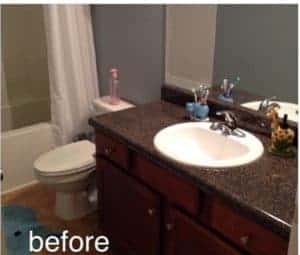
Let me show you the “before.”
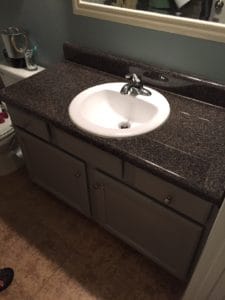
Painting the Cabinet
First, I made sure the cabinet was clean and dry—any dirt or grease can mess with how the paint sticks.
Using a mild cleaner or degreaser and a soft cloth works best. Next, I picked a good primer made for laminate or slick surfaces, so the paint wouldn’t peel off later.
This really helps the paint last longer. You can even paint laminate cabinets by using the right primer and following a step-by-step method like this one.
After priming, I applied the paint color in thin, even coats. I usually go for a paint made for bathrooms or kitchens since it resists moisture.
Using a small foam roller helps keep the finish smooth and avoids brush streaks on the cabinet doors. It’s honestly a little satisfying watching the old cabinet transform. This painting technique also works when painting any other piece of furniture.
Tips for a clean paint job:
- Let each coat dry fully before the next.
- Lightly sand between coats if the surface feels rough.
- Use painter’s tape to protect hardware or areas you don’t want to paint.
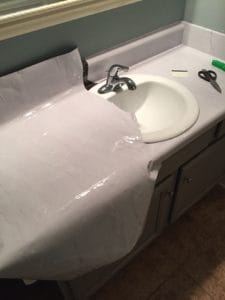
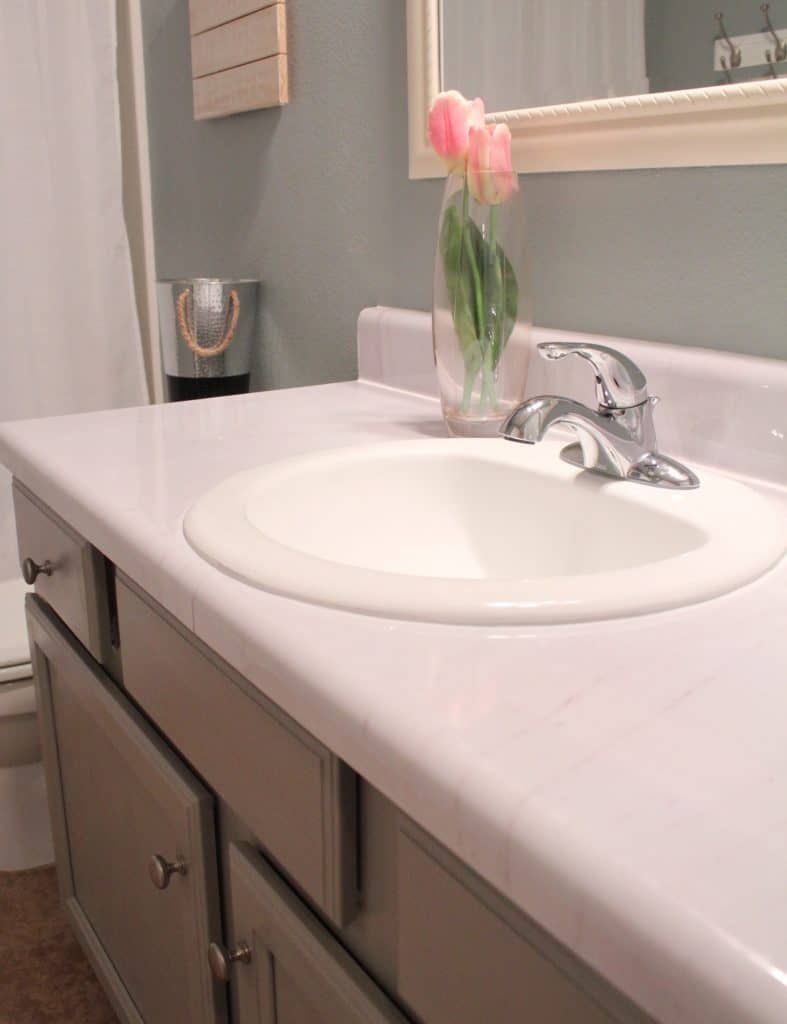
Top Vinyl Options for Faux Marble Countertops
I found a great vinyl film that made updating my countertops super easy. The peel and stick faux marble is fade-resistant and simple to clean with regular household cleaners.
I’ve got a great tutorial with video on how I installed another countertop with faux marble vinyl paper.

If I ever want to change it, I can just peel it off without messing up the surface beneath.
Tips for Putting Up the faux marble countertop
If it’s your first time, having someone help you makes the job easier. After doing one vanity, the next one feels much simpler to handle alone.
One thing I learned: don’t try putting the countertop and backsplash down as one piece. It didn’t look right when I tried that.
Work slowly and don’t worry if you need to lift the vinyl back up to fix bubbles. I took it off and redid it a few times just to get rid of air pockets.
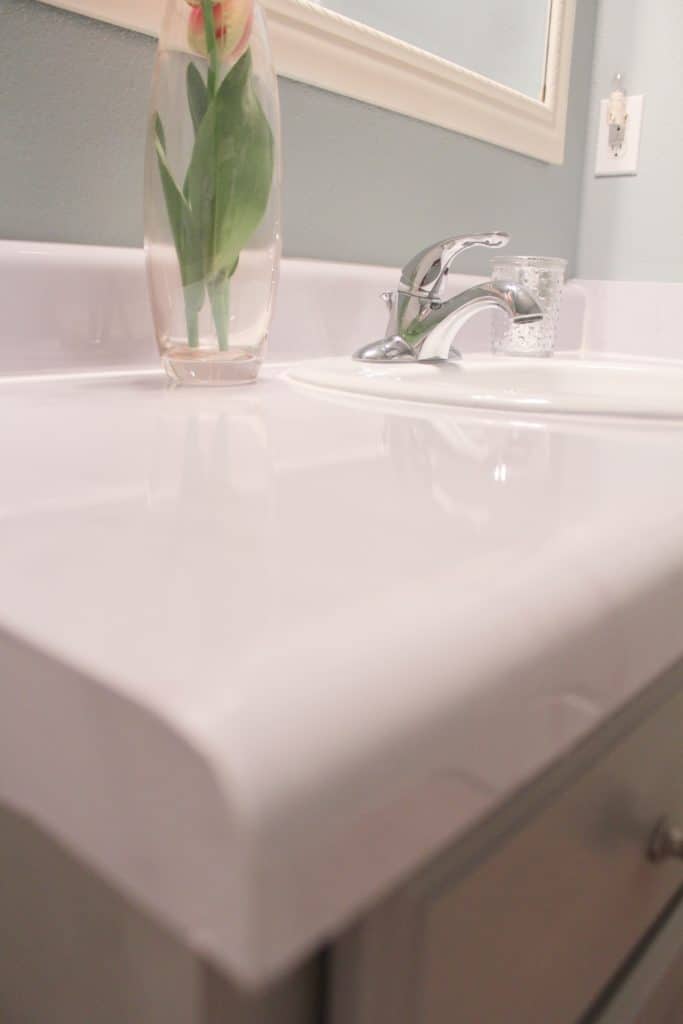
The vinyl is really easy to handle and forgiving. Also—don’t skip the caulk!
I had seams on every corner, and using caulk helped hide them and gave the whole surface a more natural look. Caulking really improved how the finished countertop turned out.
Key points:
- Have two people for your first install
- Take your time and redo if needed
- Use caulk to hide seams and finish nicely
Installing the DIY faux marble countertop
Ideas to update a bathroom on the cheap
- Remove builder grade mirror and replace with a framed decorative mirror – I had this mirror on hand so it didn’t cost anything
- update lighting (even if it’s a free update, LOL)
- add decorative towel racks – $20
- paint cabinets – supplies $10
- install Instant Granite or faux peel and stick marble – $50
- Add fun artwork or sign – $10
Now I feel like I have a new modern farmhouse style bathroom, for UNDER $100!
Some Final Pictures:
Updating a space doesn’t have to break the bank. With a little time and effort, and only $100, you turn a bathroom from drab to fab!
Lindsey*


