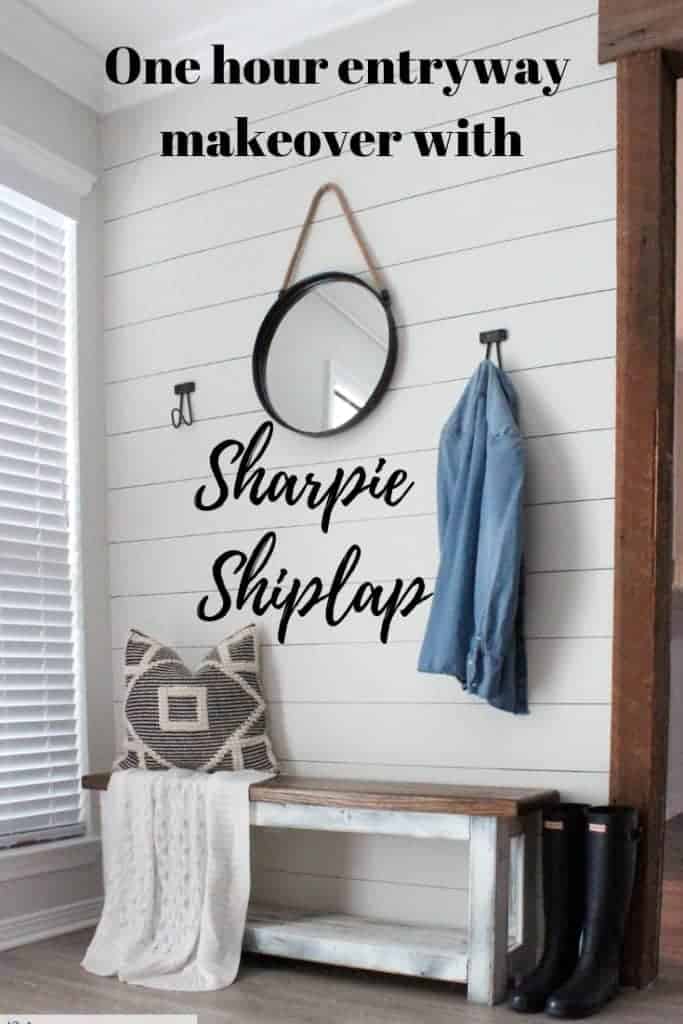
I’m all about creating new spaces. I’m more about creating new spaces that don’t take a lot of time or money! This project encompasses both of those. I still can’t believe how stinkin’ real the Sharpie shiplap looks! Speaking of Shiplap, I’m no stranger to creating my own DIY shiplap. In our old house I made over a wall with Shiplap with NO power tools! This time around, though, I made this DIY shiplap even easier! Enough talk, let’s get to the process of how I created this modern farmhouse entryway in under one hour with Sharpie shiplap.

One of the best things about this easy DIY is that it’s also renter friendly. Do you rent your home and yet still want to add a little faux shiplap? Friends, THIS is the way to go. You can also see my post where I share more ideas on DIY renter friendly wall treatments.
How do you create a faux planked wall with Sharpie Shiplap?
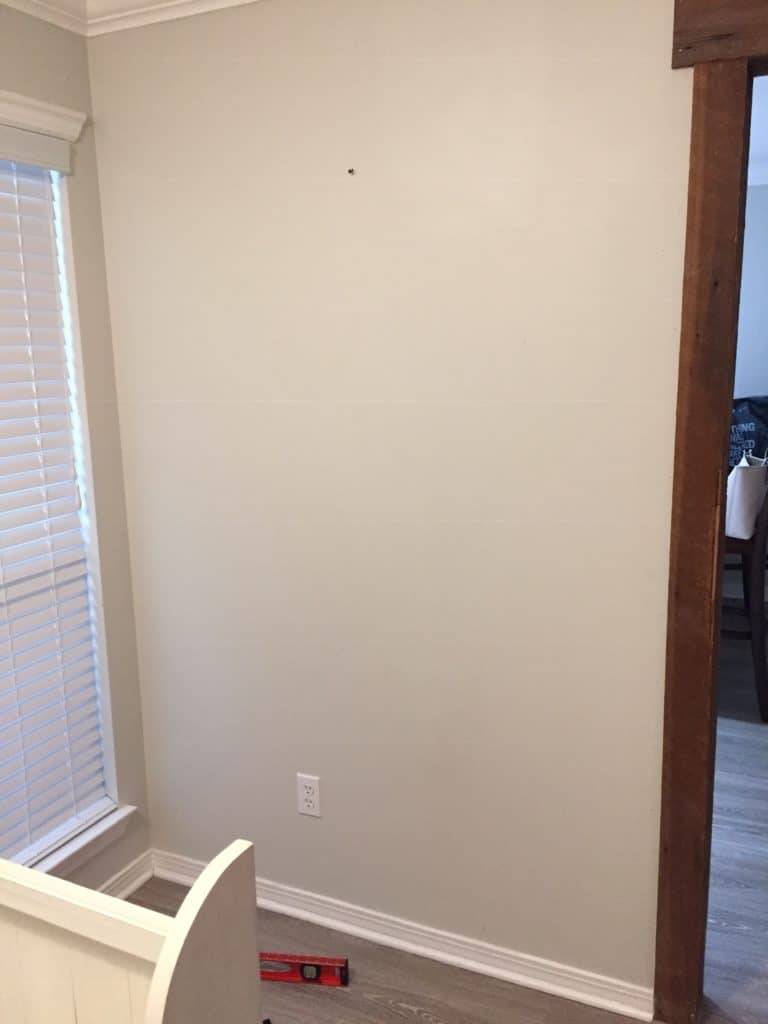
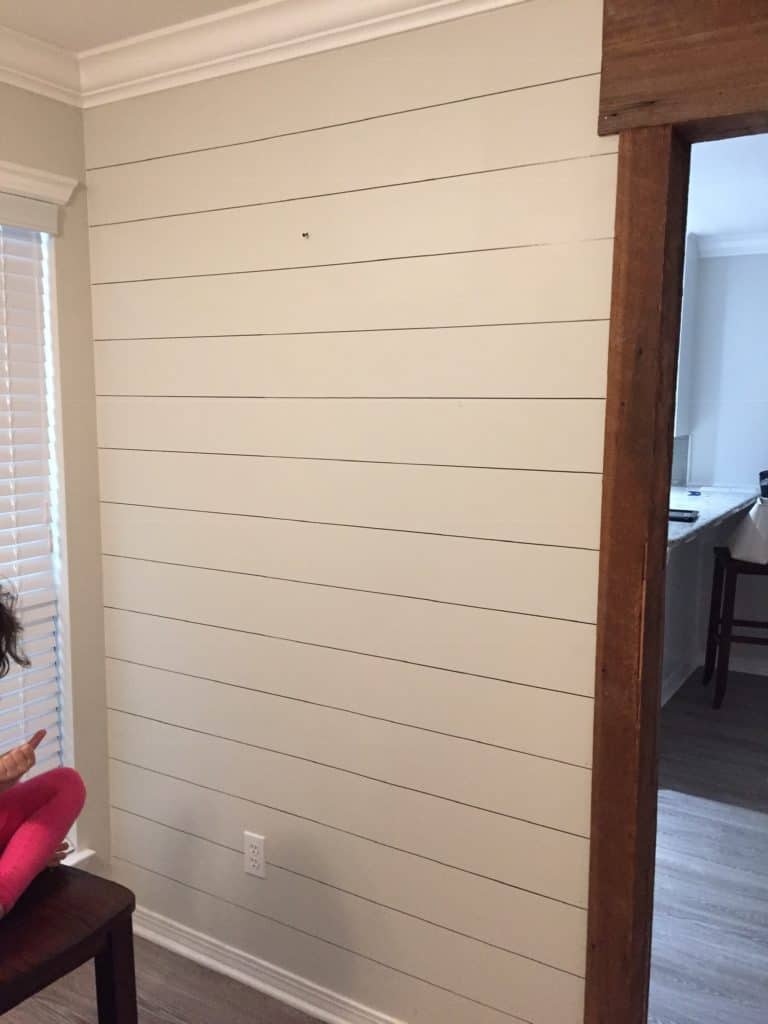
First let me show you my modern farmhouse entryway BEFORE this one hour makeover with Sharpie Shiplap.
It doesn’t look bad, I just felt like it could still look better. Your entryway is the first thing that people see when they come into your home, so you want it to look great!
Disclosure; this post contains affiliate links. As an Amazon Associate I earn from qualifying purchases. This disclosure statement refers to the rest of the Amazon links in this post. See more on my disclosure page.
Materials needed to create Sharpie Shiplap:
Note: You don’t have to use an oil based Sharpie. As a matter of fact, a regular Sharpie will work just fine. An oil based Sharpie is more smudge resistant and more permanent as well. If you know this is only temporary, I would suggest using a regular Sharpie (just be careful about smudges).
How to create a Sharpie Shiplap wall
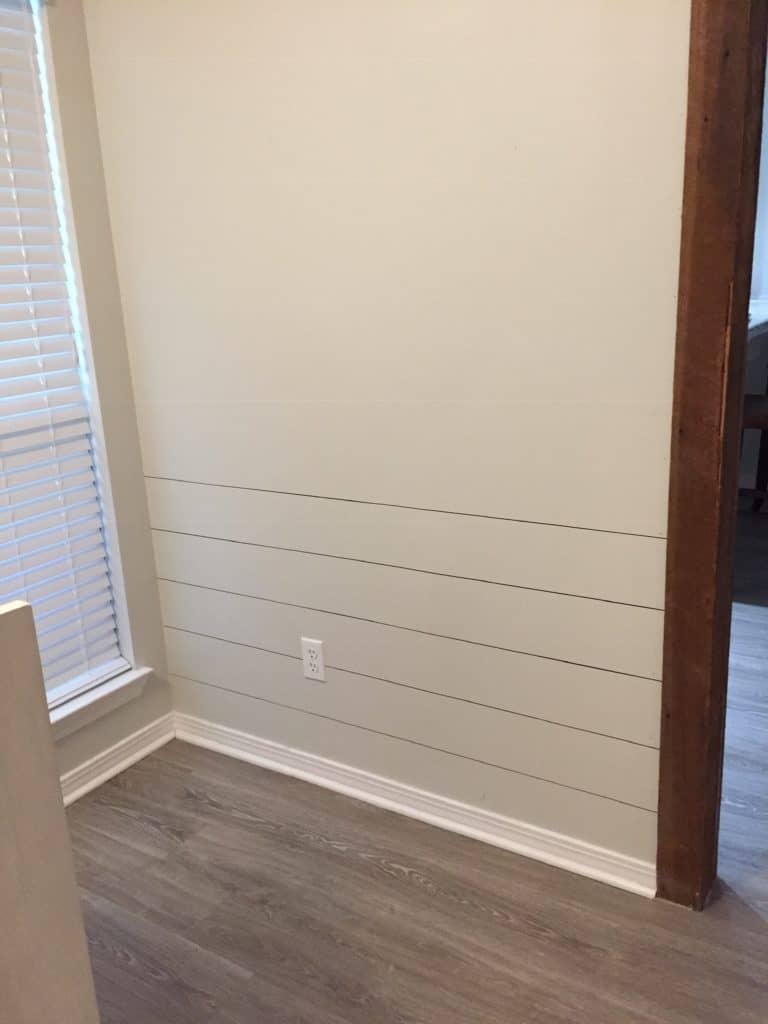
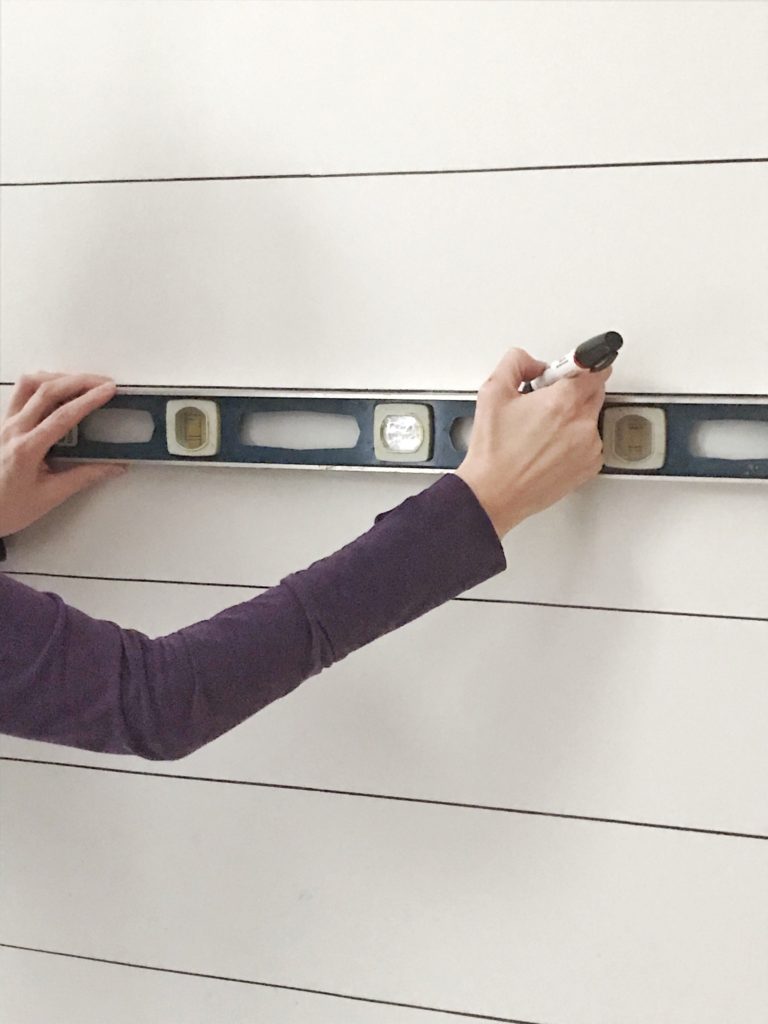
- First, decide how wide you want the faux shiplap planks to be. I decided to make my lines 6″ apart. I’m not sure if there is a magic “shiplap width” but this is how wide our real shiplap is in our living room.
- Use a pencil to mark tick marks on the side of the wall every 6 inches.
- Line your ruler up to the first tick mark. After you’ve made sure the ruler is level, start drawing a line with the sharpie. Be careful to line up the point of the sharpie perfectly when you’re moving the ruler from one point to the next.
- I started at the bottom of the wall, but hindsight I should have started at the top. Lucky for me everything lined up, but if I do this again I will start at the top (like I say, learn from MY mistakes).
- Continue making lines until you are done with the wall and you have perfectly drawn shiplap!
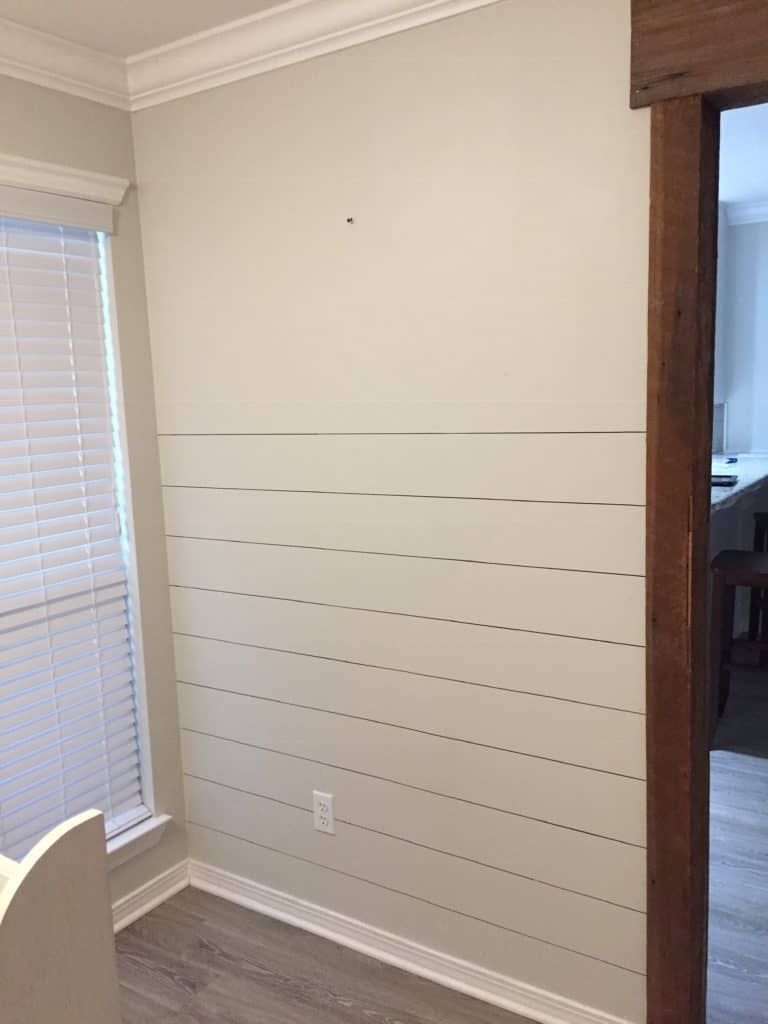

I have to admit, after the first few lines were complete I thought I had made a huge mistake. But after the Sharpie Shiplap wall was done, I was surprised at how much dimension it added. After adding accessories, it looked almost like the real thing.
Video tutorial of Sharpie Shiplap
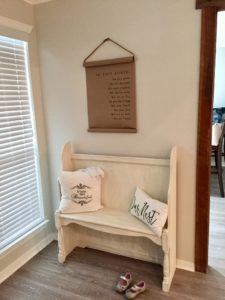
I’m finally pleased with our entryway. Best part, it really only took me about an hour to re create this whole space!
Is there a space in your home that you can add a little sharpie shiplap?
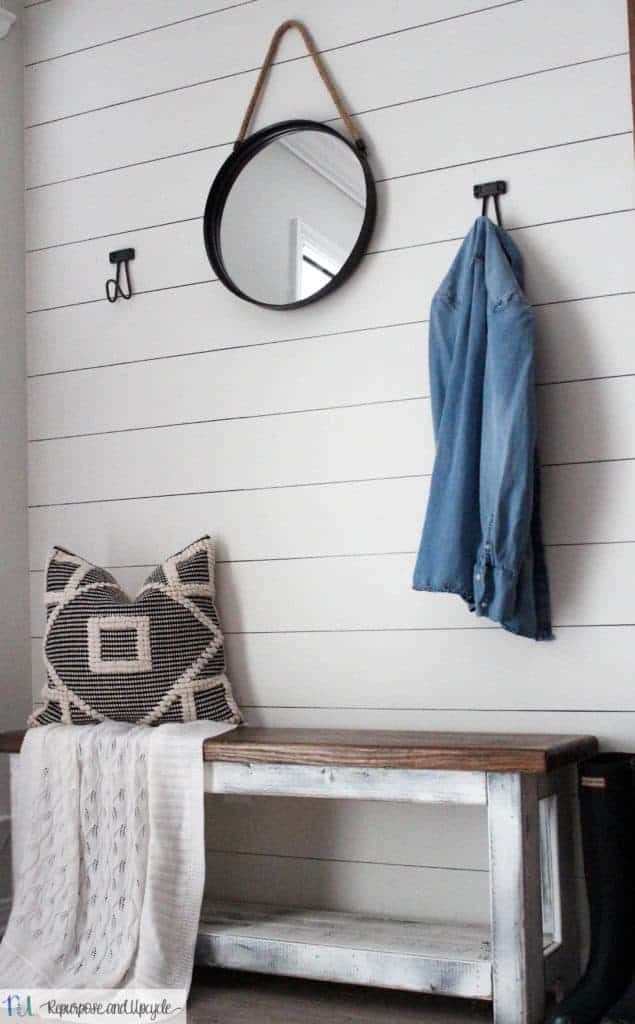
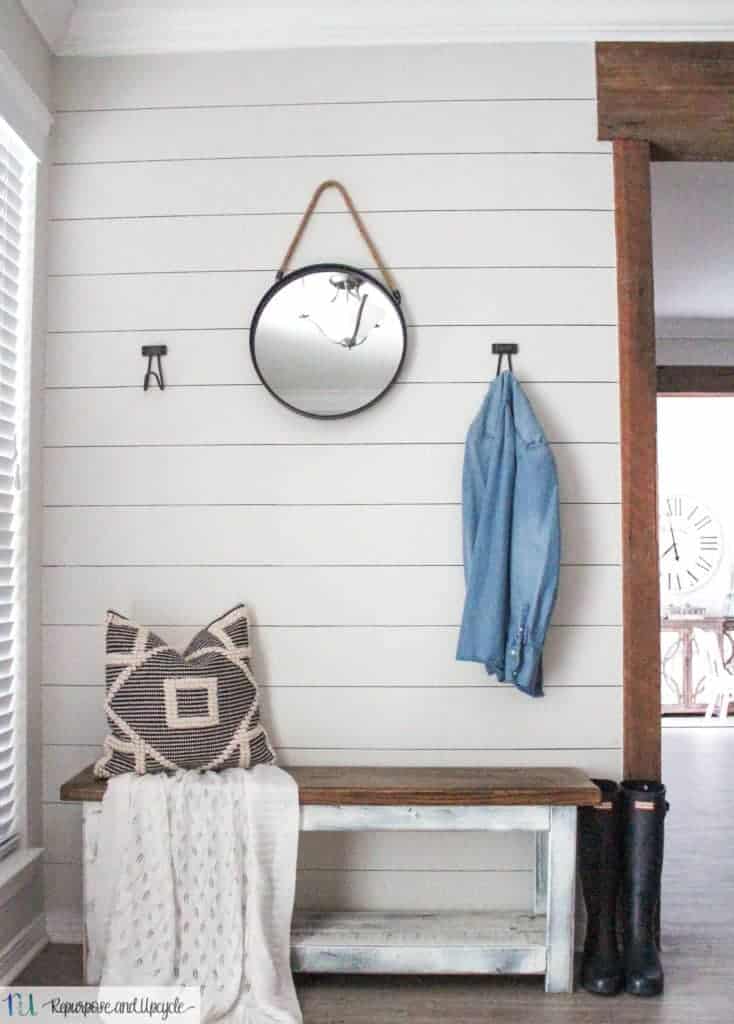
Even though the shiplap gives it a farmhouse feel, I’ve still added some modern touches with the metal mirror and more simplistic hooks.
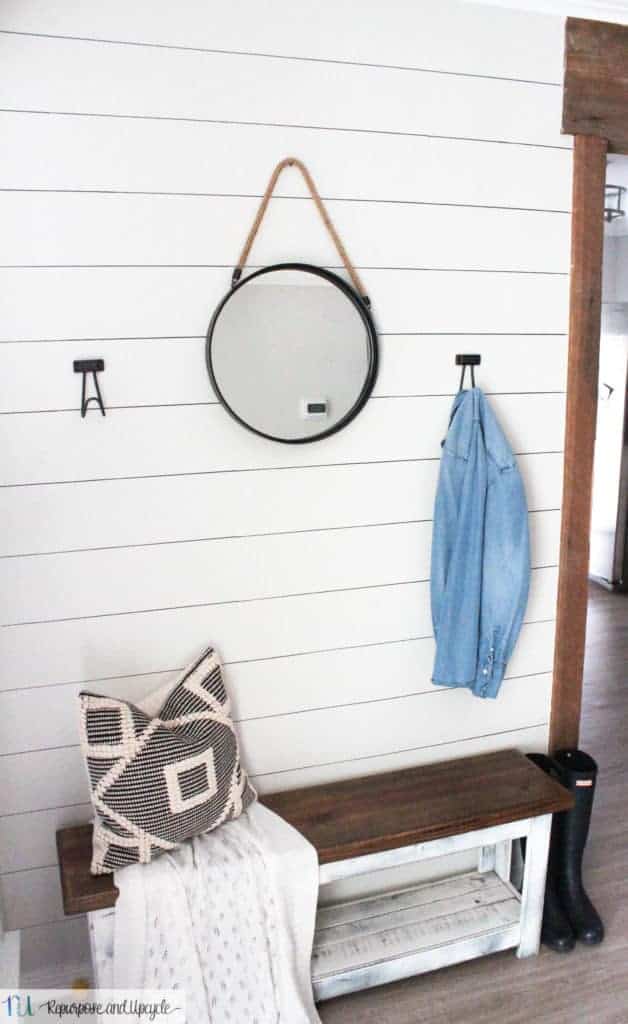
I’m so pleased with how this looks, I’m already brewing about where else I can add more sharpie shiplap!
Would you take a marker to your walls for a little faux planked boards?
Thanks for stopping by friends! I hope you’ve enjoyed this quick and easy space makeover in under one hour! Now to find another space to create!
Lindsey**


