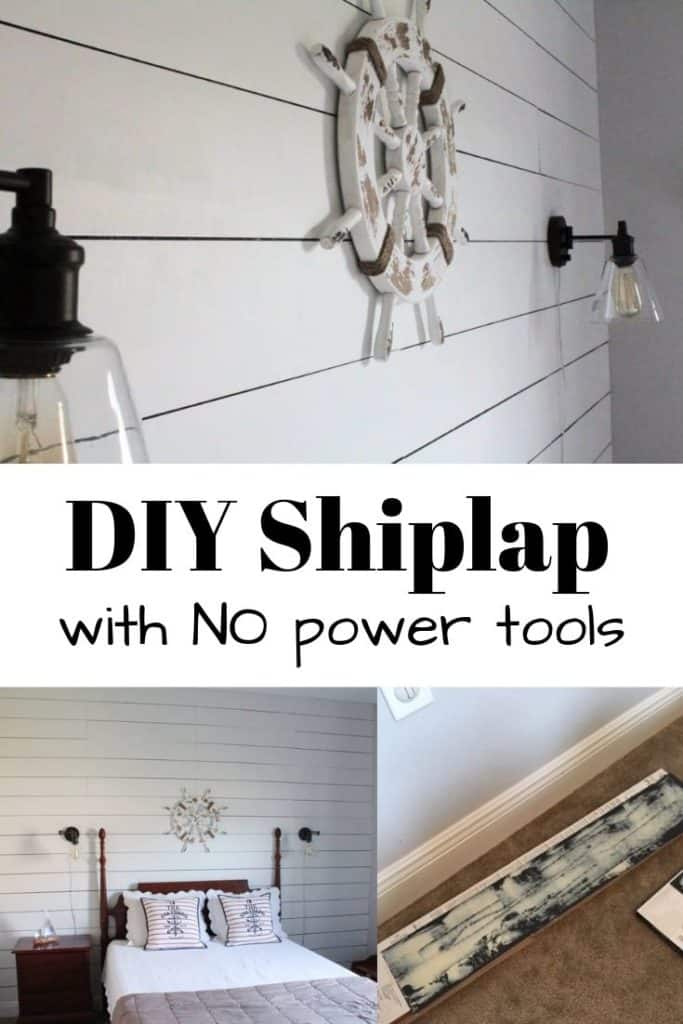
A tutorial on how to create a faux shiplap wall or planked wall without using any power tools. This process involves using peel and stick vinyl flooring.
SHIPLAP; The new buzzword in home decor. Everyone wants to have it but can everyone make it? YES! Can you really create shiplap with NO power tools? Well guess what, you’re in luck, because I created a SHIPLAP (or faux shiplap wall) with only using a few supplies and NO POWER TOOLS!

I’m guessing that since you’re reading this you might be a new DIY’er? Or perhaps you might be someone who wants to join the “shiplap train” but doesn’t want to hassle with cutting wood (this was my motivation)?
Maybe you’re just curious and want to know how to create an easy DIY planked wall with no power tools.
I’ll try to keep this short and simple, just like this project!
Disclosure; this post contains affiliate links. As an Amazon Associate I earn from qualifying purchases. This disclosure statement refers to the rest of the Amazon links in this post. See more on my disclosure page.
Materials for DIY faux wood wall
- vinyl wood plank flooring
- floor glue
- scissors or a box cutter
- paint
- straight edge
- spatula used to spread the glue
- penny or spacer
- Paint brush and fine finish roller
First you need to decide what kind of floor product you will use.
I searched for the cheapest vinyl plank flooring I could get for my faux shiplap wall.
Here is what I ordered.
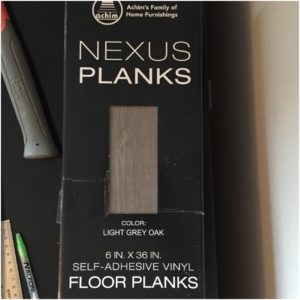
I purchased these online and you can find a very similar product HERE. Because I knew I would be painting the vinyl (or my faux wood wall), it didn’t matter what color I purchased.
Any floor glue should work, this is just the product I chose. Note: my planked wall is about 110 square feet. I was hoping a quart would be enough, but it turned out that I needed about a half a gallon.
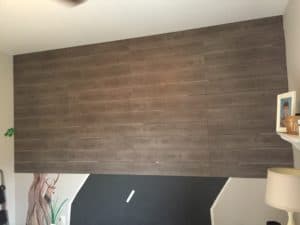
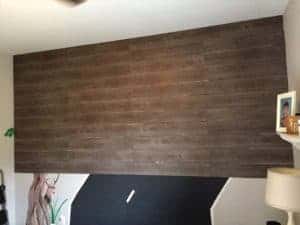
DIY Faux Shiplap wall with vinyl floor planks
- peel the back off of the vinyl flooring.
- spread a decent layer of floor glue on the back of the vinyl (pictured below)
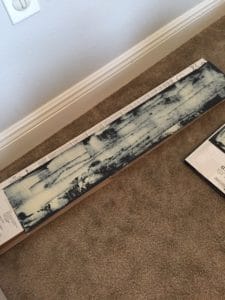
- WAIT AT LEAST 5 minutes. This is an important step and I learned the hard way that you need to let the glue “sit” and get a little sticky so it will stick on the wall. I found five minutes was key. I applied the glue to about 5 planks at a time.
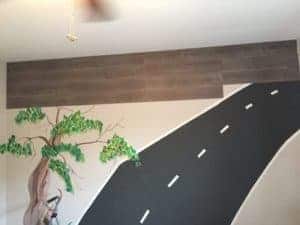
- Start by applying the planks to one of the top corners of the wall. I started at the top left. When I got to the right side, I had to cut the vinyl plank in half. I measured how much I needed to cut and used a straight edge and scissors. Easy peasy!
- After the first row of planks were up, I used a penny to create a tiny space to make it look like real “shiplap.”
Progress!
6. The next step was a tedious one! I bought cheap black paint and used a thin paintbrush to paint in between the vinyl floor lines. Since I painted the actual vinyl, I didn’t worry about being messy or keeping the black paint in the lines.
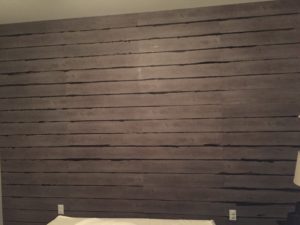
7. The next step is my favorite one; PAINTING the SHIPLAP! A few words of wisdom from experience; Use a FINE FINISH ROLLER.
The surface is not flat due to the spaces in between the planks, so you don’t want to paint the black lines. I found that a fine finish roller almost eliminated the issue of accidentally painting the black lines.
I did have to go back and touch up some of the lines after I painted the planked wall.
Side Note: Since I’ve published this post I’ve had a lot of comments regarding the black paint lines in between the boards. If your walls are a solid medium or darker shade, then it would be easier for you to paint the boards white first before you glue them to the wall (and you probably wont need to paint in between the planks).
Since I had a multi colored mural behind the wall, I had to paint the wall a solid color first, or paint black lines in between. I thought it would be easier to paint the black lines in between the boards.
A word of caution: Using floor glue to attach the vinyl to the wall is fairly permanent. If you ever plan to take these boards down, you will most likely need to re drywall.
My advice, if you’re only wanting to create a temporary WOOD PLANK WALL, you might not want to use this method. Just keeping it real and honest y’all.
That being said, I figured I would also share how to create Sharpie Shiplap because this also doesn’t require power tools.
That’s it for my shiplap with NO power tools!
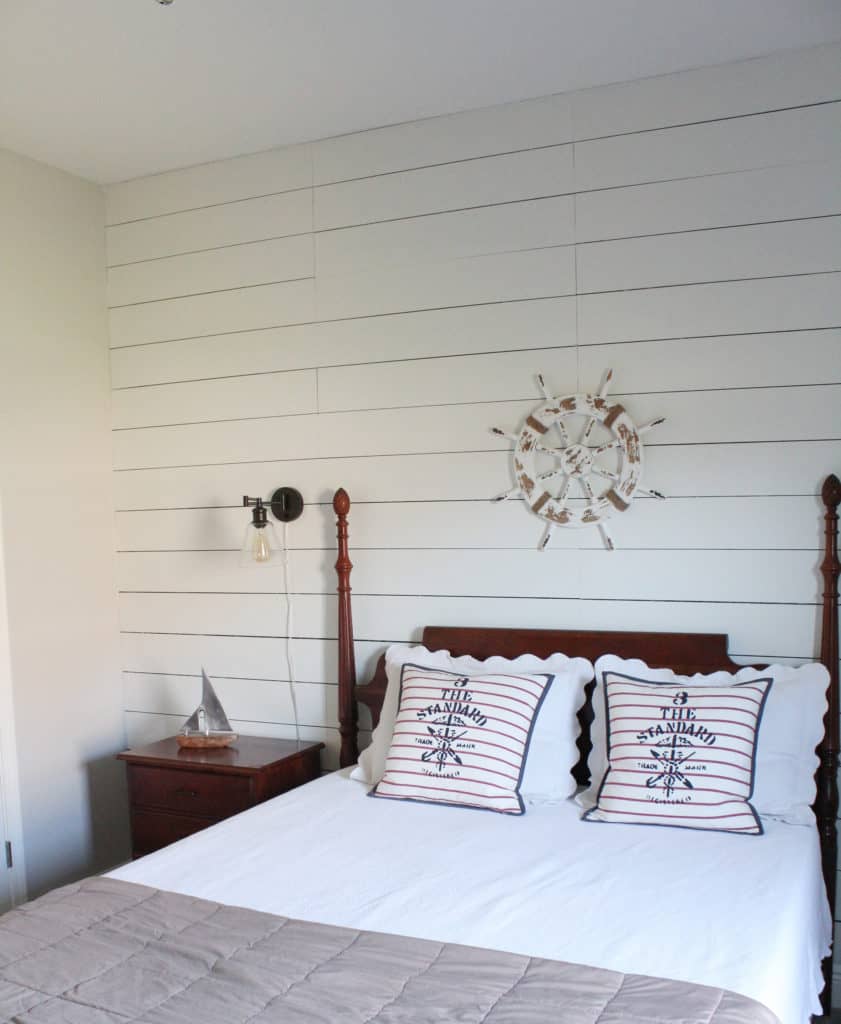
As you can see I completed this for my son’s room and finished it with a “nautical” theme. I love it.
The entire faux shiplap wall with supplies cost around $110.


I love the look of a feature will with shiplap, board and batten or even picture moulding.
Just because you don’t have a handyman in your back pocket or the skills of a seasoned DIYer doesn’t mean you can’t have your own shiplap wall. So gather up your materials and start channeling your own inner ‘Chip and Joanna Gaines.’
Lindsey**
If you enjoyed this post I would love for you to Pin it HERE. Or you can Pin the image below.