See how we updated the space where the fridge used to sit with a coffee bar. This is the second time we have transformed this space in our kitchen nook.
Right after we moved into our rustic beach cottage I already knew the first two projects we would complete; filling the space in the kitchen where the fridge was supposed to go with a few shelves and a cabinet and creating a DIY rustic farmhouse beverage bar.
You can see more pictures in the posts, but here are a few just to give you a visual.
Space where Fridge used to sit


See that little nook above where I made a few DIY shelves and added a storage cabinet? That’s where the fridge was supposed to go. But it stuck out like a sore thumb. So I moved it…
You can see below where we moved the fridge and created that DIY beverage bar on the other side of the kitchen. This set up worked so much better for our family and our needs. It also made the kitchen footprint much larger.
DIY Beverage Bar in Kitchen

A few years later my modern farmhouse style changed to a more eclectic modern style and I changed this space up too. I added a floating shelf for drinks and brought in some warmer tones with gold lights.

This is still my favorite and most functional DIY in our home. You also might like to see a handful of coffee bar ideas from other bloggers too.
Well here we are a few years later and I’ve been itching to change the old kitchen cubby area. Afterall, it was only supposed to be a temporary fix until we gutted the kitchen. Four years later…
I wanted to remove the old cabinet and get rid of the faux brick wallpaper. My vibe has changed to a more modern vibe so the brick wallpaper had to go.
Disclosure; this post contains affiliate links. As an Amazon Associate I earn from qualifying purchases. This disclosure statement refers to the rest of the Amazon links in this post.
I decided to replace the space with a stock cabinet that would fit perfectly and add peel and stick tiles that were similar to the existing tiles. I also decided to add a floating shelf that matched the other floating shelf I had above the beverage bar.
The last touch to this space would be a beautiful piece of granite that would compliment the current granite.
Let me show you a little progress.
Removing the old cabinet and floating shelves in the kitchen to create a functional DIY coffee bar
After we removed the old cabinets and shelves, I decided to cover up the brick with these easy to apply peel and stick tiles.

I didn’t do anything other than clean the surface of the wallpaper to make sure there wasn’t any dust or lint and then start to apply the new tiles.

You can see I left the water hookup exposed temporarily. I thought about keeping that exposed, but then I worried it would be an eye sore so I chose to cover it.
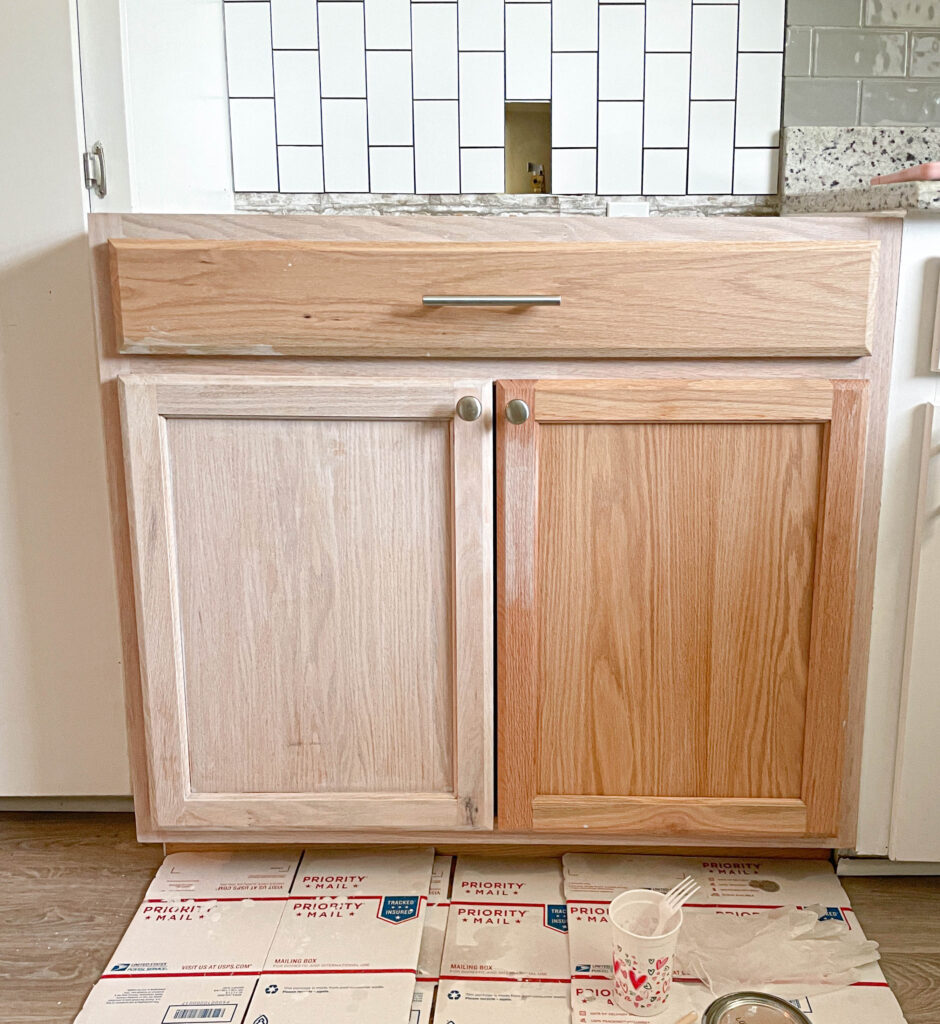
Next I moved the stock cabinet in.

It fit perfectly! Well, we had one little issue.

Apparently stock cabinets have gotten taller since the 1980’s!
I removed the cabinet, flipped it over, and used a circular saw to cut off about 1 inch to make this cabinet level with the others.


Perfect! Sort of.
Next I applied a pre stain product to make sure the finish would look even and not blotchy over time.
Unfortunately it left he cabinet looking rather orange. You know I hate orange toned wood.
Originally I had no intention of adding any color to this cabinet. After the pre stain changed the color, and not to my liking, I added a little white wash to counterbalance the new orange tones.
If you want to know how I white washed this piece, I’ve got a full tutorial on white washing with paint and water here.
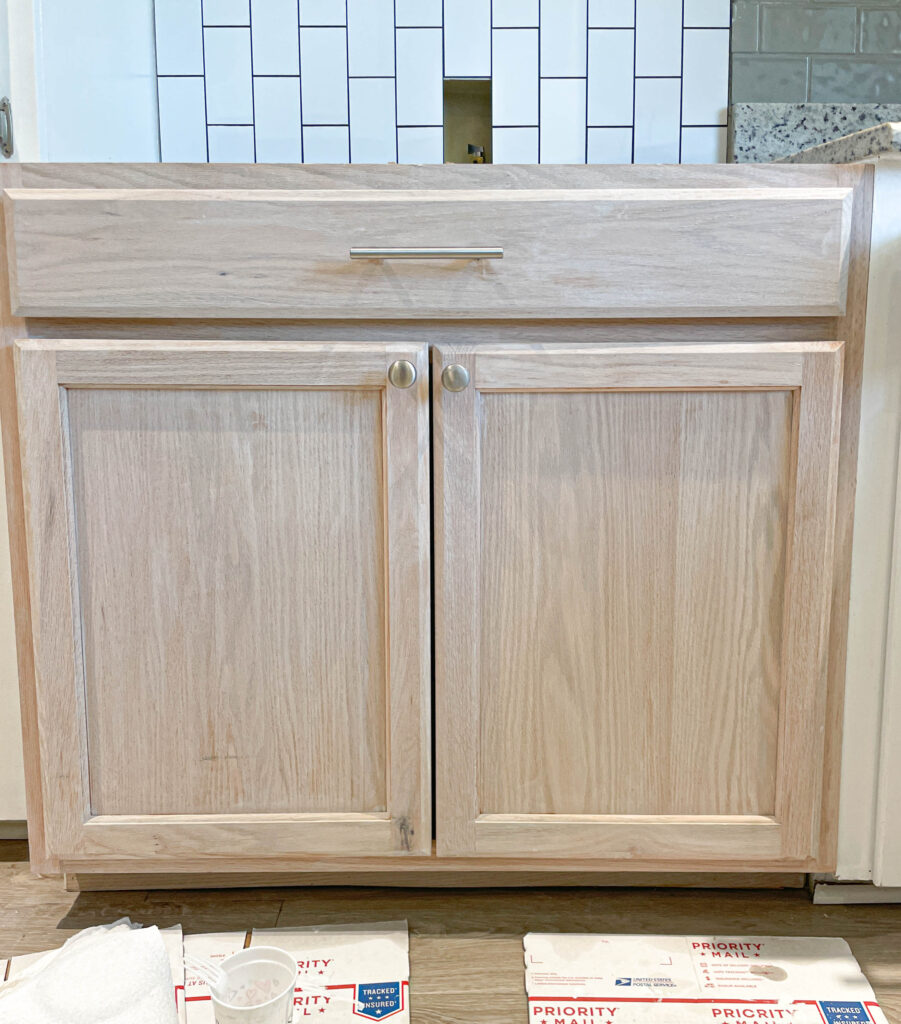
Ahhh much better.
After living with it for a while I decided to once again stain it a little darker.

I used the color Provincial by Minwax to better match the shelves.

This space is finally coming together!
By the way, what do you think of the dark granite slab? I love it!
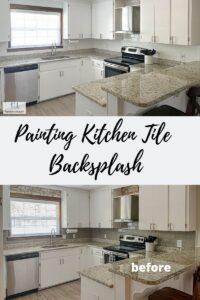
Painting the kitchen backsplash tiles
Once the cabinet was set, the new peel and stick tiles were placed, it was time to make this space look more cohesive with the same paint!
I researched the best tile paint I could find and ended up painting the backsplash tiles with a Homax Tough as Tile product. You’ve got to see the before and after!
Eeek this space is coming together finally!
After the piece of granite was installed and I finished some moulding around the vertical peel and stick subway tiles, it was time to call it quits! Ready to see it?
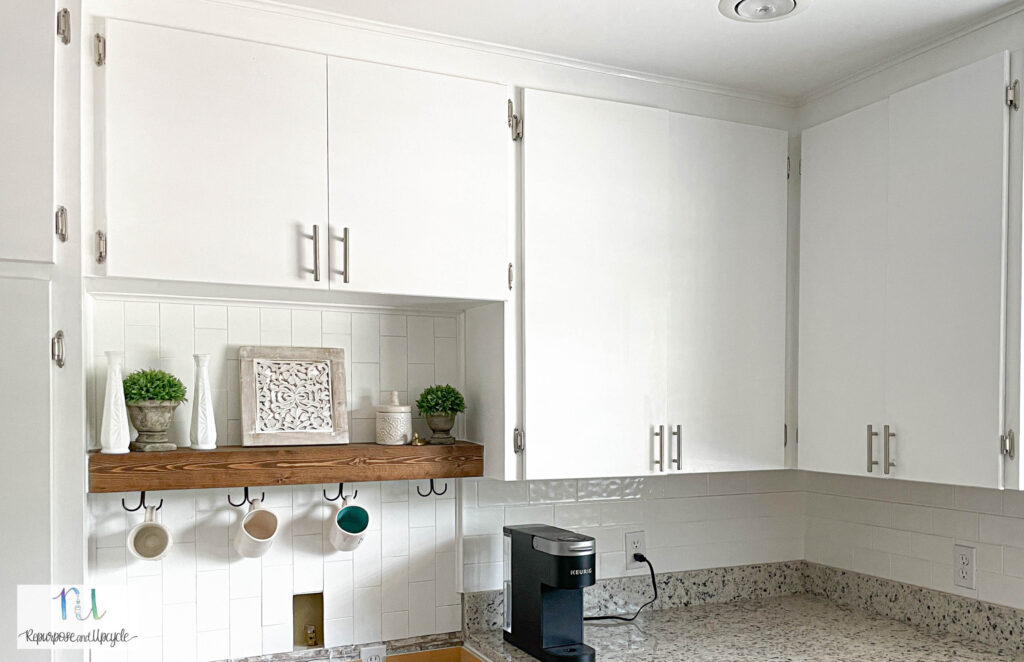
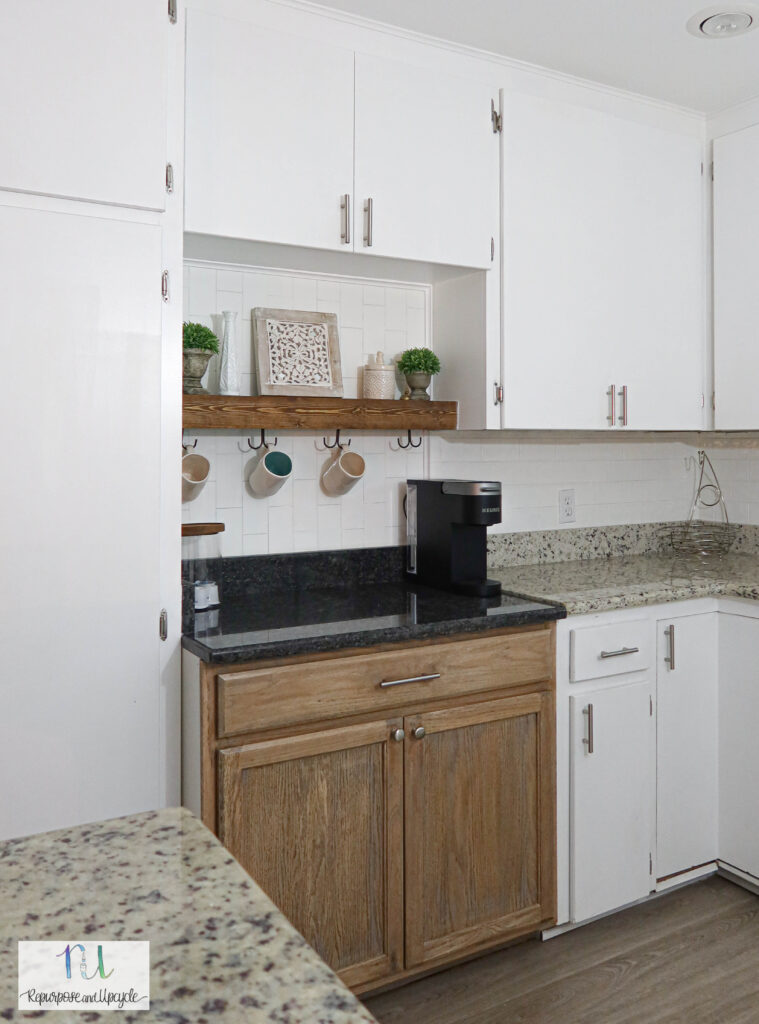
New Coffee Bar in the Kitchen with floating shelves and white subway tile
I love this new space and I feel like it was always meant to look this way!
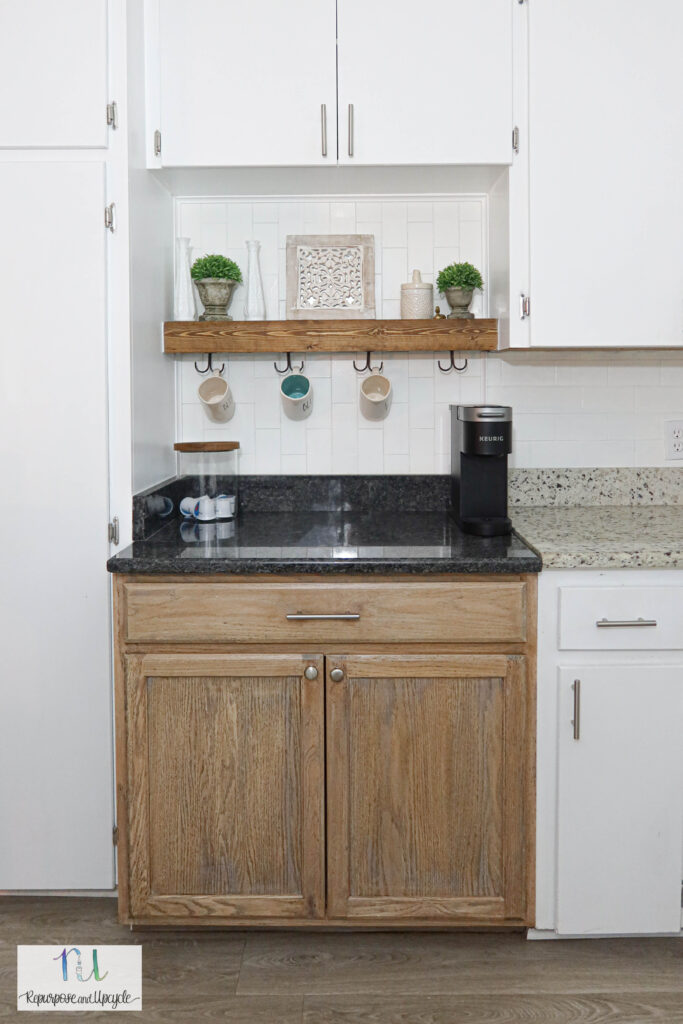
I love how the cabinet color matches the floating shelves.
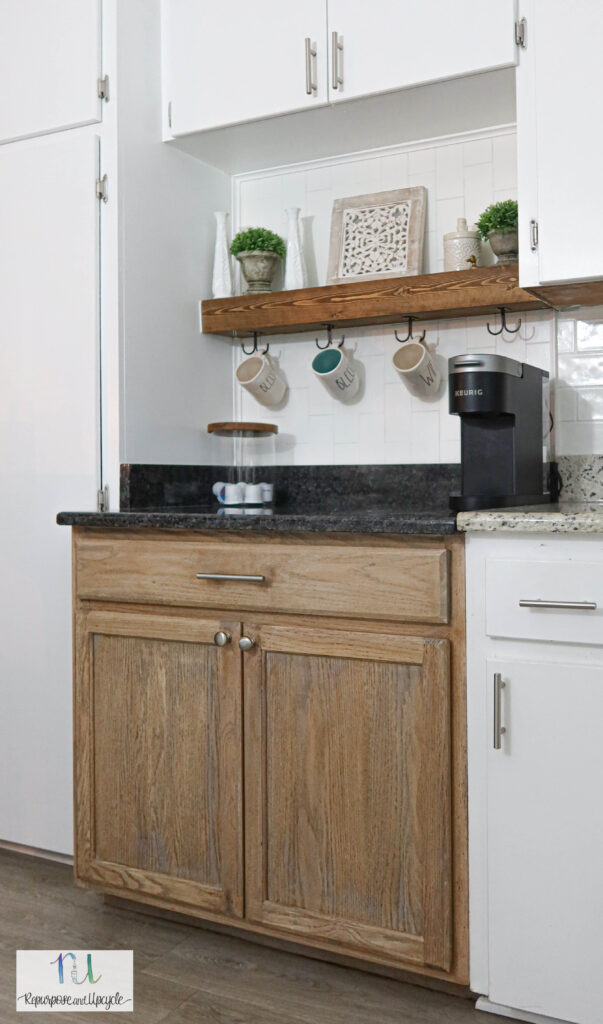
You can see I opted for a dark piece of granite to accent the lighter granite.

What do you think of the two toned cabinets? I love the dimension it gives our all white space.


I changed things up recently and added my own DIY coffee bar sign. P.S. I included 6 different signs you can print out (even with mirrored images ready for image transfers).

I’m so pleased with how this turned out. What do you think?
Thanks for following along my DIY journey friends.
Lindsey**


