Learn how to paint tile floor with Rust-Oleum Home Floor Coating with this easy two step process. See how I painted our outdated ceramic tile with this easy tutorial. With not much money or time, you can make a huge difference with this awesome tile paint!
Have you ever wanted to update your floor but you didn’t have the resources or time? I wanted to replace the old tile since we moved in a few years ago. I knew we didn’t have the budget for new floor, so I thought,
Can you paint tile floor?
Yes, you can paint tile floors, but it’s important to follow the correct process to ensure the paint adheres properly and lasts.
I also wondered “what if the space includes high-traffic areas?” Is there a product that successfully covers tile and holds up to the wear and tear? Yes, read on my friend!
I searched high and low for the most effective and easiest solution to painting our old dated ceramic tile. While researching floor tile paint, I found an easy solution; Rust-Oleum Home Floor Coating 2 step paint. This paint product came as a set with everything needed to fully update and seal tile.
This was exactly what I was looking for.
What is Rust-Oleum HOME floor coating paint?
Rust-Oleum HOME Floor Coating is a product designed to provide a durable, protective coating for interior flooring. It is part of the Rust-Oleum range of paints and coatings, which are well-known for their protective qualities on various surfaces. The HOME Floor Coating is specifically formulated to be used on a variety of flooring materials, including wood, concrete, laminate, vinyl, and more. Currently this paint comes in six paint colors.
The product typically offers the following features:
- Durability: It is designed to resist wear and tear, making it suitable for high-traffic areas.
- No Need for Primer or Sanding: The paint is made to adhere well to surfaces without the need for a separate primer or extensive sanding, simplifying the application process.
- Easy Application: It can be applied using common painting tools like rollers or brushes.
- Variety of Finishes: The coating is available in different finishes, such as matte, semi-gloss, or gloss, to match the desired look of the room.
- Fast Drying: The product often has a quick drying time, allowing for a shorter waiting period before the floor can be used again.
- Protection: It provides resistance to common household stains and chemicals, which helps in maintaining the floor’s appearance over time and is good for surfaces that get a lot of wear.
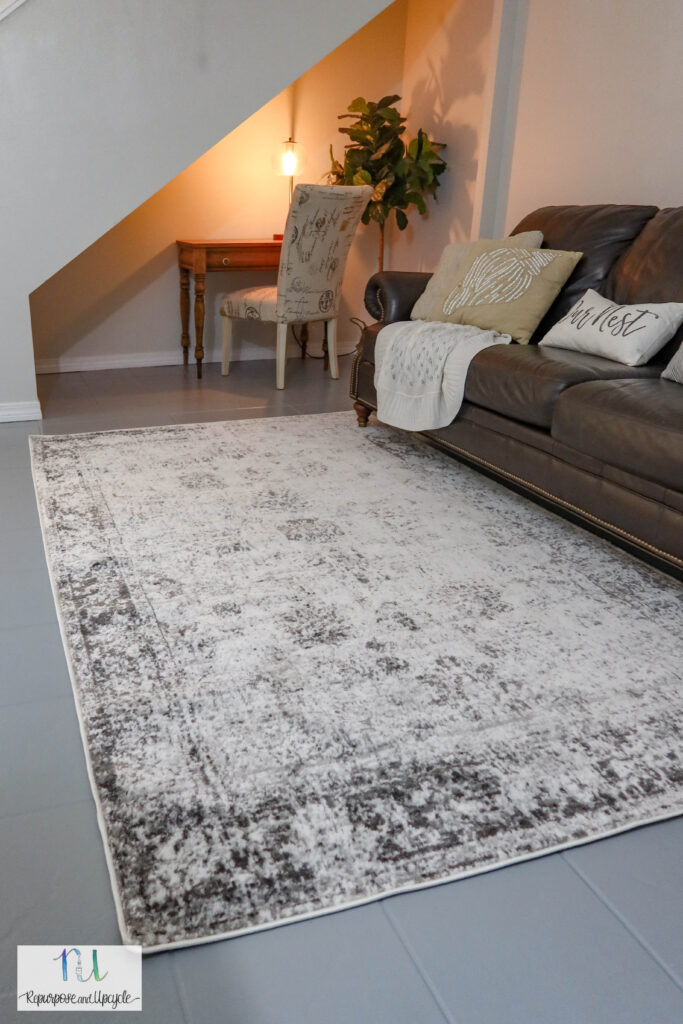
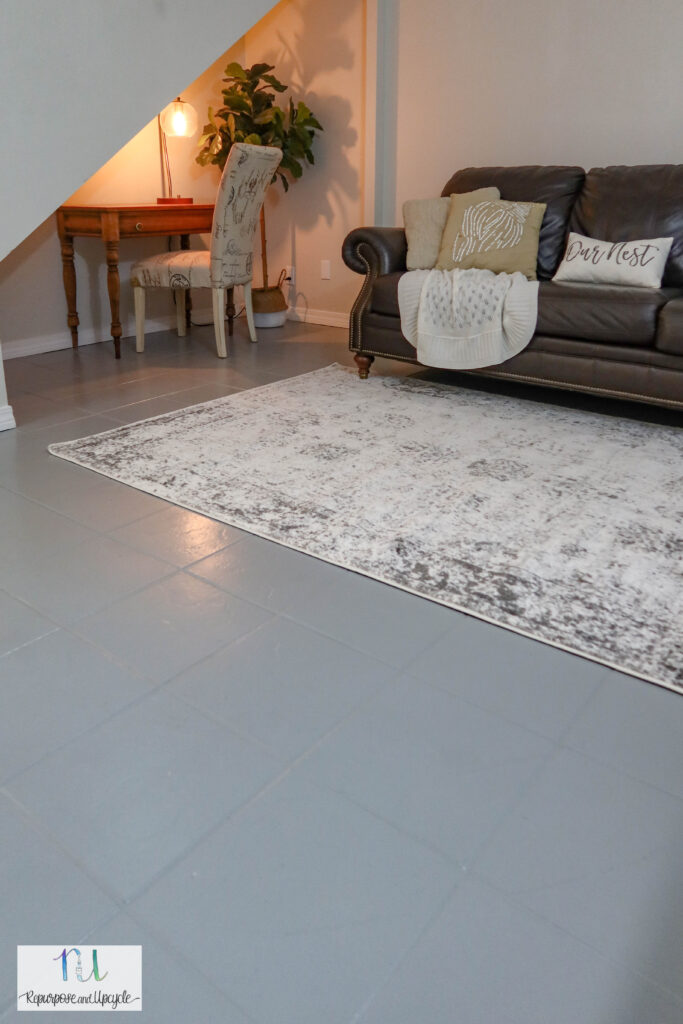
I was a little hesitant at first to paint all 400 square feet of our downstairs back house. You know how much I love DIY projects that transform a large space with little time and money, so I jumped right in! I can happily say though, that this project was well worth it and much easier to complete than I thought it would be. Let me show you how to easily paint your own tile.
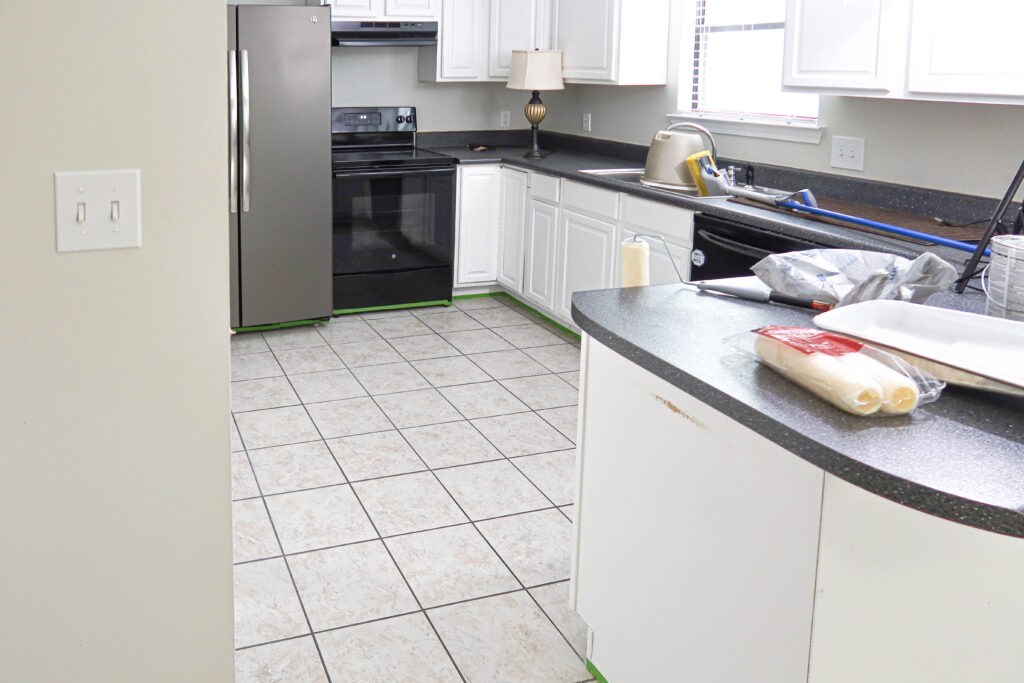
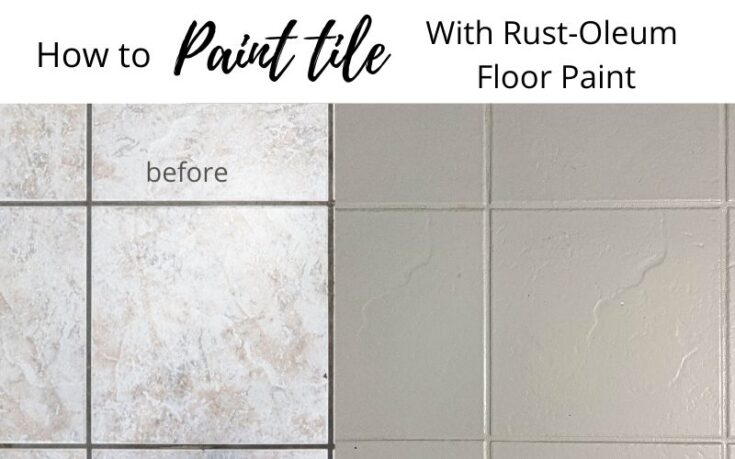
Here is the outdated tile in our mother in law suite. It’s not in terrible condition, I just wanted something different.
Outdated ceramic tile before using Rust-Oleum Floor paint
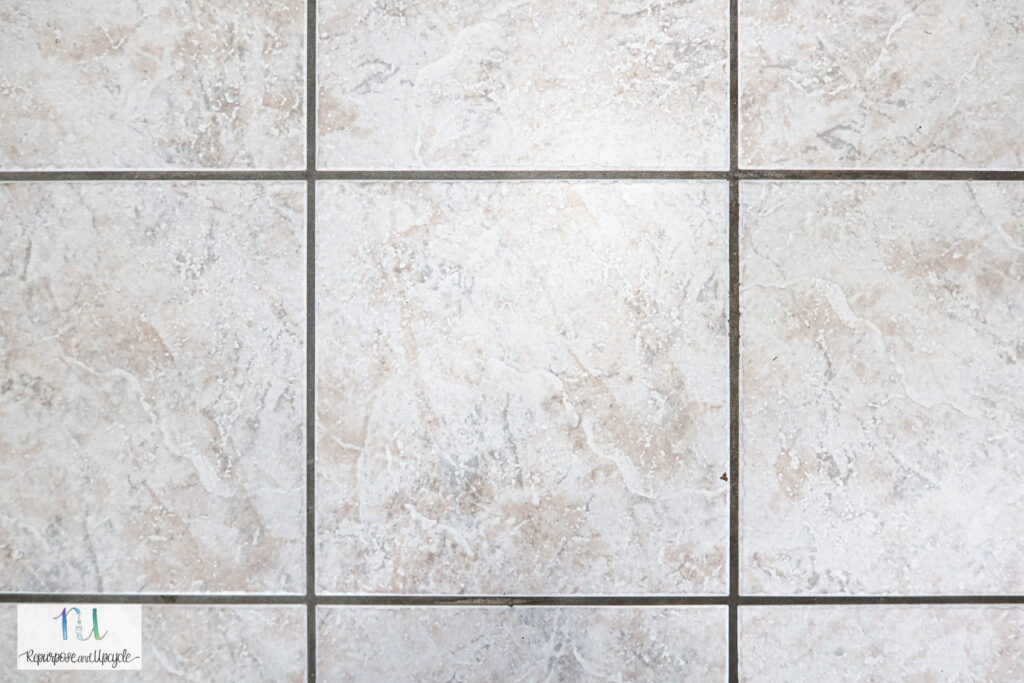
I didn’t love the dark grout lines and the pink/cream tones in the tile. To be honest, the grout isn’t dark, it’s just dirty. And trust me, I’ve cleaned and cleaned it.
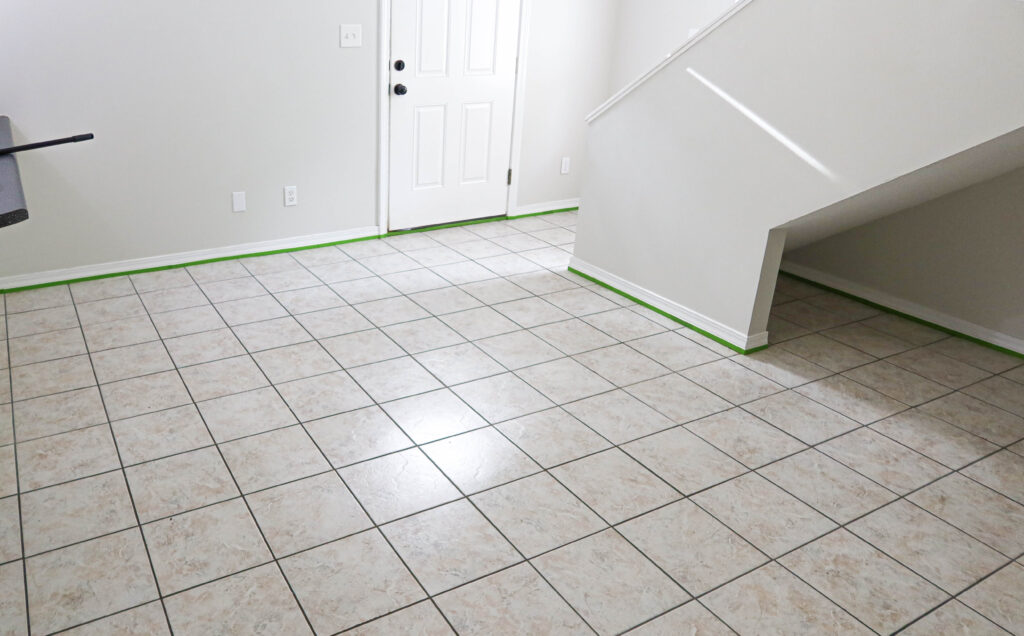
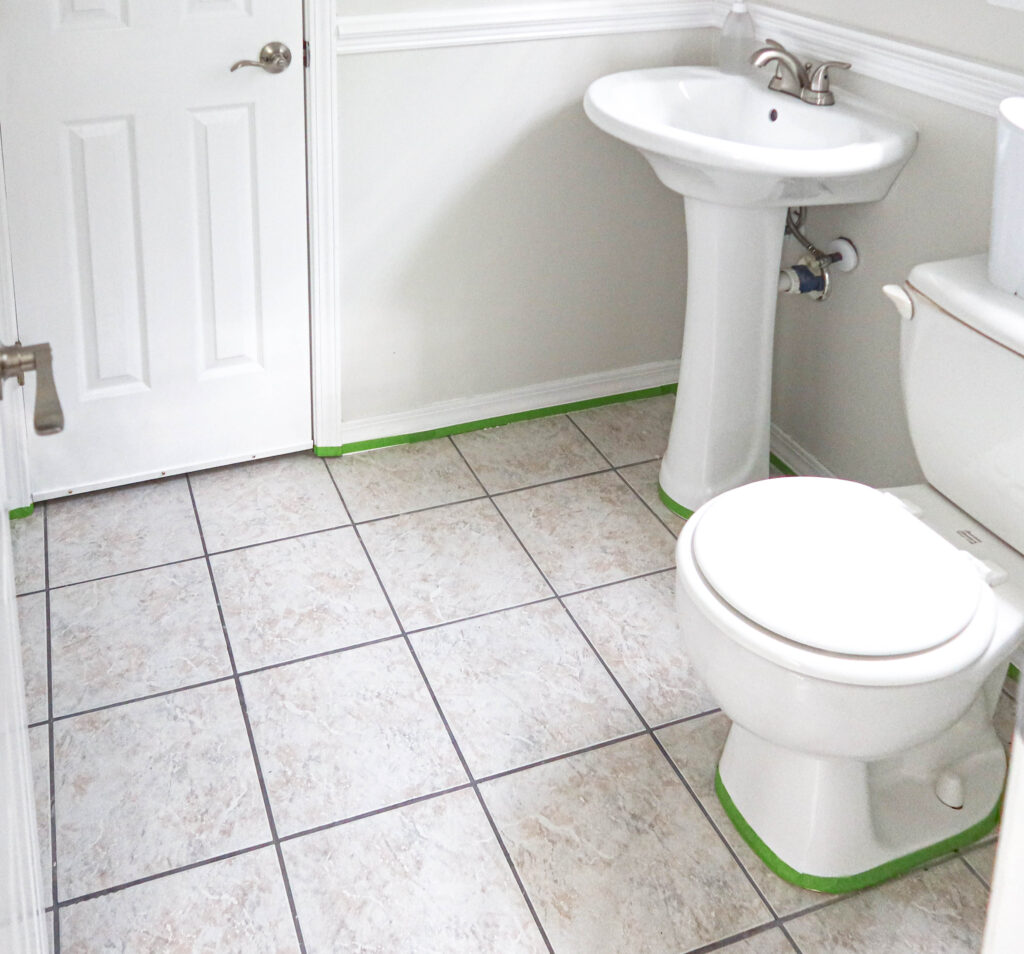
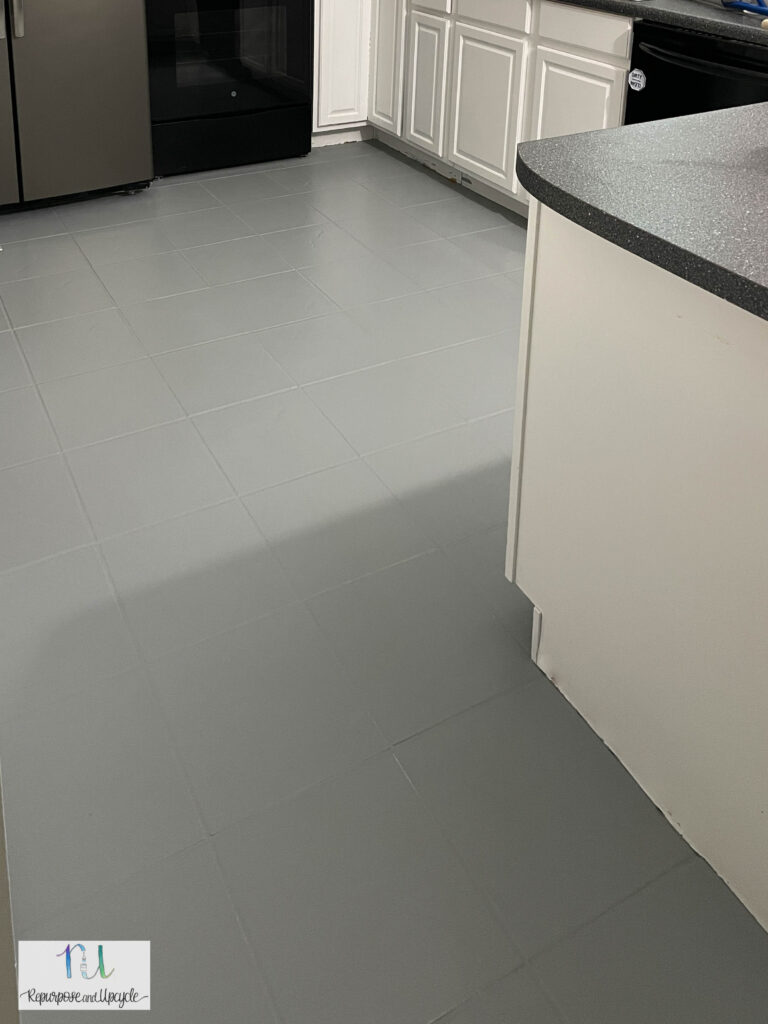
This is the living area in the downstairs of our mother in law suite. The tile extends from the living area to the kitchen and it even includes bathroom floors too.
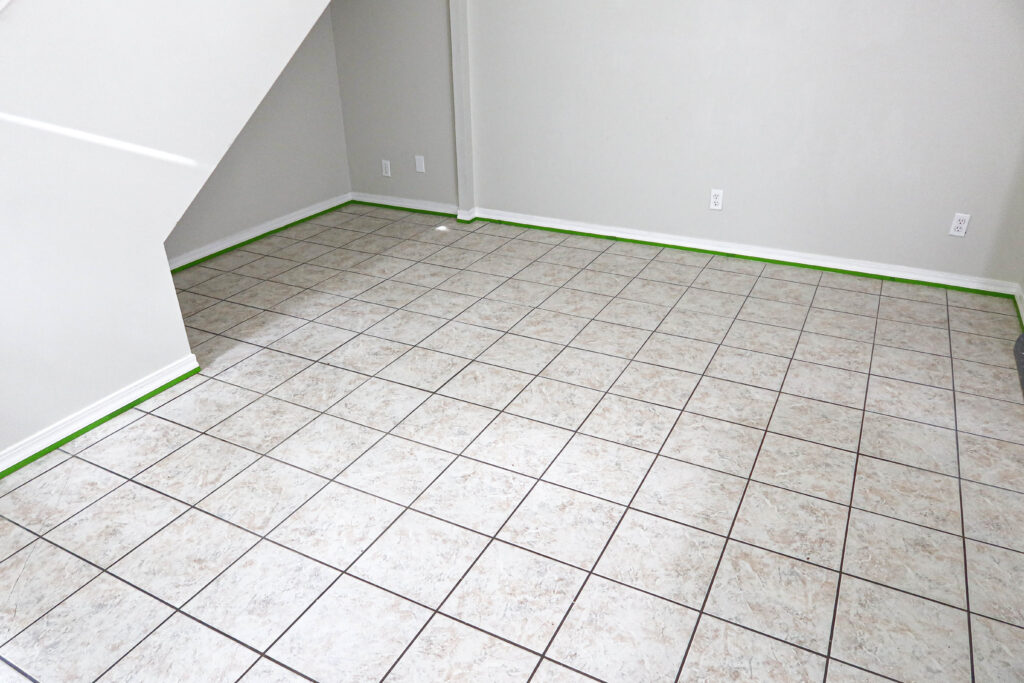
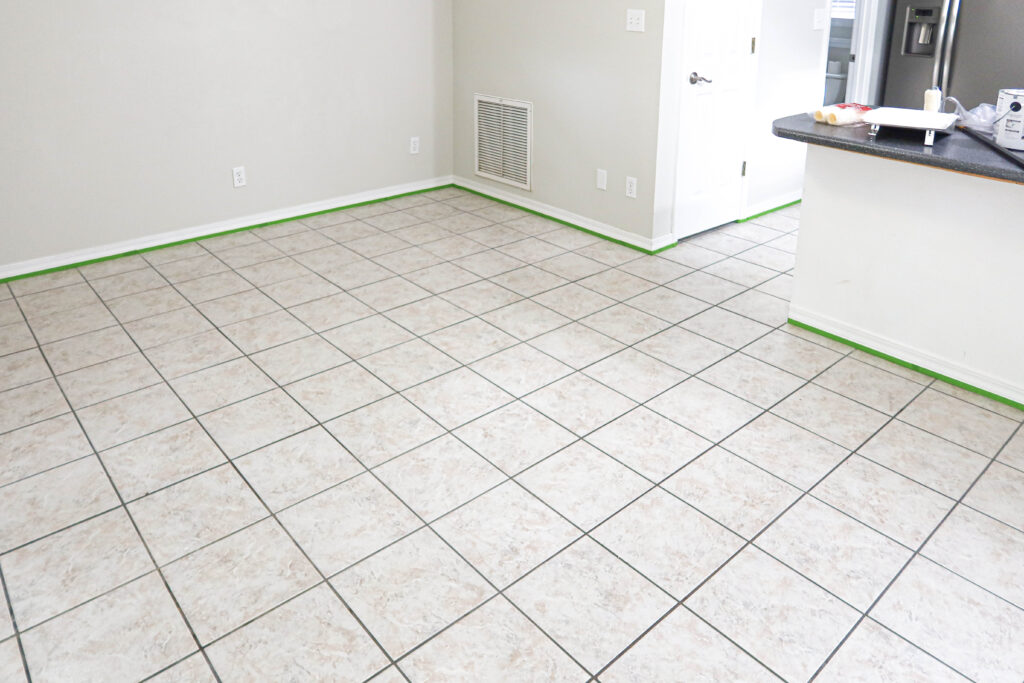
You can see I’ve already placed painter’s tape around the perimeter of the downstairs in preparation for paint!
Disclosure; this post contains affiliate links. As an Amazon Associate I earn from qualifying purchases. This disclosure statement refers to the rest of the Amazon links in this post. See more on my disclosure page.
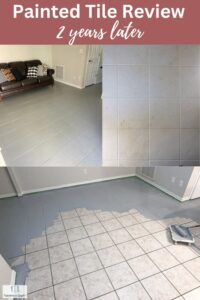
Update; It’s been 2 years since I published this post so I figured it was time for a painted tile review video and post. Check it out!
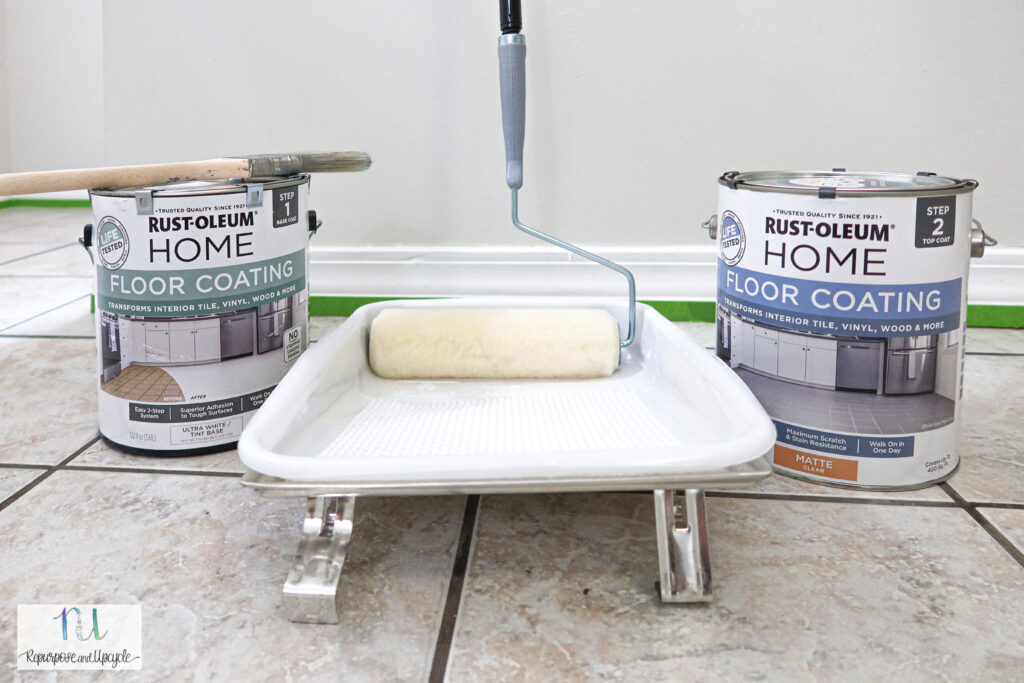
Supplies to paint the floor tile:
- Rust-Oleum HOME Floor Coating base coat- I used the color French Gray and I used about 1.5 gallons
- Rust-Oleum HOME Floor Coating Matte Clear Top Coat
- Paint brush
- Fine finish paint roller and roller extender
- Paint tray
- Painters tape
- Degreaser – Krud Kutter works great
- Mop
- Small paint brush for touch ups
If you don’t want to order the Rust-Oleum product online, you can also get it at your local Home Depot store.
I’m sharing my tips below on how to apply the floor paint kit. Always refer to the Rust-Oleum website before starting a project of your own.
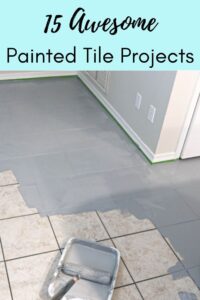
Before you leave, also check out 15 awesome painted tile projects here.
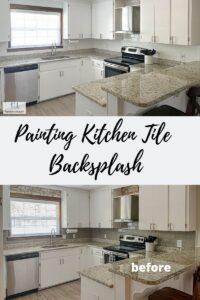
I get asked a lot if you can use this floor tile paint on a kitchen tile backsplash. I’m sure you can but it’s formulated for a floor. There are a handful of products that are specifically made for backsplash and bathroom tile. For best results, you might want to refer to that type of paint before choosing this for a backsplash.
If you are looking to paint a tile backsplash, I recently painted ours and wrote a post all about it.
Check out my painting kitchen tile backsplash with Homax Tough as Tile product.
Let’s get back to painting this outdated tile floor…
How to prepare tile for Rust-Oleum HOME Floor Coating
Rust-Oleum suggests cleaning the surface really well. I always say that prep work is sometimes more important than the actual paint job. They even suggest using a degreaser to make sure any dirt and grime is gone (especially around the bathroom floor tiles). Once the surface is clean and dry, it’s ready for paint.
Covering the baseboards and walls with painter’s tape is a good idea too.
Below is a simple step-by-step tutorial on this cost-effective way to paint tile. Also refer to my video tutorial as well.
How to paint tile floor with Rust-Oleum HOME Floor Tile Paint
- Clean the floor well. Sweep or vacuum the floor to remove any debris or dust. Then, use a mop and a mild cleaner or degreaser to clean the floor. Rinse the floor with water and let it dry completely.
- Apply painter’s tape around the perimeter of the entire floor.
- Use a paint brush to cut in the edges of the wall with the first coat around the perimeter. Work in small sections and don’t do it all at once. Always try to keep a wet edge while applying the paint.
- Pour the base coat into a paint tray and dampen the roller with plenty of paint.
- Use the paint roller to roll a section of the floor for the base coat. Once one section is complete, move to the next always trying to keep a wet edge.
- After applying the base color of paint on the surface, let it dry at least six hours.
- Next step, apply the sealer coat (2nd step) the same way you applied the paint by always keeping a wet edge.
- Use one coat of sealer, two coats if you want extra durability letting the sealer dry for at least 2 hours in between coats.
- Last step, allow 24 hours for light foot traffic and 72 hours for replacing furniture.
Note; Rust-Oleum says “one coat of paint is recommended.” This is against most advice I would ever give, but believe it or not, after only one coat of this paint, our floors looked flawless. I’m sure there are situations where two coats of paint is necessary, but most of the time it should only take one paint coat.
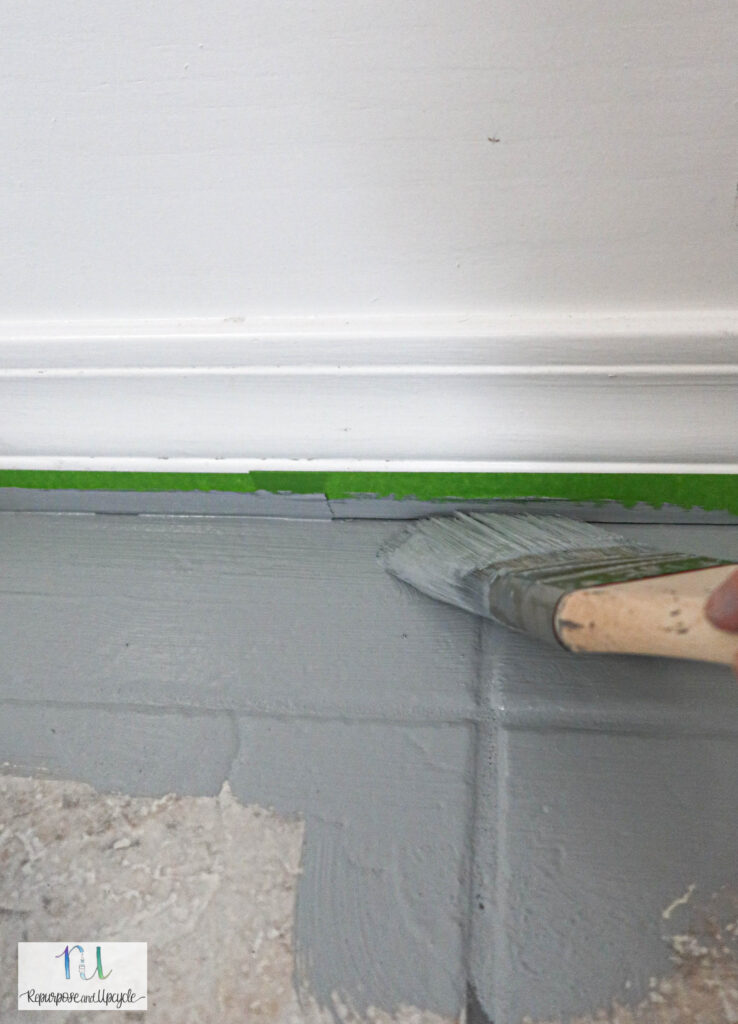
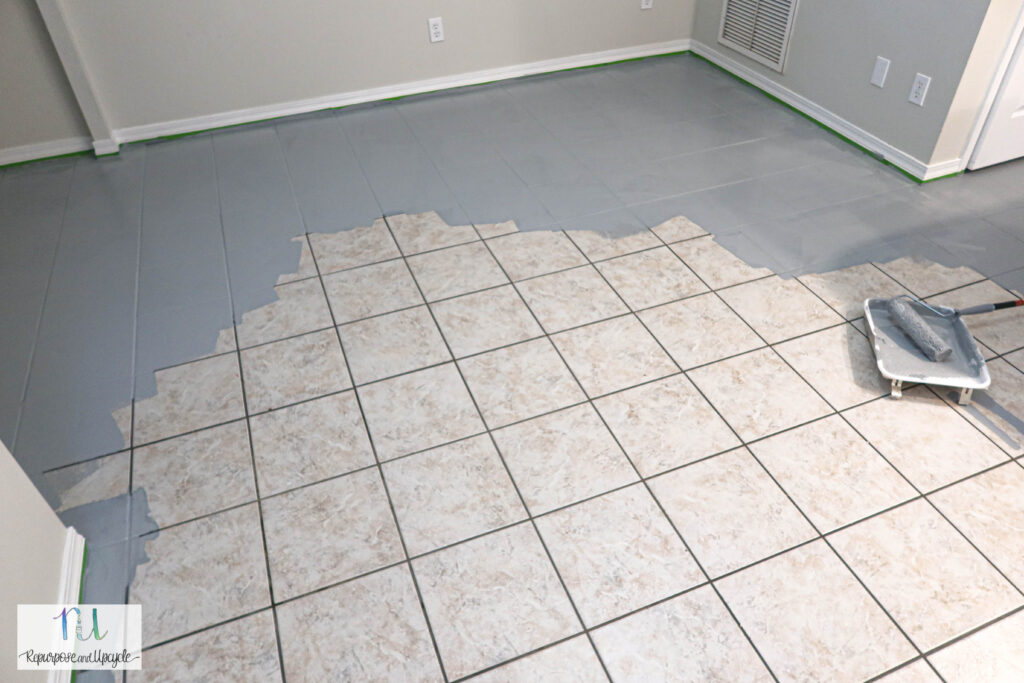
I used an angle brush to cut in to all the edges around the perimeter of the tile so I could quickly roll the rest of the floor with tile paint. You need to always keep a “wet edge” to reduce brush marks to I worked in sections cutting in a little at a time and rolling the floor at the same time. I worked my way from one part of the downstairs to the other.
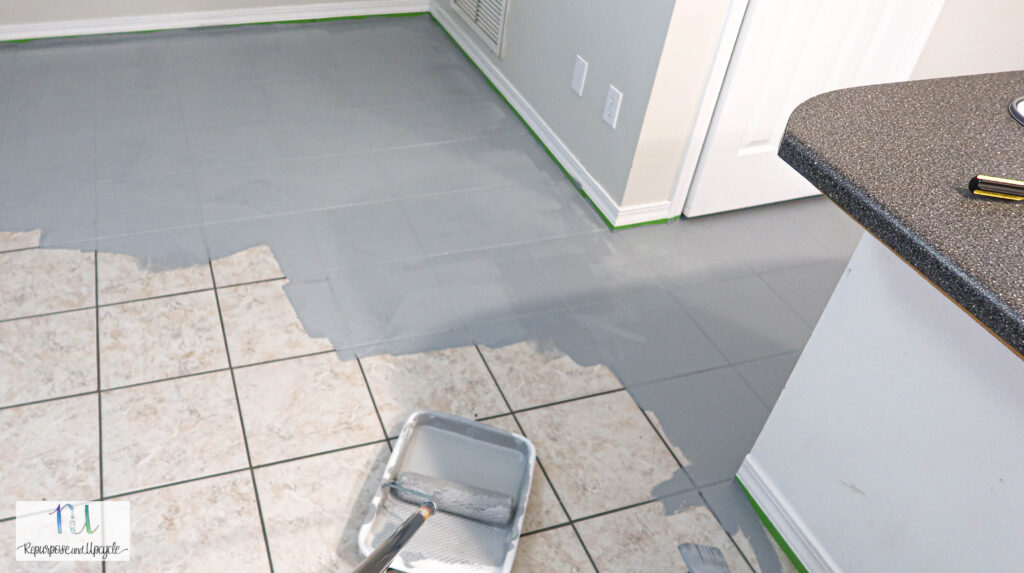
Once I started to roll the tile paint it went really quick and I could see the transformation!
How many coats of Rust-Oleum Floor Tile paint did it take to cover old tile?
Because I was going from a light white color to a darker color, I only used one coat of paint. One coat of paint and one coat of sealer has worked really well for this floor. Also note that Rust-Oleum recommends only one coat of paint.
It’s crazy what a little paint can do!
Before starting with the sealer, make sure to examine the floor and take care of any necessary touch-ups. I had a few in the bathroom where I accidentally stepped on the wet tiles.
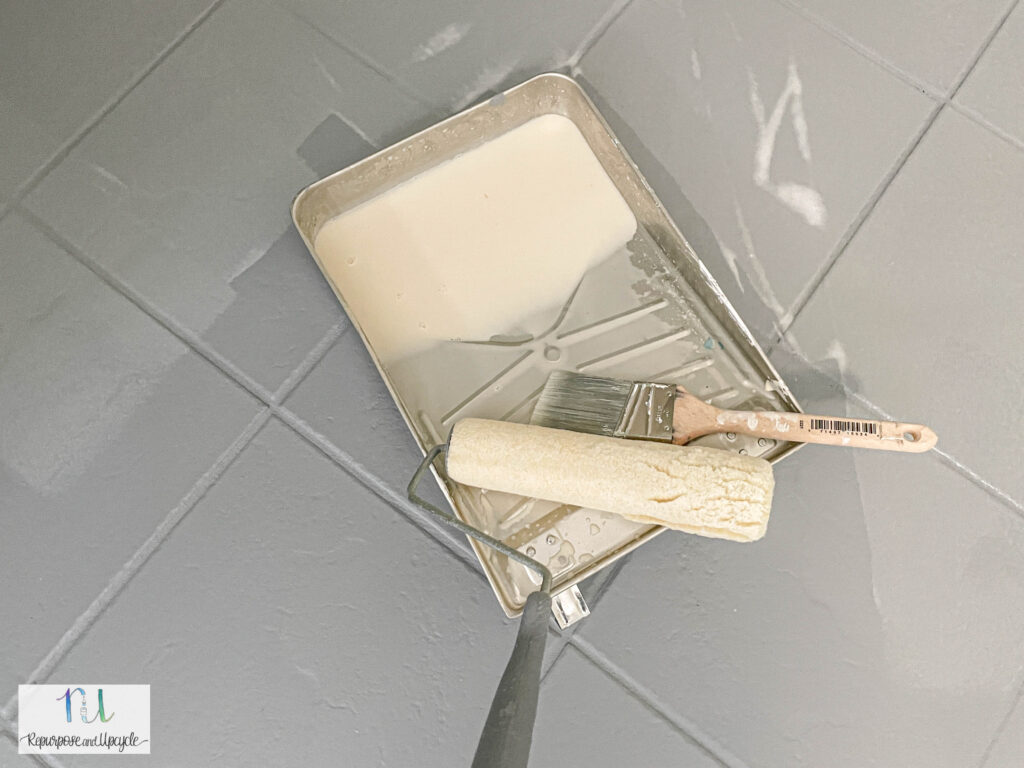
The sealer (2nd Step) goes on with a slight film, but dries totally clear. As with the paint, make sure to apply the sealer always keeping a wet edge to make sure there aren’t any brush marks.
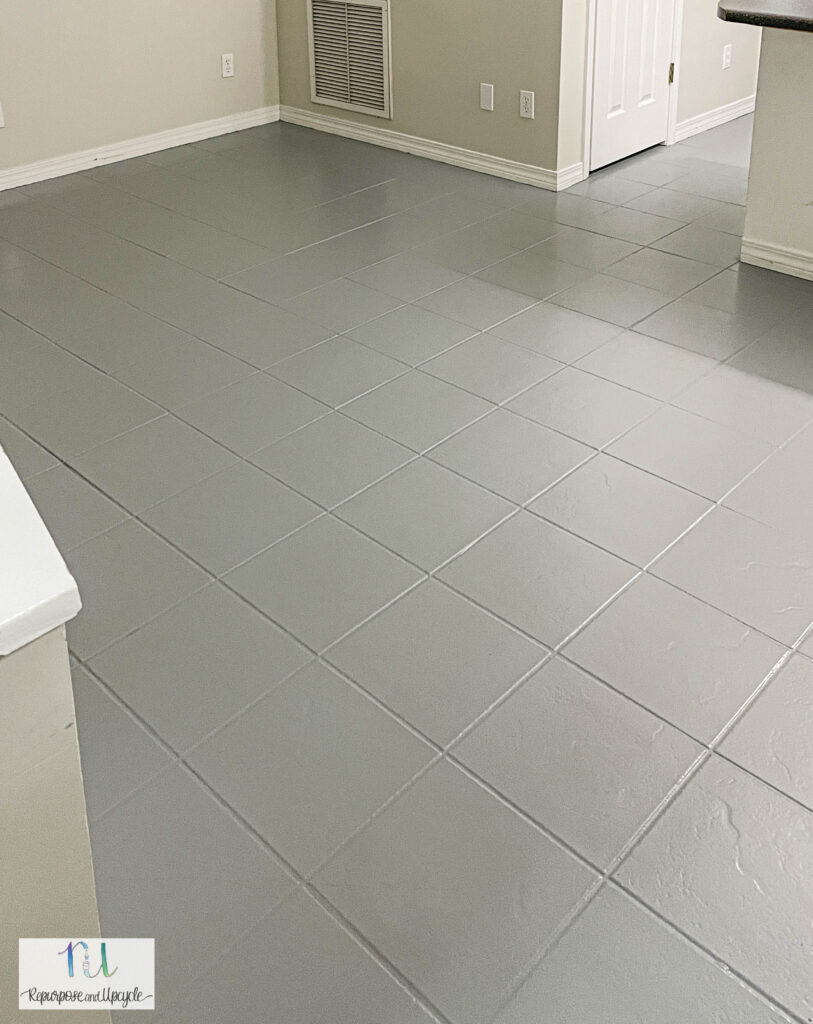
You can see that once the paint dried it had a darker/grayer look to it! Eeek these ceramic floor tiles are looking better already and it almost looks like new tile.
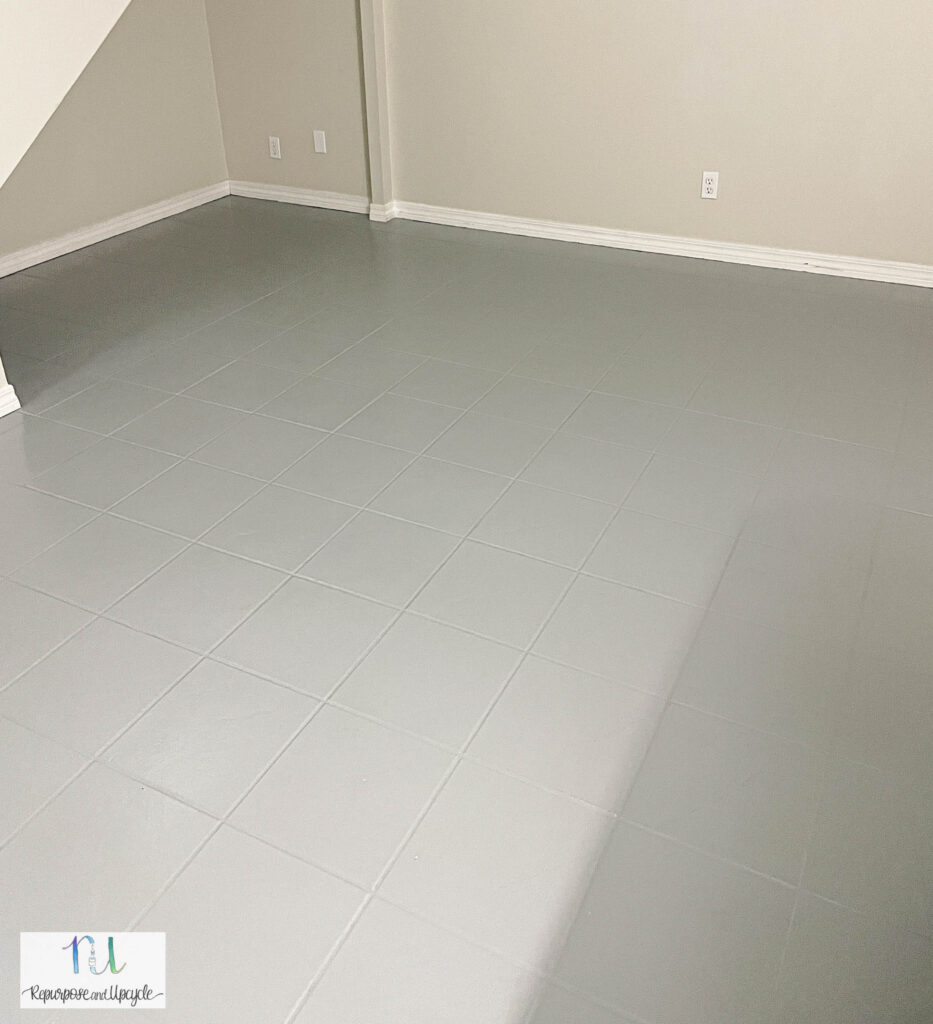
I’m not sure why but for some reason the tile looks so much cleaner and more modern now!

Painted Floor Tile before and after
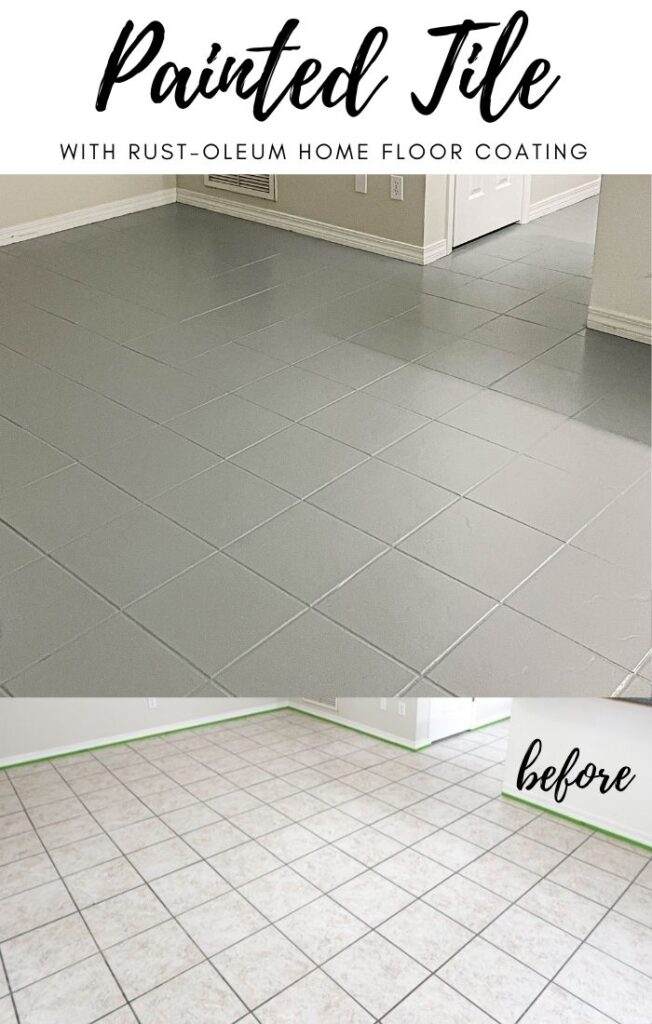
I love a good before and after! What do you think? This painted tile floor has transformed this space.
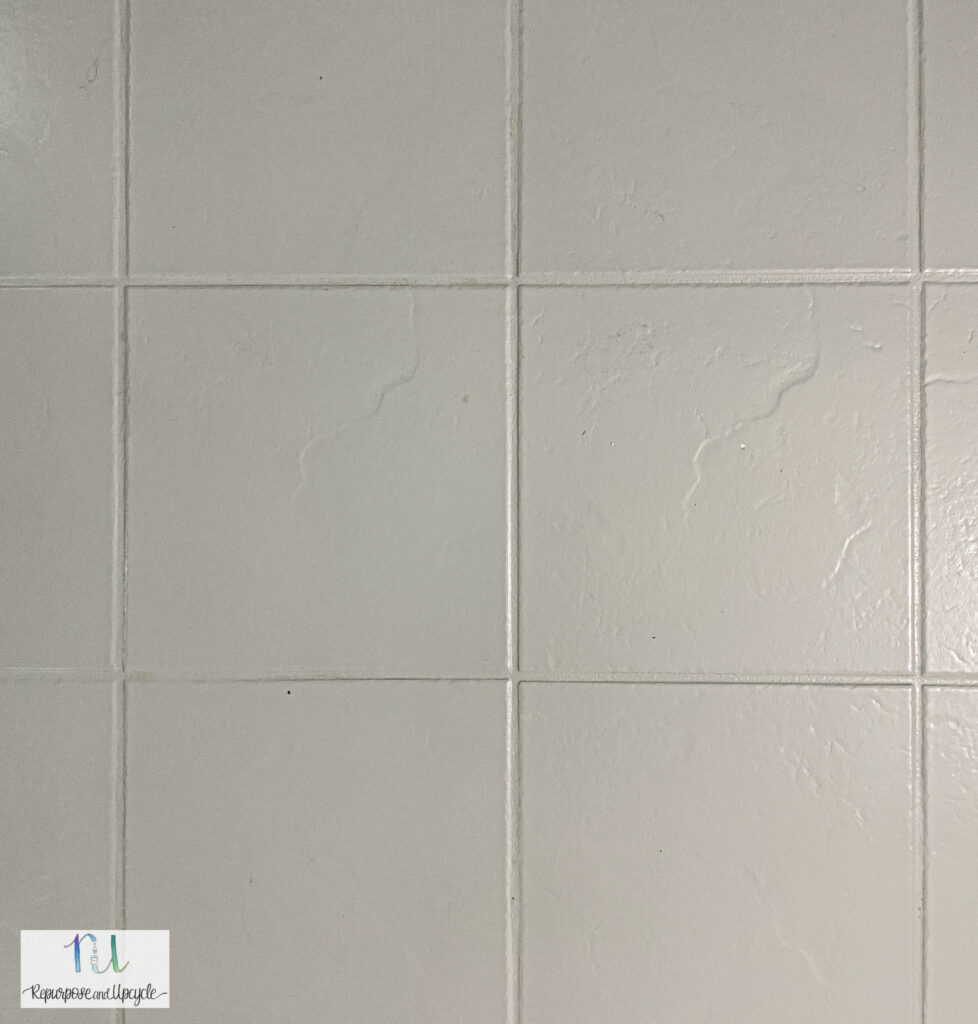
I’m so pleased with how the painted floors turned out. We even did the “scratch test” and moved the furniture around a little-no paint peeling!
I feel like the gray color was a good pick to “modernize” the space. I also like that it won’t show dirt easily.


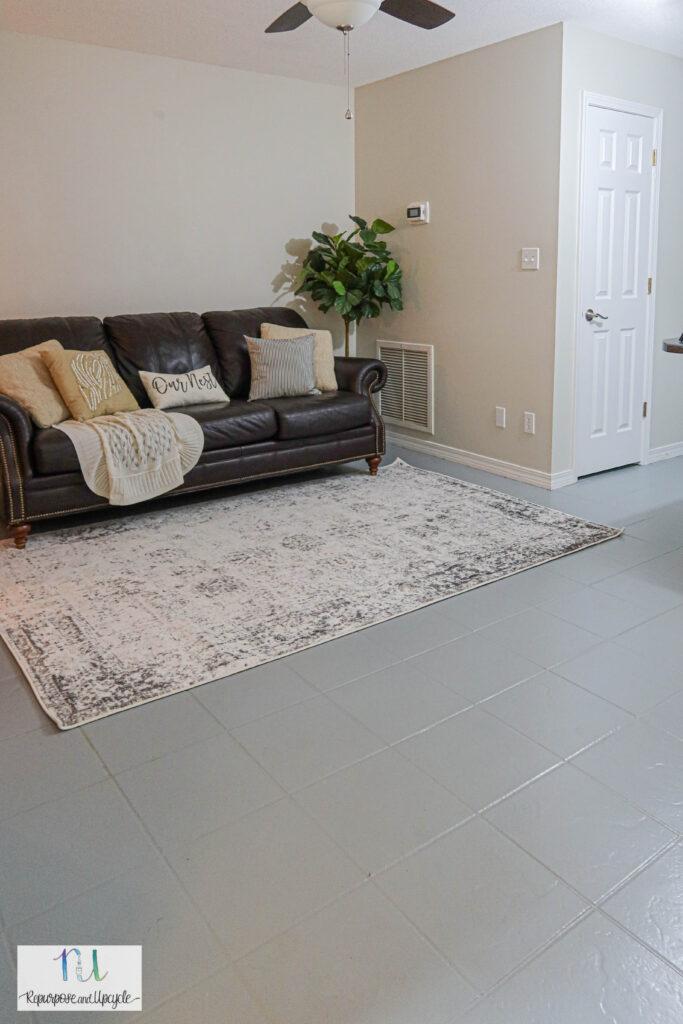
I feel like I can officially call this space done now! Time to work on the upstairs.
Using Rust-Oleum Home Floor Coating to Paint Tile Floor
Learn how to use Rust-Oleum Home floor coating to transform outdated tile floor. I've shared how I easily created painted floor tiles.
Materials
- Rust-Oleum Home Floor Coating base coat and sealer- I used the color French Gray
- Paint brush
- Paint tray
- Painters tape
- Degreaser
- Mop
Tools
- Fine Finish paint roller and roller extender
Instructions
- Clean the floor well and let it dry.
- Apply painters tape if you choose to.
- Use a paint brush to cut in the edges of the wall with the base coat around the perimeter. Work in sections and don't do it all at once trying to always keep a wet edge.
- Pour the base coat into a paint tray and dampen the roller with plenty of paint.
- Use the paint roller to roll a section of the floor. Once one section is complete, move to the next always trying to keep a wet edge.
- After applying one coat of base coat paint on the surface, let it dry at least six hours.
- Apply a second coat if you feel that one coat isn't enough.
- Once the base coat paint has dried a full six hours, apply the sealer coat (2nd step) the same way you applied the paint.
- Use one coat of sealer, two coats if you want extra durability letting the sealer dry for at least 2 hours in between coats.
- Allow 24 hours for light foot traffic and 72 hours for replacing furniture.
Notes
These are the steps I used to paint our outdated tile floors. Always refer to the Rust-Oleum website as well before starting a project of your own.


