Friends, this is quickly becoming an interesting time in history. I never in a million years thought we would be confined to the walls of our home to prevent the spread of an illness. Furthermore, I never thought medical workers, hospitals and doctors would have a shortage of necessary medical equipment like face masks. What do you do when you can’t find necessary goods? You make them of course! Let me show you my version of the DIY no sew face mask similar to the N95 face mask.
Let me first preface this post by saying that my DIY face mask DOES NOT and WILL NOT replace the actual N95.
The CDC says the use of homemade face masks are to be used as a last resort. It also says that homemade masks should ideally be used with a face shield. Heed these words friends.
This post came out of a cry for help from a friend who works at a local Dr’s office here in town and was in need of a face mask alternative.
DIY cloth mask tutorials are being posted everywhere. Here is my concern with that; viruses live on fabric…
So what happens when your fabric mask is contaminated (or you think it is) due to being around someone with a highly contagious virus? If it’s the only one you have you can’t throw it away.
It’s not like you can run home and wash it in under 30 minutes.
This is when I came up with a different solution. This might not be the best solution, but I do believe it’s better than the fabric masks because it’s partly disposable.
Unfortunately, I do believe we are in a “last resort” type of situation now. According to lots of research, the best mask to protect yourself against the newly formed viruses are the N95 respirator masks.
Table of Contents
What is so special about the N95 mask?
For starters, the N95 respiratory masks are very effective in filtering or blocking very small particles in the air that are transmitted by coughs and sneezes (unlike surgical masks). This makes them a good choice to protect against highly contagious viruses.
What do the N95 masks look like?
Below is a picture of an old N95 mask that I have.
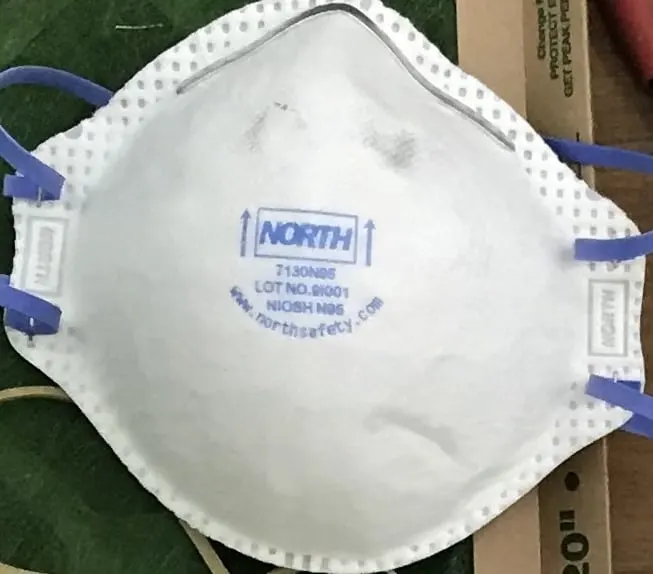
They are designed to fit close to the face and block out 95% of small particles (hence the name N95). Most of the diagrams I’ve seen show 4 different layers, one being a filter. You can see an example of a N95 mask below from Softseal Respirator mask.
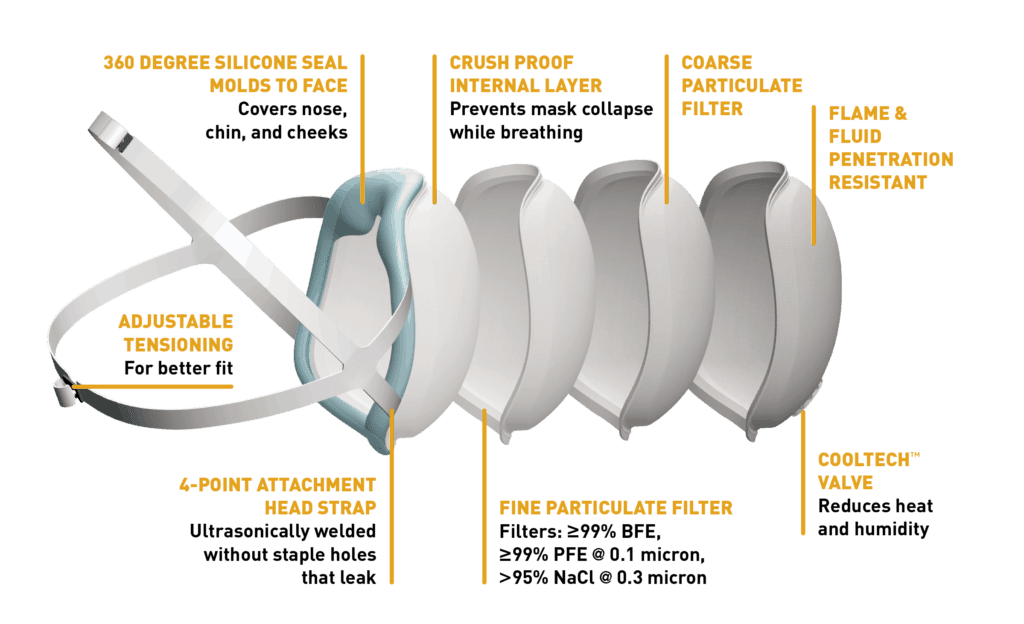
Let’s create one of these masks shall we?
Disclosure; this post contains affiliate links. As an Amazon Associate I earn from qualifying purchases. This does not affect the price you pay. This disclosure statement refers to the rest of the Amazon links in this post.
Materials to create your own homemade protective face mask similar to an N95 mask:
- AC Air Filter – make sure it’s not fiberglass
- Fabric
- Scissors
- Fabric tape
- Elastic or rubber bands
- Hot glue gun
- Wire clothes hanger
- Pliers or wire cutters
- Stapler
I’m no stranger to NO SEW projects. I grew up learning to sew and I hated it. Guess what; I still hate it. I break out the fabric tape to replace a regular seam more than I care to admit. From creating DIY no sew pillows to DIY no sew valences, I’m quite versed with no sew projects.
How to make a DIY NO SEW face mask or DIY mouth mask;
- Create a stencil- I did this by tracing the old N95 mask I had. Don’t forget to add an inch or two inches all the way around. I’ve shared my stencil below.
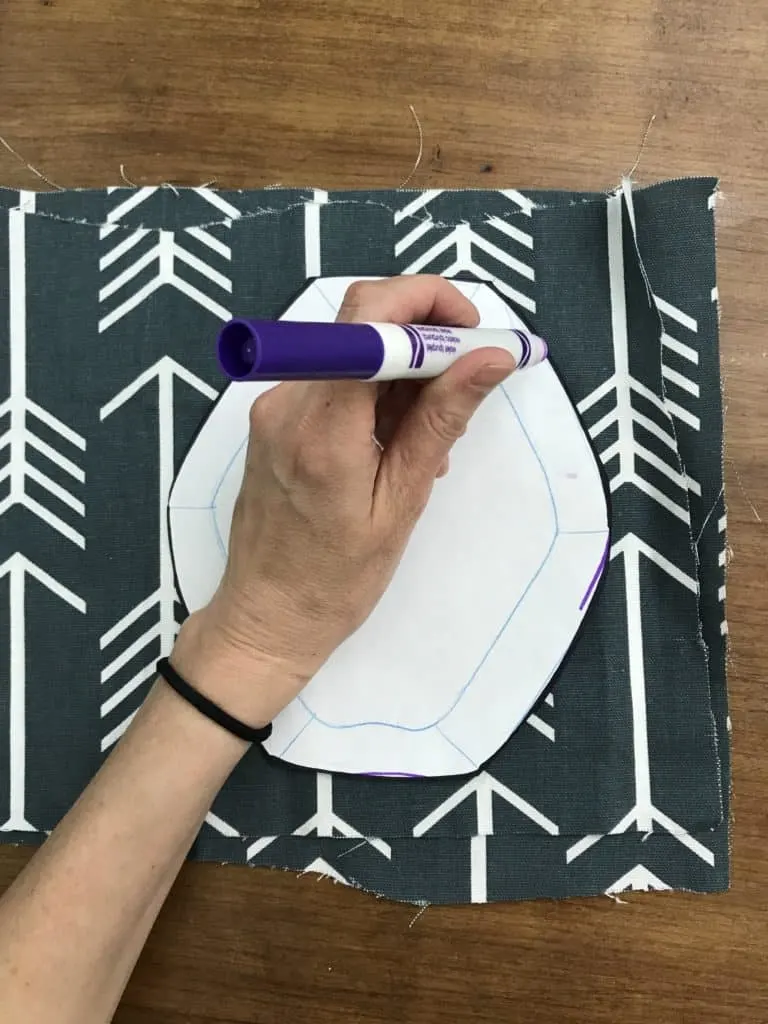
- Double up the fabric and trace the stencil over the fabric.
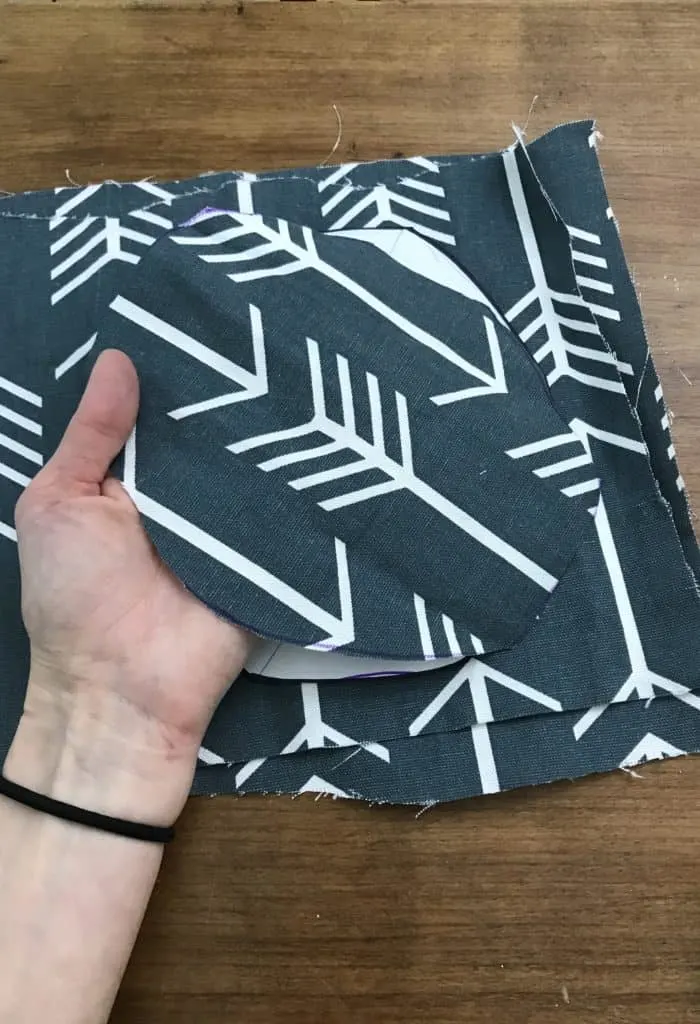
- Cut 4 pieces of fabric.
- Trace your stencil over the AC filter and cut it out.
- Hot glue one layer of fabric to the AC filter.
- Hot glue another layer.
- Cut two pieces of wire from the clothes hanger about 5″ each
- Bend the two pieces slightly to match the angle of the pattern on the top and the bottom.
- Hot glue the wire pieces to the top and bottom INSIDE piece of fabric (the bottom piece of fabric).
- Hot glue all around the face mask to make sure it’s sealed.
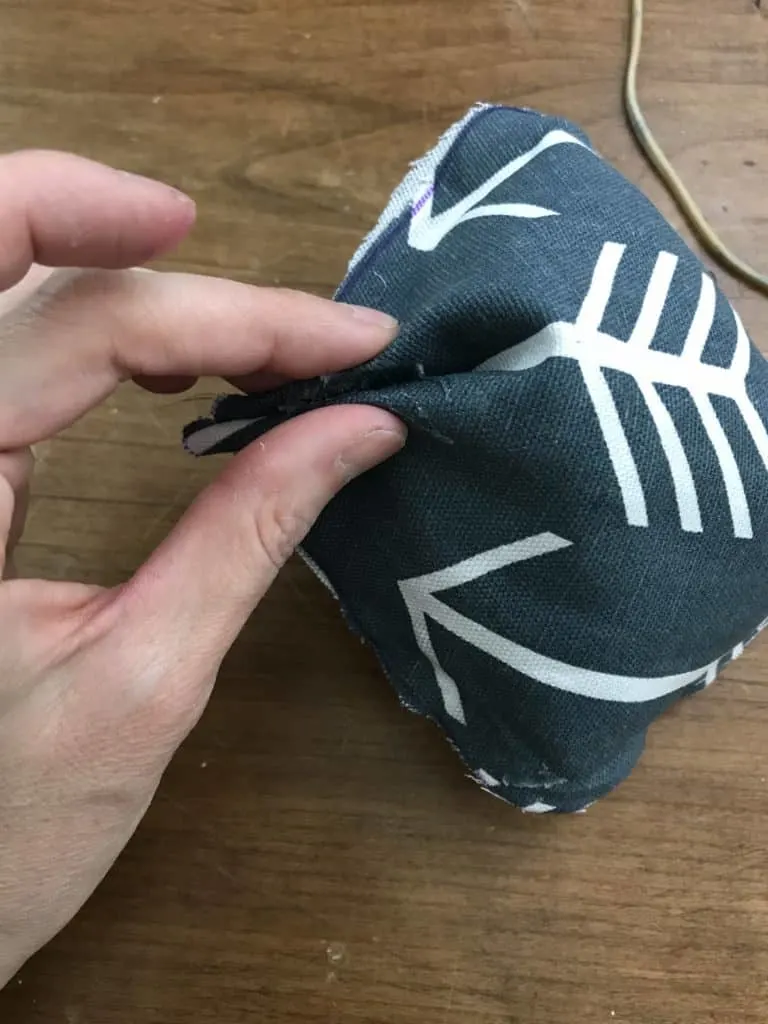
- Use your fingers to pinch the sides and hot glue them together (see video for more details).
- Cut 2 elastic or rubber bands to fit your face.
- Staple them to the OUTSIDE of the mask on each side. One needs to extend above your ears and one below.
- Take the last piece of fabric and pinch the sides and hot glue it together.
- Use the fabric tape to tape the last piece of fabric to the mask.
NOTE: I am using a fiberglass air filter in the video below. Hindsight I would have used a non fiberglass air filter like this one. There is a lot of debate on what type of “filtration material” to use for DIY face masks. I’ve seen some people use vacuum bags, but these are hard to breath with. The fiberglass AC filters are the most breathable but could cause harm due to the small glass particles. It seems that the best option would be a non fiberglass AC air filter.
That being said, I’m no expert– Just a girl trying to come up with a last minute homemade mask solution for all the folks that need protection but can’t get it.
Video tutorial for No sew face mask similar to N95 here.
DIY dust mask template
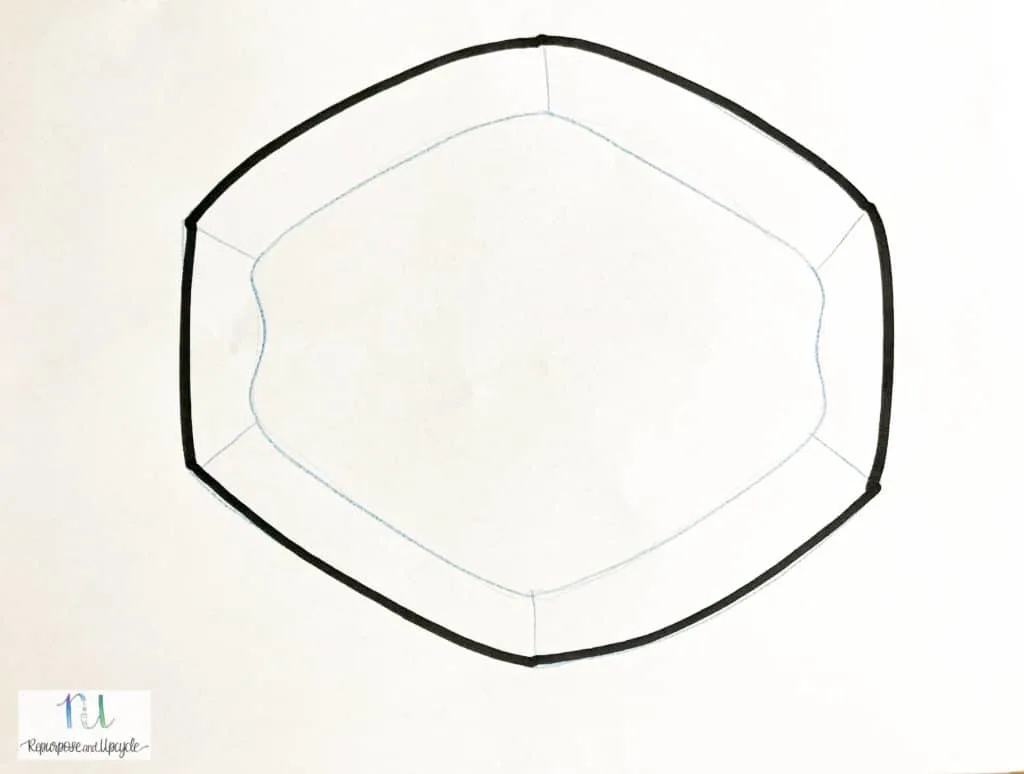
One thing to note about N95 masks is that most of them have four layers and at least one of those layers is considered a “filter.”
I figured the “filter” layer could be created from an extra AC filter I had. Why not right? It’s kind of the same principal.
Let me show you some how-to pictures;
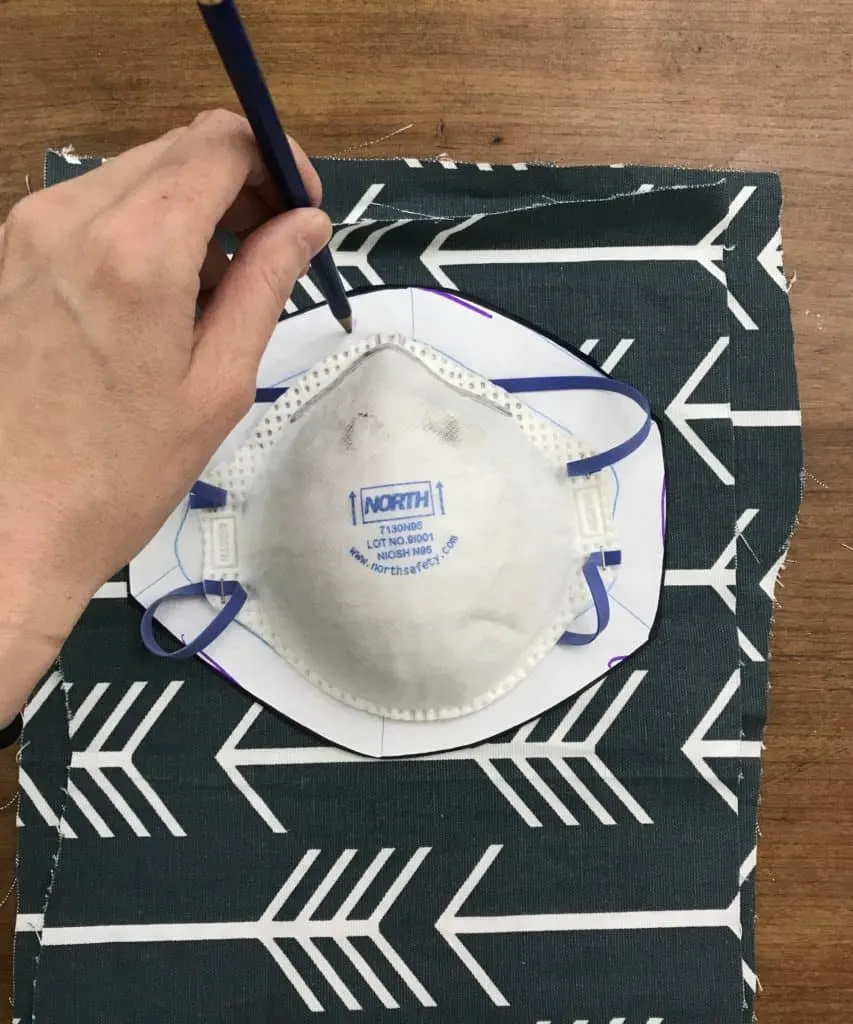
Next use the stencil to cut the AC filter. Make sure you don’t use a fiberglass filter.
You can see the metal pieces I’ve cut from the clothes hanger.
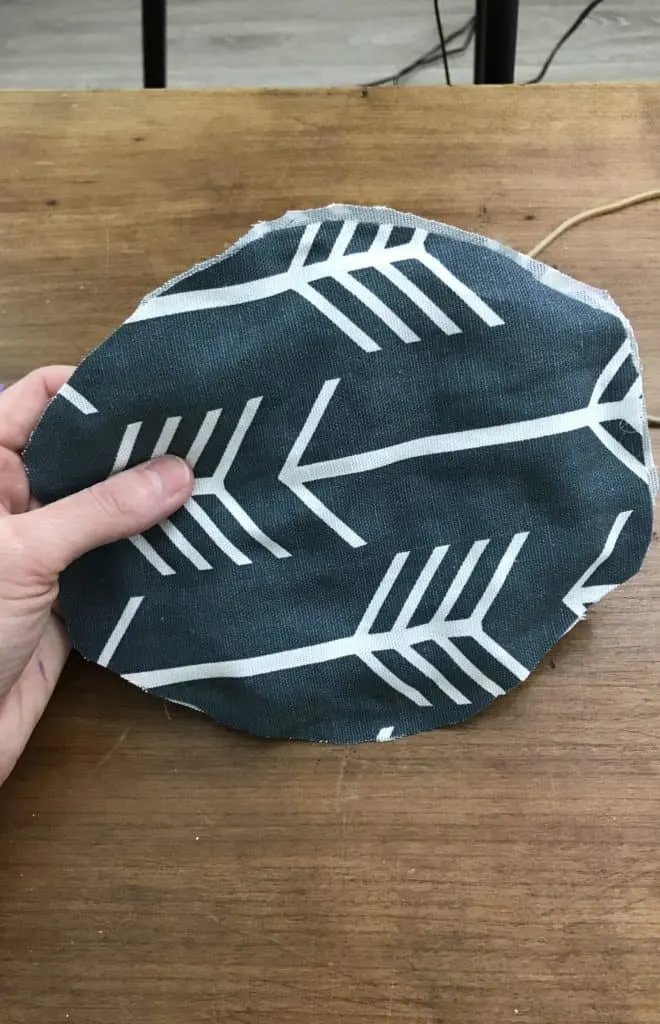
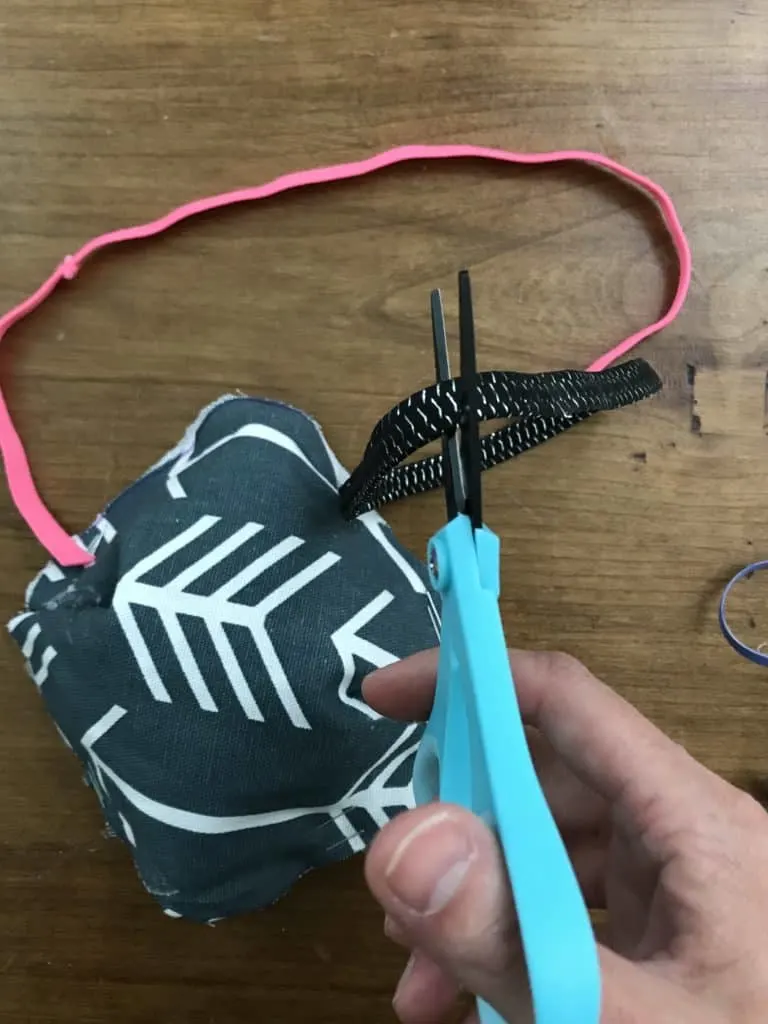
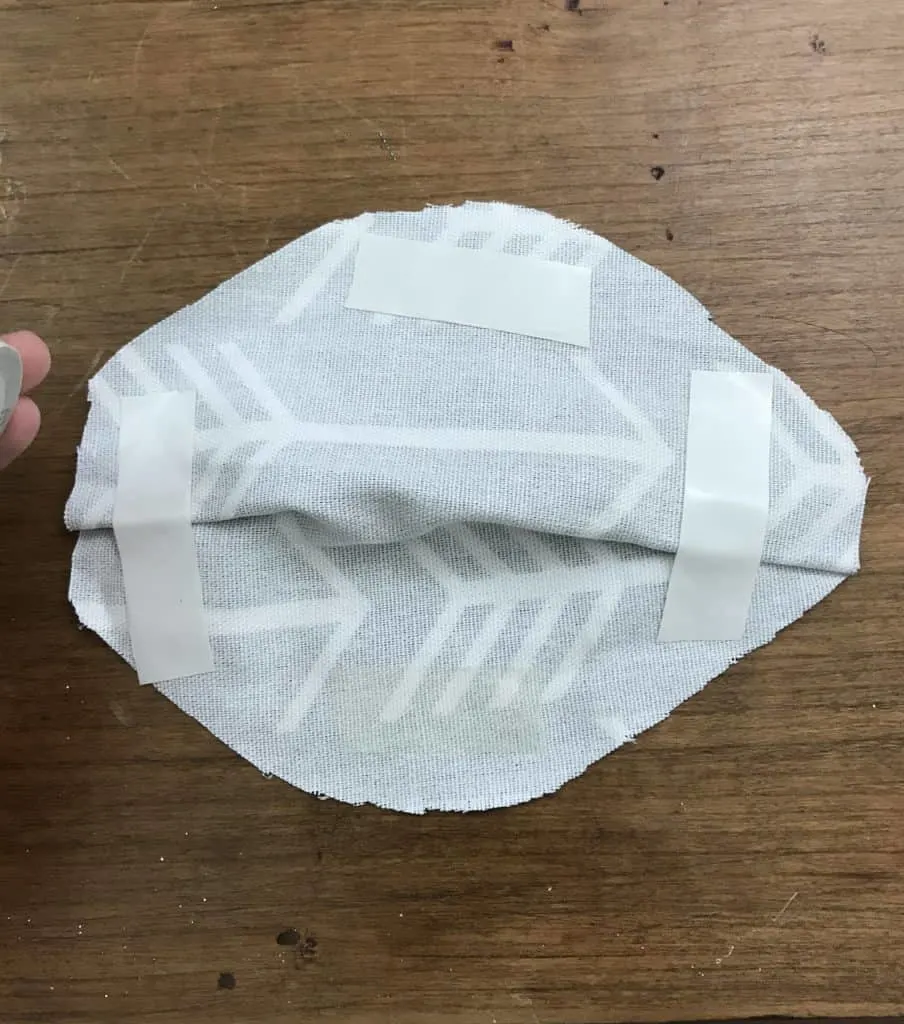
Your DIY mask will include four layers:
- base fabric layer that sits on your face
- AC filter cut to size
- another fabric layer on top of AC filter
- “disposable” fabric layer attached with either fabric tape or velcro
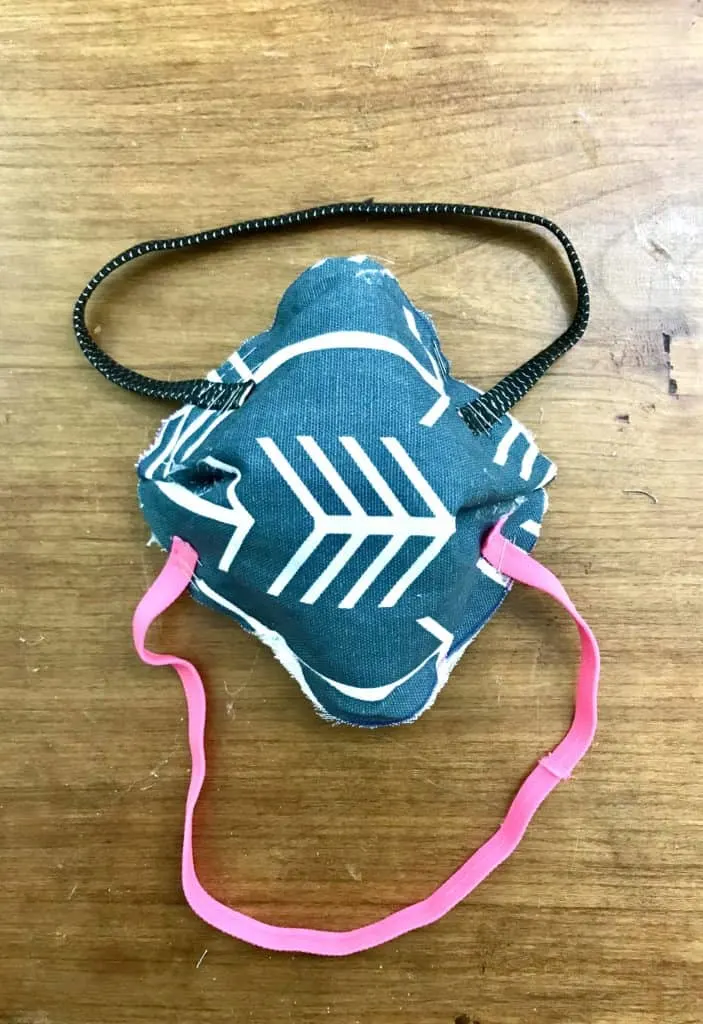
Now you have your very own handmade N95 face mask. What do you think?
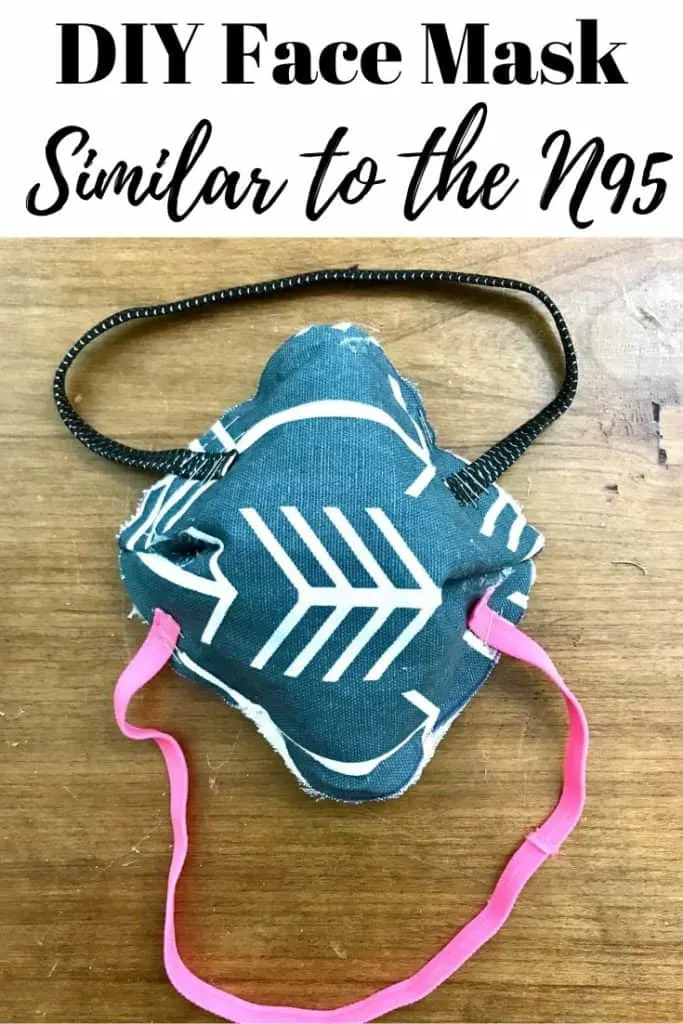
NO SEW DIY N95 Face Mask
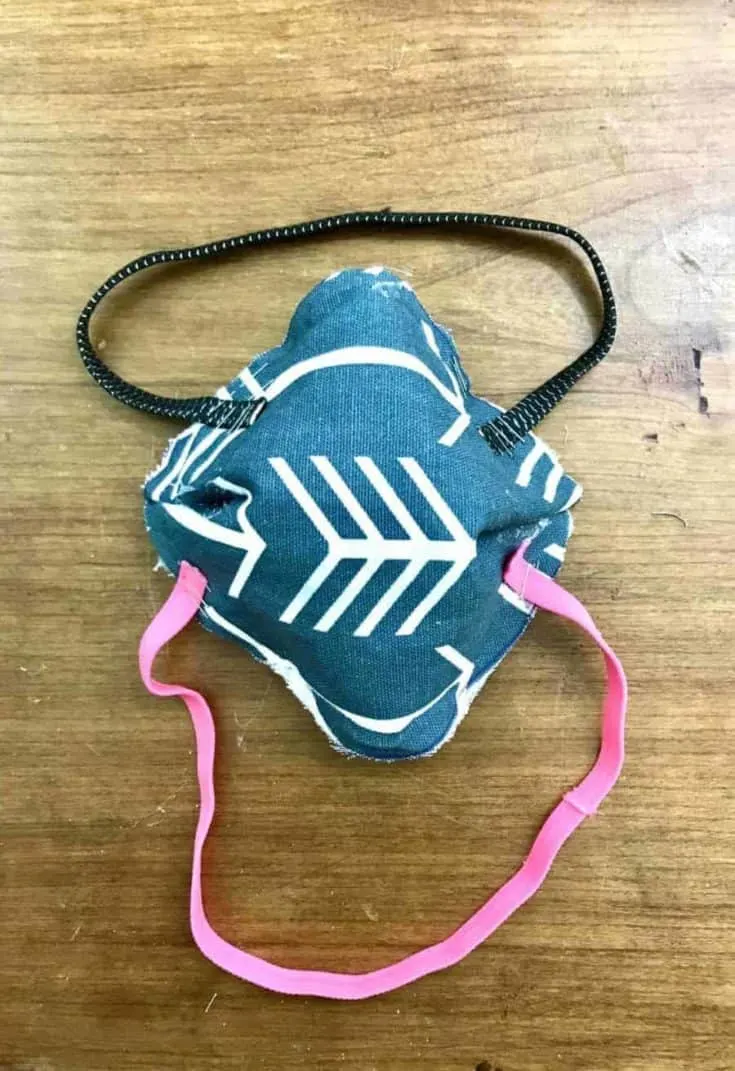
In a time when N95 face masks are hard to come by, learn how to make a homemade NO SEW version of this face mask with household items. You probably have all the supplies on hand to create this DIY face mask. If you can't find protective face wear anywhere, let me show you how to make your own.
Materials
- AC Air Filter - not fiberglass
- Fabric
- Scissors
- Fabric tape
- Elastic or rubber bands
- Hot glue gun
- Wire clothes hanger
- Pliers or wire cutters
- Stapler
Instructions
- Create a stencil- I did this by tracing the old N95 mask I had. Don't forget to add an inch or two inches all the way around.
- Double up the fabric and trace the stencil over the fabric.
- Cut 4 pieces of fabric.
- Trace your stencil over the AC filter and cut it out.
- Hot glue one layer of fabric to the AC filter.
- Hot glue another layer.
- Cut two pieces of wire from the clothes hanger about 5" each
- Bend the two pieces slightly to match the angle of the pattern on the top and the bottom.
- Hot glue the wire pieces to the top and bottom INSIDE piece of fabric (the bottom piece of fabric).
- Hot glue all around the face mask to make sure it's sealed.
- Use your fingers to pinch the sides and hot glue them together (see video for more details).
- Cut 2 elastic or rubber bands to fit your face.
- Staple them to the OUTSIDE of the mask on each side. One needs to extend above your ears and one below.
- Take the last piece of fabric and pinch the sides and hot glue it together.
- Use the fabric tape to tape the last piece of fabric to the mask.
Notes
My DIY face mask DOES NOT and WILL NOT replace the actual N95. This should be used as a last minute resort when other masks are not available.
I hope this post has helped you prepare or ease your mind that you can create your own face mask in a time of need. Take care friends and stay well.
Lindsey**
Hi Lindsey
I love your post for this mask and would very much like to make a few for my family.
Where did you purchase the AC filter from and what brand did you buy.
Keep up with your positive posts.
Thanks
Ann
Hi Ann,
it needs to be a non fiberglass mask like this one; https://amzn.to/2MA124D – this is from Amazon.
Let me know if you have any more questions!
If the mask is light enough, the paper/metal ties you get at the grocery store work great for the nose area.
Great idea!
I developed a similar basic pattern, with more tapered pleats, for a much better fit and used iron-on adhesive to attach pieces that velcro behind the neck, rather than elsatic.
In addition, take several long pipe-cleaners, twist together for strength, glue on across the nose and below the eyes, for a better seal and even to hold glasses in place.
great tips! Thanks for those.
I used Walmart Bags and they worked good, I used for the outside fabric and two layers of fabric for the inside.
I used two 4 inch lengths of aircraft safety wire for the nose piece.
Now that’s a great disposable option!
I heard they are using car cover material for Mask Making
interesting
I use the blue cloth shopping bags from Walmart. I saw this on a you tube video when I started making mask for family and nurses I know.
oh that’s a great idea!
I have used pipe cleaners and they work very well. I also heard of, but haven’t used YET, HEPA vacuum cleaner bags as filters. You can cut the seams and lay it flat to get at least four filters out of it, cut around the hole.
…
So many great ideas!
I tried pipe cleaners- nah. Not strong enough. Doubled, tripled.
Paper clips are the answer. Easy to bend, cheap, keep their shape.
2 1/2″ wrapped it in electrical tape
great to know! Thanks for the tip!
I’ve heard that the vacuum cleaner bags are hard to breath through. Pipe cleaners would be a great choice!
I think your suggestion has health implications down the line with inspiration of fibers not meant to be used to filter on your nose and lungs
Do you mean the air filter? I made sure to disclose to NOT use a fiberglass filter.
And it’s okay to wash these with the AC filter inside them?
I wouldn’t wash the main mask, but the top layer of fabric, yes! I would wipe the main mask down really well after each use.
I don’t know if things hotglued can be washed. It might be a great 👍🏾 idea if it’s washable, to be able to remove the filter, wash, then replace filter.
Also, make a pattern putting pipe cleaner in place of wire hanger. Keep up innovating.
Should these be thrown away after each use?
My purpose for this mask is a last resort kind of thing when all other masks are gone. In that situation, I intended for the user to make a lot of different top layers that can be thrown away or swapped out after every use. So not necessarily throwing the entire thing away, but at least the top later. Then sanitize the rest of the mask as frequently as you can. I hope this helps.
Well based on the latest (TODAY) evolution of mask usage… As has been said :
If WE are a silent infected person and leave home, that’s when WE can cause problems.
Also I think the emphasis on these is personal use and we toss or wash.
I love how creative everyone is.
Our most important goal is to have supplies to continue making a good version. AND those supplies will need to continue to evolve as supplies may become scarce. The little girl in Boston making 24 per day was having trouble finding elastic.
So my thought on the
..Wire Hanger.. because that is my most scarce item.
IDEAS: industry wire
from Home Depot. Can
come on a spool. I think
it gets pretty thin.
Floral arrangements wire
sometimes covered in
green fabric.
Picture hanging wire.
Any thin wire could probably be braided or twisted.
Same concept and concerns on elastic. Option is ties but not great.
Maybe someone can compile a list of items and the alternatives for others to use.
My sister suggested cutting open a bungee cord.
That’s a great idea!
Pipe cleaner is a great idea! I didn’t have any to use, but that would have actually been easier to work with. I tried to use things that most people would have on hand.
I use the plastic covered wire from coffee bags. It’s flat and strong, I also have some farmers milk filters used when straining raw cows milk. (Co-op). They can be rinsed and dried, reusable. Easy to cut and sew, or glue. Or just slipped into a pocket
I’ve read that vacuum cleaner bags prevent small particles from getting through, per this article: https://hackaday.com/2020/03/18/homemade-masks-in-a-time-of-shortage/. Did you consider vacuum cleaner bags instead (or with) the ac filter?
Look at the University of Southern Florida N95 mask.
Vacuum cleaner bags are too hard to breathe through and using these filters you have to be extremely cautious.
I ordered some new but old style HEPA Kirby upright filters on eBay. I’ve gotten a bunch of filters from each one. They are not hard to breathe through. They are a lightweight but strong fabric not paper.
No I did not but that’s a great idea!
Aren’t the staples really scratchy?
Not at all!