I know you’re thinking “here she goes again with the fabric tape!” I might be a little (maybe a lot) obsessed with this stuff. When there are so many great projects that require sewing, and you find an alternative that doesn’t require a single needle, you jump for joy! I hate sewing, can you tell? Let me dive straight in to yet another NO SEW project and this one is all about how to make a roman shade or valence from a shower curtain.
Friends, I have immersed myself into the no sew world lately. I created my own DIY no sew pillow covers, and then I made my own no sew pillows from tea towels, and finally I rounded up a post with a beginners guide to no sew projects.
Let’s just say I have a love affair with all things no sew!
This post contains affiliate links. This means that if you purchase from one of these links I will receive a small commission but rest assured you will pay no more for the product.
Let’s start with materials:
- fabric of your choice or shower curtain
- fabric tape (peel and stick and iron on)
- scissors
- measuring tape
- ribbon of your choice
- iron
A couple things to note;
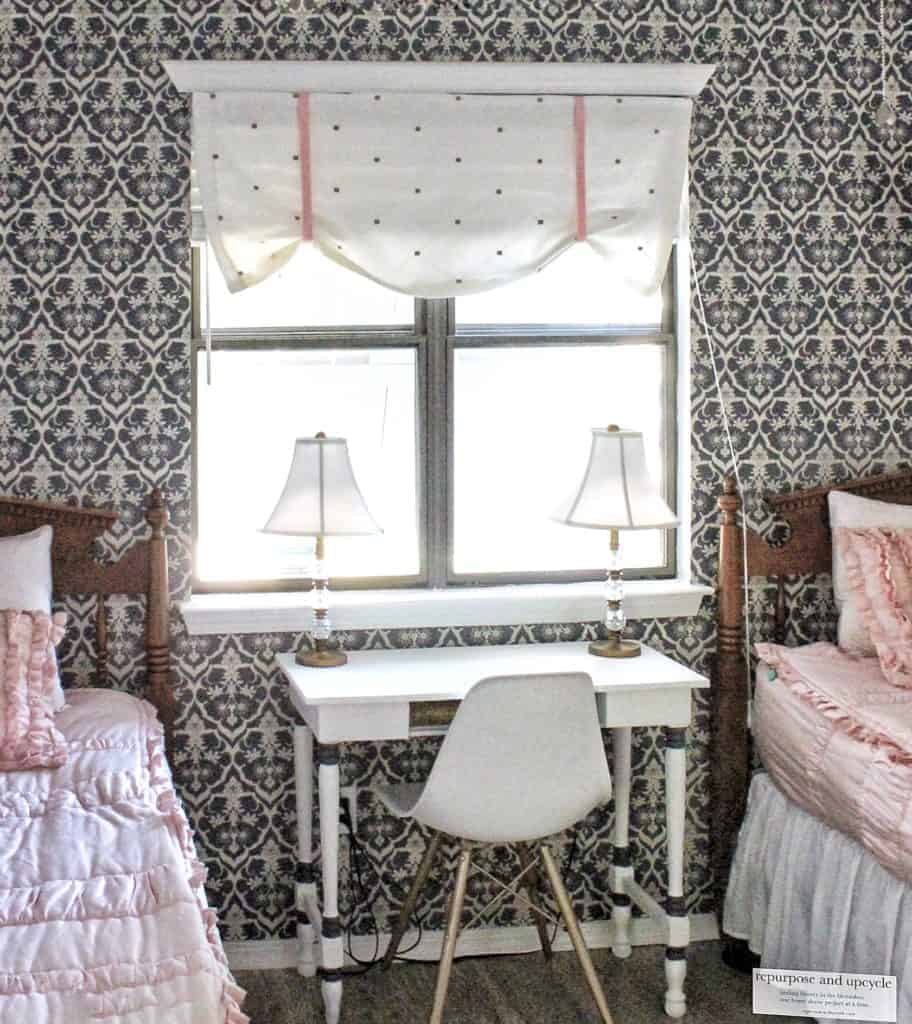
I’m using a shower curtain to create a roman shade valence.
This shower curtain happened to be on sale at Bed Bath and Beyond.
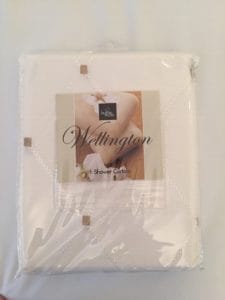
The reason a shower curtain works well is because it is wide and will fit the width of almost any window. Most shower curtains also have a decorative hem at the top that slides or fits into the shower curtain rod.
Just as a shower curtain fits into a shower curtain rod, your new no sew roman shade will fit into a curtain rod!
This saves time and work! Yay for repurposing a shower curtain to a roman shade!
Another thing to note;
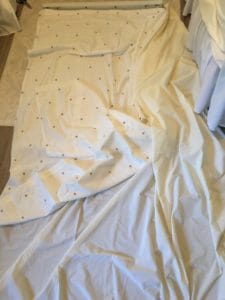
Most shower curtains are not lined. This provides a problem and will require you to back the fabric with a solid piece of material. I have chosen to cut up an old sheet to line the shower curtain with.
If you choose to use fabric to make this DIY roman shade or valence, you might not have to line it if you purchase upholstery weight fabric.
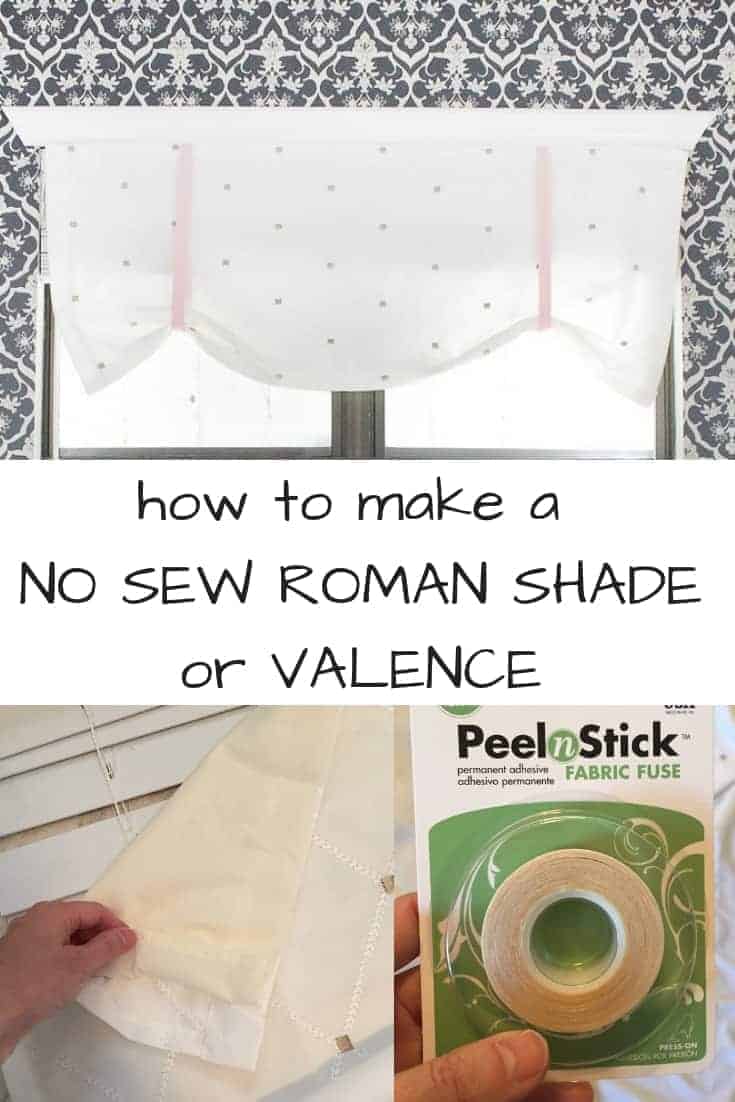
How to make a no sew roman shade or valence
- Measure the length and width of your window. This is where you need to decided if you are making a regular roman shade or just a valence. The method to making both are exactly the same, you just need to alter the length based on which one you choose.
- Once you’ve measured the window and have your exact measurements, add at least 3 inches to each side (this will allow room to make the “hems”).
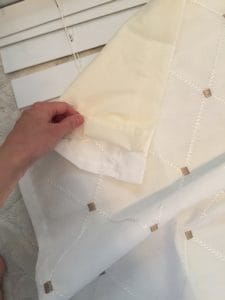
- If you are lining the roman shade, cut out your lining material and start using your double sided fabric tape (I use the iron on for this part) and back the entire shade. You can see below where I’ve started to lay out the lining (old sheet) under the shower curtain so I can measure and cut!
- Next grab your iron on fabric tape and start attaching the lining to the shower curtain or fabric. I attached the lining up to the edge of the two sides that I cut. I did, however, only attach the lining to the inside of the other two sides that already had a hem.
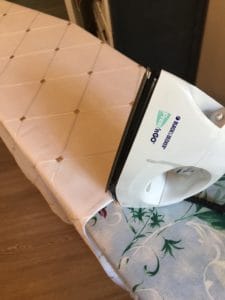
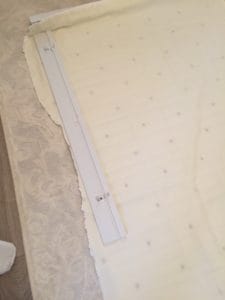
- Once you’ve fully lined your roman shade or valence, it’s time to make the “hem.” The easiest way to do this is to grab a straight edge and fold over the outside edge to the inside (to make sure it’s straight) and attach it with fabric tape.
- Once you’ve lined the shade, “hemmed” all the edges, and have a nice looking curtain, it’s time to add the ribbon. This is where the curtain will look more like a roman shade.
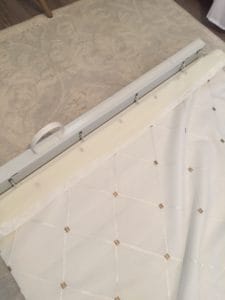
- Before I added the ribbon, I attached the curtain to the outer edge of the blinds. I did this with the peel and stick fabric tape. You can choose to do this before you attach the curtain, it’s completely up to you. For me, I thought it would be easier to attach it first. If you are sliding your shade into a curtain rod, you can either do that now or after you attach the ribbon.
- All that’s left to do is to attach the ribbon! There are a few different ways to do this. You can use a piece of ribbon in the middle, or two on the sides, or three or four! I attached the ribbon to the back side of the curtain with, yes, peel and stick fabric tape.
Now you’re done! Hang that DIY roman shade or valence and enjoy!
The best part about this project is that it doesn’t require my old sewing machine! Since this project, I’ve also created my own DIY no sew pillows covers with fabric tape and DIY No Sew Pillows from Tea Towels from the Target Dollar Spot.
Video tutorial on how to make a no sew roman shade or valence from a shower curtain.
Now tell me, isn’t fabric tape the best? LOL.

How to make a No Sew Roman Shade or Valence
This is a quick tutorial on how to make a no sew roman shade or valence from a shower curtain.
Materials
- fabric of your choice or shower curtain
- fabric tape (peel and stick and iron on)
- scissors
- measuring tape
- ribbon of your choice
- iron
Instructions
- Measure the length and width of your window. This is where you need to decided if you are making a regular roman shade or just a valence. The method to making both are exactly the same, you just need to alter the length based on which one you choose.
- Once you've measured the window and have your exact measurements, add at least 3 inches to each side (this will allow room to make the "hems").
- If you are lining the roman shade, cut out your lining material and start using your double sided fabric tape (I use the iron on for this part) and back the entire shade.
- Next grab the iron on fabric tape and start attaching the lining to the shower curtain or fabric. I attached the lining up to the edge of the two sides that I cut. I did, however, only attach the lining to the inside of the other two sides that already had a hem.
- Once you've fully lined your roman shade or valence, it's time to make the "hem." The easiest way to do this is to grab a straight edge and fold over the outside edge to the inside (to make sure it's straight) and attach it with fabric tape.
- Once you've lined the shade, "hemmed" all the edges, and have a nice looking curtain, it's time to add the ribbon. This is where the curtain will look more like a roman shade.
- Before adding the ribbon, attach the curtain to the outer edge of the blinds with peel and stick fabric tape. You can choose to do this before you attach the curtain, it's completely up to you. If you are sliding your shade into a curtain rod, you can either do that now or after you attach the ribbon.
- All that's left to do is to attach the ribbon! There are a few different ways to do this. You can use a piece of ribbon in the middle, or two on the sides, or three or four! Attach the ribbon to the back side of the curtain with, yes, peel and stick fabric tape.
Thanks for stopping by. I hope I’ve inspired you to grab some fabric fuse and begin to create!
Lindsey**


