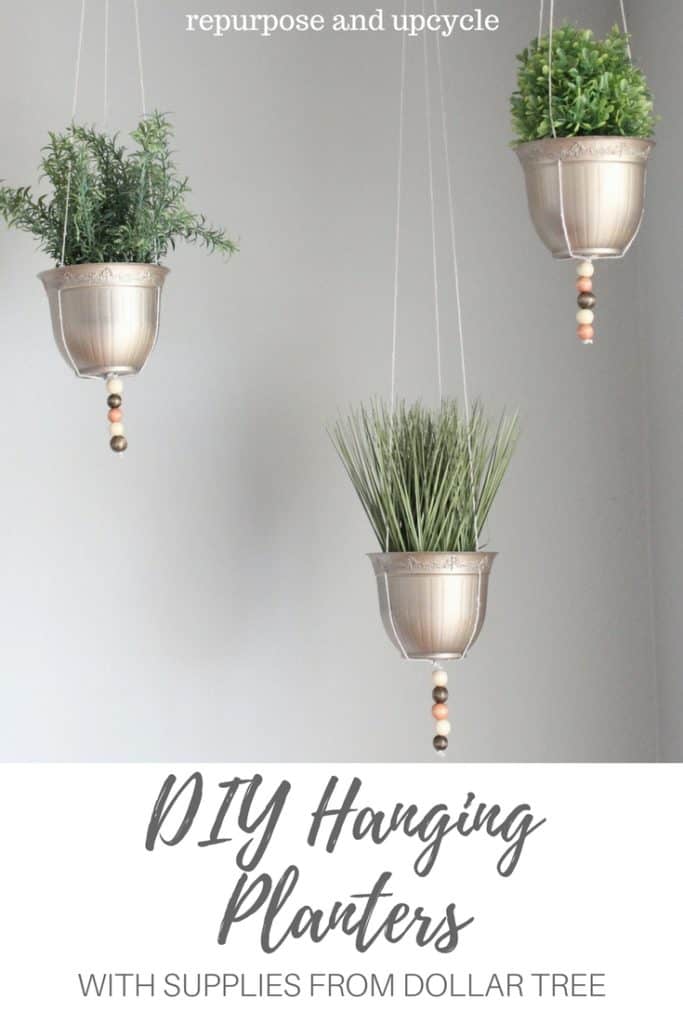
Check out how to make these DIY planters with supplies from the Dollar Tree!
With spring just around the corner and the winter blues headed out, it’s time to spruce up my space with some new decor. I figured what better way than to bring the outdoors in with a little DIY hanging planter project. I’ve gathered up all my supplies and you’ll never guess where I found them….The Dollar Tree!
I love an “indoor garden,” but I don’t have a green thumb. Recently I even added a few DIY planter ideas. Adding touches of green to my home really warms it up and makes it more welcoming.
It seems that boho style is on the trend these days. I’ve started seeing a lot of macrame cord and woven patterns, and I have to say I’m loving it. Even though I do still prefer a vintage, cottage style, I wanted to add a little boho vibe to my home.
Since I’m currently loving gold tones, I figured I would start this Dollar Tree DIY project with a little spray paint.
Disclosure; this post contains affiliate links. As an Amazon Associate I earn from qualifying purchases. This disclosure statement refers to the rest of the Amazon links in this post. See more on my disclosure page.
DIY hanging planter supplies:
- Spray Paint of your choice – I chose to use this gold spray paint
- Planter pots of your choice – I got mine at the Dollar Tree three pots for only a dollar!
- Cotton twine or any sort of twine
- Floral Foam – I also purchased from the Dollar Tree
- Screw driver with a drill bit
- Faux plants
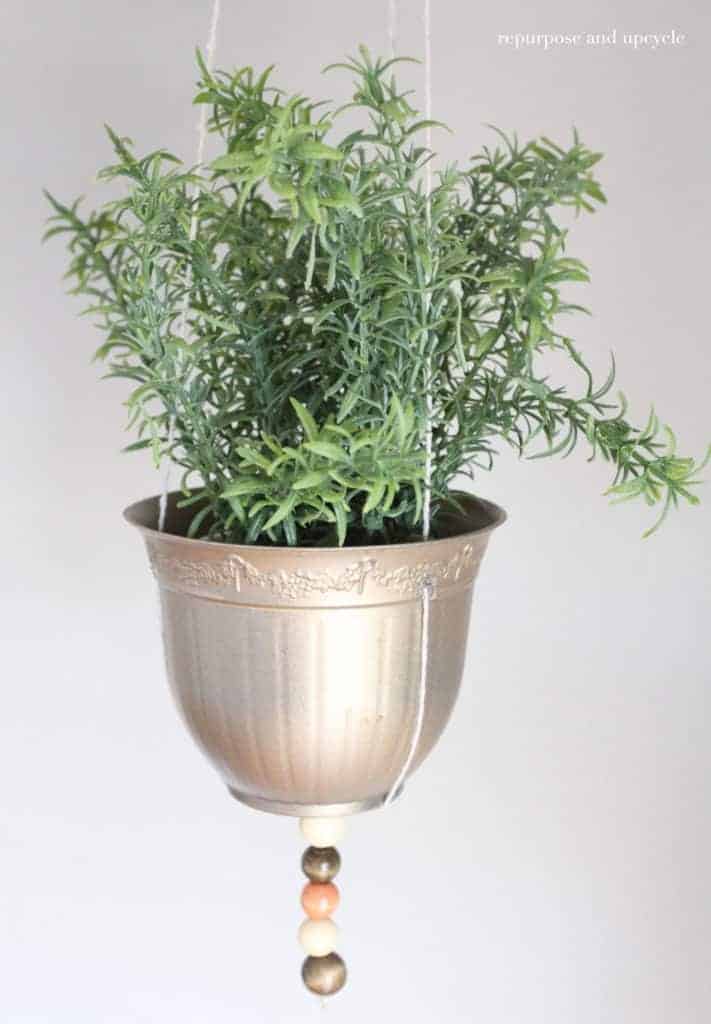
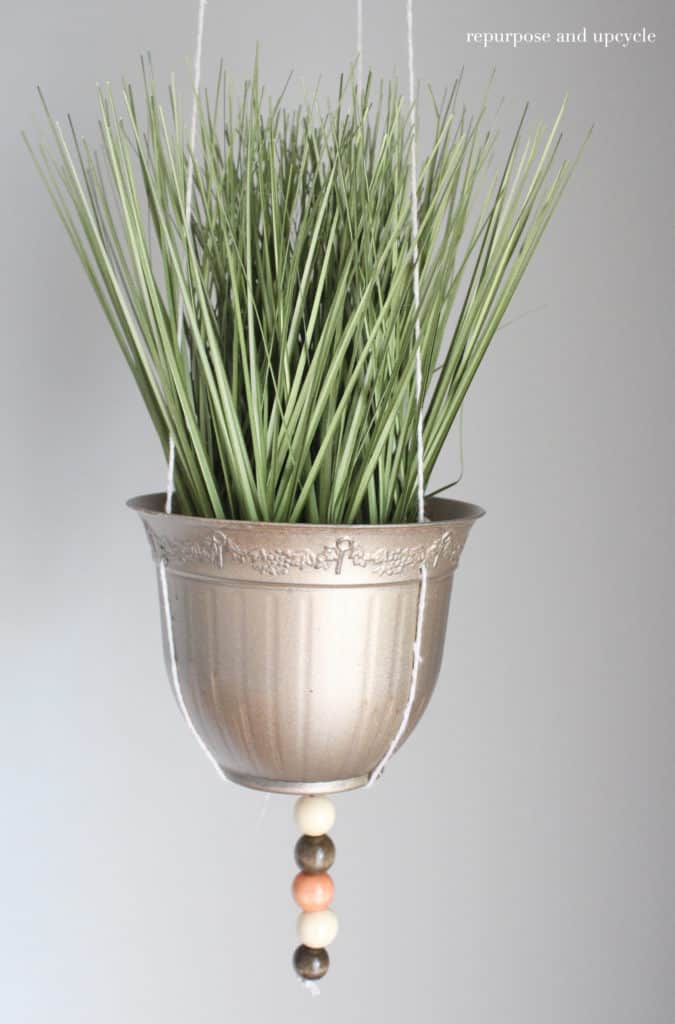
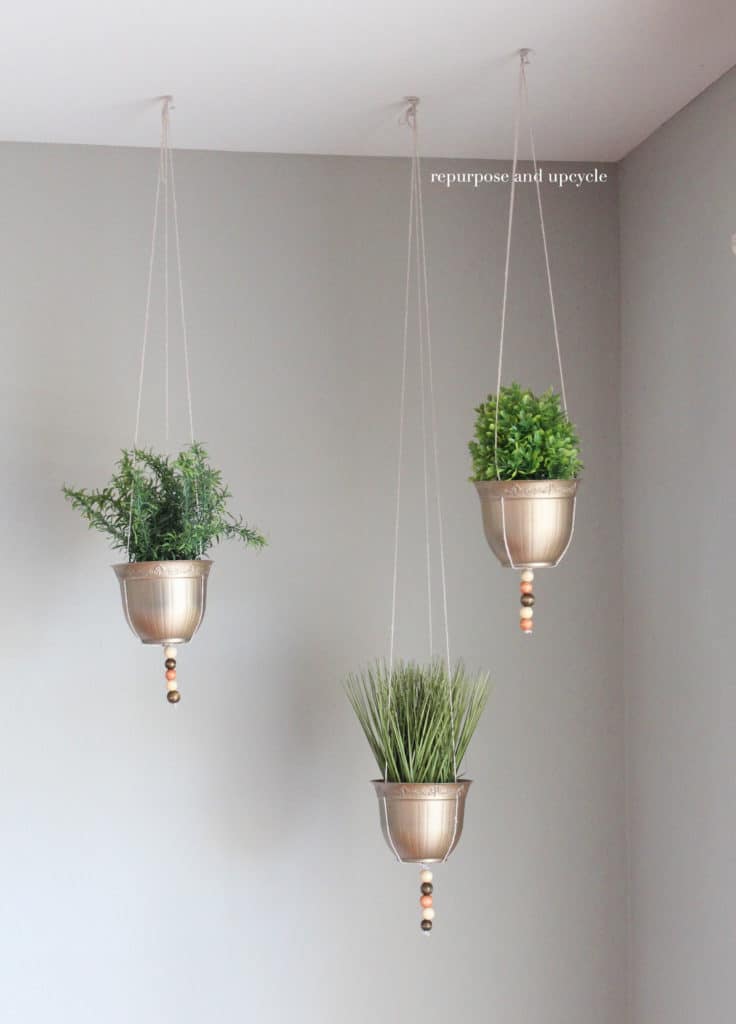
I chose to spend a little more and purchase already made faux indoor plants from Target. These little planter pots with the different grasses and greenery were only $7.99 each. The fit perfectly inside the dollar tree planters. I figured I could reuse them if I ever got tired of the hanging planters.

What do you think about my 8″ inch faux planters from Target? I purchased three:
- Boxwood
- Artifical Grass
- Artificial Rosemary
The rest of my supplies:
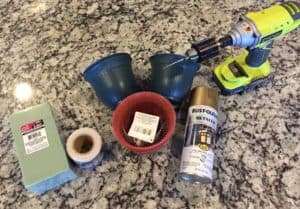

First thing I had to do before I spray painted the planters was to drill three holes in each of them.
Note; If for some reason you plan to use real plants, make sure to drill drainage holes at the bottom. If you do decide to use real plants, it’s a good idea to make these cute planters for outside. After all, you wouldn’t want excess drainage dropping from above.


Once the holes were drilled, it was time to spray paint. Like I said earlier, I wanted to go with a gold color.
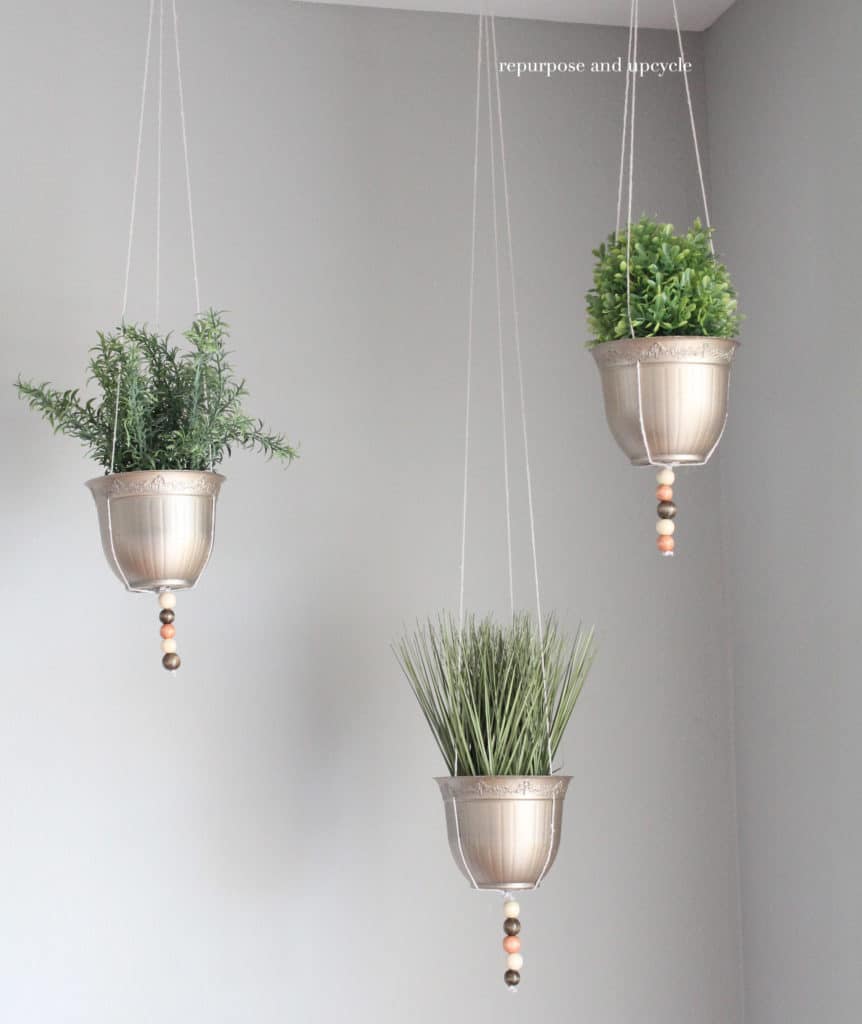
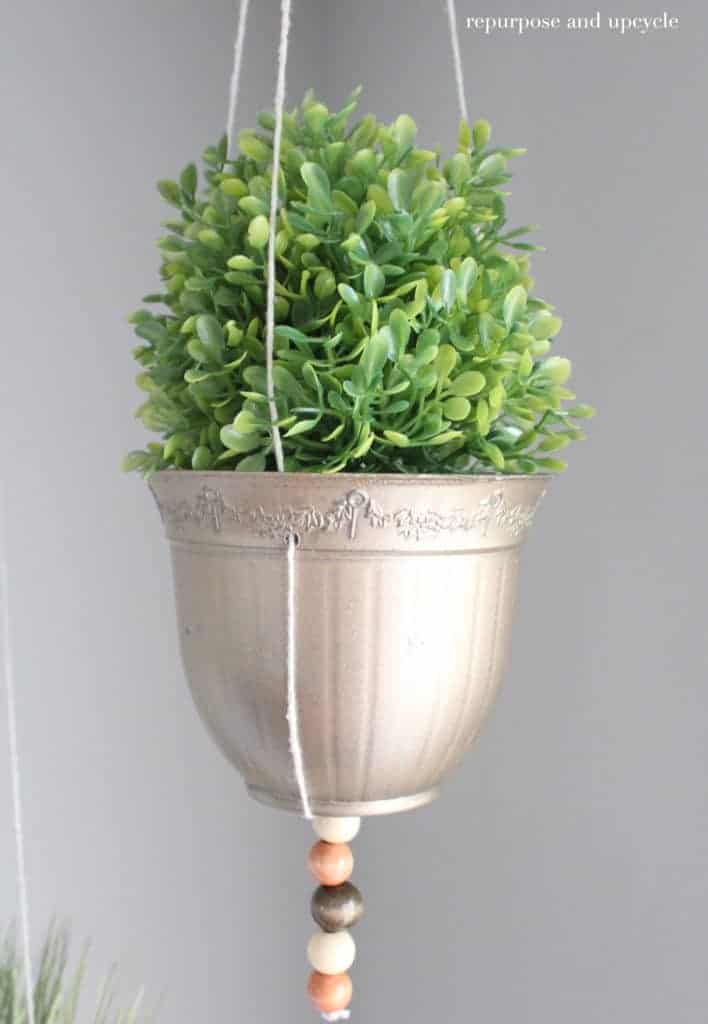
After spray painting the planters, use the yarn to string through the pot. I used regular old twine so I could string a few beads through, but a heavier macrame cord would look nice too.


After I strung all the yarn through the holes, I tied them at the bottom of planter and used a little hot glue to secure it.

I decided to add a few beads at the bottom to “dress it up” a bit. The simple yarn just didn’t look good. And that’s it!
FYI: I hung the hanging planters with a thumb tac. These planters are super light, so a thumb tac held them sufficiently.

I love how the planters add just a little bit of color to this space!
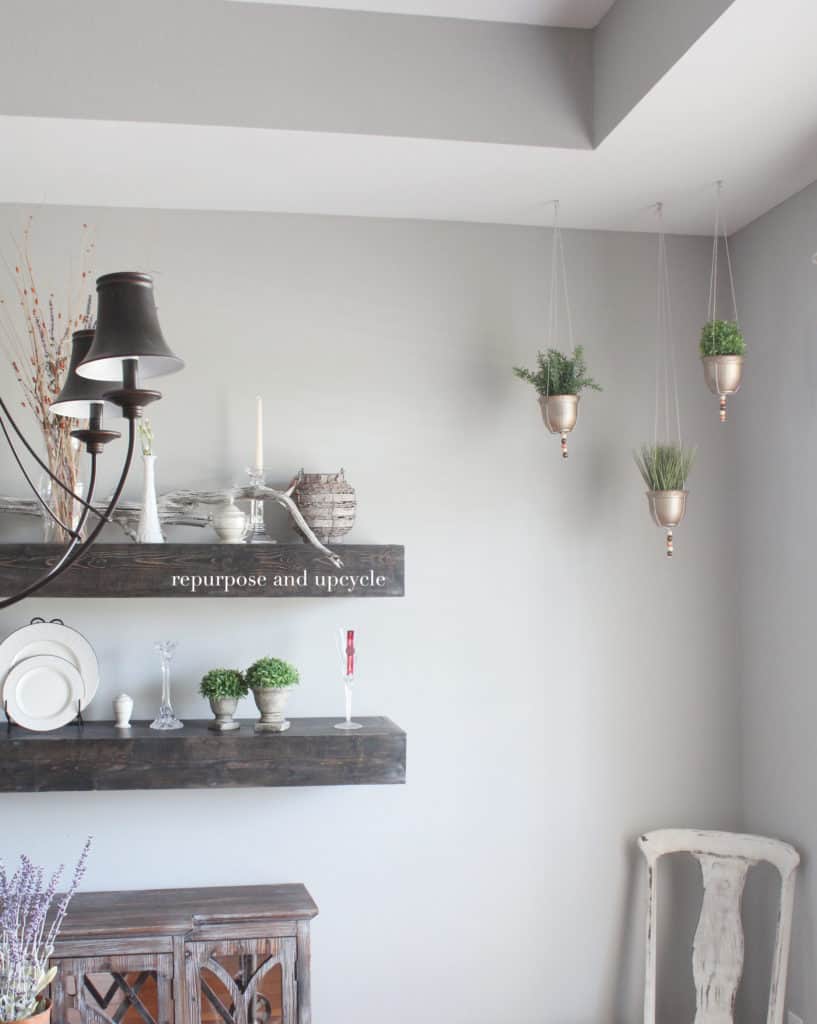
This corner of our dining room needed a little something and I think it’s the perfect touch of greenery.
What do you think? I think my DIY hanging planters fit in well with the rest of my dining room!
If you want to see a few more planter projects, check out a few below:
DIY Faux Stone Hanging Planters with Spackling Compound
Installing Window Box Planters with Shutters to Hide Asymmetrical Windows
I hope you’ve enjoyed this simple DIY project guys!
Lindsey**


