Do you have any spruce wood furniture? If you don’t, I bet a good part of the framing on your home is made from a soft wood like Spruce. Spruce wood is often known for it’s lightweight design, cost-efficiency and availability. This makes it a great wood to use for things like shelves. Let me show you how easy staining spruce wood is!
I’m going to take you step by step on how I stained the wood surface with a few oil-based stains to enhance the natural color. I also used a little paint to finish the edges of the shelves, but I won’t go into too much detail on that because I’ll be discussing the stain process today.

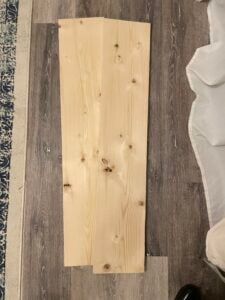
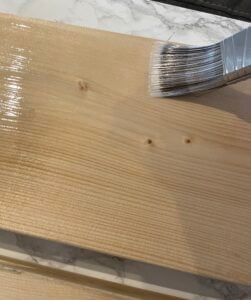
Below is the Spruce wood I’ll be staining and making shelves out of.
Best way to stain Spruce wood
Sanding
First things first, make sure the wood has a smooth finish. This mean sanding the spruce top (or entire surface) until it’s smooth. Start with a 100 grit sandpaper and end with a a 220 grit sandpaper (or similar grit). No need to use a finer grit sandpaper. The goal isn’t to remove a lot of the wood, just to smooth the surface.
The biggest sanding tip for this type of wood is to use a hard sanding block and slowly sand in the direction of the grain of the wood until the rough spots and imperfections are gone.
Since spruce is a softwood, be careful not to sand too hard as you don’t want to end up with streaks in the wood where you can visibly see where you’ve sanded.
You can see below where I scratched the surface by sanding too deep and hard. When I applied the stain, it settled in the grooves that weren’t smooth. Make sure not to make the same mistake!

Pro tip: If you don’t have a sanding block, you can make one. Use a book or another hard and straight surface and wrap the sand paper with it.
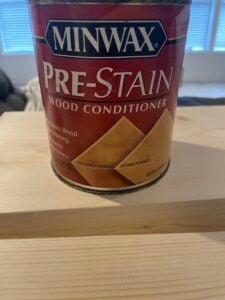
Apply wood conditioner
Softwoods are known for being blotchy when stained. How do you get around this? Using a wood conditioner or pre-stain conditioner to the bare wood is key to creating a uniform finish on your piece of wood. Don’t skip this step!
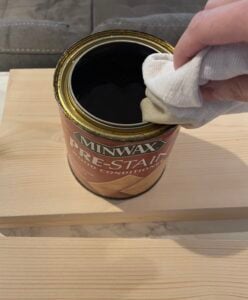
How to apply wood conditioner
- When you open the can, make sure to stir it well
- Using a lint free rag, dip it into the conditioner and apply it in the direction of the wood grain
- After 5 minutes, wipe off the surface with a clean lint free rag
Once the wood conditioner is dry (drying time might vary), apply the stain over it within 2 hours.
Note: these directions will work for most wood conditioners, but always follow the directions of the product you are using.
Apply the wood stain
What kind of wood stain should you use on spruce wood? What wood stain color should you use? That is a personal preference! Wether it’s an oil-based stain, water-based stains or even if you choose to use gel stains, the sky is the limit.
It’s always a good idea to practice with the stain of your choice with test pieces first before you dive into staining the entire piece of wood.
I chose to use a variation of Minwax and Varathane oil based stains to apply to the spruce wood shelves. I applied one coat of each different type of stain.

Apply the stain the same way you apply the wood conditioner. Always follow the directions on the stain product you use, but normally most stains say to wait at least 2 -4 hours in between stain coats. I waited about 4 hours in between using the first stain coat and the second stain coat.
For best results, apply a liberal amount of stain in the direction of the wood grain and let it to absorb. Then wipe the excess away and watch the beautiful color come out. As with any stain, the more coats of stain you apply, the darker the finish. So the end result is ultimately up to you.
Troubleshooting blotchy stain lines
Another big tip I have to share; immediately after you apply the stain make sure it looks uniform and not runny. You can see below where I had a few stain streaks.
I think what happened here was that a few drops of stain got on the surface of the table I was using and absorbed on the bottom side of the wood. When I rolled the wood over, the extra stain ran down the wood. Since it hadn’t fully absorbed yet, I was able to use a rag with a little bit of stain and wipe it away.
As a side note; I did decide to paint the sides of the shelves and not leave them stained. Why? Well, I just didn’t love the way they looked. So I painted them!
Top Coat
What about applying a clear coat? Some stain products come with a clear coat already mixed in, but if your stain product does not, I would definitely suggest applying one. I won’t go into all the details, as I have an entire post dedicated to my favorite top coats for wood.
For this staining project I chose to apply a Minwax “One Coat Polyurethane” sealer to the wood.
Another tip when applying sealer; The biggest mistake I run into (and I see other refinishers run into as well) is leaving the drip marks to dry. Let me show you.

Make sure to check and double check to ensure there are no drip marks!
How many coats of sealer do you use for stained wood surfaces? That is entirely up to you. A good rule of thumb I go by is that if it’s going to be used for a high traffic surface, I always apply two good coats. For these shelves, and since this sealer is known for only needing “one coat,” I only applied it once.
Make sure to allow the sealer to fully cure before using the surface. FYI the cure time and the re-coat time are different! For those that don’t know; The cure time is that amount of time it needs to sit before fully being used and the re-coat time is how long you need to wait until you can apply another coat.
In a nutshell:
| HOW TO STAIN SPRUCE WOOD |
| 1) Prepare the surface with sanding |
| 2) Use a wood conditioner |
| 3) Apply the stain |
| 4) Fix or trouble shoot blotchy or streaky stain problems |
| 5) Protect the finish with a top coat |
My new stained Spruce wood floating shelves
I love the way they look! What do you think? I wanted a very natural “wood look” and I think that’s what I got. By the way, if you want to see more of these DIY thin floating shelves check out this post. If you want to see the entire twin bed nook with a ceiling track, check out this post!

Let me show you a close up of the wood without all the decor. Like I said, I love the natural look.


And that’s it folks, easy peasy right? You don’t have to be a professional to create beautiful wood furniture pieces. I hope this easy tutorial will help you know how to stain soft woods for your wood projects. Like I said, ultimately, the finished product is up to you and how you want your stain to look. That being said, there are some tips to staining soft wood types and I hope you will use these tips to create your own lovely stained furniture!


