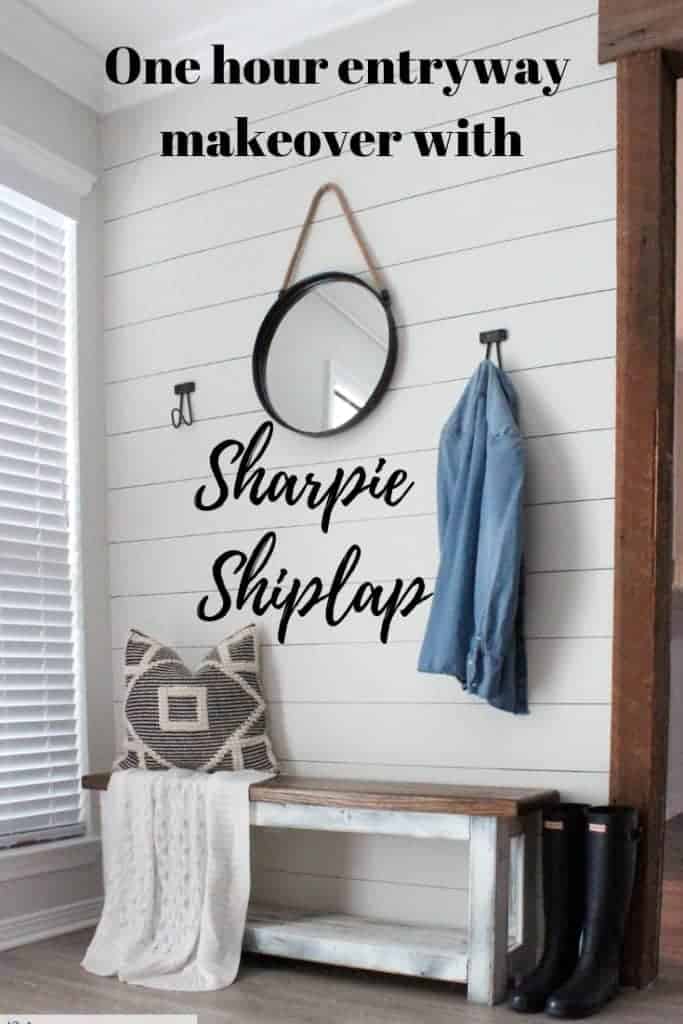
I’m all about creating new spaces. I’m more about creating new spaces that don’t take a lot of time or money! This project encompasses both of those. I still can’t believe how stinkin’ real the Sharpie shiplap looks! Speaking of Shiplap, I’m no stranger to creating my own DIY shiplap. In our old house I made over a wall with Shiplap with NO power tools! This time around, though, I made this DIY shiplap even easier! Enough talk, let’s get to the process of how I created this modern farmhouse entryway in under one hour with Sharpie shiplap.


One of the best things about this easy DIY is that it’s also renter friendly. Do you rent your home and yet still want to add a little faux shiplap? Friends, THIS is the way to go. You can also see my post where I share more ideas on DIY renter friendly wall treatments.
Table of Contents
How do you create a faux planked wall with Sharpie Shiplap?
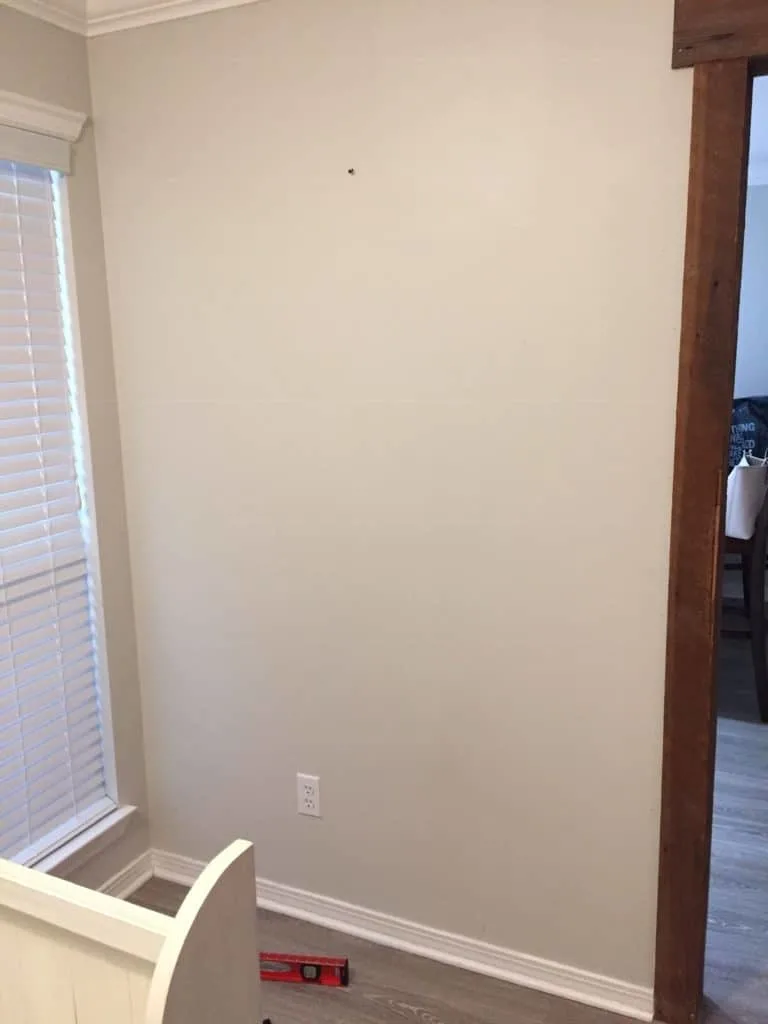
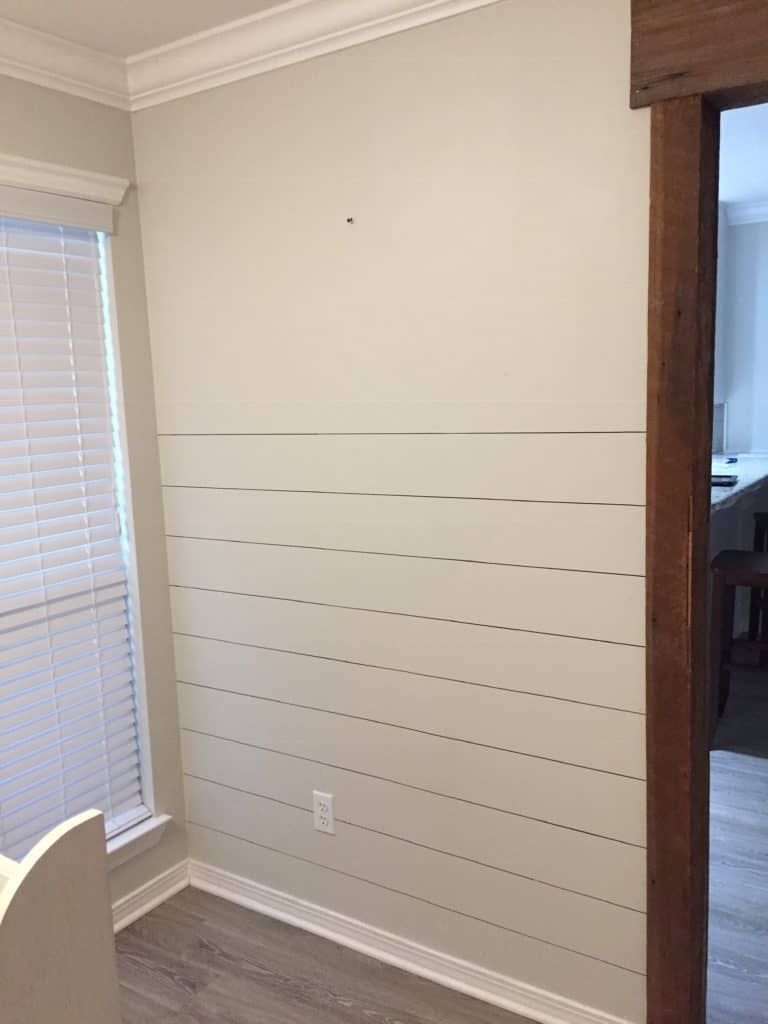
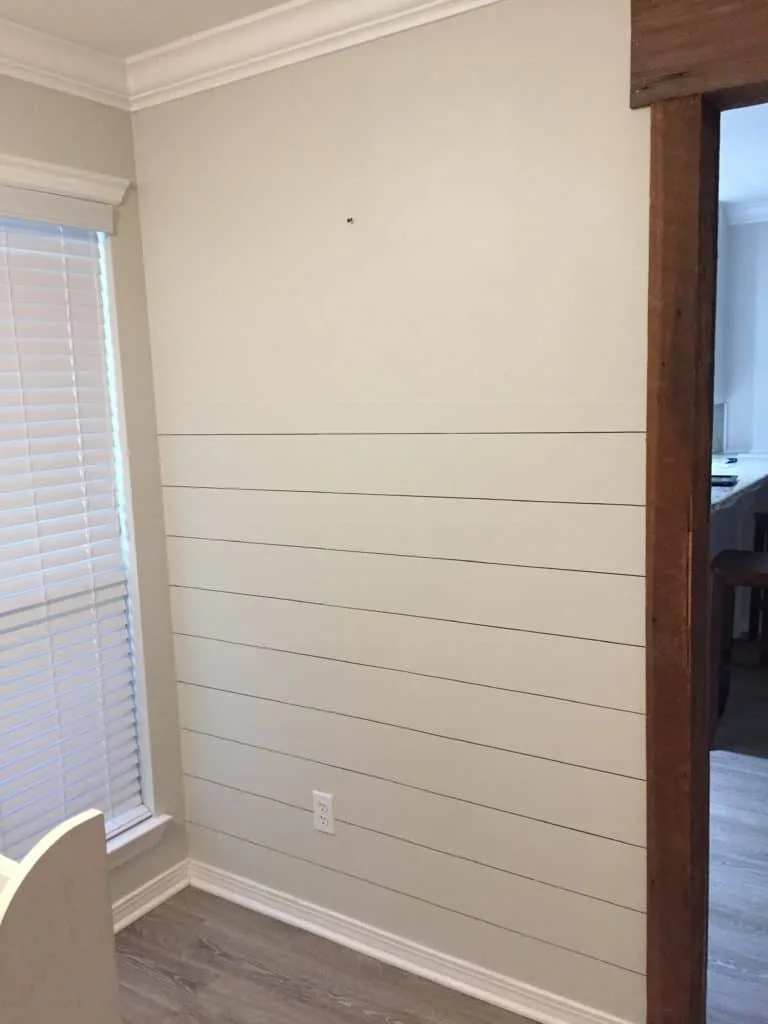
First let me show you my modern farmhouse entryway BEFORE this one hour makeover with Sharpie Shiplap.
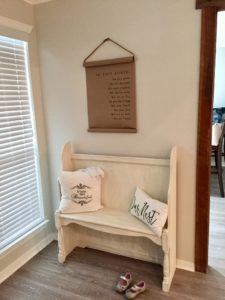
It doesn’t look bad, I just felt like it could still look better. Your entryway is the first thing that people see when they come into your home, so you want it to look great!
Disclosure: this post contains affiliate links. This means that if you purchase from one of these links I will receive a small commission at no extra cost to you.
Materials needed to create Sharpie Shiplap:
Note: You don’t have to use an oil based Sharpie. As a matter of fact, a regular Sharpie will work just fine. An oil based Sharpie is more smudge resistant and more permanent as well. If you know this is only temporary, I would suggest using a regular Sharpie (just be careful about smudges).
How to create a Sharpie Shiplap wall
- First, decide how wide you want the faux shiplap planks to be. I decided to make my lines 6″ apart. I’m not sure if there is a magic “shiplap width” but this is how wide our real shiplap is in our living room.
- Use a pencil to mark tick marks on the side of the wall every 6 inches.
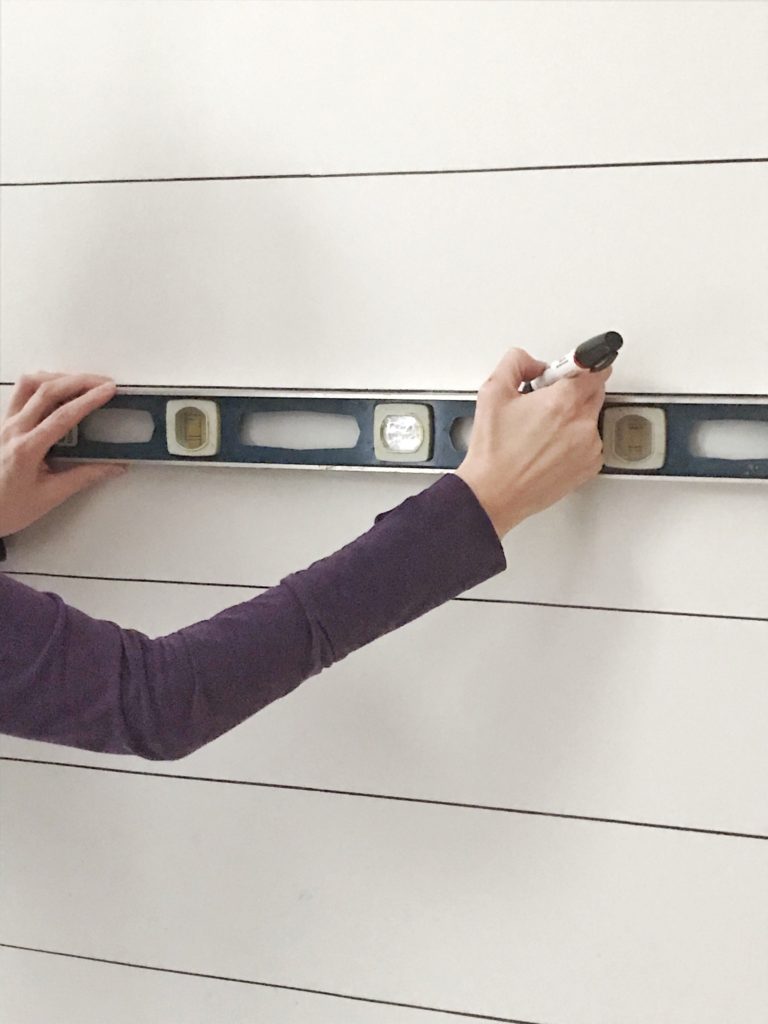
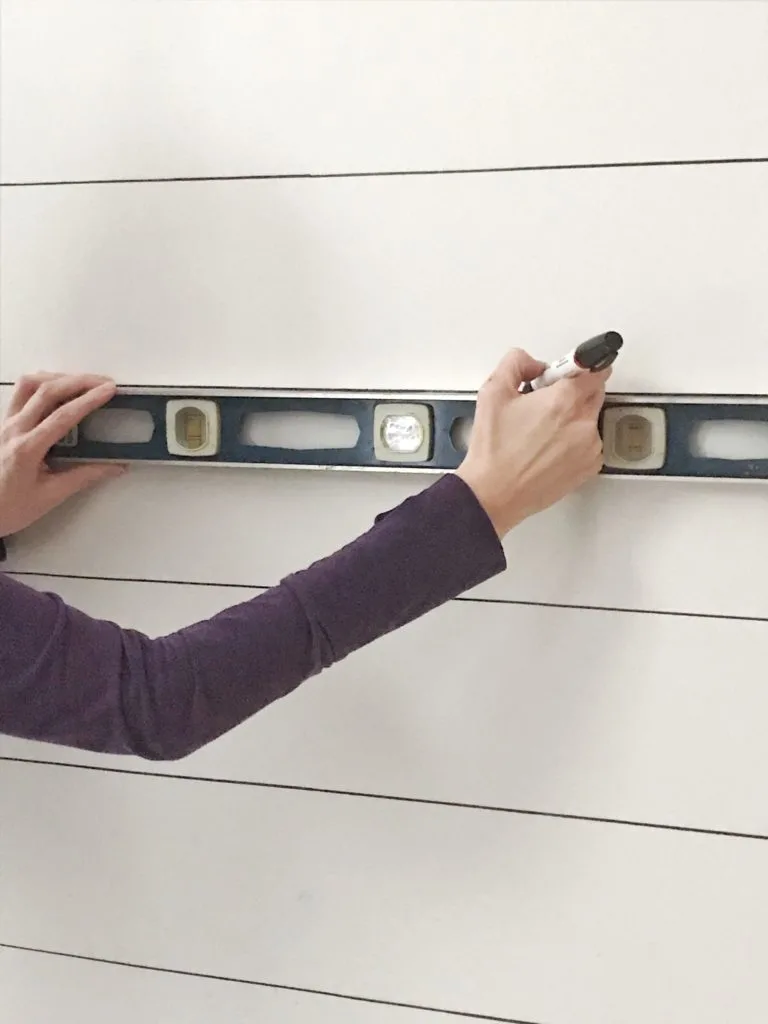
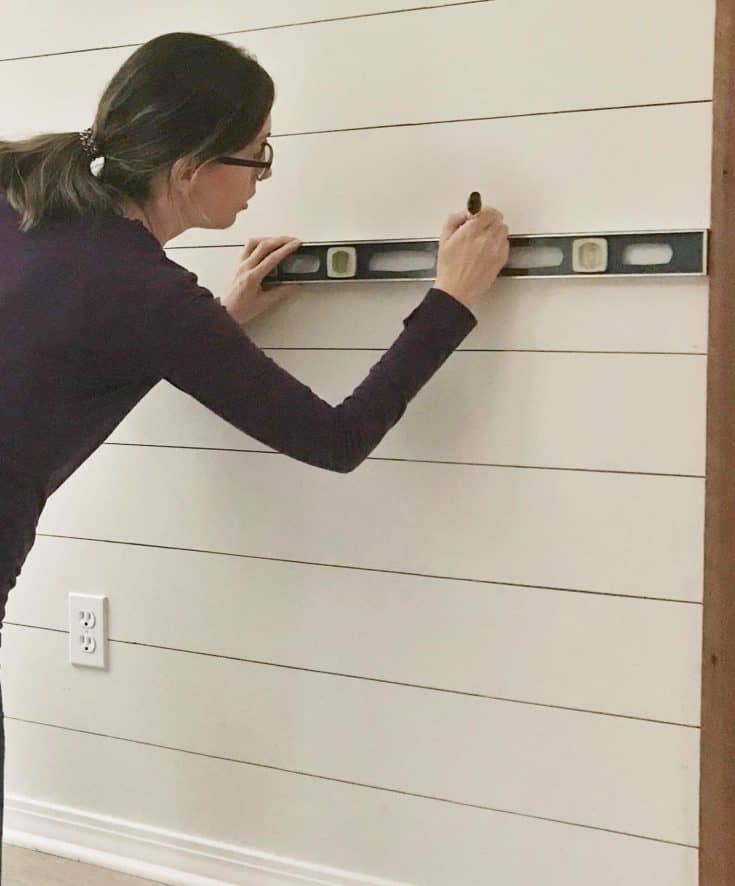
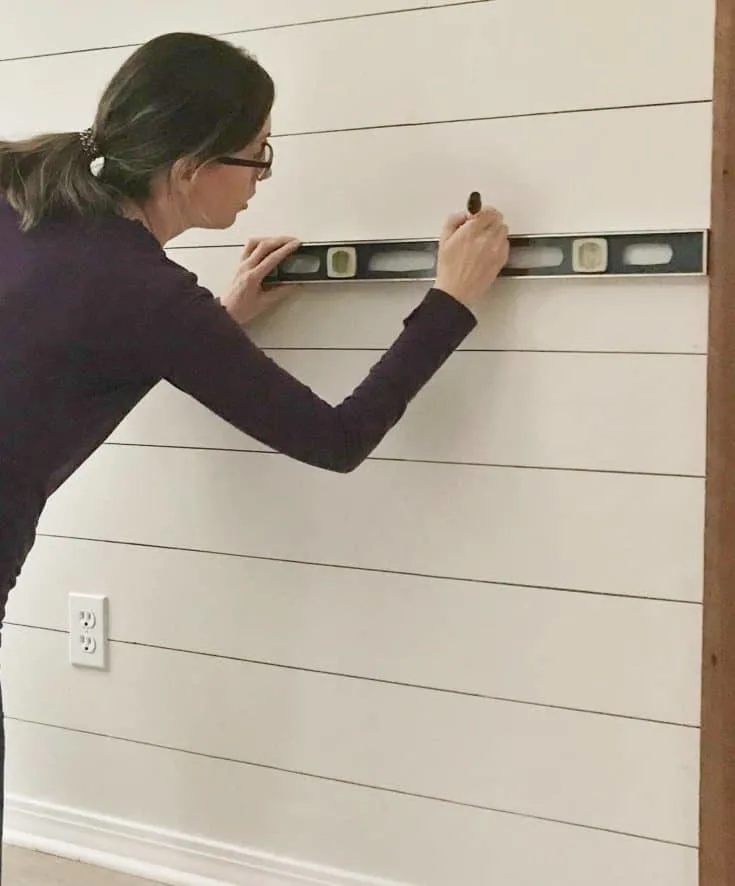
- Line your ruler up to the first tick mark. After you’ve made sure the ruler is level, start drawing a line with the sharpie. Be careful to line up the point of the sharpie perfectly when you’re moving the ruler from one point to the next.
- I started at the bottom of the wall, but hindsight I should have started at the top. Lucky for me everything lined up, but if I do this again I will start at the top (like I say, learn from MY mistakes).
- Continue making lines until you are done with the wall and you have perfectly drawn shiplap!

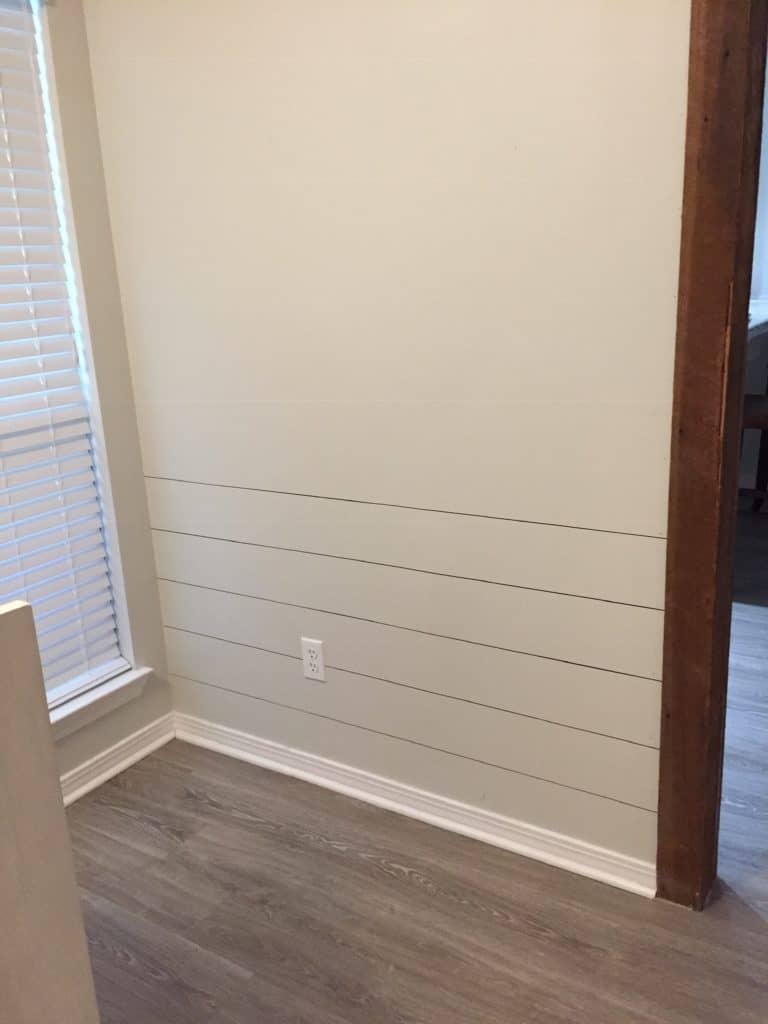

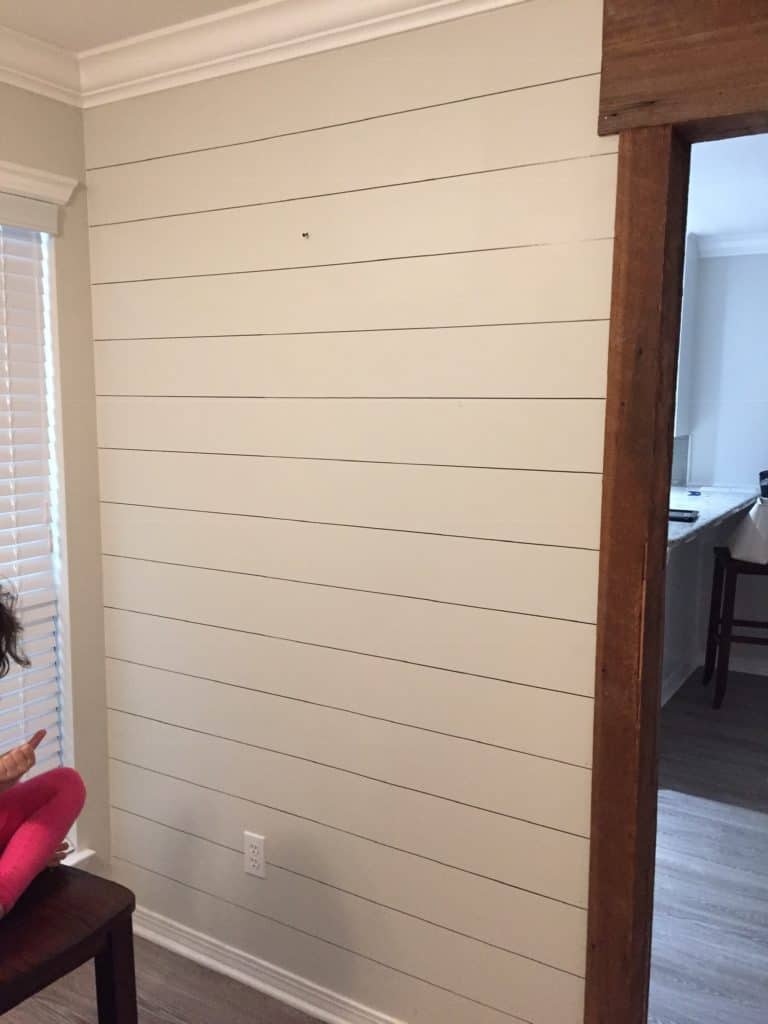


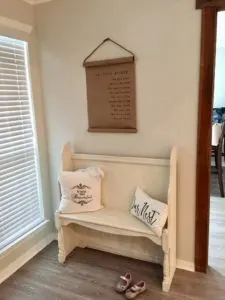
I have to admit, after the first few lines were complete I thought I had made a huge mistake. But after the Sharpie Shiplap wall was done, I was surprised at how much dimension it added. After adding accessories, it looked almost like the real thing.
Video tutorial of Sharpie Shiplap
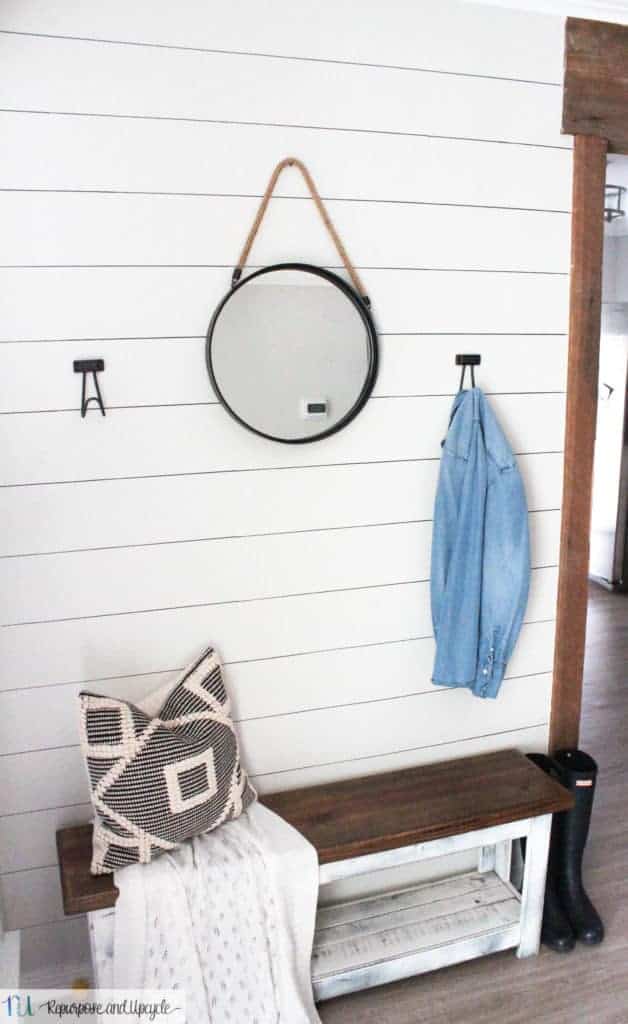
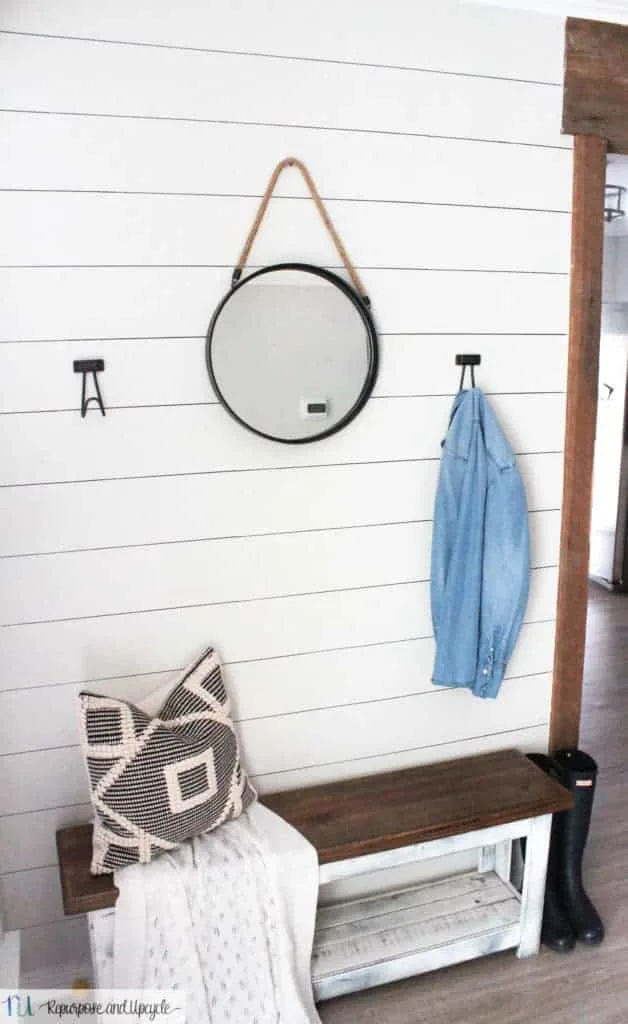
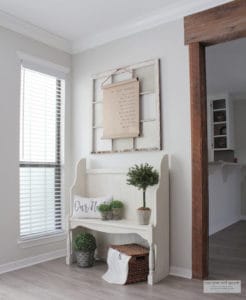
I’m finally pleased with our entryway. Best part, it really only took me about an hour to re create this whole space!
Is there a space in your home that you can add a little sharpie shiplap?
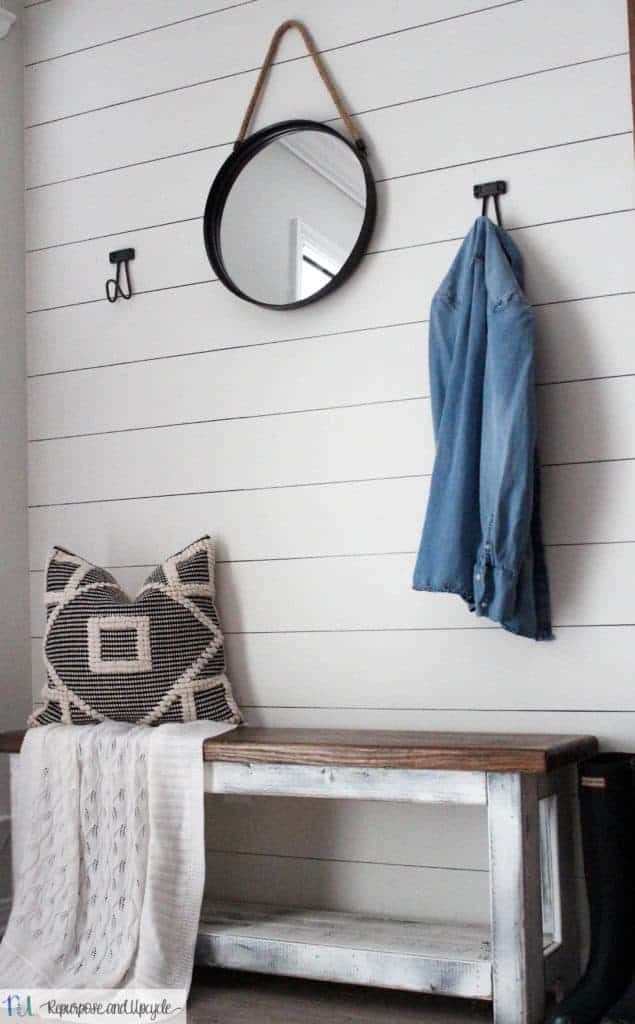

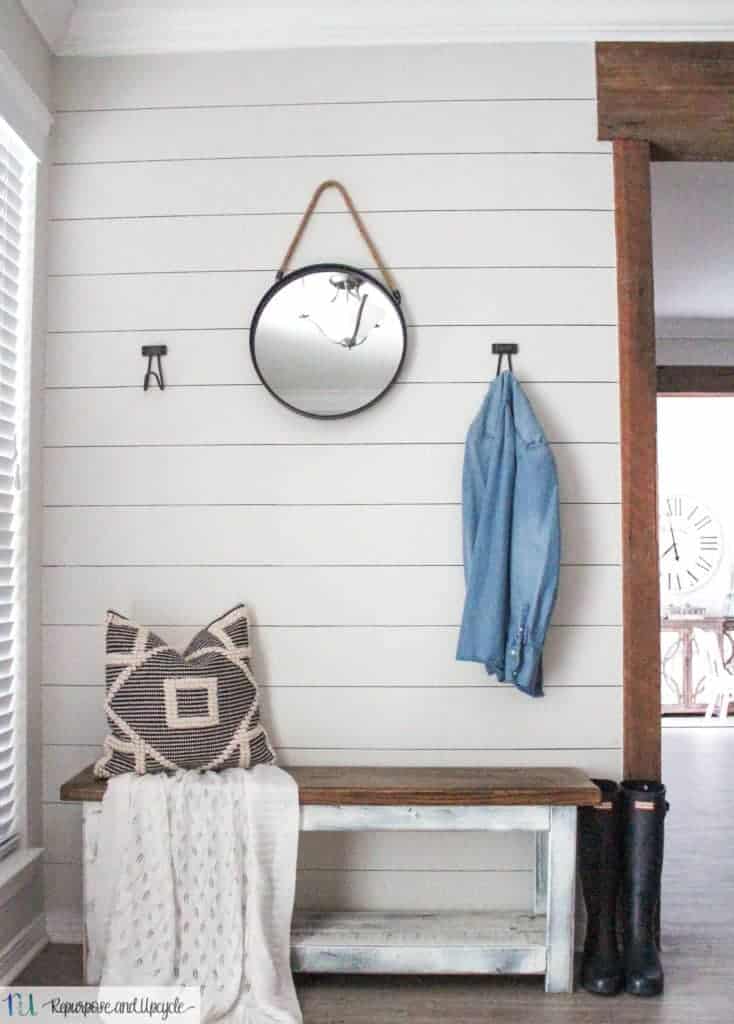
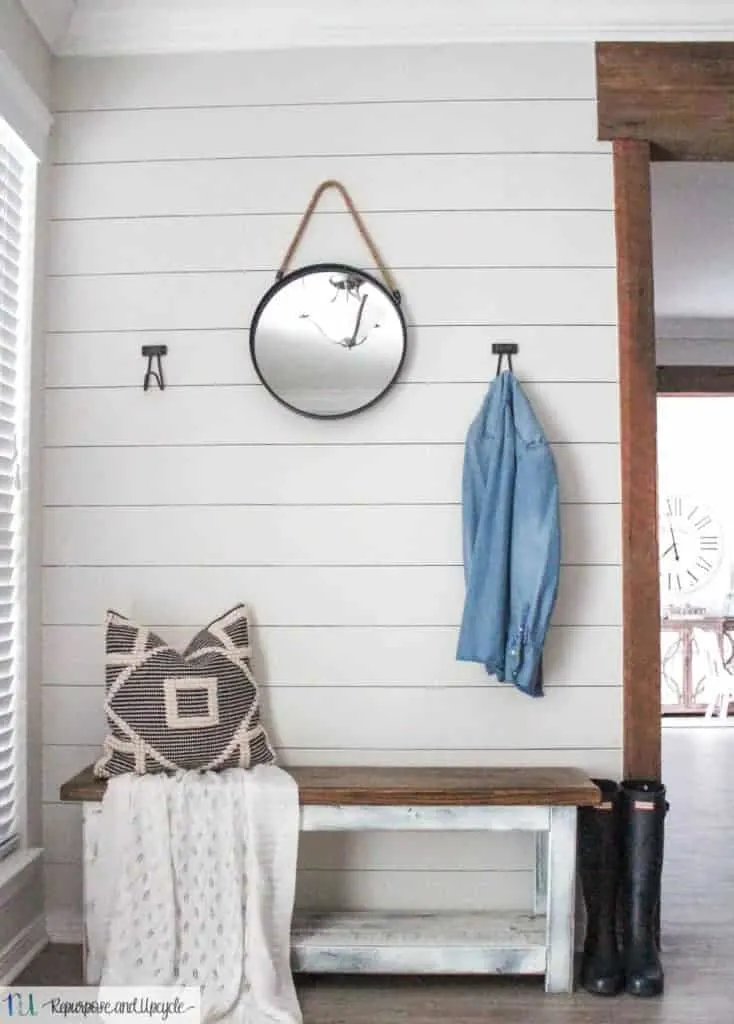
Even though the shiplap gives it a farmhouse feel, I’ve still added some modern touches with the metal mirror and more simplistic hooks.
I’m so pleased with how this looks, I’m already brewing about where else I can add more sharpie shiplap!

Would you take a marker to your walls for a little faux planked boards?
SHOP THE SPACE:
How to create Sharpie Shiplap
A quick guide on how to create your own DIY Sharpie Shiplap. This post includes a video on how I created an entryway makeover in about an hour with this easy shiplap tutorial created with a sharpie.
Materials
- Ruler with a level
- Sharpie oil based paint marker in medium point
- Pencil
Instructions
- Decide how wide you want the faux shiplap planks to be.
- Use a pencil to mark tick marks on the side of the wall every 6 inches.
- Line your ruler up to the first tick mark (start at the ceiling). After you've made sure the ruler is level, start drawing a line with the sharpie.
- Continue making lines until you are done with the wall and you have perfectly drawn shiplap!
Notes
I started drawing lines at the bottom of the wall, but hindsight I should have started at the top. Lucky for me everything lined up, but if I do this again I will start at the top (like I say, learn from MY mistakes).
I made my shiplap lines 6" apart. I'm not sure if there is a magic "shiplap width" but this is how wide our real shiplap is in our living room.
Be careful to line up the point of the sharpie perfectly when you're moving the ruler from one point to the next.
If you enjoyed this post you might be interested in seeing a few more spaces I created like it.

Modern Farmhouse Entryway with Thrifted Finds
Thanks for stopping by friends! I hope you’ve enjoyed this quick and easy space makeover in under one hour! Now to find another space to create!
Lindsey**
It looks great but I don’t remember you saying what color sharpie you used.
I used a regular old black oil based Sharpie.
[…] I did this on my real shiplap, but it’s also an amazing way to create the look of a shiplap wall with only a little black paint or a sharpie! It would be a great faux shiplap idea that’s extremely budget friendly! (Note: The sharpie won’t work on an uneven wood surface, but on a low texture wall it would be great!) Just use a yardstick, or painters tape, to mark the wall ever 6″ and use the sharpie to draw a line. Lindsey has a great example! […]
Hi,
Where are you located in the US or the UK. I am buying an 18th Century cottage and there are low ceilings downstairs so I am looking for all the tricks I can muster.
Thank you,
Mattie
I’m in the US! Did you see this post?
https://repurposeandupcycle.com/ceilings-look-taller-trick/
Did you make your bench? If so do you have a tutorial on that?
Hey Sammy, I did not. I purchased it locally.
I love this! Did your wall have any texture or was it smooth? I have textured walls and am afraid it wouldn’t work.
It has a small amount of texture
My shiplap has tan grooves and I need to make lines where I can’t put shiplap. What color should I use?
If I’m understanding you correctly you want to add “sharpie shiplap” to a wall that already has real shiplap. Can you match the tan with some sort of permanent tan marker ? If not, I would suggest going in between the lines of real shiplap with black paint and continuing with the black sharpie.
Looks great! I thought it was real. What color is your paint?
Is the marker black? It almost looks gray.
Yes it’s very black!
[…] […]
Your wall looks fantastic!
[…] One Hour Entryway Makeover with Sharpie Shiplap from Repurpose & Upcycle. […]
This is actually very cute! I know what I’m going to do for my bedroom walls.
Abigail Joy.
I was on my way to target to buy some of the infamous “faux shiplap” wallpaper. My kids fell asleep in the car so when I got there I had a few minutes to check Pinterest for helpful hints on how to use the wallpaper. Thank goodness I did because I stumbled across your blog and literally saved myself about $75 on wallpaper! I got the markers and I’m going to do this to a wall in my kids playroom tomorrow. If it turns out as good as I hope, I will tag you on IG. Thank you for this post.
I’m so glad you found my post! Yes please tag me on IG and let me know how it turns out!
[…] One Hour Entryway Makeover from Repurpose and Recycle […]
[…] One Hour Entryway Makeover With Sharpie Shiplap -Repurpose and Upcycle […]
[…] Bars Anika’s DIY Life — How to Use a Miter Saw REpurpose and Upcycle — Entryway Makeover with Sharpie Shiplap Mama of Many Blessings — Eating Organic on a Budget Debbie Dabble – Letting Go for […]
[…] easiest way to install shiplap is with a sharpie! Can you believe this is sharpie? Repurposed and Upcycle has the full […]
[…] One Hour Entryway Makeover from Repurpose and Recycle […]
[…] Sharpie Shiplap from Repurpose and Recycle […]
How did you not have stop and start marks when you lifted the sharpie then put it on the wall again as you moved across the wall ?
I think this looks great, but I swear I would have “dots” where I started again.
Actually if you look real closely you can see that I do have marks. I did figure out how to position my marker to minimize the “stop marks.”
Lovely ideas to transform an entryway – thank you ! xx
That’s so cool! I couldn’t believe it was done with Sharpie! Amazing!
So how hard would this be to paint over? We will be renting and I DEFINITELY do not want to be charged for drawing on the walls! lol
not hard at all. One coat of primer and one coat of paint!
This looks great and doesn’t look like it was done with a Sharpie at all! Great DIY!
Lindsey… this is amazing! Such a wonderful option… and so affordable. This would be a wonderful option for a rental, too! Would love if you would link-up at Homestyle Gathering! (I saw this at Home and Garden Thursday). Pinning!
Hey, Lindsey… just wanted to let you know that I featured your post on my accent wall post today. No pin image and do-follow link! Thank you!
ok I am going to this! Oil black permanent marker? Or just a simple black permanent marker and a level?
Oil based is less likely to rub off.
Looks so fantastic! It’s simple, but makes such a strong statement.
[…] If you are wondering about the lovely DIY Shiplap, it’s actually my own SHARPIE SHIPLAP! […]
This looks awesome. What a great idea!
Who knew sharpies were so versatile! Brilliant!
This looks brilliant! #bloggerclubuk
Your faux shiplap looks great! Thanks for sharing your space at the Merry Maids linky party.
Would this work on concrete floor? Thanks!
That’s a good question! I don’t see why it wouldn’t. Just make sure you use the oil based sharpie and make sure you seal it with a good sealer.
If I did this, but later wanted to change things up again, is it easy to paint over the sharpie?
Also, if you know you aren’t going to keep it long term I would maybe use a regular sharpie not an oil based.
It is, but you need to use a good primer and then paint.
We are impressed. I have not had the money to do the real feel but yeah,Fake it till you make it” has a true meaning. Hubby 70 and I am surviving 5 rods in my spine😐. Helpful DYI
Thanks Jenny, it really does look real! It’s definitely a lot easier than doing the real stuff.
That looks wonderful. You did a great job! I love any DIY project that doesn’t take days and days…
It really makes such a difference!