Learn how to stain wood stairs in just a few easy steps. Staining wood stair treads is a simple DIY project and doesn’t have to be hard work, let me show you!
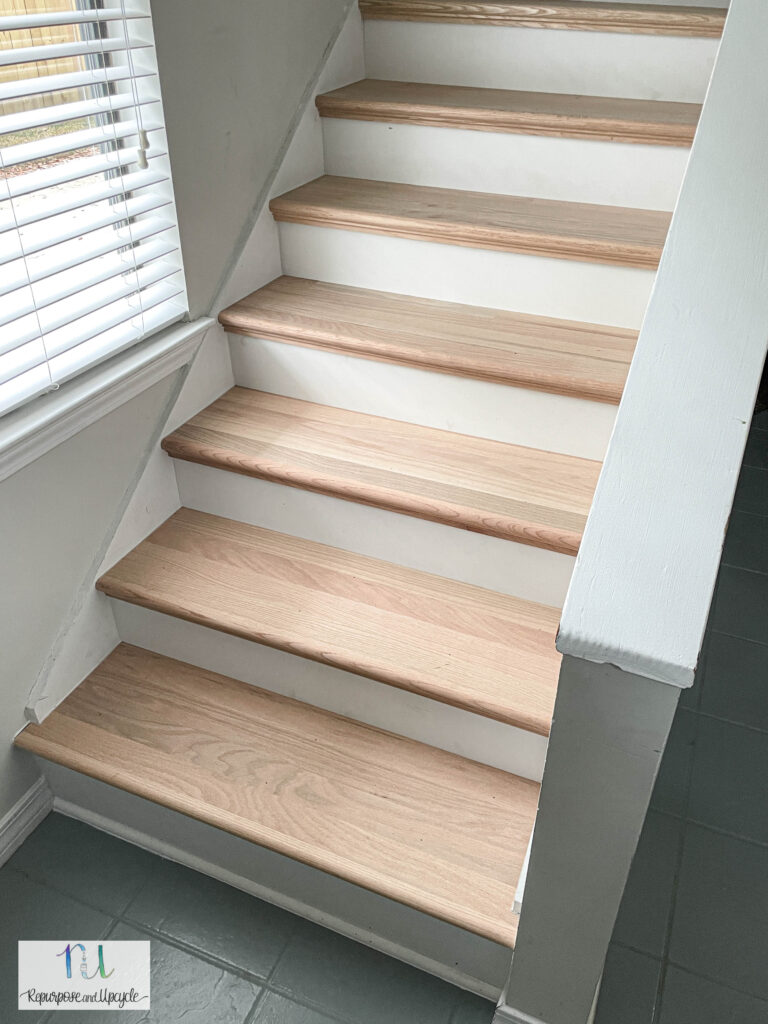
Have I ever mentioned that we have a “back house?” It’s a completely separate home with a full kitchen, two bathrooms and a bedroom upstairs. We’ve had a friend living there who recently moved out. Needless to say the carpet that was on the stairs and bedroom floor had to go! We hired someone to lay the red oak stair treads and install white risers, but I decided I would stain them myself.
Have you ever stained or painted bare wood stair treads after they’d been installed? It’s not as ideal as refinishing them before installation but the way the schedule worked out with the installers, I did not have time to stain them before.
Bummer, but I could work around it.
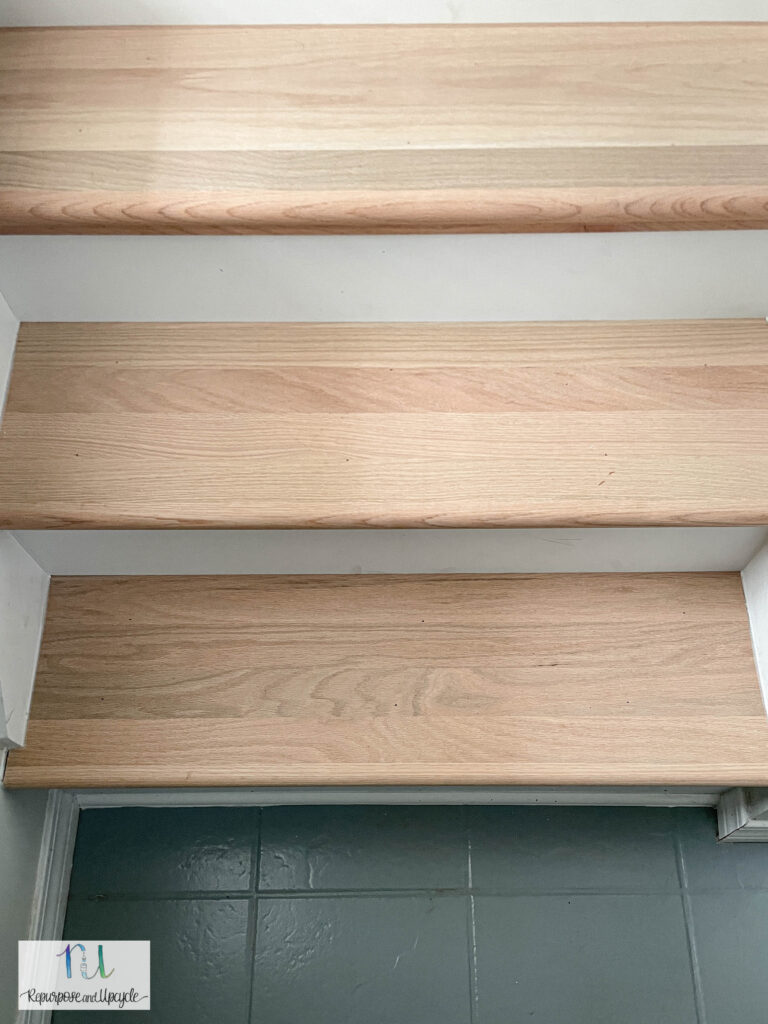
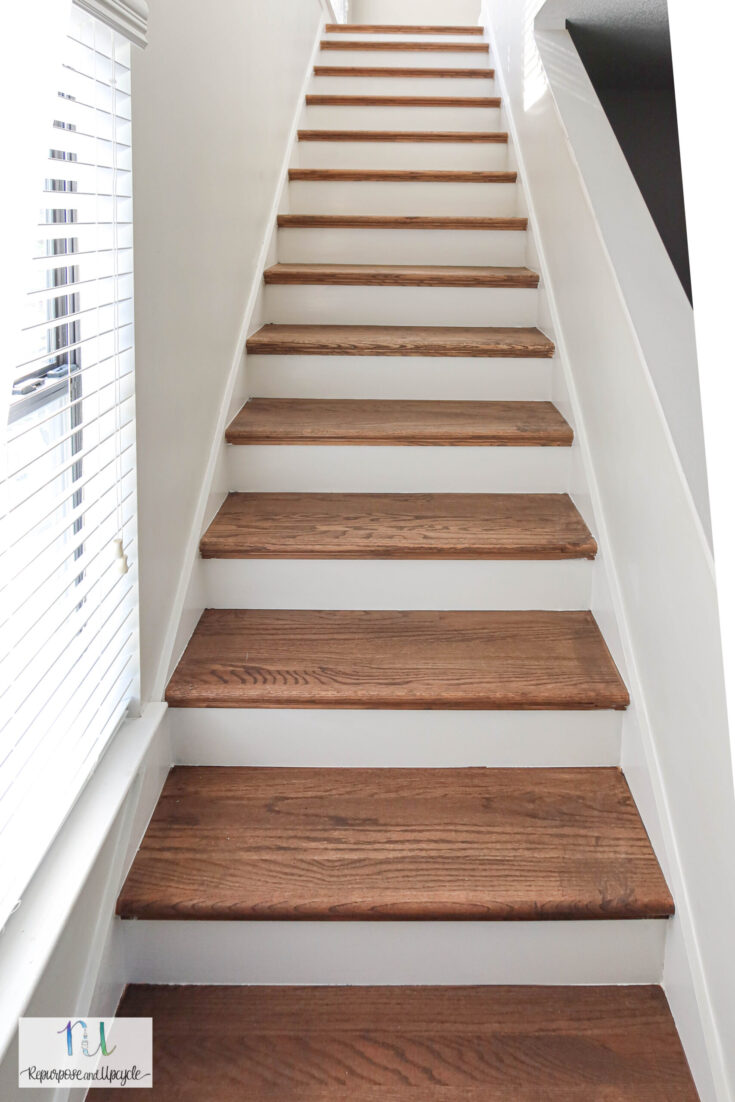
Let me show you what the hardwood flooring looked like after installation and before a little bit of staining.
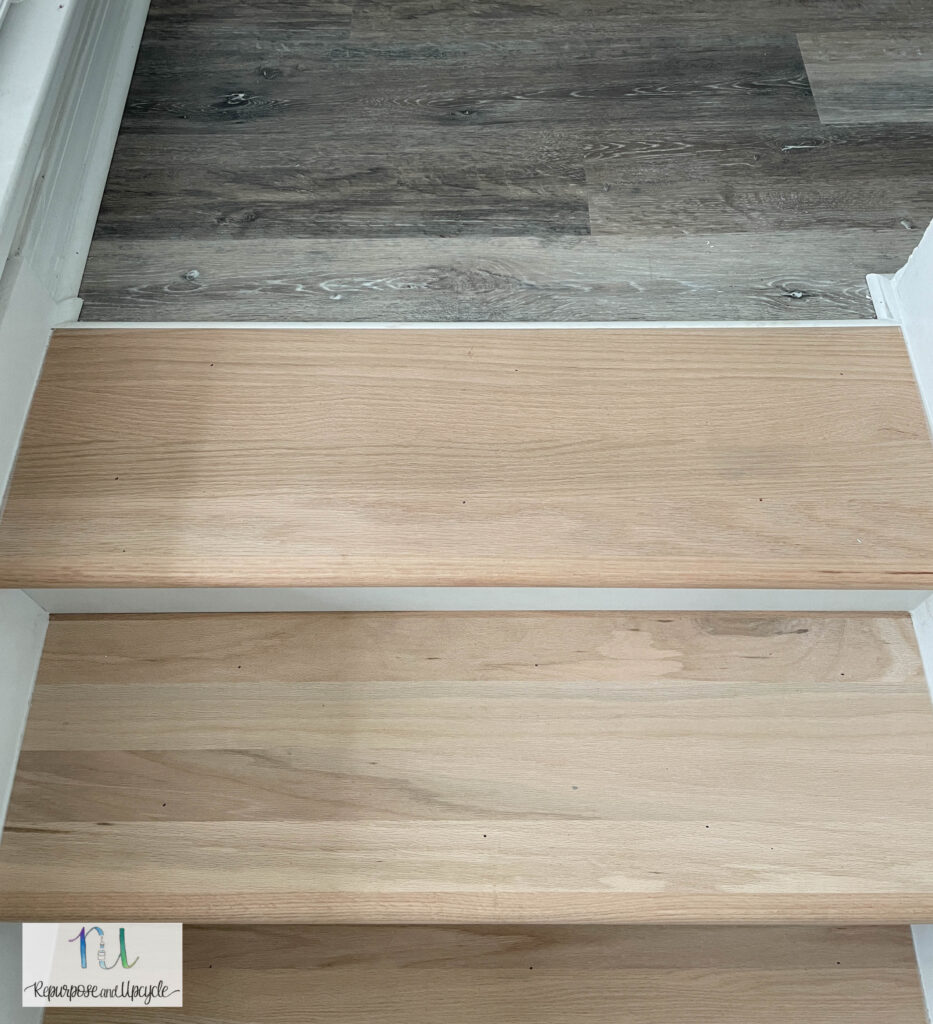
For those that are wondering, the tile below the wooden stairs is painted dark gray. I wrote a instructional post with a video on how to successfully paint outdated tile with Rust-Oleum Home Floor coating.
You’ve also probably noticed that there are a handful of different floors in a very tight area. I’ve got the painted tile floor, Oak hardwood stairs and the luxury vinyl at the top of the stairs.
Because of this, I needed to pick a color that would blend all three or go with all three surface colors.
Disclosure; this post contains affiliate links. As an Amazon Associate I earn from qualifying purchases. This disclosure statement refers to the rest of the Amazon links in this post. See more on my disclosure page.
When picking a stain color, make sure to choose one that blends or compliments the other floors colors. It’s virtually impossible to match a stain color to another floor unless it’s the same type of material.
Best Stain for Wood Stairs
When choosing a stain product, you want one that will ensure durability and have anti-slip capabilities. There are a few different types of stains including water-based stains vs oil-based stains. Let me show you a few.
Penetrating Stains
Pros:
- Does a good job of penetrating the pores of the wood to prevent wear and tear to the stain color
- Enhances the natural look of the wood and highlights the wood grain
- long lasting
- Quick drying
Cons:
- Darkens the wood with every application
- Wood will have to be sanded to remove stain
Examples:
General Finishes Penetrating Wood Stains
Stain mixed with an anti skid additive
If you want to use a stain that sits on top of the surface, like a gel stain, but want more skid resistance, mixing an anti skid additive, like Homax, will help. This is very important for high-traffic areas if you choose to use something like a gel stain.
Pros:
- Does a good job at preventing slips on the stairs
- Allows more variety when choosing a stain
Cons:
- Steps can feel “gritty”
- Takes away from a smooth finish
I know this post is about wood stains for stairs, but I have to mention that you could even use a wood dye followed by a good sealer.
Can you use a stain plus sealer in one for stairs?
This is more of a personal preference, but I would not recommend it. If you are looking for a long lasting stain and sealer finish, first thing, use a good stain and then a good sealer on top.
I discussed this more in depth on my post about sealers for wood stairs. Even Minwax clearly states NOT to use their Polyshades line (stain plus sealer) on stairs.
That being said, Minwax has a product called 1 Step Floor Finish where you can choose a handful of colors already mixed in with the sealer.
Best Sealer for stained wood stairs
The age old debate has always been; Oil-based vs. Water-based sealer? Water based sealers have come a long way in durability for wood surfaces. Most of them actually perform if not as well, almost as well as what an oil based sealer does.
As a matter of fact, there are sealers made specifically today for floors.
That being said I used a regular old polyurethane sealer for our step down to our sunken living room and we’ve been using it daily for 3 years and it looks the same as it did the day I stained and sealed it.
Before you choose a sealer for your stairs, you need to make sure it’s compatible with the stain you use. Normally the directions will tell you what type of sealer needs to be used with the stain product.
I outlined in depth on this post about oil based vs water based and how to choose the right sealer for it. Most of the time you also need to take into consideration the type of wood and the area where it’s being used.
Sealers for Wood Stairs
Here are a few examples of good sealers made specifically for wood stair treads.
- Varathane floor finish in oil based and water based.
- Minwax Polyurethane for floors
- Minwax Ultimate Floor Finish
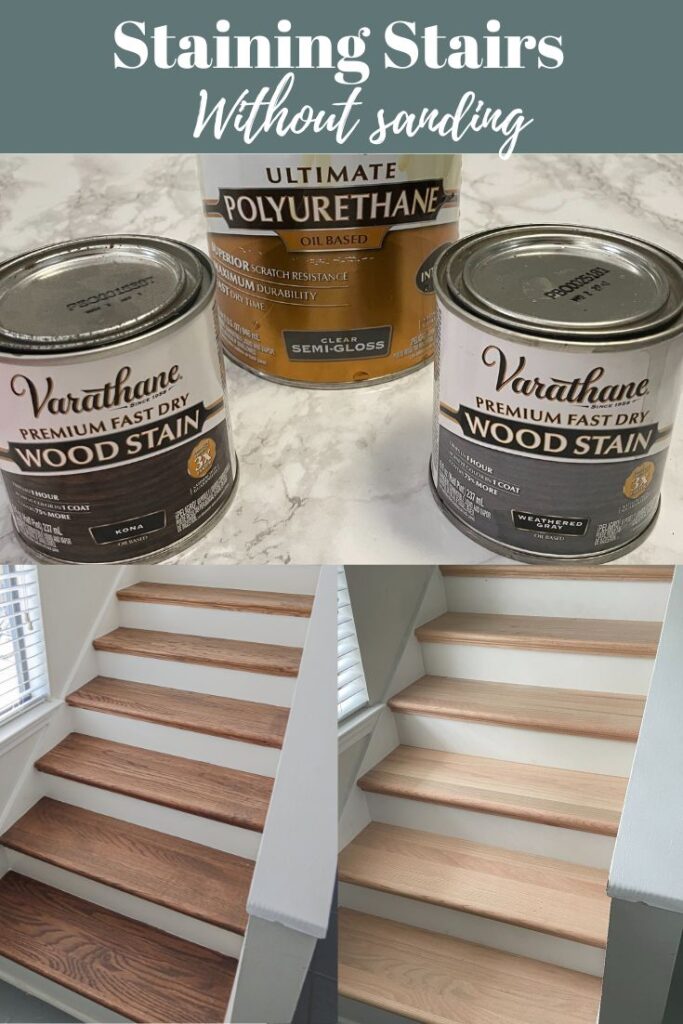
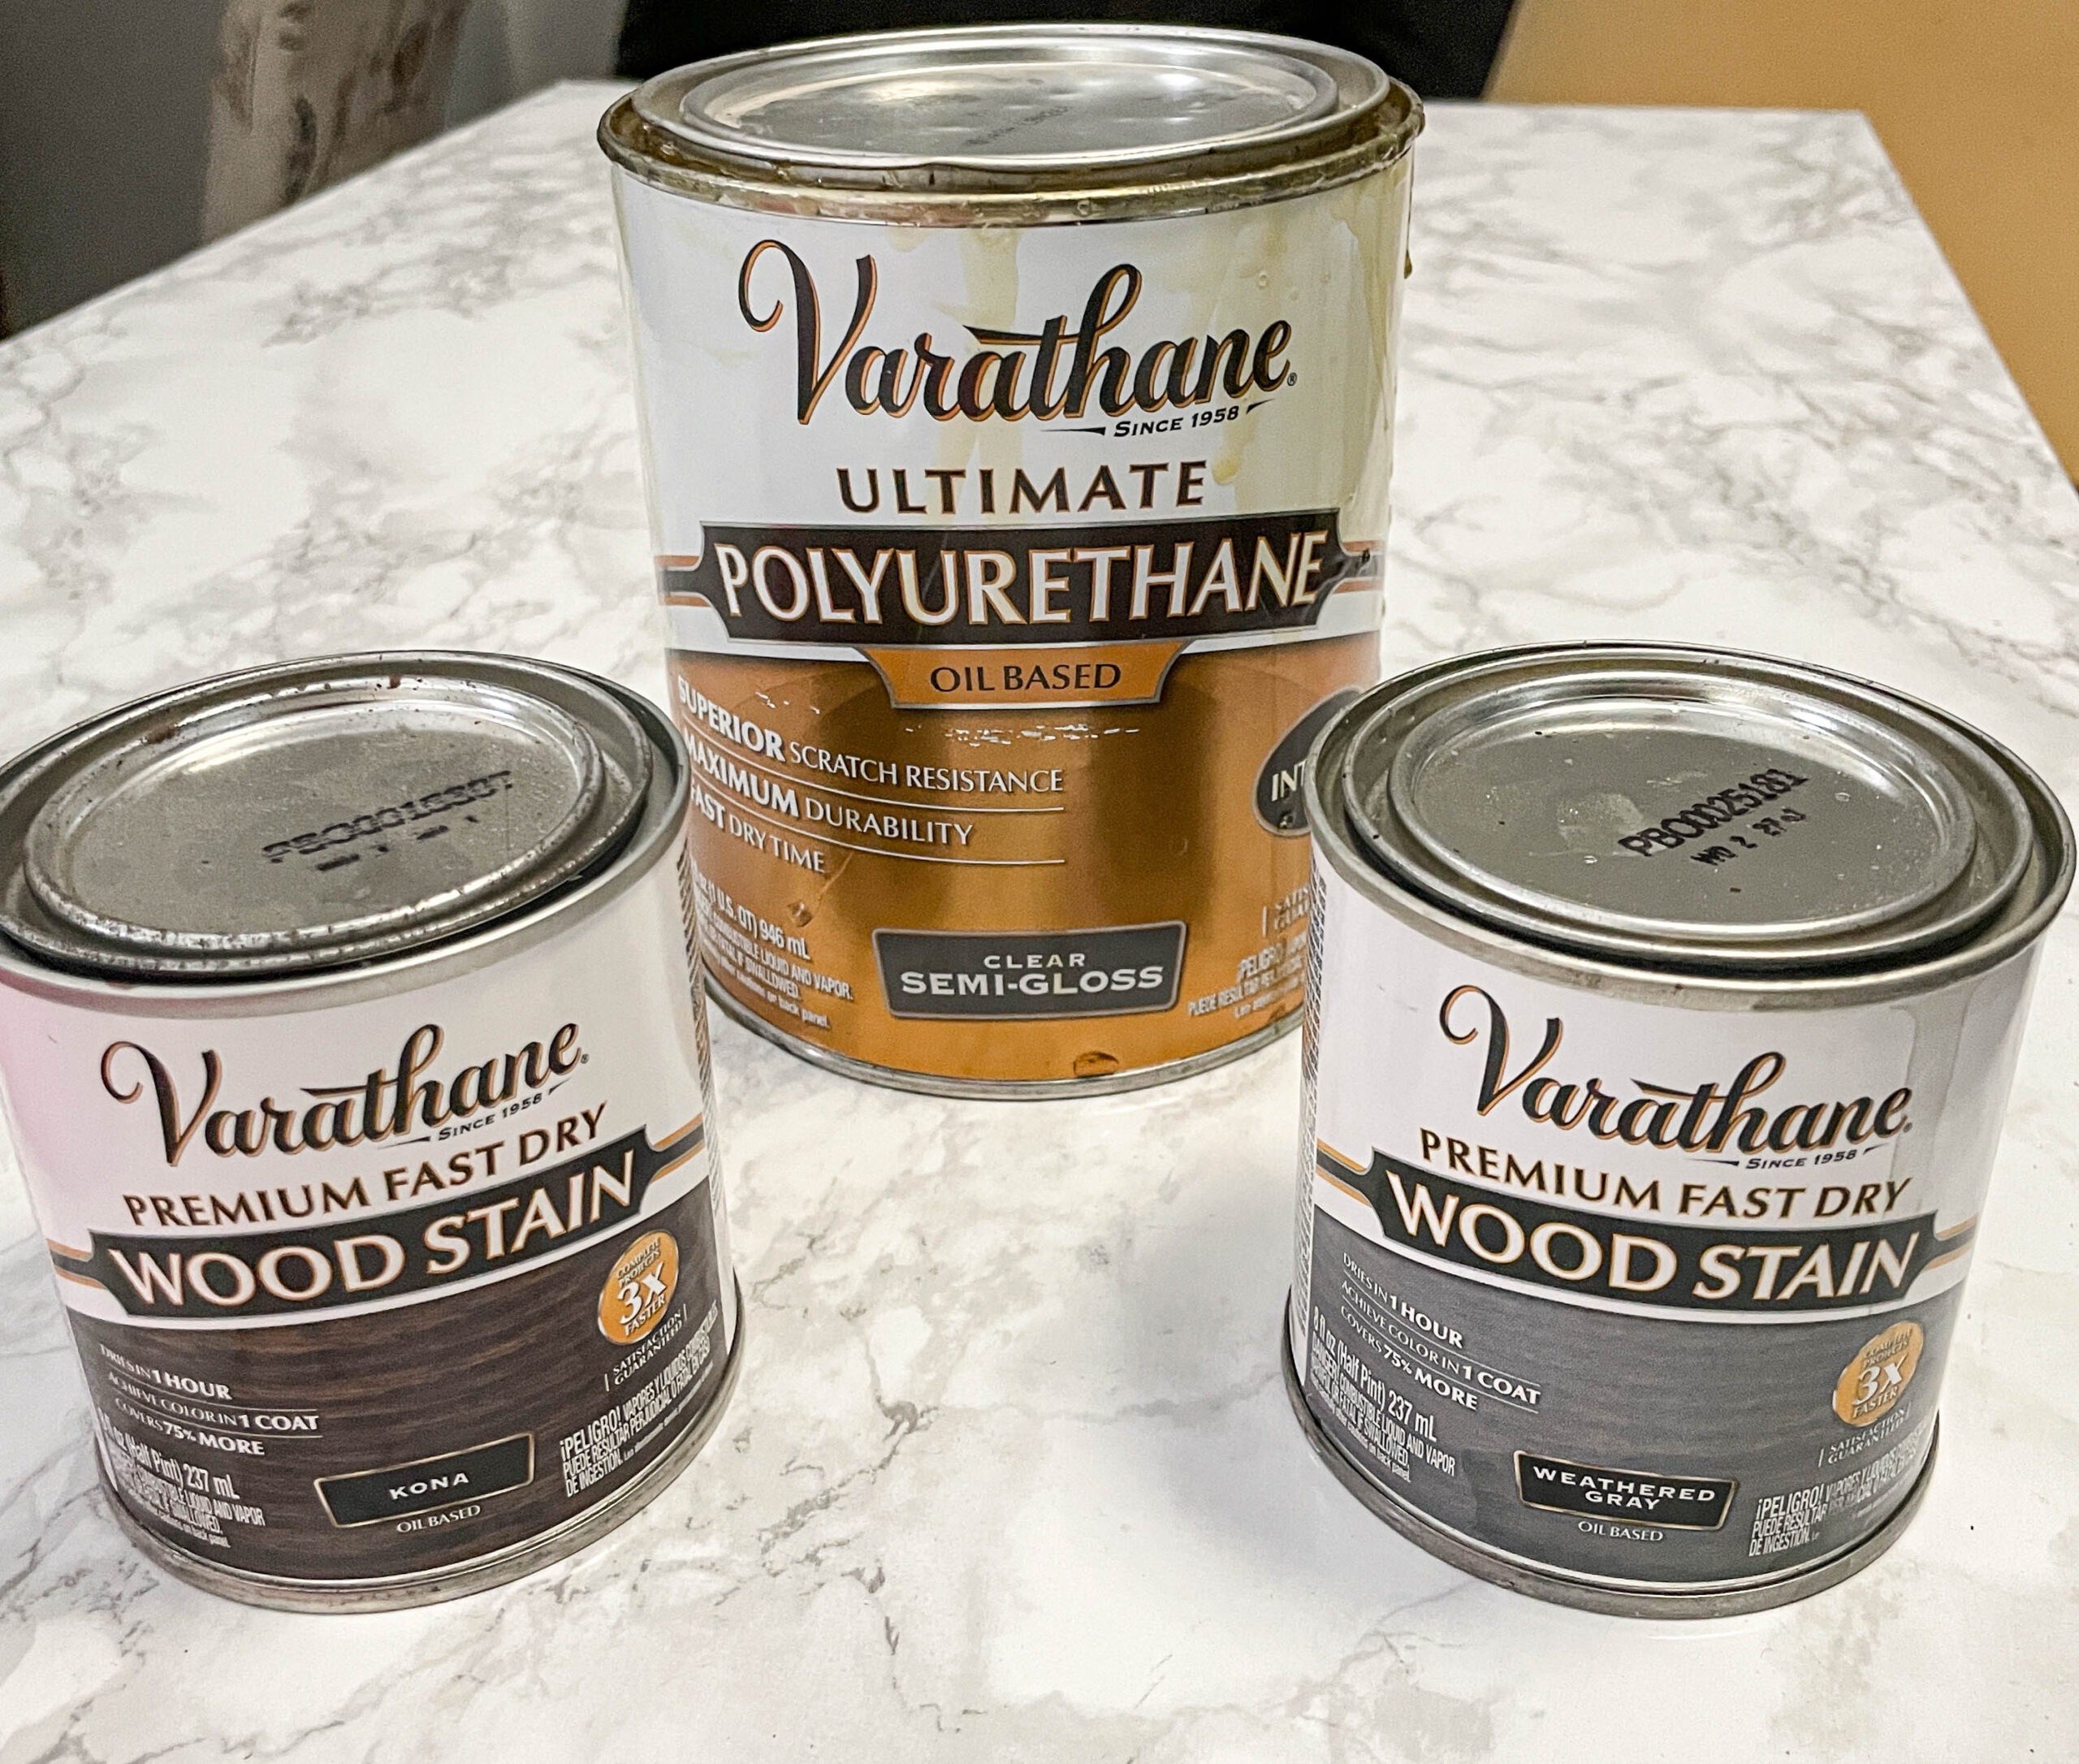
For my wood stair project, I chose to use a mix of Varathane’s oil based in the color Weathered Gray and Varathane wood stain in the color Kona. I then used an oil based Polyurethane sealer in semi-gloss for the top coat. I applied one coat of the stain and two coats of the sealer.
Should I have used a dedicated floor sealer instead of a regular old polyurethane sealer?
I wanted to stick with an oil based product due to durability because I read a few reviews that said that the water based floor finish just doesn’t hold up like the old oil based sealers (even NON floor sealers) do. The other thing….Varathane’s oil based floor finish is very potent and very strong. As someone who suffers migraines, I really detest the lingering (like days on days) smell of VOCs.
Hindsight, what I should have done is finish the floor treads BEFORE installation. If I had done this, I would have used the same Varathane stains WITH Varathane floor finish in an oil based product.
Materials used to stain stairs
There are a handful of different supplies and materials needed before you dive into staining your hardwood floors or stair treads. It’s a good idea to use a wood conditioner first to get an even finish, but this isn’t required. As a matter of fact, I did not use a wood conditioner and my stairs looked OK without it. That being said, there are just a few areas on the sides of the stairs where I noticed the stain is a little darker. This wouldn’t have happened if I had used a wood conditioner. Moral of the story; you can get away without using a wood conditioner, but it’s probably best if you do use one.
Supplies:
- tack cloth
- gloves
- wood conditioner
- stain
- sealer or clear coat
- Lint free cloths
- foam brush
- painters tape
- mask or other protective gear
How to stain wood stair treads without sanding
In a nutshell, you can definitely get away with not sanding the old stair treads before staining them. Here is a quick guide on how to stain the wood surface for a lasting finish.
- Using a tack cloth or damp rag, clean and wipe the surface of the steps to ensure they are dust free.
- Apply painters tape around the treads
- Next step, apply a wood conditioner in the direction of the wood grain and follow instructions for the product
- Using a foam brush or lint free cloth, wipe the stain on the wood surface in the direction of the wood grain.
- Immediately take a clean lint free cloth and wipe the excess stain away.
- Once the stain is dry, decided if you want to make it darker and add a second coat of stain and follow steps 4 and 5
- Once the stain is dry, apply a good sealer product and wait the recommended dry time before using them.
As far as how many coats of sealer, that’s a personal preference. I used one coat of sealer for these stairs but it wouldn’t have hurt to apply two. Keep that in mind especially for a new finish or dark stain that will get a lot of use. The darker the stain, the more chance it has of fading or showing wear and tear.
Note; some refinishers will tell you to always use a fine grit sandpaper or electric/orbital sander before staining stair treads. I don’t think this is necessary IF the stair treads are new. If you are refinishing old stairs that have an existing stain or paint, it is very important to use a chemical stripper and sander to remove any old finish before applying a new stain. There are stains, like gel stains, that can sit on top of old stain and paint, but then you run the risk of eventually tearing down that finish with foot traffic. Just think, stairs (normally) get a lot of use.
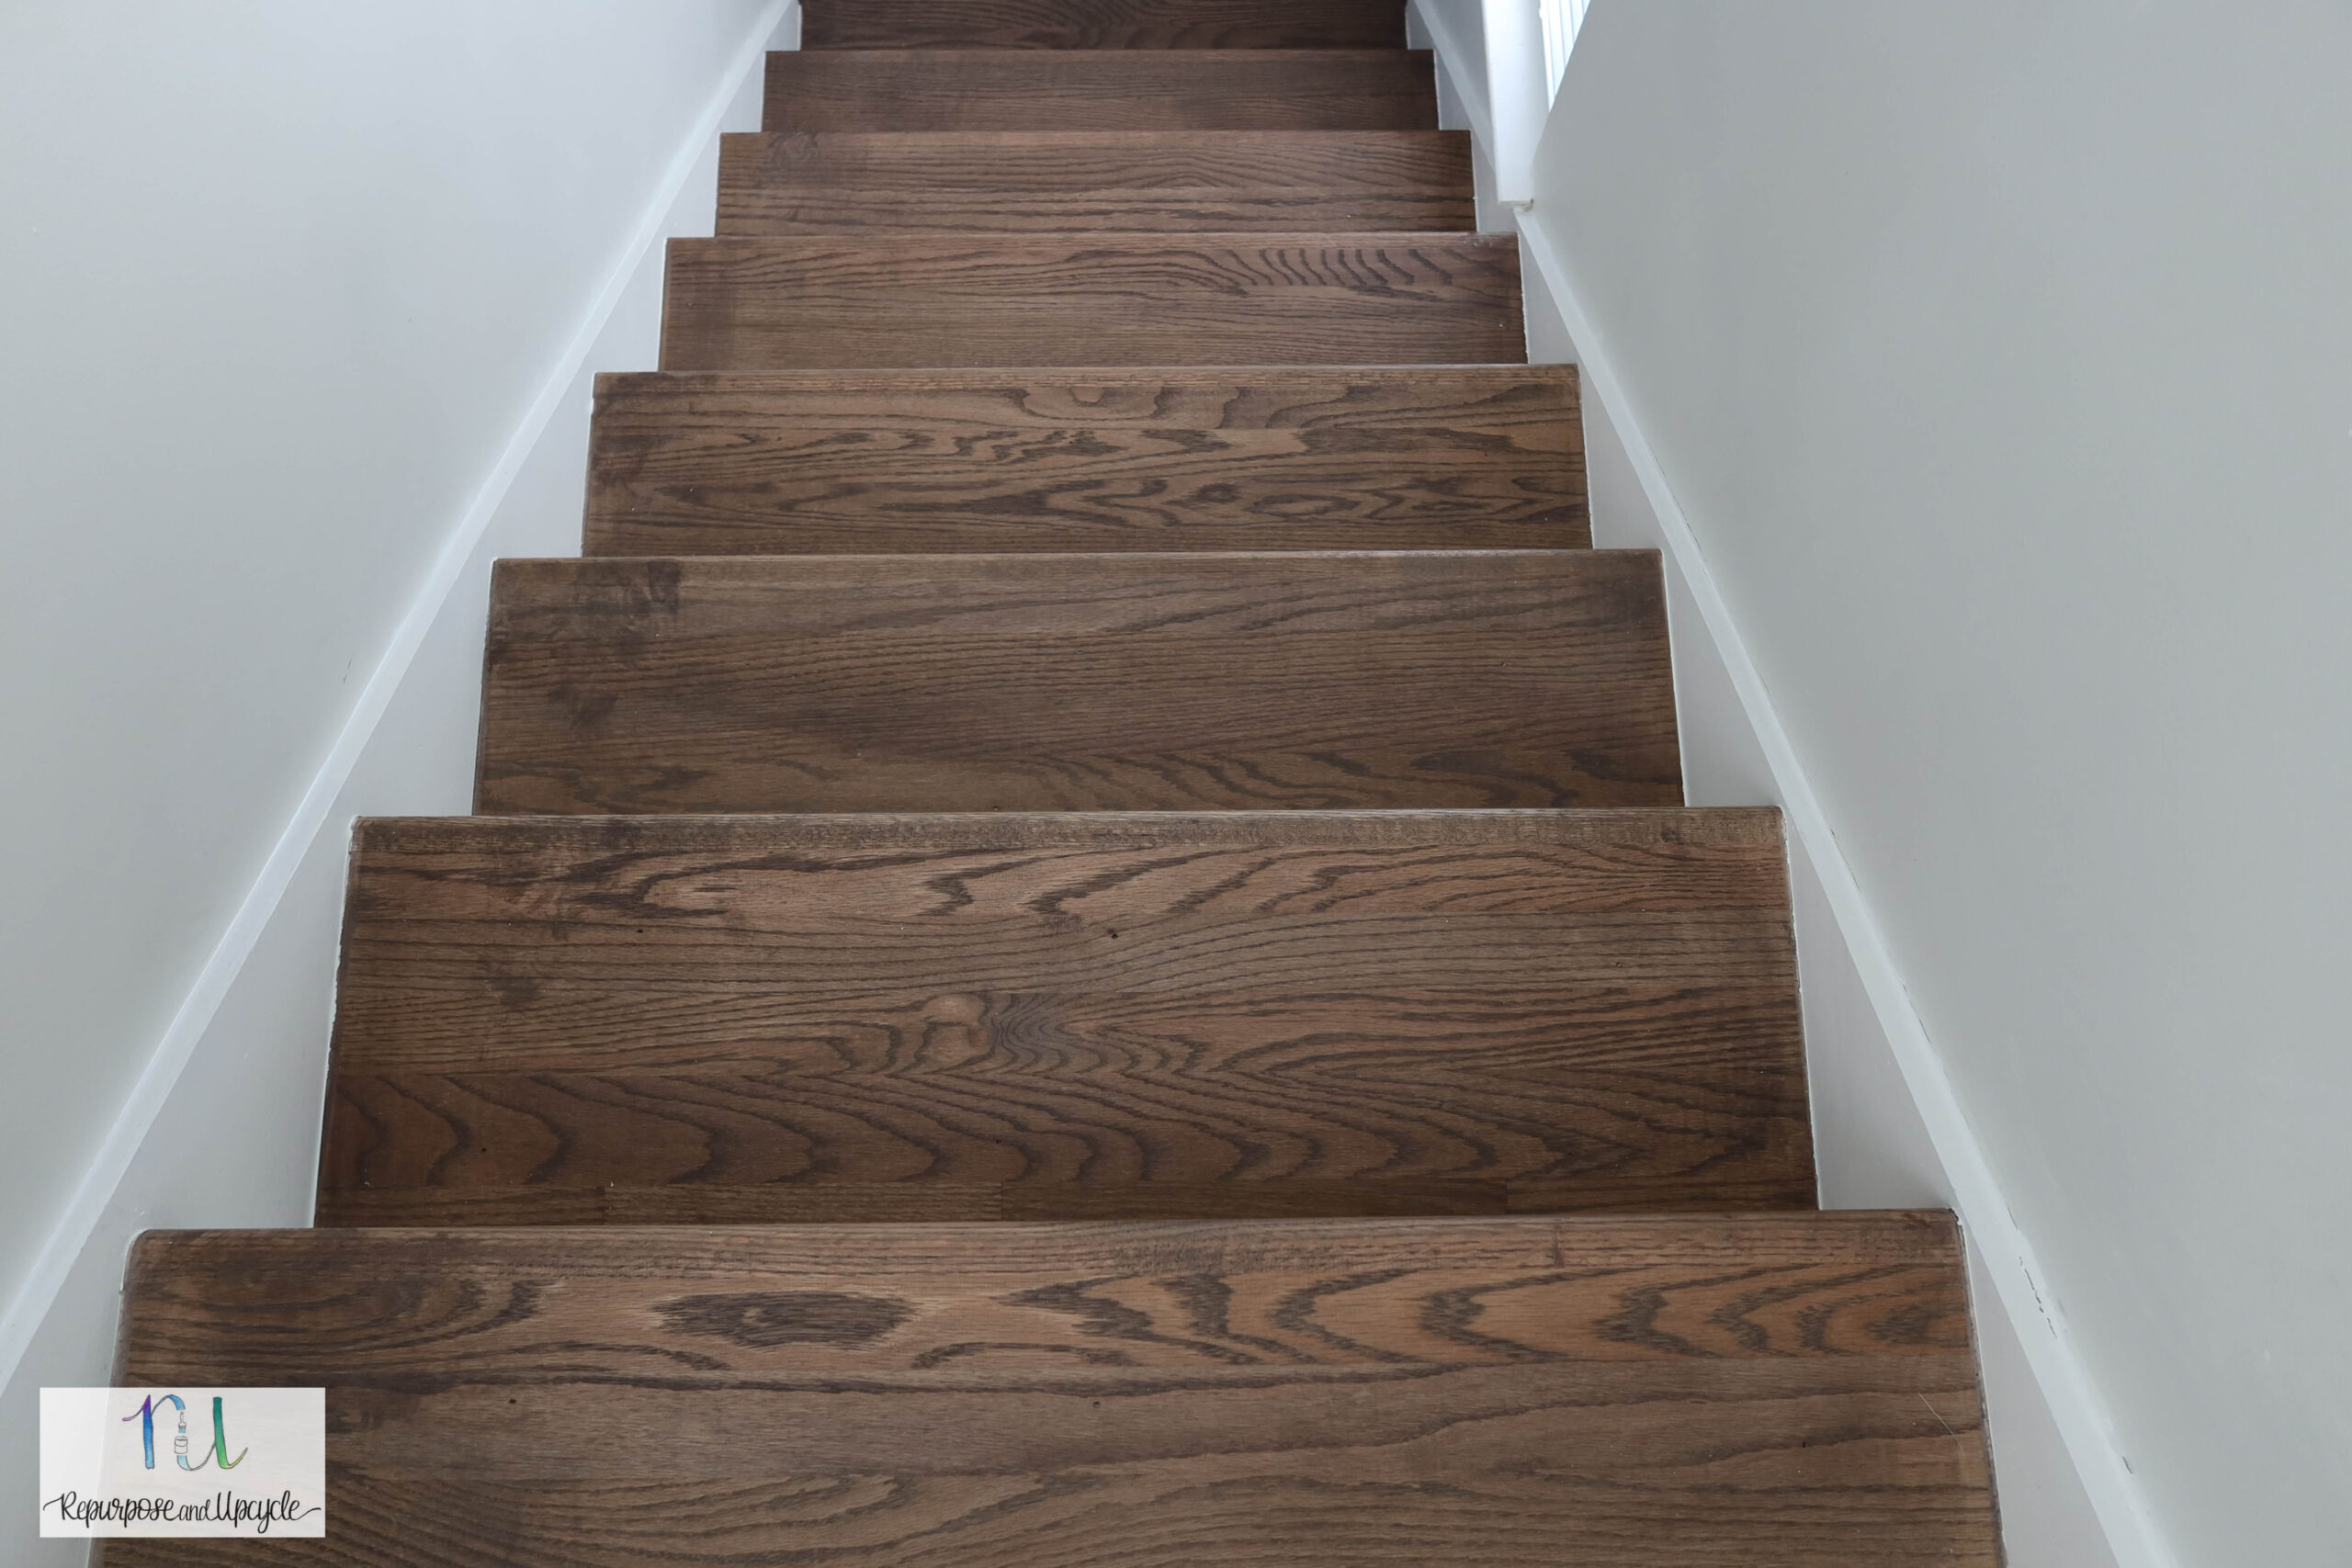
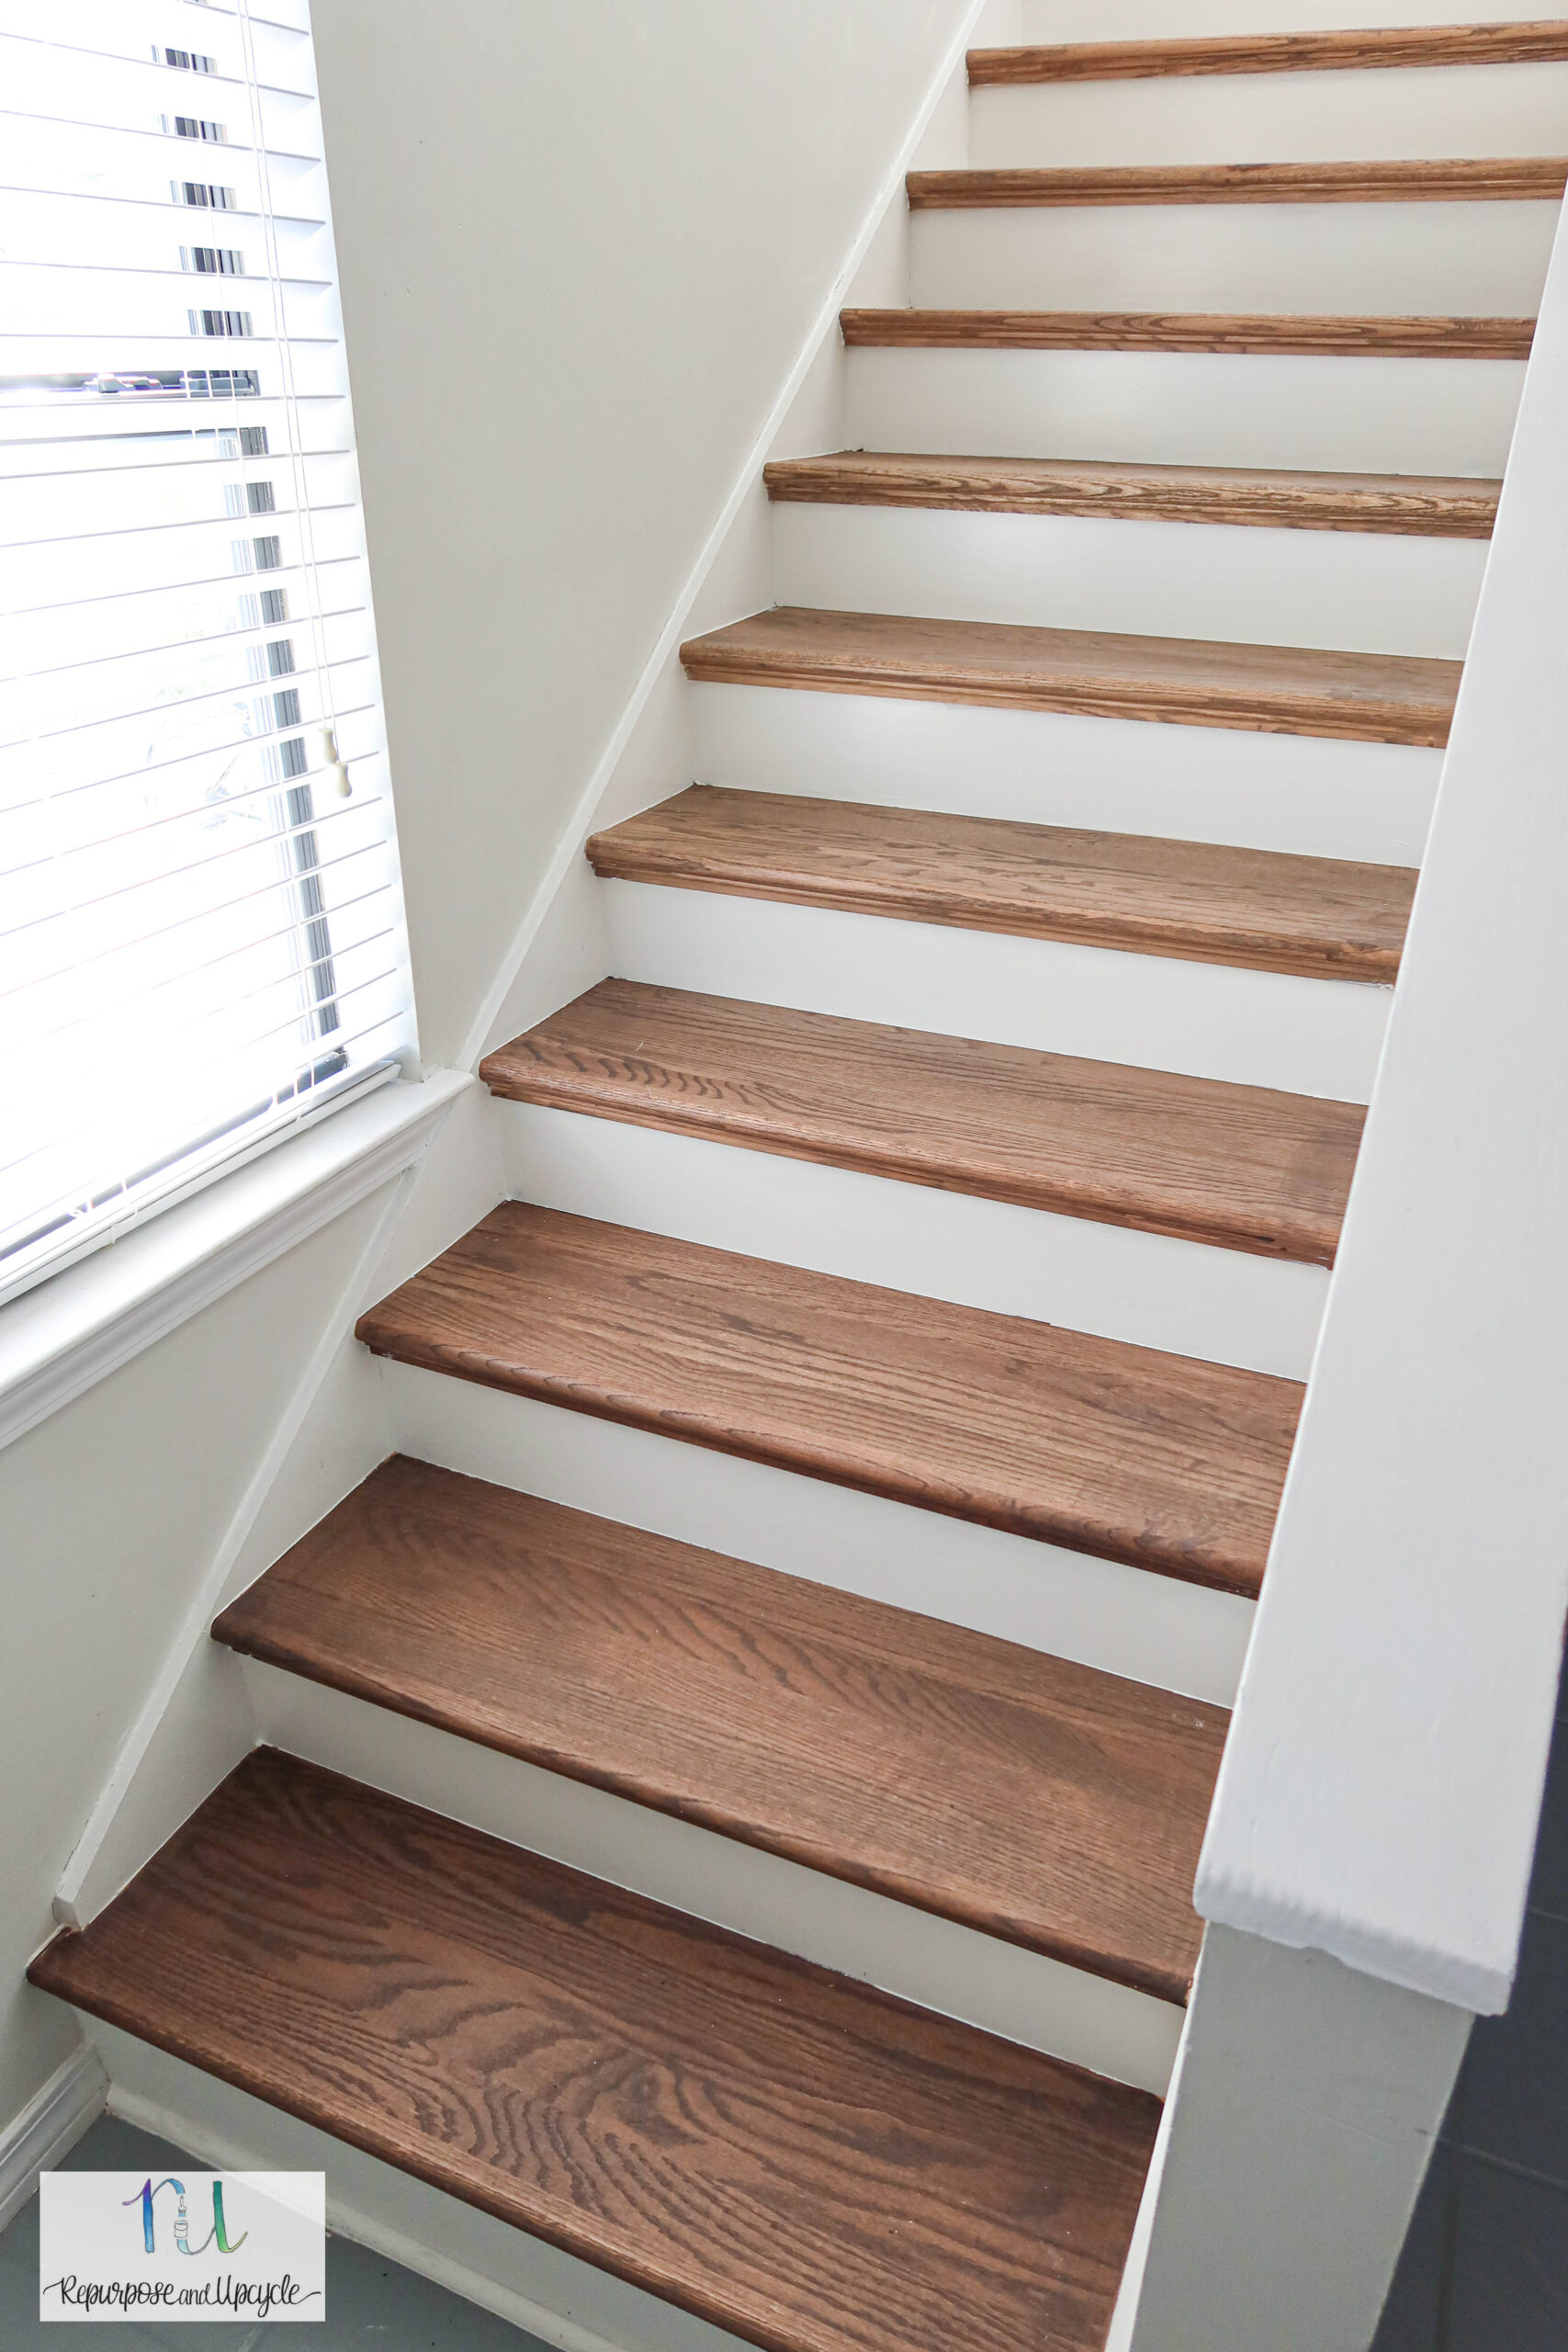
Stained oak wood stair treads
Here they are! I love how the stain really neutralized that red-ish finish. I’m still debating on whether I should add a carpet runner, but for now I’m loving my newly stained steps.
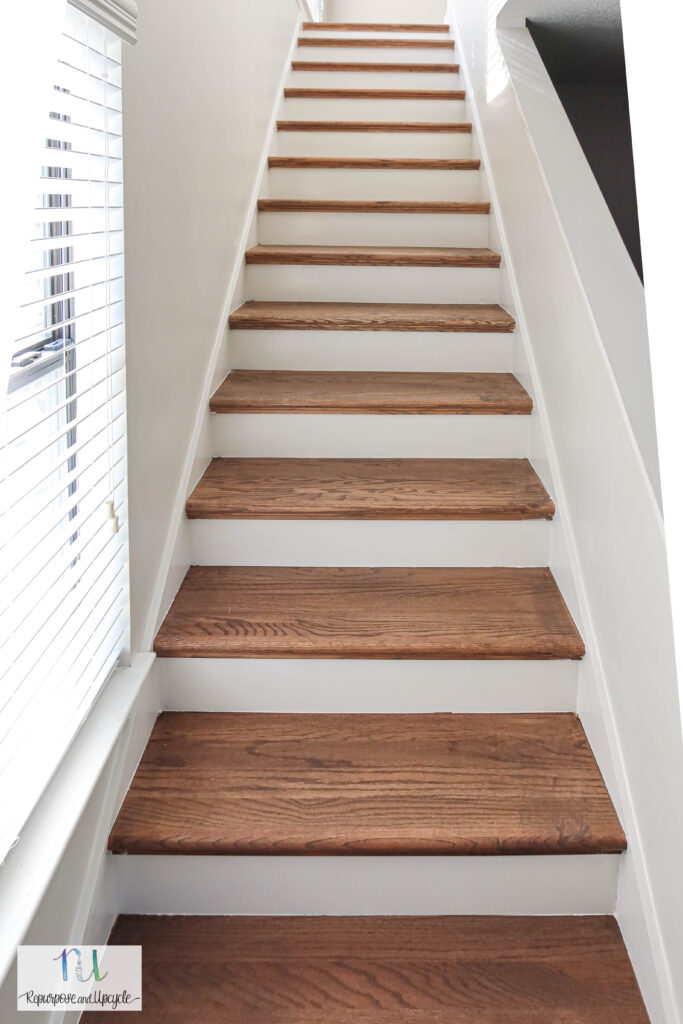
I love how the stair treads look now.

I hope you’ve learned some good tips on how to stain wood and seal stair treads WITHOUT sanding! Yay for not sanding.
How to stain wood stairs without sanding
Learn how to stain wood stairs in just a few easy steps. Staining wood stair treads is a simple DIY project, let me show you!
Materials
- Lint free cloths
- cleaner solution (ammonia free preferred)
- wood stain
- wood sealer
- painters tape
- Synthetic paint brush
- Wood conditioner (optional)
- Painters tape
Tools
- No tools needed
Instructions
- Use a lint free cloth (and cleaning solution if needed) to wipe down floor treads and let dry
- Apply wood conditioner according to instructions (optional)
- Prep the area by laying painters tape around the stairs if desired.
- Apply the first coat of stain IN THE DIRECTION of the wood grain according to the instructions. Use a lint free cloth or brush to apply it making sure to wipe up excess liquid as you go.
- Apply second coat of stain if the first coat isn't the desired color and let fully dry
- Apply sealer according to the directions from the manufacturer. Let first coat dry and apply second coat of sealer.
Notes
Wood conditioner allows the stain to penetrate the wood evenly. I chose NOT to use wood conditioner because I wanted to highlight the different wood tones and imperfections in the wood.
I only applied one coat of stain and two coats of sealer. Make sure to apply multiple coats of sealer for a durable finish.
Use a hard cardboard edge to apply stain with rather than using painters tape. This works if you are not a messy painter.