Refinishing any old door sounds like an arduous task and hard work doesn’t it? The thought of stripping the old stain and finish, sanding the wood, cleaning the wood and then re staining a wood door is a lot. I’m here to show you how to refinish a wood door the easy way in just a few hours.
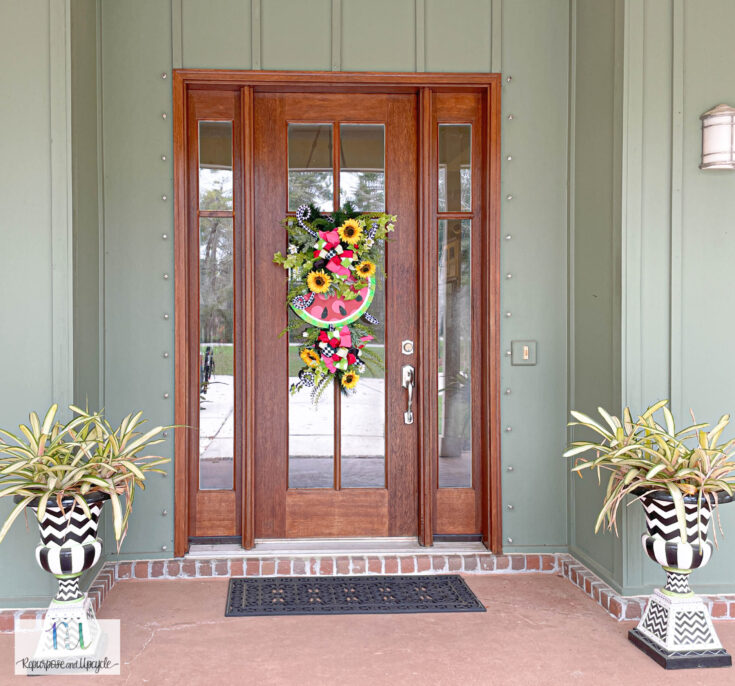
This is my mom and dad’s solid Oak wood front door. It’s beautiful. It’s heavy. It’s ornate. It’s a statement piece. It’s also seen better days.
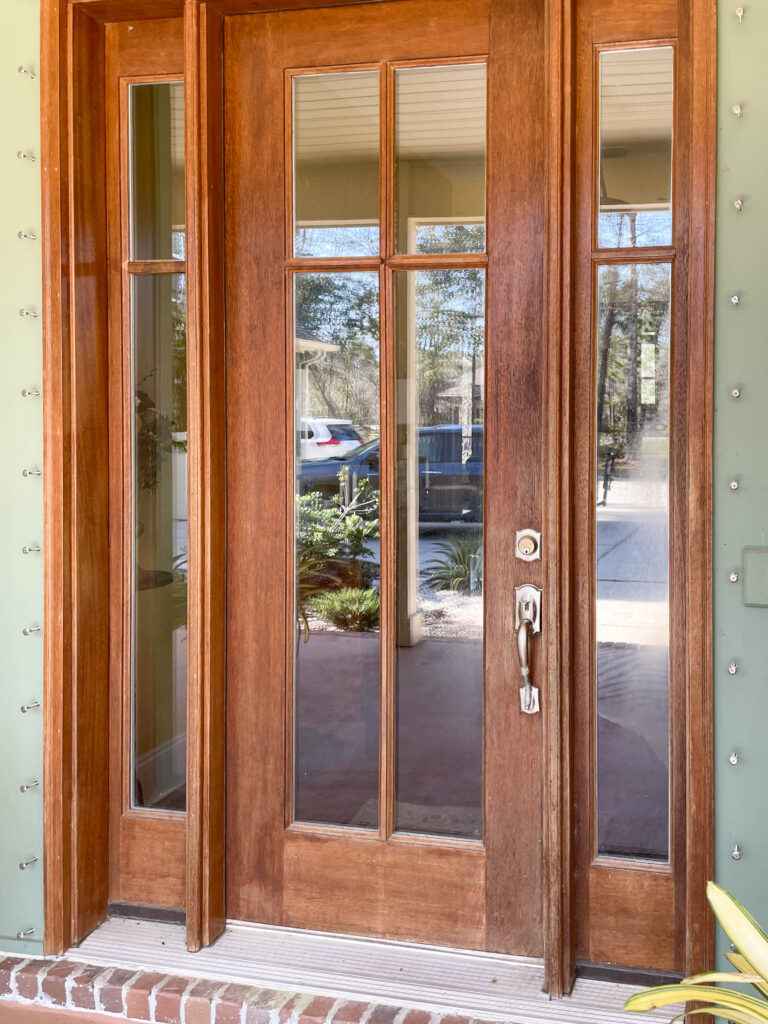
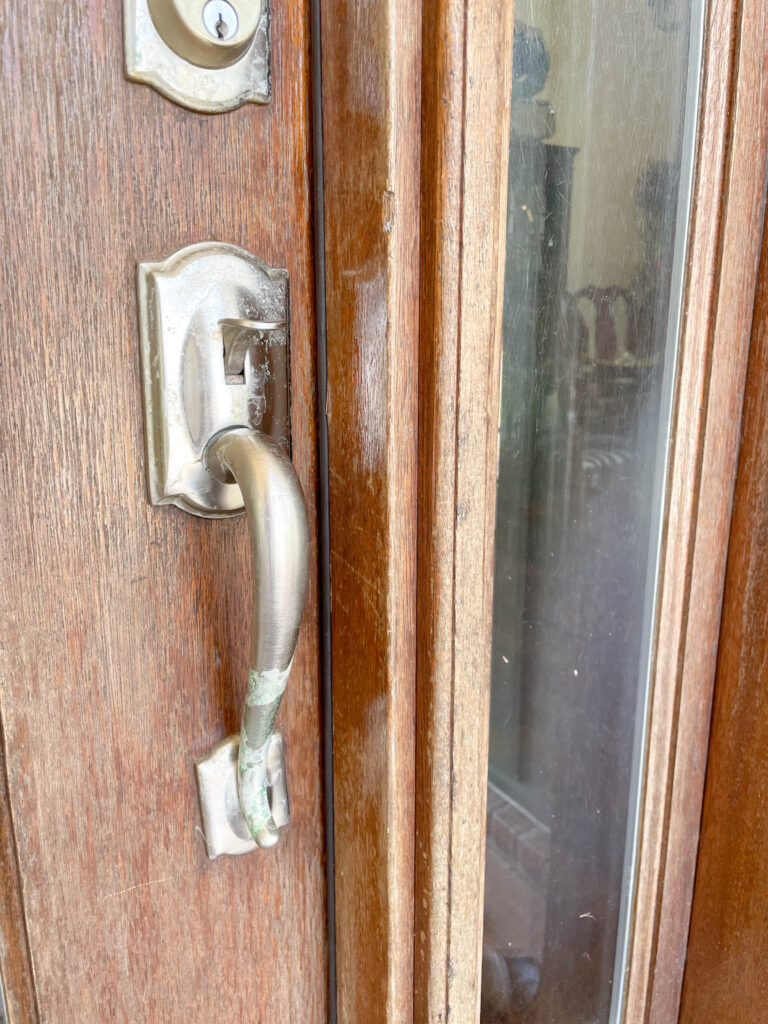
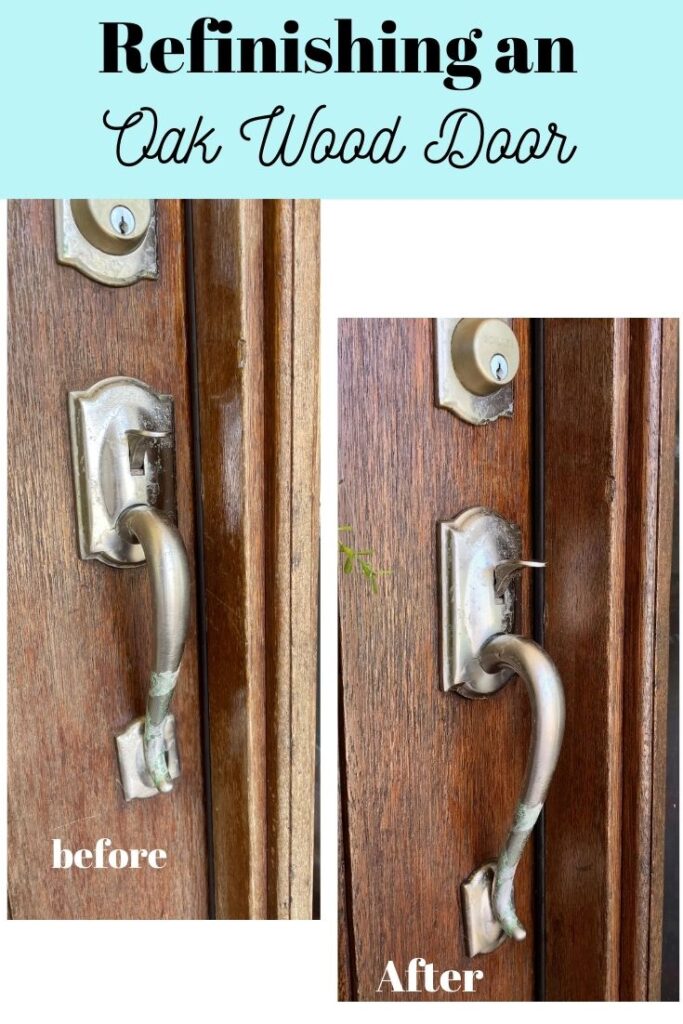
The existing finish doesn’t look terrible. If you look closely, especially around the door handle, you will see lots of weathered wood and areas where the sealer and stain have faded. We knew it was a good idea to refinish it before it got any worse. First thing, time to prep.
Disclosure; this post contains affiliate links. As an Amazon Associate I earn from qualifying purchases. This disclosure statement refers to the rest of the amazon links and other affiliate links in this post.
Before I get too far into this tutorial, let me share that my parent’s wanted me to refinish the wood door and restore it with a protective coat so it will last many more years. They did not want to change the color or add an exterior paint to it.
I am not giving this door a makeover but merely giving it a facelift.
Best part? I completed this makeover in a matter of a few hours!
First, before I get started I need to address the elephant in the room. Read below.
Why did I use Minwax PolyShades over an exterior door when it says indoor use?
Full disclosure; PolyShades is supposed to be for mainly indoor use. That being said, I looked and researched high and low for a stain product that I could apply over a previous stain for outdoor use. I couldn’t find a product that didn’t require stripping the old stain off of the entire wood door first. The calling card for this product is that it can be used over previously finished surfaces. Since the door is covered under a large porch and not ever in direct sunlight, I decided to give it a try. IF your door does face the elements (direct sun and isn’t heavily protected by a large porch, I would suggest using other products that I’ve listed near the end of this post). It’s been over three years since the door was refinished and it still looks amazing. Look below and see!

Supplies used;
- Sandpaper- I used an angled block sander and fine grit (120 grit sand paper).
- Tack cloth and lint free cloths
- Cleaning solution; 1 part water to 1 part vinegar
- PolyShades or new stain- I really like this product because you can use it OVER an existing polyurethane finish.
- Foam brushes
- Wire brush (if needed)
- Painters tape


In a nutshell, let me show you …
How to Refinish a Solid Oak Door over a previous finish
- First step, Remove the existing hardware (kick plate, hinge pins, door knob)for best results. This isn’t 100% necessary if you are going to keep them, but it will be easier to sand and stain without it.
- Sand the entire door with fine grit sandpaper. Use an angled block sander for those hard to reach areas.
- Clean with a 1:1 part vinegar to water solution.
- Use a tack cloth or lint free cloth to make sure the surface is free of any debris.
- Use painter’s tape to cover areas you don’t want refinished.
- When the surface is completely dry, apply the first coat of stain or polyurethane and follow the directions for the product you are using.
- Next step, apply a second coat if necessary. Wait the allotted dry time.
- Reapply door hardware


Tips to refinish an exterior wood door
I used 120 grit sandpaper to lightly sand the door since I’m not stripping the old finish. Always sand in the direction of the wood grain. See more painting and sanding tips and tricks here.
Use a coarser sandpaper (like 80-grit sandpaper) if the surface has a lot of wear and tear. Make sure to finish the flat surfaces with a fine grit sandpaper for a smooth finish.
Some people will advise you that you don’t want to use a super fine grit sandpaper because it will close up the pores in the wood. My thoughts are if you aren’t stripping the wood, you will be applying a product over the existing paint or previous finish anyway. So a fine grit sandpaper should be fine. This is good to know though if you are applying a product on bare wood.
Be mindful of the previous finish on the door and make sure it’s compatible with the product you are going to use on top of it. I talked extensively about this in a post on how to choose the right type of paint. The particular stain product I used (PolyShades) says it CAN be used over polyurethane and spar varnish finishes.
Can you use this wood refinishing method on Oak kitchen cabinets?
Since I’ve published my YouTube video a week ago I’ve already received two questions about this. In a nutshell;
I don’t see why you can’t use this simple refinishing method on any solid wood surface including refinishing Oak wood cabinets. Just be mindful that you probably won’t be able to lighten the wood with this method. This doesn’t mean you can’t change the color. There are a handful of colored stains that can be applied over a previous stain to change the color. I’ve outlined a few below.
Other wood stain products you can use to refinish a Wood Door
Some of my favorite wood stain products are those that require little prep work (yay for not requiring chemical strippers).
- Gel stains- Gel stain is sort of like a mix between stain and paint. It a thicker stain product that sits on top of the existing finish. I previously gave our fiberglass front door a faux wood finish with gel stain. I also repainted a solid wood dresser set with gel stain. Old Masters gel stain can be used on an exterior door as long as it’s covered with a clear finish. It’s a great product because Its a thick formula (like using coats of paint) that allows easy application especially on a vertical surface.
- Valspar also makes a great product for exterior wood. It’s called One-Coat Exterior Solid Stain. I’ve used it and I can personally attest that it’s a great product.
- Kilz also makes a great exterior wood stain. Even though I’ve never used it, it comes with great reviews on Amazon.
Refinished Solid Oak Exterior Wood Door
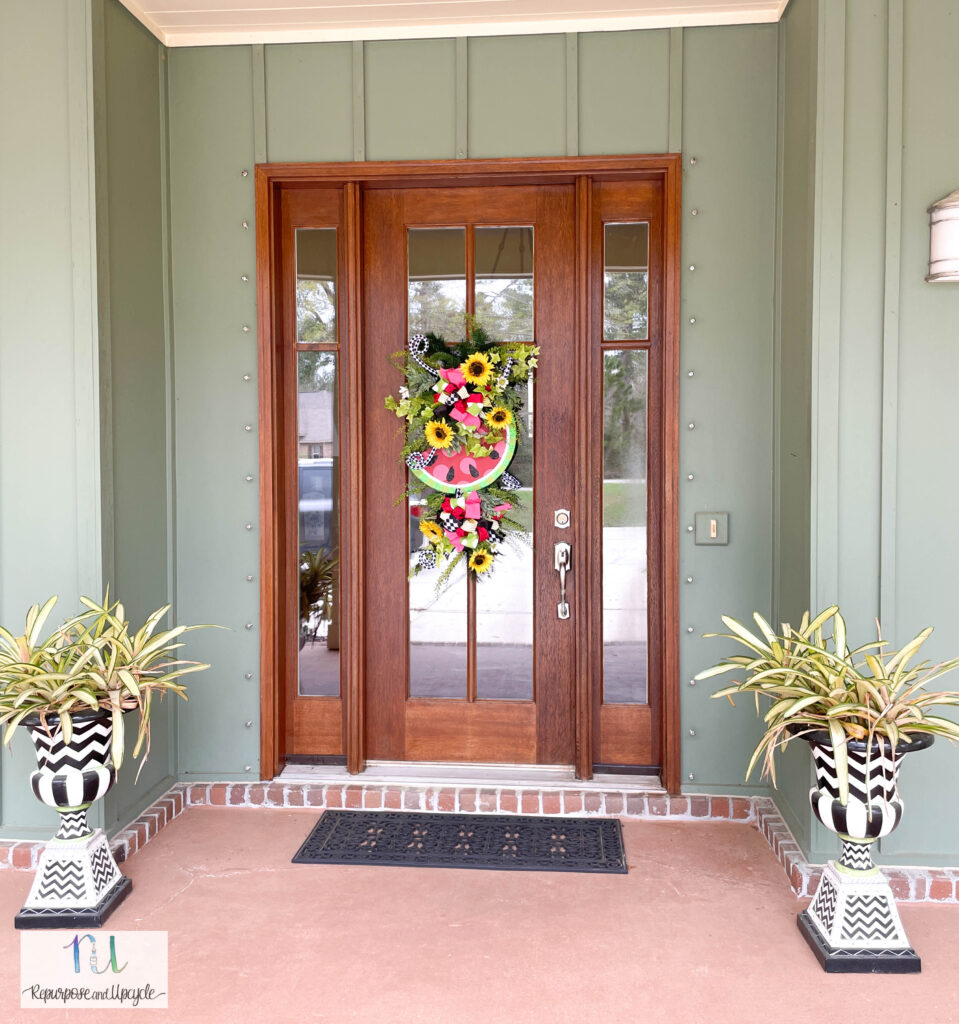
Ta Dah! Here is the new door.
Now, you’re probably thinking, “it doesn’t look that much different.”
Here’s the thing; If you look closely, you will notice it’s more evenly stained.
The biggest part? It’s been sealed again to protect the wood for future years of exposure.

I hope this post has been helpful and given you some ideas on how to finish a set of solid wood doors. Heck, even if you’re refinishing a fiberglass door this post might be of help. It doesn’t always take a lot of effort or extra time to restore a solid piece of wood to it’s original beauty. Thanks for stopping by guys.
Lindsey**
How to Refinish a Solid Oak Wood Door Over a Previous Finish
Learn how to easily refinish a solid oak exterior front door with PolyShades stain and polyurethane. This is a great tutorial on how to refinish a wood door.
Materials
- Sandpaper- I used an angled block sander and fine grit (120 grit) sandpaper
- Tack cloth and lint free cloths
- Cleaning solution; 1 part water to 1 part vinegar
- PolyShades stain and polyurethane in one
- Foam brushes
- Wire brush (if needed)
- Painters tape
Instructions
- Remove the existing hardware if you are going to replace it. This isn’t 100% necessary if you are going to keep it, but it will be easier to sand and stain without it.
- Sand the entire door with fine grit sandpaper. Use an angled block sander for those hard to reach areas.
- Clean with a 1:1 part vinegar to water solution.
- Use a tack cloth or lint free cloth to make sure the surface is free of any debris.
- Apply painters tape if you choose to
- When the surface is completely dry, apply stain or polyurethane and follow the directions for the product you are using.
- Apply consecutive coats if necessary.
Notes
Be mindful of the previous finish on the door and make sure it’s compatible with the product you are going to use on top of it. The particular stain product I used (PolyShades) says it CAN be used over polyurethane finishes.
Use a coarser sandpaper if the surface has a lot of wear and tear and finish with a fine grit sandpaper.


