Skip to Content

How to Make an Indoor Awning with Repurposed Roofing Tin

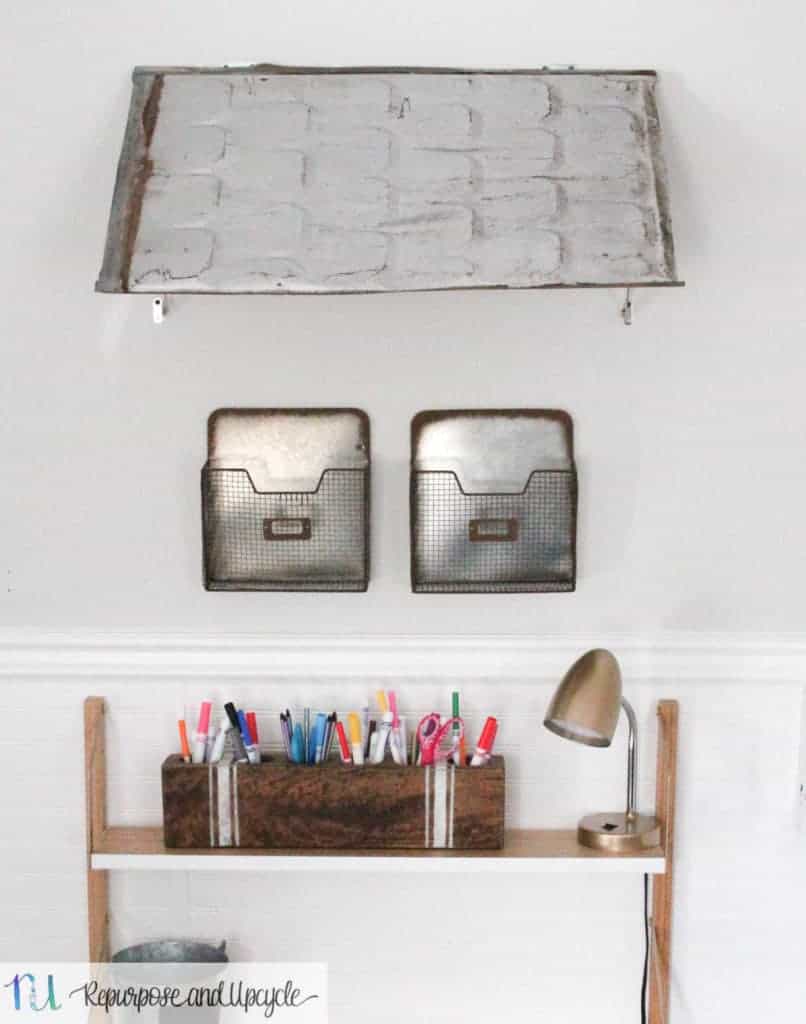
Learn how to make an indoor awning with repurposed roofing tin for a fun accent piece around a window or any indoor space.

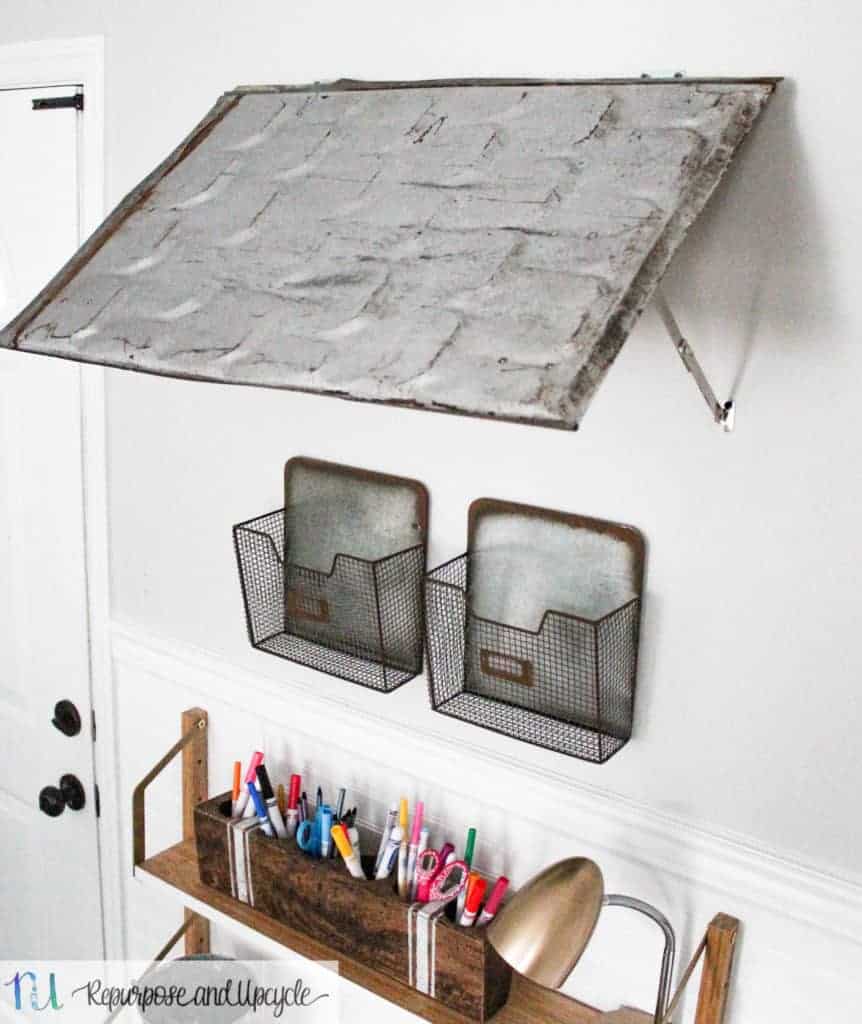
When I was creating ideas for my kids homework station, I wanted to add a few fun elements. After I decided on the actual desk, (which is the SVALNÄS DESK FROM IKEA) I thought it would be neat to add an indoor awning to the homework space. What kid doesn’t want a space with it’s own little “roof” on it? Ok, I’ll admit, mommy thinks it’s pretty cool too. Let me share with you how I created a an indoor awning from a piece of repurposed roofing tin.

How to Make an Indoor Awning with Repurposed Roofing Tin

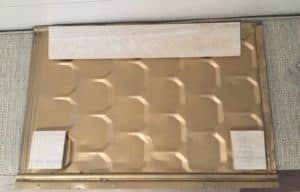
This idea came from my need to declutter our garage. I had these old piece of tin lying around and I could tell hubby was a little annoyed. Can any of my other crafting friends relate? 

Roofing Tin

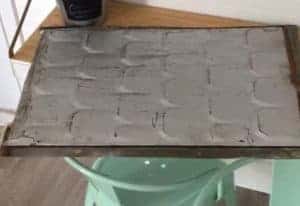
It isn’t the prettiest or shiniest piece of tin, but you know I like it that way! A little rust just adds value. 🙂

I’m always on the hunt to add a little character to our home. I first had the idea to add it over a spare bathroom window. I decided I didn’t want to do that because no one sees it except my kids. That’s when I knew it would add an extra element to my kids homework station.

Disclosure: this post contain affiliate links. This means that if you purchase from one of these links I will make a small commission, but rest assured you won’t pay any more for the product.

How to create an indoor awning

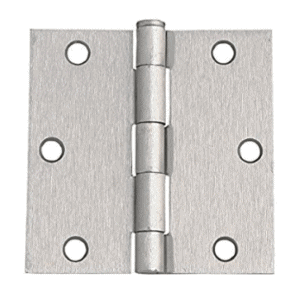
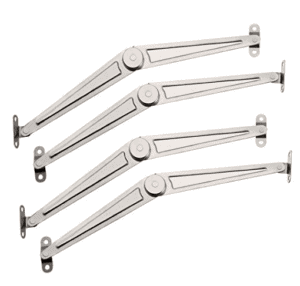
First I needed to figure out how to attach the hardware to the tin.

I’ve shared a few products below that I chose to use.

  1. Folding Butt Hinge 
  2. Lid Support Hinge 

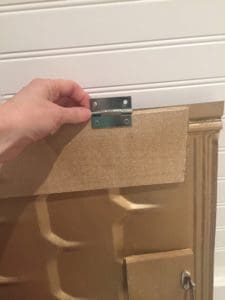
The best way to attach anything to a tin surface is probably by welding, but since I don’t have the ability to do that, I figured I could use a piece of scrap wood.

how to create an indoor awning with repurposed tin

I had a piece of scrap wood that I cut into three pieces large enough to attach the hardware to. I screwed the wood pieces to the piece of tin.

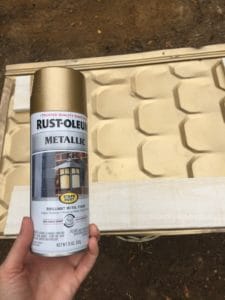
One thing I did to create a more “visual appealing” project was to spray paint the wood the same color that I spray painted the inside of the tin. 

This is my favorite gold spray paint. 

Now it was time to screw the hardware to the wood.

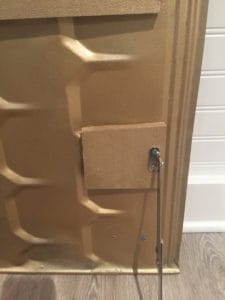
After you’ve attached the hardware to the piece of repurposed tin, mount it to the wall and Ta DAH!

Video on how to create an indoor awning with a piece of repurposed tin

How to Make an Indoor Awning with Repurposed Roofing Tin

What do y’all think?

I love the fun vibe this repurposed indoor awning creates to my kids homework station.

How to Make an Indoor Awning with Repurposed Roofing Tin

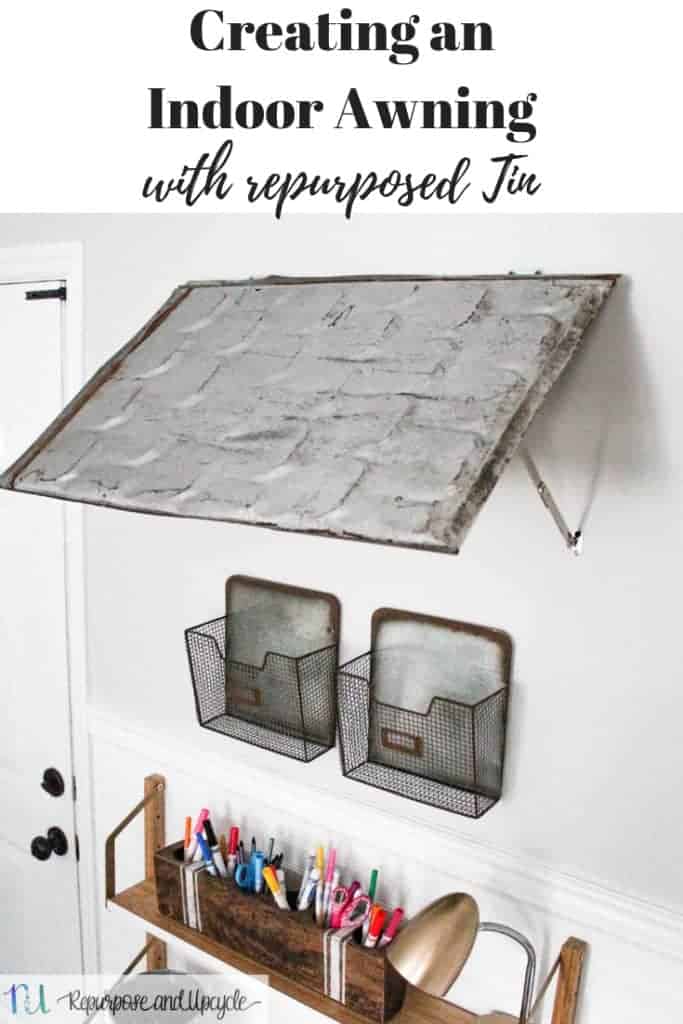
Did you enjoy this post? If you did I would love for you to Pin the image below to Pinterest. 

The great thing about this tutorial is that you can use it for so many different projects. You can even use the same method to create Bahama Shutters.

Want to see more of this space and all the details on how to create your own kids homework station? Come on over and take a peek. 

How to create an Indoor Awning

how to create an indoor awning

This is a simple tutorial on how to make an indoor awning out of repurposed tin without welding. You can also use this same method to create Bahama Shutters.

Active Time 1 hour
Total Time 1 hour
Difficulty Medium

Materials

  • Awning material (this can be wood, metal, or anything as long as it fits your dimensions)
  • Folding Butt Hinge
  • Lid Support Hinge
  • Screws
  • scrap wood if needed

Tools

  • drill

Instructions

  1. First attach wood pieces to the underside of the awning where you will attach the hardware. You will need three pieces of wood; one long piece (or two small pieces) for the top two folding butt hinges and two on each side of the awning for the lid support hinges.
  2. Once the wood is secure, use a drill to screw the hardware into the wood.
  3. Secure the top of the awning to the wall first with the folding butt hinges and screws.
  4. Decide what angle you want the indoor awning or bahama shutter to sit at.
  5. Next screw the lid support hinges to the wall at the angle you want the indoor awning or bahama shutter to open at.

Notes

When deciding where to attach the lid support hinges, make sure the hinges will be long enough to create the "angle" you need with the indoor awning. I made the mistake of attaching them too low and realized that the awning wouldn't open as wide as I wanted it.

How would you use this piece of repurposed tin?

Lindsey**

Leave a comment

Your email address will not be published. Required fields are marked *


  1. Christine says:

    Very cute and clean looking. I actually went to ikea online and only see desks with more shelves. I’m curious if you bought this separately and put together or was it all in one kit?

  2. That is so cute! I love the character it adds. Thanks for sharing it with us at the Homestead Blog Hop!

  3. […] Repurpose and Recycle: Metal Awning […]

  4. […] people on the planet. After creating a homework station for her kids she decided to show us How to Make an Indoor Awning with Repurposed Roofing Tin to go over it. Mind […]

  5. […] feature this week is this creative How to Make and Indoor Awning with Repurposed Roofing Tin from Repurpose and Upcycle.  I love this idea, I am trying to figure out where I might use one of these in my house, it is […]

  6. Rhonda Gales says:

    Visiting from Sunday’s Best. This is cute idea for kids. Gives them an at home feeling. Thanks for sharing.

  7. […] #1 ~ How To Make an Indoor Awning with Repurposed Roof Tin […]

  8. […] DIY Indoor Awning Project | Repurpose & Upcycle […]

  9. So fun! Love that it’s an awning for the kids zone. Super cute!! Visiting from Pretty Pintastic Party.

  10. This is so cute! How fun for them to be able to sit under an awning to do their work and projects. Very creative. I love it!!

Skip to Instructions