Painting a file cabinet is such an easy way to flip an old metal eye sore! Learn how I added a simple picture frame and paint to make this old cabinet look new.
I intended on throwing this old filing cabinet away. I told myself, “how can I keep something that I don’t have room to store anymore.” Since we moved and downsized, we don’t have the closet space to hide it. That’s when I decided on painting this metal filing cabinet to give it a quick and easy facelift.
My plan was to ditch the old filing cabinet and purchase a few nice looking wood cabinets that wouldn’t stick out like a sore thumb.


Then I came to my senses.
Why would I get rid of the old metal filing cabinet when I could make it over with almost no money and little time?
Do you have an old metal filing cabinets? Don’t get rid of it! Let me show you how to repurpose it.
Stick with me; I’ve got a DIY fail I also want to show you. Not all of my projects are cupcakes and rainbows. 🙂
Disclosure; this post contains affiliate links. As an Amazon Associate I earn from qualifying purchases. This does not affect the price you pay. This disclosure statement refers to the rest of the Amazon links in this post.
Table of Contents
Supplies to update a metal filing cabinet with paint
- Filing cabinet
- 8 by 10 Black Frames from Target
- 4 wooden furniture feet. I could not find a link to the ones I purchased, but HERE you can see something similar.
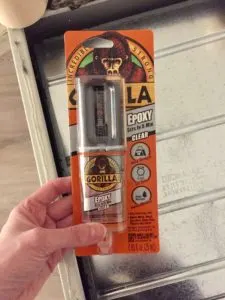
- Gorilla glue epoxy
- Krylon Chalkboard Paint
- Black contact paper
- Drill
- Drawer pulls of your choice
- Hot glue gun
How to add a picture frame and paint to a metal filing cabinet
- Clean the filing cabinet. Make sure you don’t have any debris left on the metal. A good way to clean metal is with vinegar.
- Remove the old hardware off of the front of the drawers.
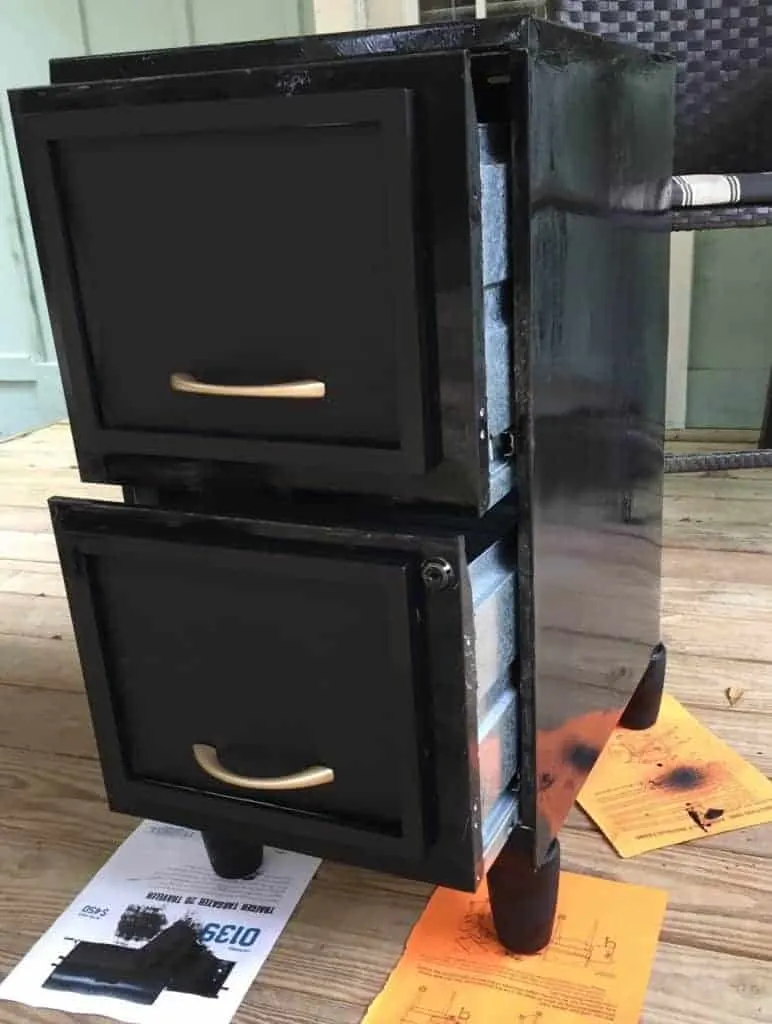
- Open your frame and add the black contact paper to the front. Note; I removed the glass and added the contact paper to the cardboard backing.
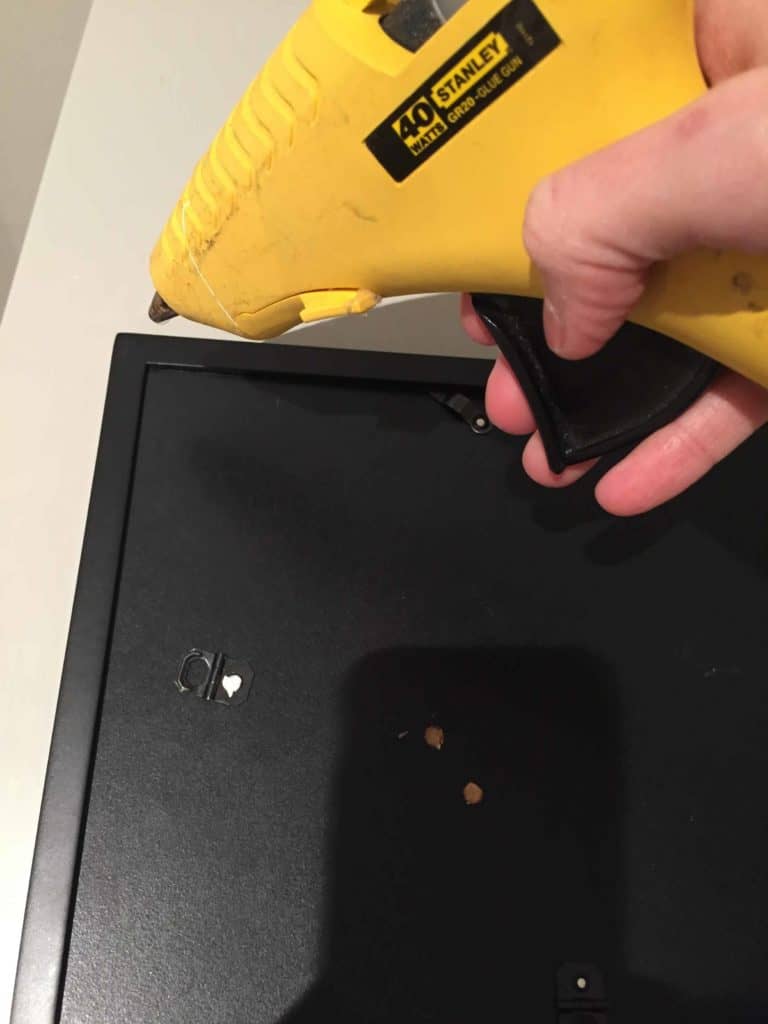
- Use a hot glue gun to adhere the photo frame to the front of the filing cabinet drawers.
- Drill the drawer pulls into the front of the “frame.” The hardware is what secures the photo frames to the front of the filing cabinet drawers (you can’t count on the hot glue holding forever).
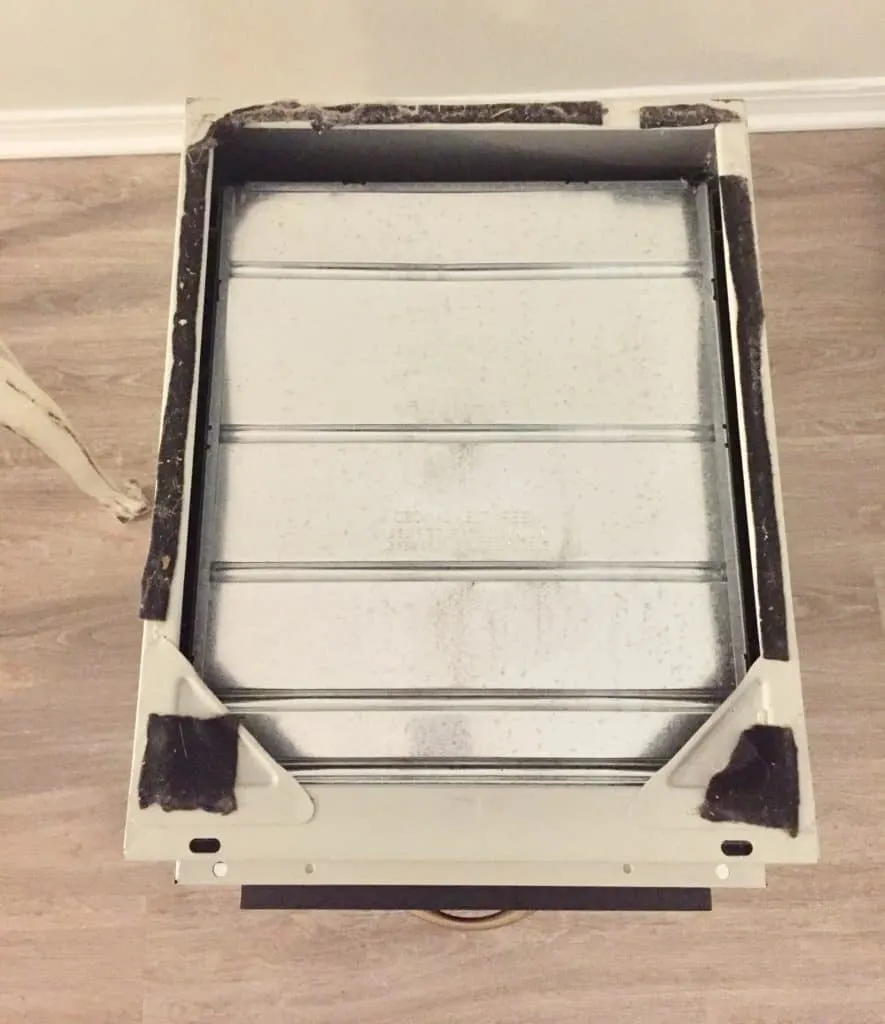
- Turn the filing cabinet over and drill four holes for the legs.
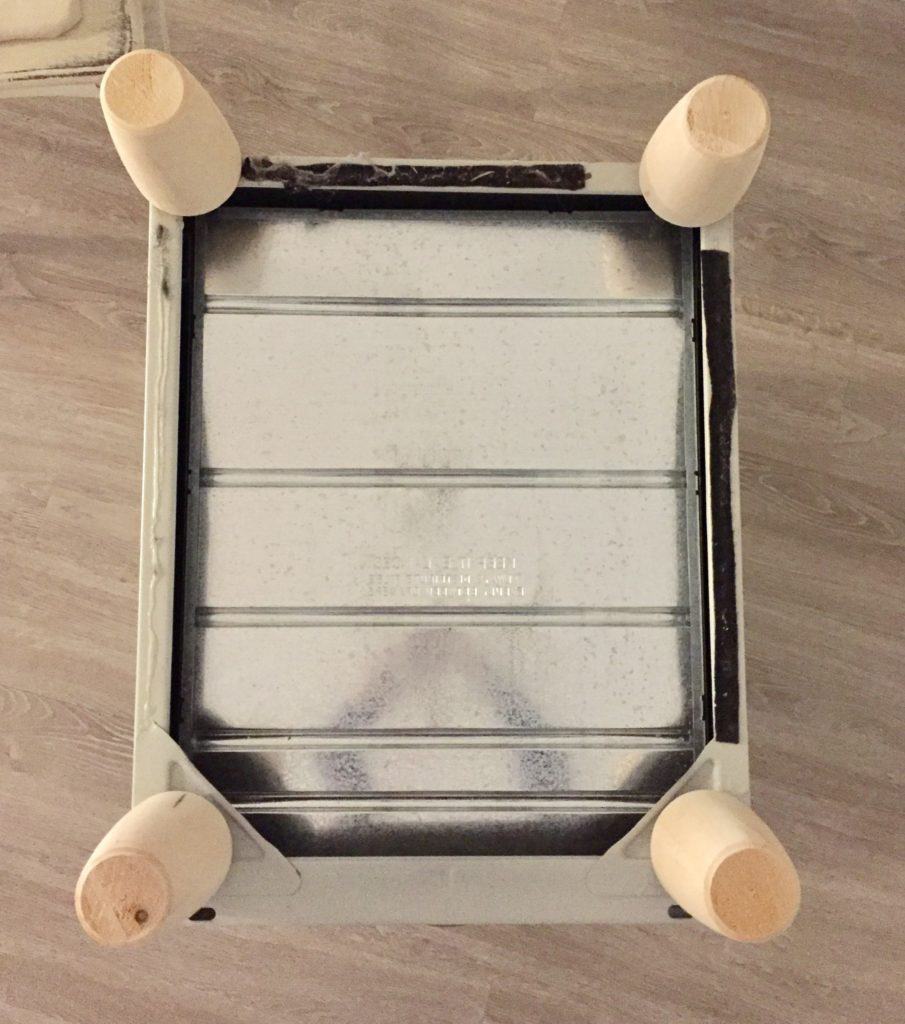
- Use the epoxy glue to add the legs to the base of the filing cabinet.
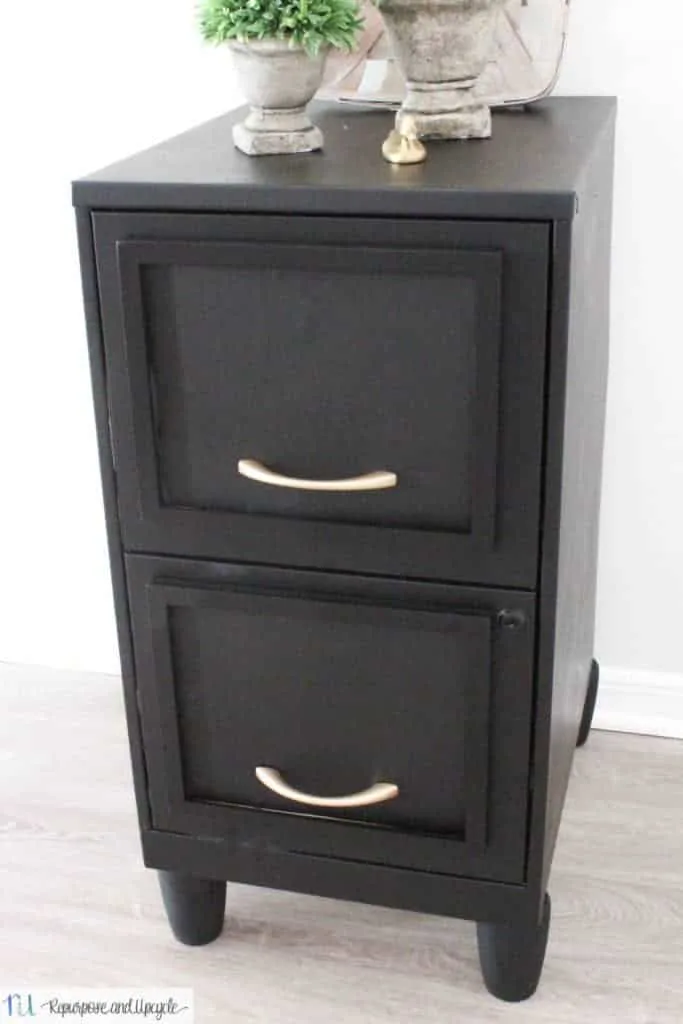
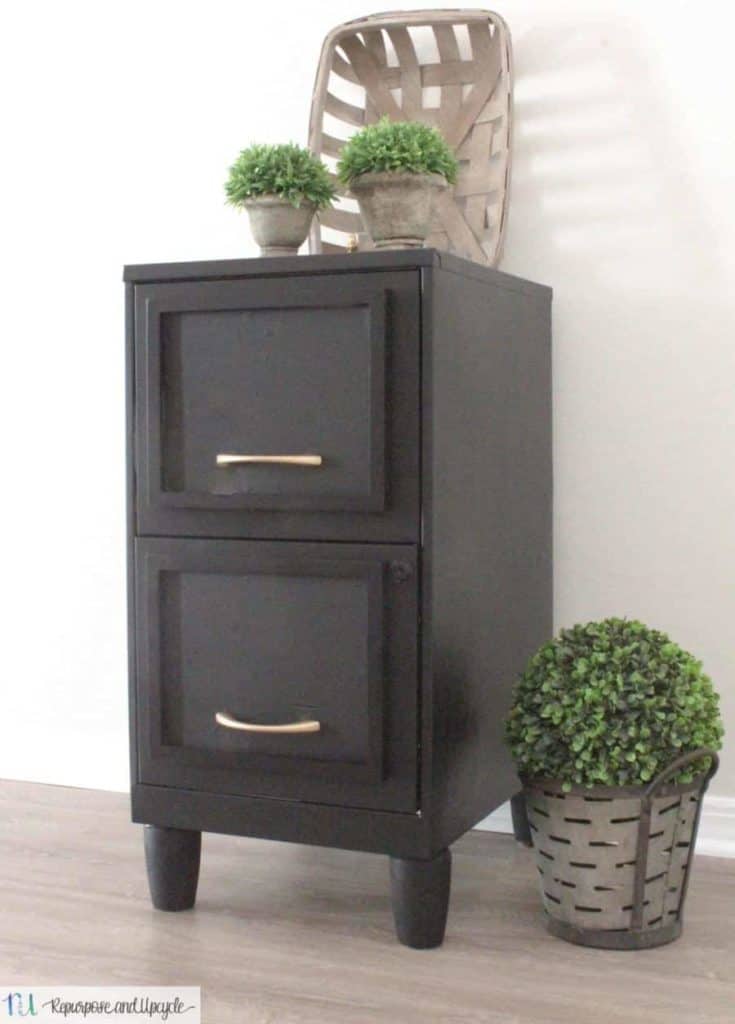
- Paint the rest of the filing cabinet with the Chalkboard paint. I decided to use chalkboard paint because it adheres well to metal and it gives it a smooth matte black look.
- Seal the Chalkboard paint with a good sealer.
I love easy furniture makeovers that turn trash to treasure. I still can’t believe I was going to get rid of it!
Let me share a few of the process pictures.
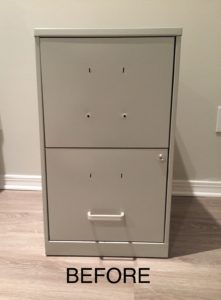
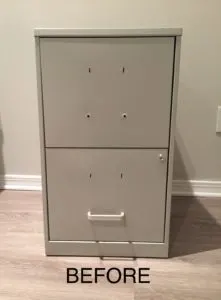
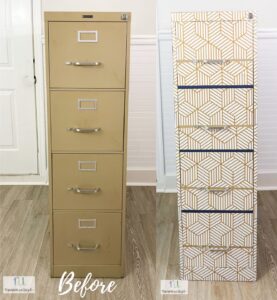
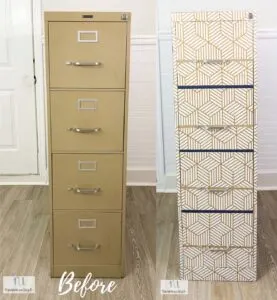
Below is the infamous “BEFORE” picture. You can see it’s missing a few drawer pulls. No problem there because I knew I was going to get new ones anyway.
This is the simple frame I purchased from Target. I measured the height and width of the filing cabinet drawers and decided on a frame that a few inches smaller.
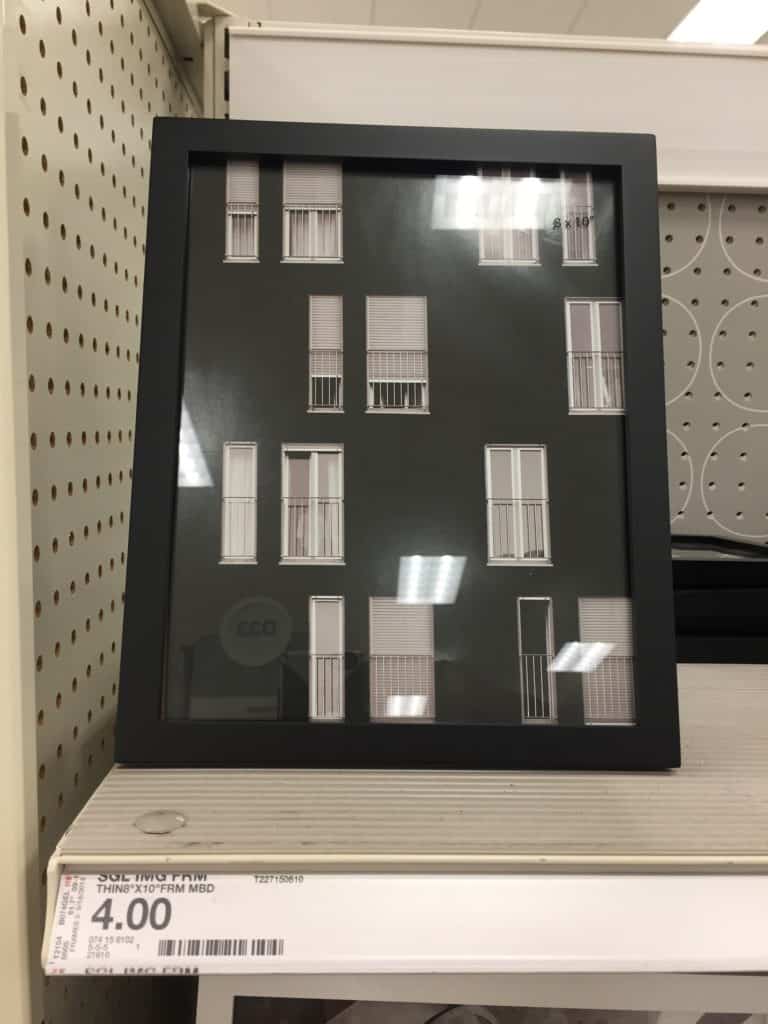

My suggestion is to make sure the dimensions on the frame versus the filing cabinet drawers are similar ratios. For example, the difference in the width from the frame to the end of the drawers are about an inch on all sides. The top and bottom space is a little smaller than the sides but it still looks good.
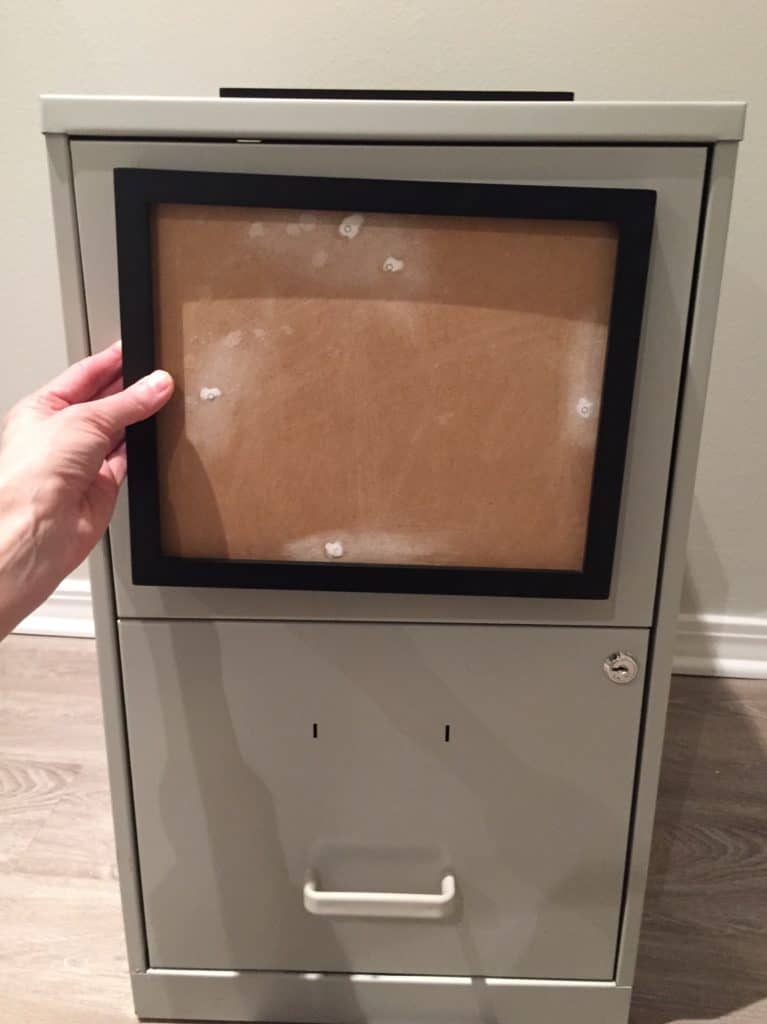


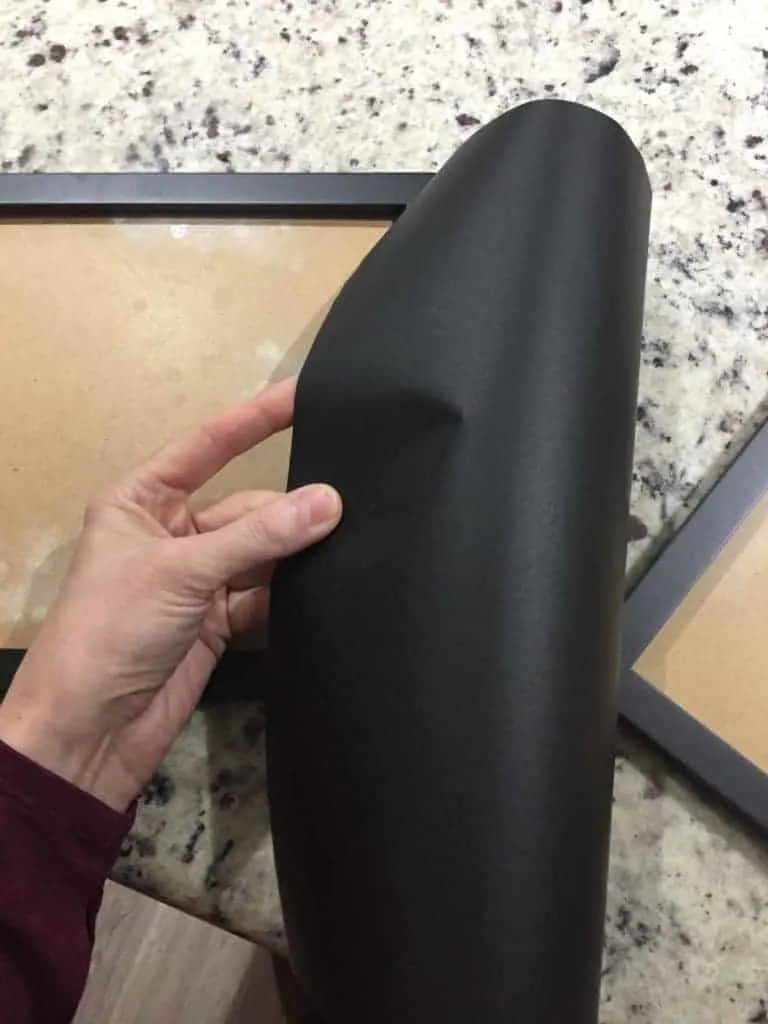
I used contact paper to cover the front of the picture frame. You don’t have to do this. You can always paint the cardboard that comes with it.

As a matter of fact, my pet peeve with the contact paper is that it still creates small bubbles in the frame. Obviously, with paint you won’t have to worry about this.
I used hot glue to adhere the frames to the filing cabinet.
Once you decide on drawer pulls, measure and mark where you want them to sit. Drill holes for the hardware. Secure the drawer pulls to the filing cabinet.

I used an epoxy glue to add the legs to the four corners of the filing cabinets.

Note; What I really wanted to do was drill four holes in the bottom to make sure the legs would be secure. Unfortunately there wasn’t anywhere for me to do that.


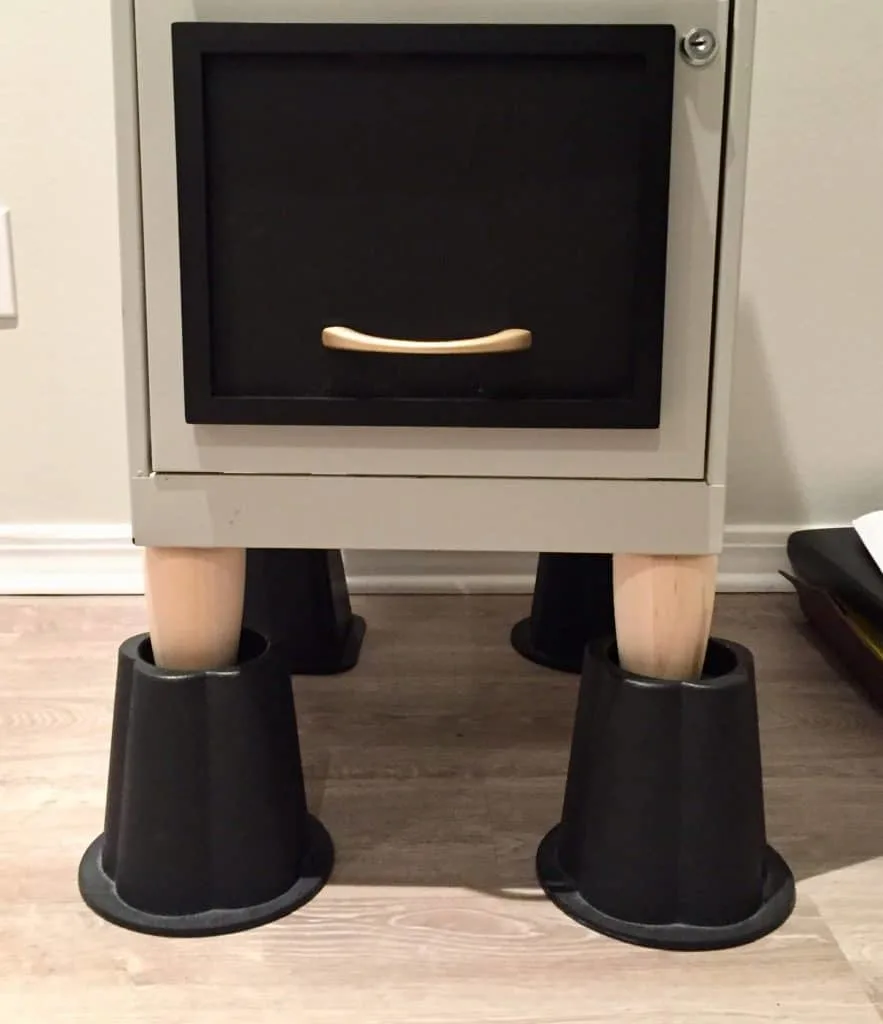
I added the bed risers beneath the legs to make it easier to paint. I’ve shared a handful of tips like this and other painting tricks you might not learn elsewhere in another post.
This is where my DIY fail comes in. After I did some research, I decided that the best and easiest way to paint the filing cabinet black was with a can of paint that said it was specifically designed for metal AND it was paintable (in case I ever decided to change the look). Well let me tell you, not everything is as it says. Here is what the top looked like after I sprayed one application.
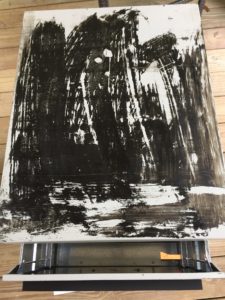
Yuck! It wouldn’t adhere to the metal at all and immediately bubbled after I applied it. This just goes to show that you always need to “test” an area before you go wild with painting (I’m telling myself this:))
Now what? I decided to apply Krylon’s Chalkboard paint. I wanted a smooth matte black finish, and since my first option didn’t work, I thought the chalkboard paint would be a good alternative. I knew from a previous experience that Chalkboard paint DOES adhere well to metal, so that’s what I decided on. Good news, it worked!
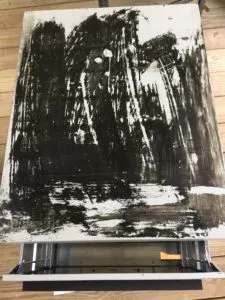
Below is a shot after the first coat.


I added a second coat of chalkboard paint and then a sealer and then I was done! Ready to see the reveal?
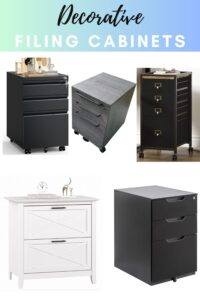
If you’ve decided that you don’t want to deal with a file cabinet DIY and would rather purchase a more decorative filing cabinet, check out five awesome file cabinets from Amazon here!

Or if you are looking for another way to makeover a filing cabinet check out our DIY file cabinet makeover with peel and stick wallpaper. This might be my favorite way to flip an old filing cabinet.
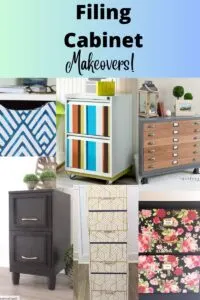
If you are looking for more filing cabinet makeovers check this post out!

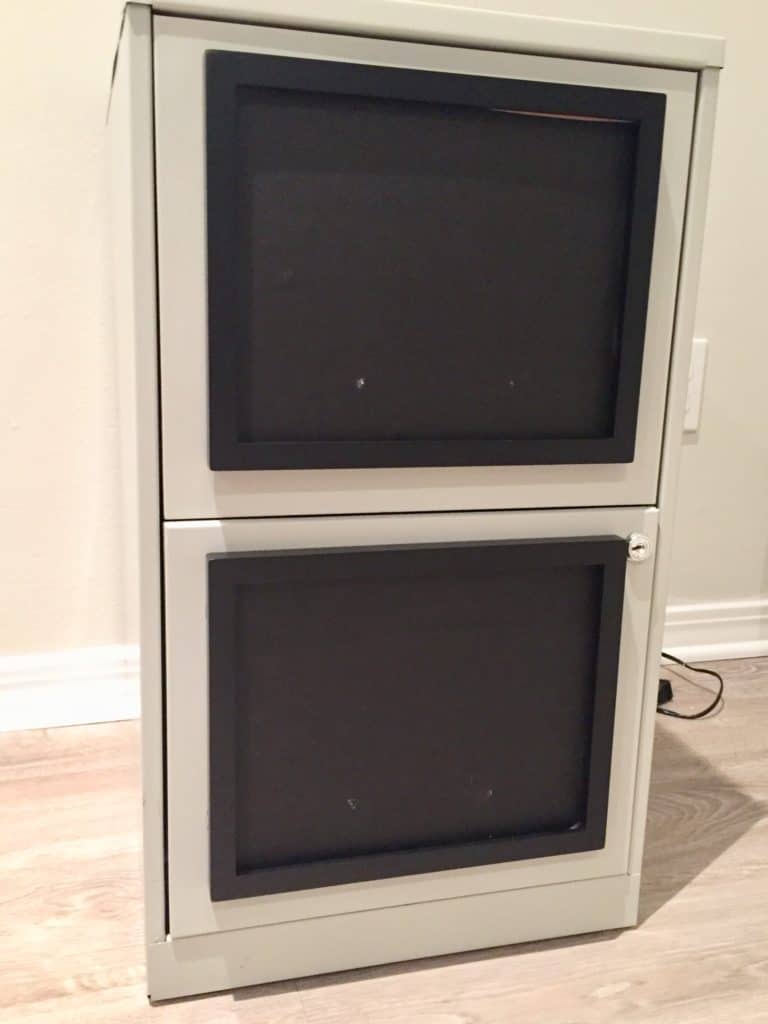
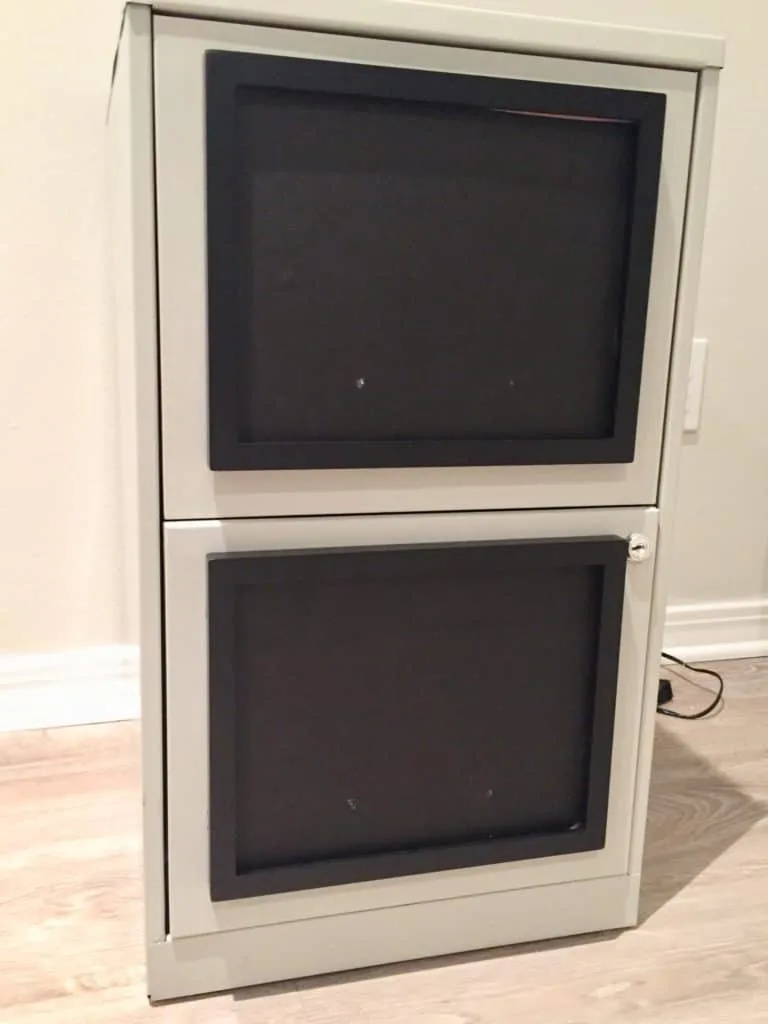
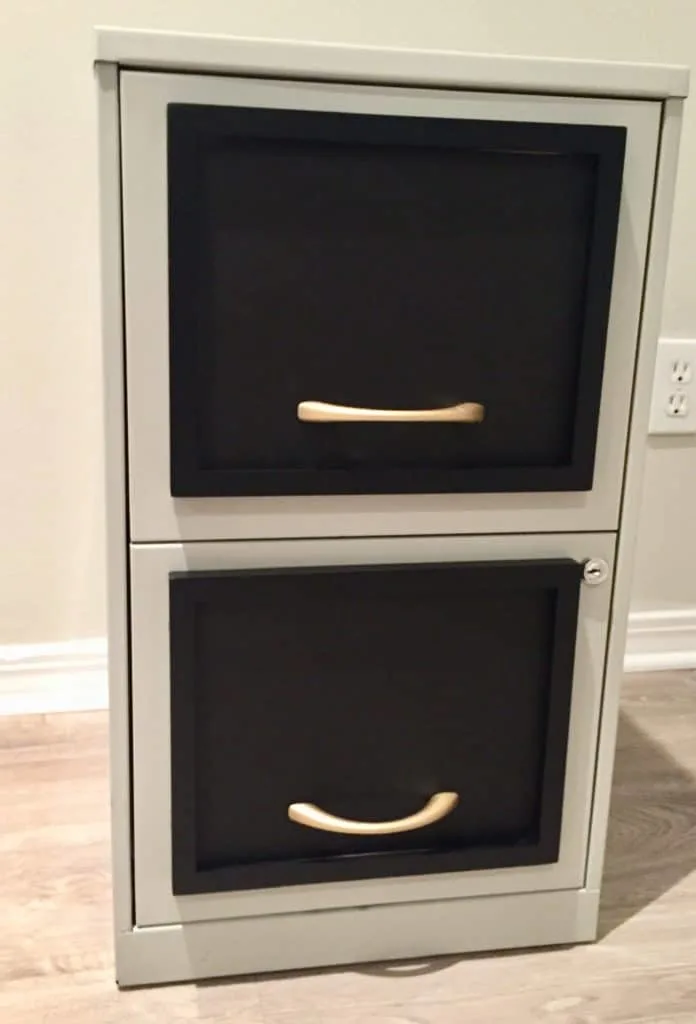
The reveal of the painted file cabinet

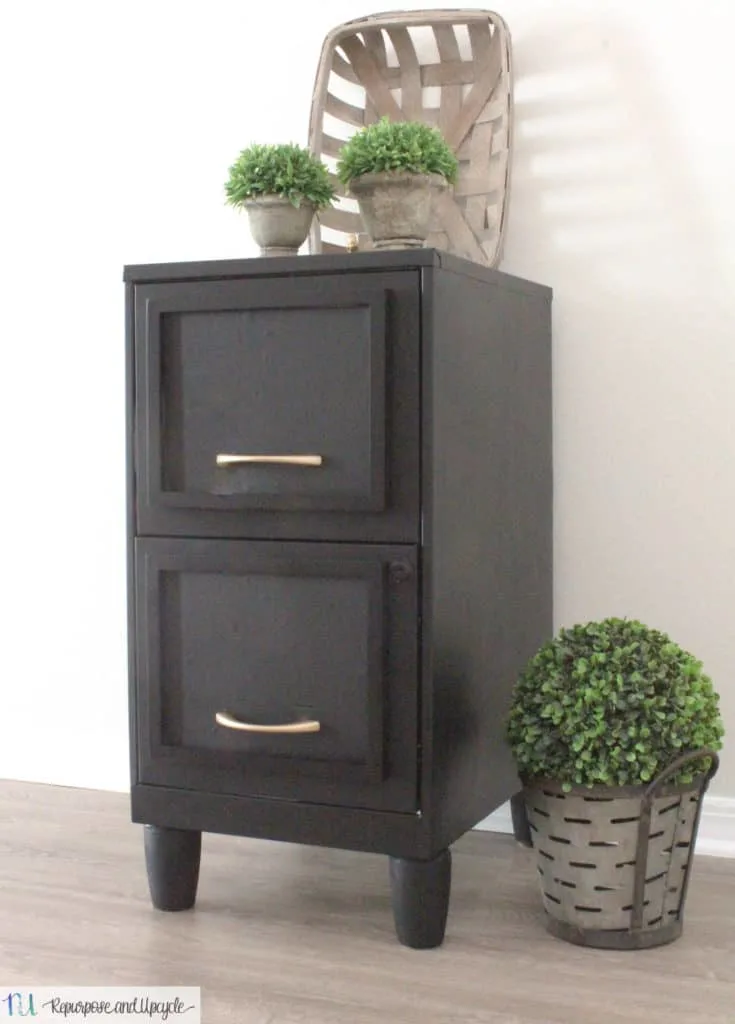

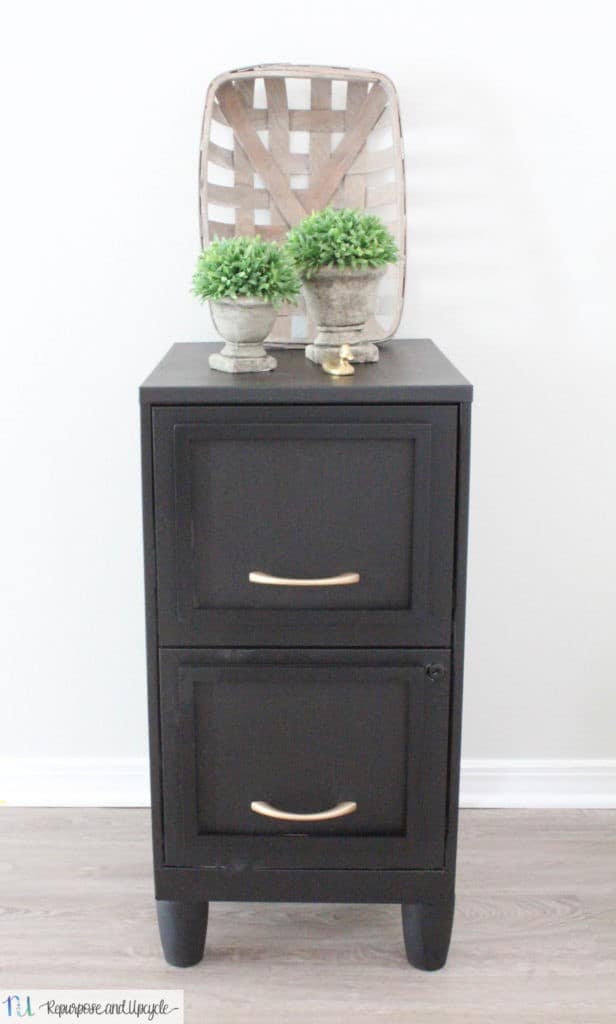
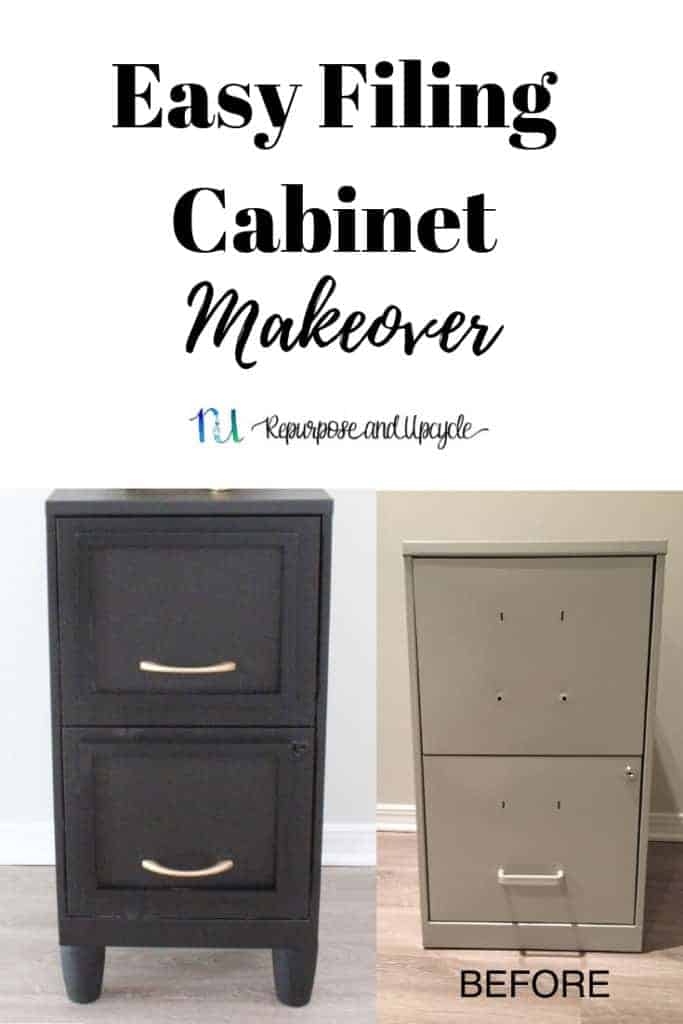
What a transformation! I’m so glad I decided to give it a makeover rather than pitching it!
Filing Cabinet Makeover

Check out my easy filing cabinet makeover! Learn how I added a simple picture frame and paint to make this old cabinet look new.
Materials
- Filing cabinet
- 8 by 10 Black Frames from Target
- 4 wooden furniture feet
- Gorilla glue epoxy
- Krylon Chalkboard Paint
- Black contact paper
- Drawer pulls of your choice
- Hot glue gun
Tools
- Drill
Instructions
- Clean the filing cabinet. Make sure you don't have any debris left on the metal. A good way to clean metal is with vinegar.
- Remove the old hardware off of the front of the drawers.
- Open your frame and add the black contact paper to the front. Note; I removed the glass and added the contact paper to the cardboard backing.
- Use a hot glue gun to adhere the photo frame to the front of the filing cabinet drawers.
- Drill the drawer pulls into the front of the "frame." The hardware is what secures the photo frames to the front of the filing cabinet drawers (you can't count on the hot glue holding forever).
- Use the epoxy glue to add the legs to the base of the filing cabinet.
- Paint the rest of the filing cabinet with the Chalkboard paint. I decided to use chalkboard paint because it adheres well to metal and it gives it a smooth matte black look.
- Seal the Chalkboard paint with a good sealer.
Ready to see some more furniture flipping inspiration? Check out my very talented blogger friends below!
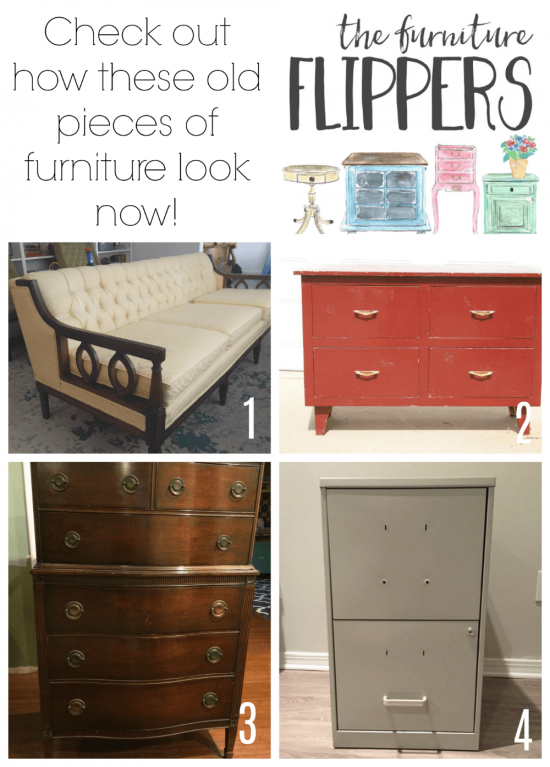
- How to Reupholster a Vintage Sofa by Lovely Etc.
- Dresser Makeover by A Fresh Squeezed Life
- Painted Vintage Dresser with DIY Chalk Paint by Refresh Living
- Easy Filing Cabinet Makeover by Repurpose and Upcycle
As always, thank you for following along. Let me know what you think about this makeover!
Lindsey**
Love what you did! And the feet are super. Gave me ideas. Thank You!
Great and you’re welcome!
On the filing cabinet makeover does the frame your using just have a piece of paper in it? Wouldn’t that tear if it was bumped?
Hey Mary,
I took the piece of paper out of it so no it doesn’t have paper in it.
I’m going to attempt this project but I’m confused about step number 5. It says to drill through the “frame” to secure it but none of the photos show that the frame has been drilled through. Nor are the “pulls” attached to the frame. Am I missing a step?
Sorry for the confusion! To clarify what I meant- you need to drill through the frame to make holes in it where the existing cabinet pull holes are. This way you can attach the hardware into the same holes that are already there. Does that make sense?
Hi, that looks awesome! I’m doing something very similar but there isn’t much space to attach the feet -how did you do that?
I was thinking of attaching a piece of wood to the underside and add the feet to that, but not sure it will take the weight.
Thank you Lara. I used an epoxy resin to attach the feet to the metal, but it was super successful. Honestly, I didn’t leave the feet on the cabinet for very long after I finished the makeover for that very reason. The feet did not stay put that well. If I were to do it over, attaching a piece of wood to the underside would be a good idea and probably what I should have done.
Awesome. This is a feature on my blog for Inspire Me Monday. Over at Everyday Edits, formerly known as not a trophy wife. laura
Wow what a transformation. I will be featuring this tonight at my Winter Blues Wednesday party that opens at 8pm EST. Please stop by and pick up an I’ve Been Featured button. Thanks. http://diybydesign.blogspot.com
[…] Easy Filing Cabinet Makeover by Repurpose and Upcycle (PIN IT) […]
[…] Easy Filing Cabinet Makeover from Repurpose and Upcycle […]
Liked the DIY you shared. Its good to upcycle .I think I can do it. Found this in Bloggerspitstop
you can totally do this! Good luck.
How has no one done this before! This is great! #trafficjam
I can hardly believe that’s the same file cabinet! Amazing job! I have a big, unsightly one that could use some love like this…. Pinning! 🙂
#embracingchangelinky
What a change – ugly old metal cabinet to beautiful new wood-look cabinet. Not only did you do a great job in the transformation but you also did a fantastic job in documenting the process in words and photos.
That looks great, the frames make it look totally different don’t they? What a clever upcycle. Shame about the first paint, but we all live and learn 🙂
What a change! I’m eying my metal file cabinet as I read this … hmmm!
Final result is great. When paint companies say their product works on metal…they are implying on clean base metal—and a surface not treated before. Every finish has it’s peculiarities, just because it’s metal (the filing cabinet) doesn’t mean that a wax or weird cleaning product hasn’t been applied. You have to follow cleaning and de-glossing on all surfaces in order to get most paints to stick. Your solution was great–and I love the finish it ended up with, and the unglossy black/dark gray is very classy!
Thank you Sandi! I thought I had cleaned the surface thoroughly, but I guess not. Or maybe the product just didn’t work with the cabinet!
It’s possible that there was vinegar residue, which would breakdown the spray paint?
What a beautiful end result! Love the picture frame idea.
Thank you Lori. Maybe the vinegar caused it? The paint was old, so really I think that was the problem.
I’m going to make mine into a table. I only have one, so I’m going to have to create legs for the other side. BUT since you have two you could put a wood slab on the top and have a great desk. Is this something you would like to do with them? I hope this helps!
Very nice job
This so AWESOME! When we move i will have to have the filing cabinet in the living room. Your design is coming to the rescue of an eyesore! Thank you.
I love the finished product! How creative.
I need a filing cabinet and have been eyeing them, but haven’t felt confident in repurposing one. Thanks for the inspiration!
I have a four draw maybe too big to put legs on. Any other ideas for big file cabinets thanks
heavy metal casters?
Thanks Randi! It was a fun and easy project!