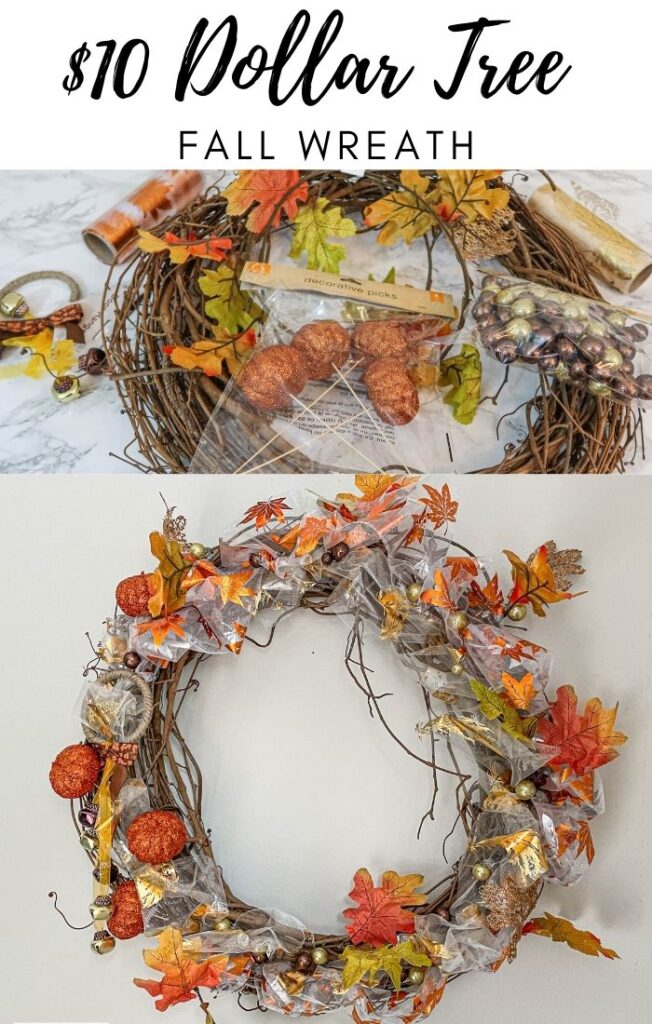
For around $10 you can create your own DIY Fall Wreath from the Dollar Tree. Making your own wreath doesn’t have to cost a lot or take a lot of time. Let me show you!
Dollar Tree crafts are my favorite. They are affordable and fun! I’ve recently shared a few DIY Dollar tree crafts with a DIY hanging planter project, and a DIY Christmas Ornament from gum ball machine. This DIY fall wreath might be one of my favorite Dollar Tree crafts though.
I won’t take a lot of time explaining how to create a DIY fall wreath because I explained it all in a video. Make sure to check it out below or on YouTube.
On a side note; if you are searching for other thrifty ways to decorate for the holidays on a budget, check out my simple post with a video.
Supplies:
- Grapevine wreath- this is the only item I didn’t get from the Dollar Tree
- Ribbon
- Door hanger
- Vase fillers
- Garland
Tools:
- Hot glue gun
- Scissors

Creating a simple fall wreath is easy in just a few steps. Follow these steps with different wreath decor to create different looks for the different seasons.
There isn’t a right or wrong way to make a holiday wreath. Below are my simple steps on how I create my own DIY wreaths.
How to make a simple DIY Fall wreath from Dollar Tree supplies for around $10
- Start by adding ribbon and tucking it into the grapevine wreath about every few inches until you’ve gone all the way around the wreath. Feel free to use different types of ribbon and overlap them if you like.
- Next add the garland around the wreath in the same pattern that you added the ribbon. Use a hot glue gun to attach the garland to the wreath.
- If you plan to add a large bow, now is the time to hot glue or attach it where you please.
- If you have small decor elements like beads or jewels, add these in varying places around the wreath.
- Next add larger items like seasonal figurines (ex. the door hanger and the decorative pumpkin picks).
- Make sure the wreath looks “balanced” meaning that if you have one large item on one side, make sure to counteract it with another large item on the opposite side.
- Lastly make sure you like the way everything looks. Don’t hesitate to move things around until the wreath looks exactly like you want it to.
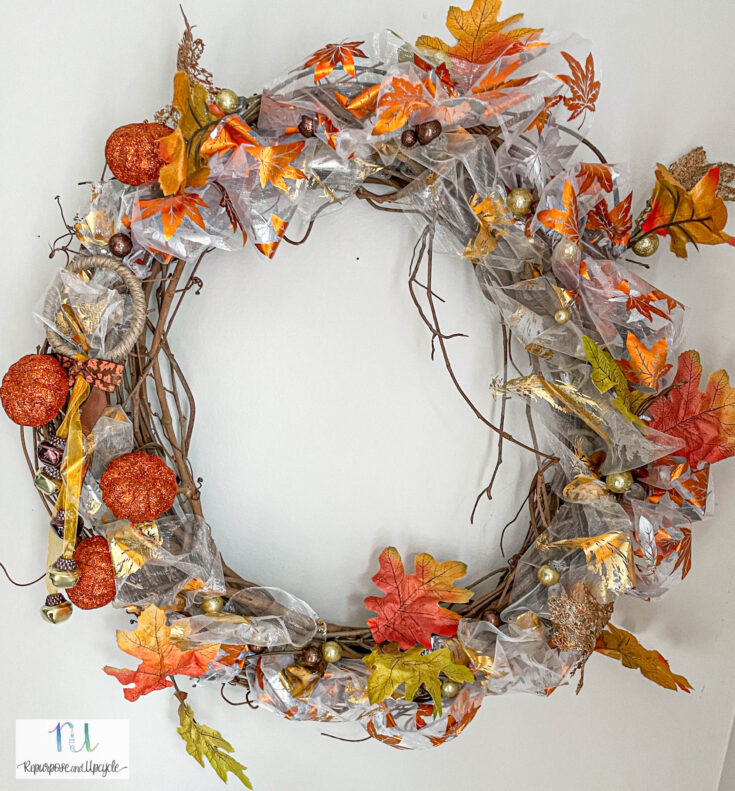
DIY Fall Grapevine Wreath from Dollar Tree supplies
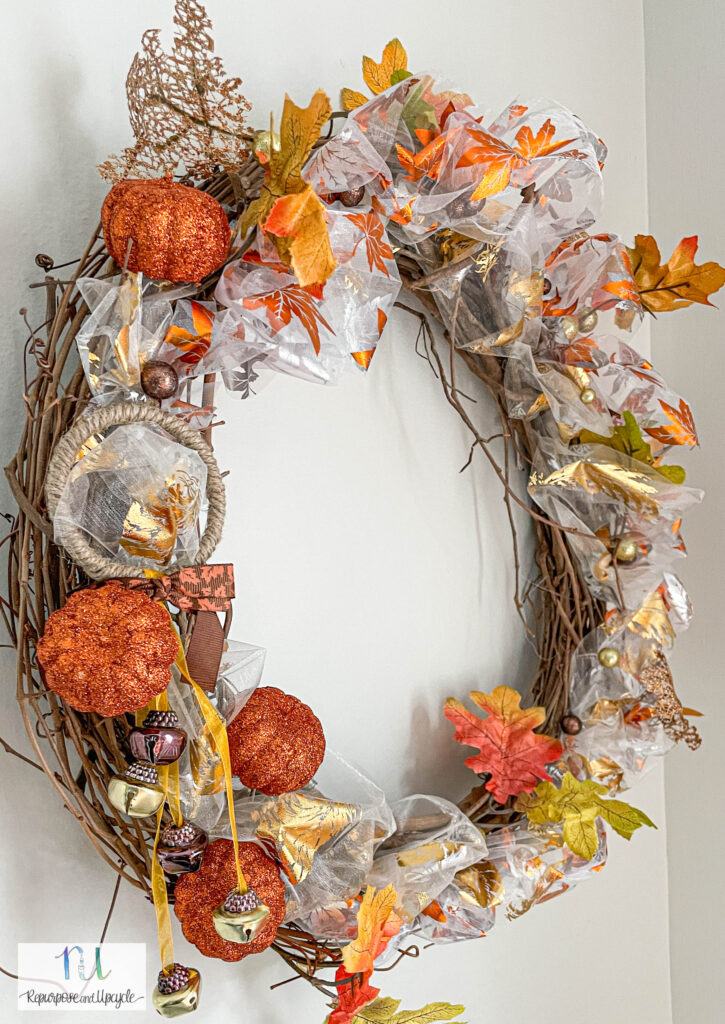
I love how the fall colors pop!

One element that I think draws visual interest to any wreath is when they are asymmetrical. You can see here where I added the pumpkins and the door hanger to one side of the wreath and not the other. I balanced it out by adding the garland to the other side.

What do you think? Could you create a simple DIY fall wreath with this tutorial?
Happy fall crafting friends!
Lindsey**
DIY DOLLAR TREE fall wreath for ONLY $10
Learn how I created a DIY DOLLAR TREE FALL WREATH for ONLY $10. Making a fall wreath doesn't have to be expensive or time consuming. Dollar Tree has a handful of great fall decor items. I created this DIY wreath in only about ten minutes and I'll show you how to also.
Materials
- Grapevine wreath- this is the only item I didn't get from the Dollar Tree
- Ribbon
- Door hanger
- Vase fillers
- Garland
Tools
- Hot glue gun
- Scissors
Instructions
- Start by adding ribbon and tucking it into the grapevine wreath about every few inches until you've gone all the way around the wreath. Feel free to use different types of ribbon and overlap them if you like.
- Next add the garland around the wreath in the same pattern that you added the ribbon. Use a hot glue gun to attach the garland to the wreath.
- If you plan to add a large bow, now is the time to hot glue or attach it where you please.
- If you have small decor elements like beads or jewels, add these in varying places around the wreath.
- Next add larger items like seasonal figurines (ex. the door hanger and the decorative pumpkin picks).
- Make sure the wreath looks "balanced" meaning that if you have one large item on one side, make sure to counteract it with another large item on the opposite side.
- Lastly make sure you like the way everything looks. Don't hesitate to move things around until the wreath looks exactly like you want it to.
Notes
There isn't a right or wrong way to make a holiday wreath. Below are my simple steps on how I create my own DIY Fall wreath.


