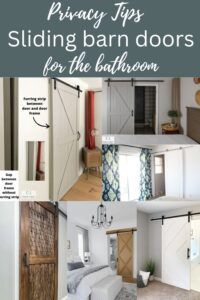
Full review of the SmartStandard sliding barn door hardware kit with installation video. Learn how easy it was to install this sliding door!
I feel like the barn door trend is slowly starting to lose its popularity. With that being said, sometimes installing a sliding door is more a matter of function than it is aesthetic. Our decision to install one into our master bathroom was first for function only. Now that it’s up, I’m so pleased (and a little surprised) with how it looks and how much I like it! I’m so excited to share my new SMARTSTANDARD sliding barn door with you today.
I knew from the beginning that I would build my own sliding door (or so I thought). That’s probably the cheapest option right? That’s when I realized how expensive barn door hardware alone can be! I knew about what the cost of lumber would be so once I sat down and analyzed the cost of this new project, I realized it would be well over $150 for me to DIY it. That’s when I found an affordable ready-to-build barn door kit.
Video tutorial on how to install a Smartstandard Sliding Barn door hardware kit
Disclosure; this post contains affiliate links. As an Amazon Associate I earn from qualifying purchases. This disclosure statement refers to the rest of the amazon links and other affiliate links in this post.
Check out some more sliding barn door ideas to the bathroom before you leave! I also shared a tip so you can have a sliding door to the bathroom and not loose too much privacy.
Installing the SMARTSTANDARD Sliding Barn Door Hardware Kit
I just happened upon this barn door hardware kit while I was looking for sliding hardware. The SmartStandard kit’s got great reviews, came in all different options and sizes, and fit what I was looking for perfectly. I couldn’t believe that this kit would be any sort of decent quality. Because the reviews said otherwise, I decided to give it a try.
My first impression when I opened the box was how heavy duty the lumbar was. It’s mostly tongue and groove boards (solid spruce) that are already pre drilled for hardware. The kit even comes with a drill bit.
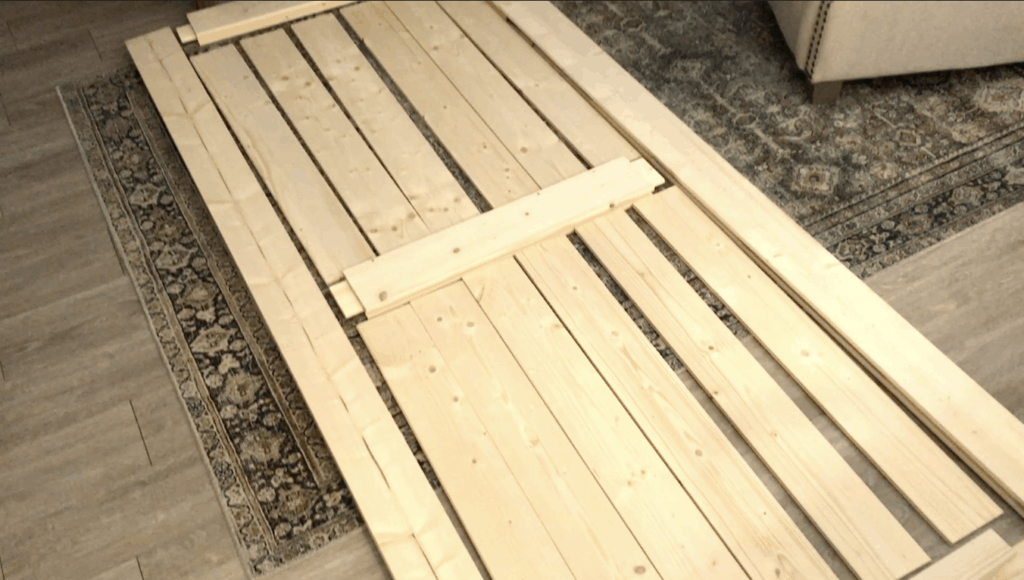
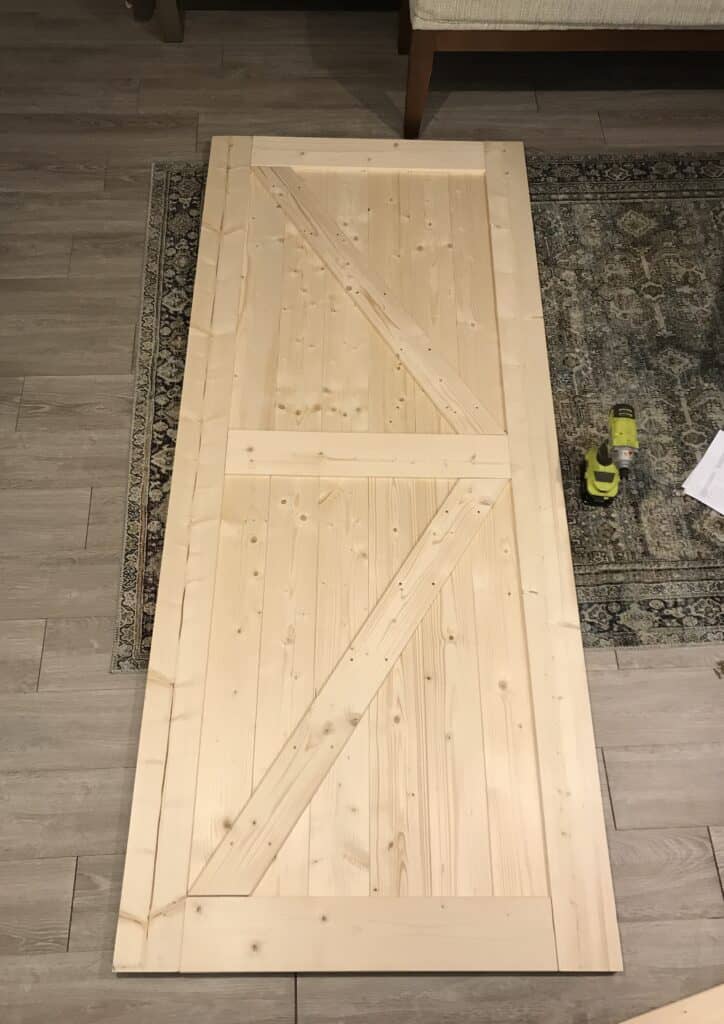
The first thing I did was lay the wood out on the floor and assemble it. Once it was assembled, you use the hardware and drill bit provided to secure it together.
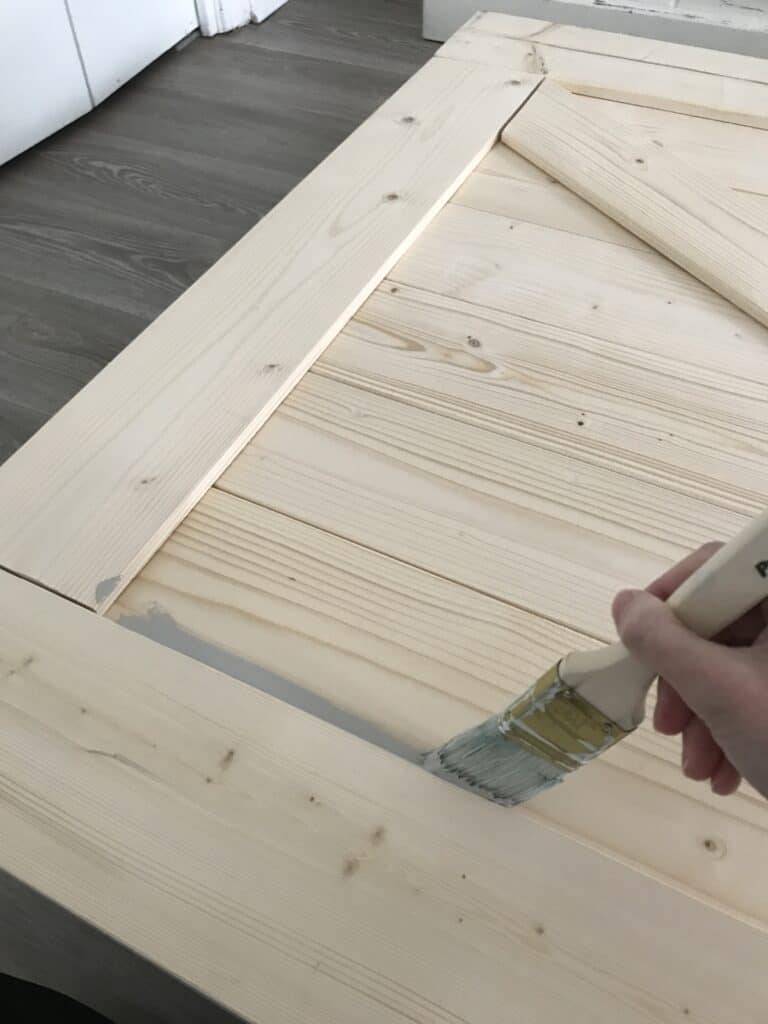
I loved the unfinished look of the raw wood, but I ultimately decided to paint the door gray. I used a paint-plus-primer latex paint.
I used the same gray paint that I did with the stenciled wall in our bathroom.
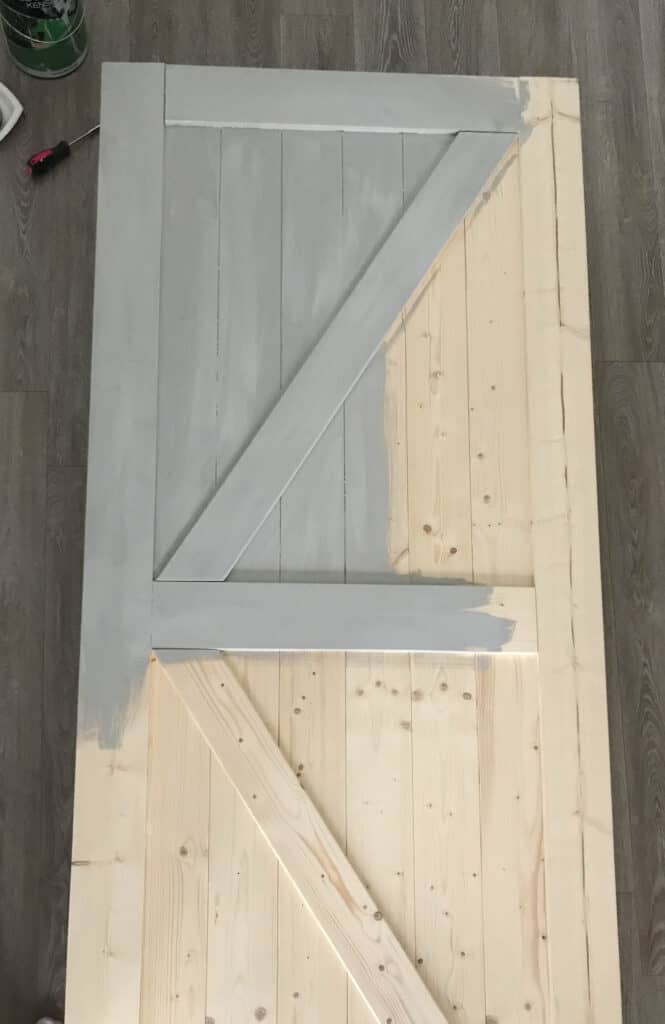
It took two full coats of paint plus primer to get a good finish.
While the paint was drying I started to put together the sliding hardware.
How do you install a barn door rail when the studs don’t line up with it?
You need to install a header board when the metal rail is pre drilled for the hardware. The chances of the predrilled holes lining up with studs in the wall is very small. Most people use a 1 by 3 board to screw into the studs. Then you install the metal rail on top of the header board.
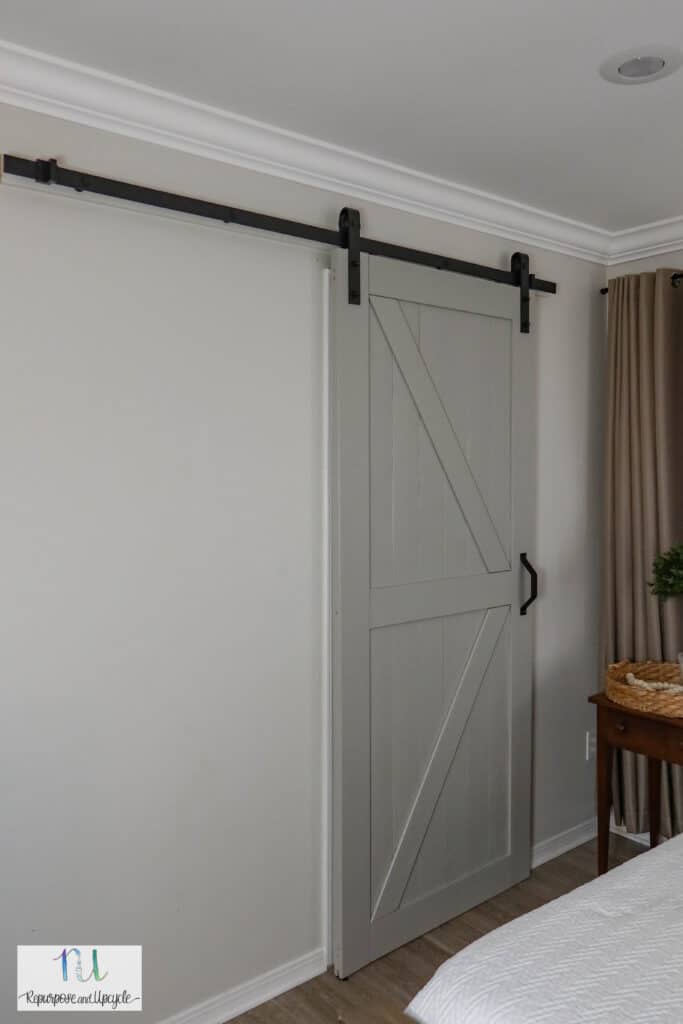
The SmartStandard metal rail did come with pre drilled holes so we definitely had to install a header board.
Was the SmartStandard barn door kit easy to install?
The instructions were super clear and easy to follow. As a matter of fact, I did most of it myself with exception of drilling the header board and the metal slider into the wall. I needed two sets of hands to make sure it was level. I would say a beginner DIY’er could put the kit together and install it.
What accessories came with the SmartStandard barn door kit?
This particular barn door kit (I can’t speak for all of them) came with a door handle, two different types of floor tracks and two stoppers for the track.
The floor tracks are essential for a barn door to make sure it doesn’t swing or hit the wall. The two floor tracks included an adjustable roller to install on the wall, and a barn door floor guide that you install directly into the floor.
We opted to use the floor guide that screws directly into the floor because we have vinyl planks (that we don’t love) and wood subfloors. If you are on a concrete slab or you don’t want to drill into your existing floors, the adjustable roller would be the way to go.
Do you have to take the trim off the wall when installing a barn door?
Installing a barn door doesn’t require you to remove the old trim. That being said, when you remove the old door hardware it will probably leave a mark in the existing trim so it will look better if you replace it.
Even though we did not replace the door trim before installing our SmartStandard barn door, we do plan on doing that soon. We should be able to remove the trim around the installed barn door. We might need to adjust the door stops temporarily so we can move the door further to each side.
My new SmartStandard sliding barn door
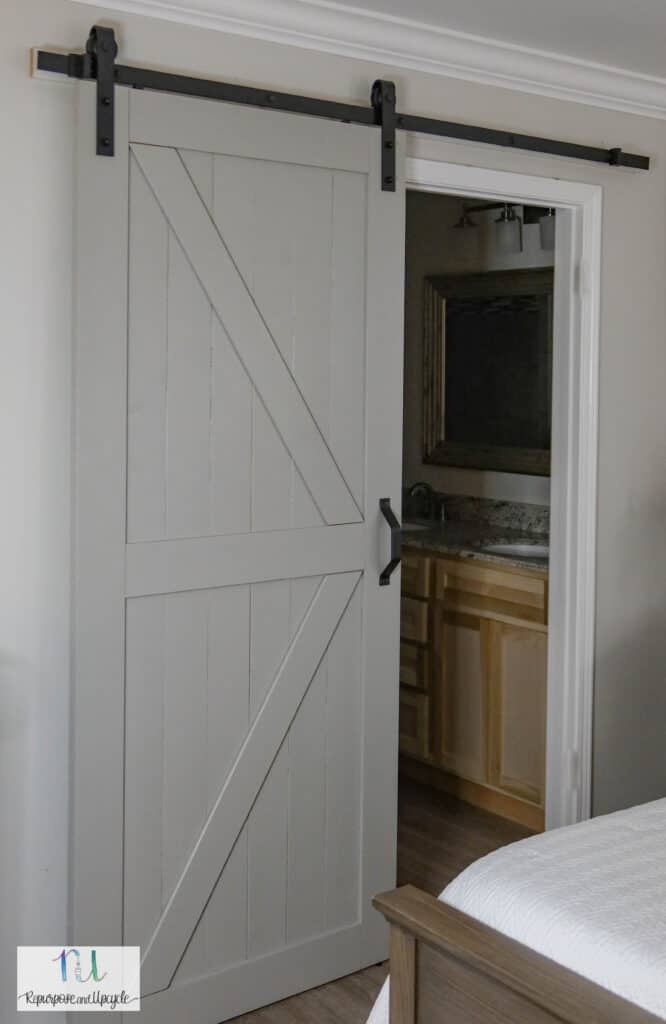
I didn’t realize how much I would love the look of my new door!
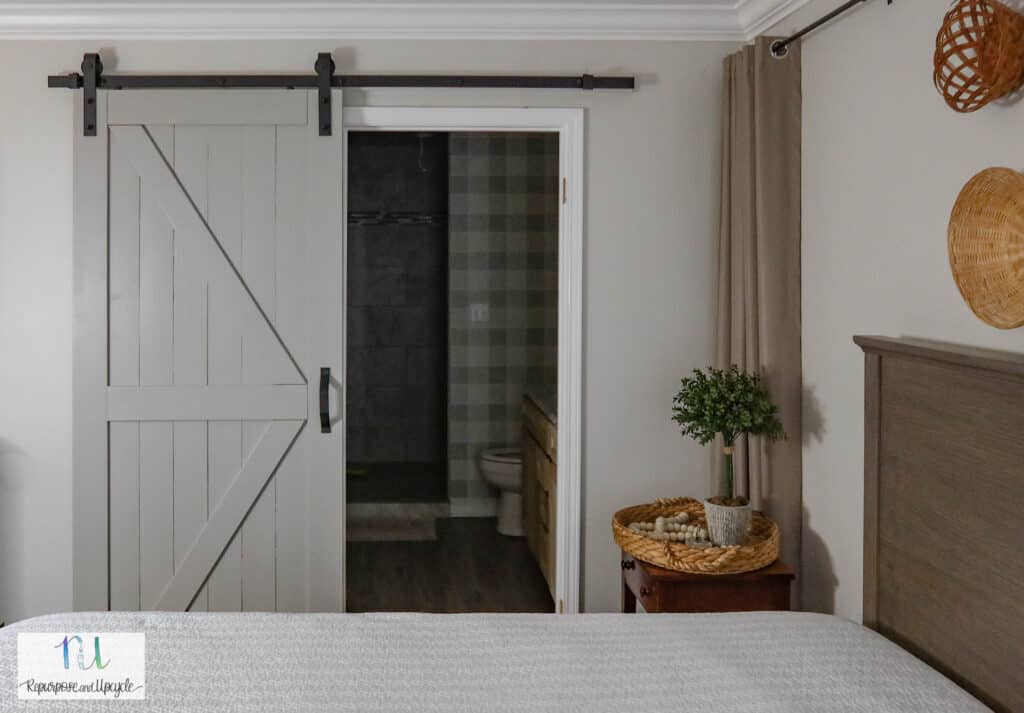
If you peek inside the master bath you can see my stenciled buffalo check wall that has the same matching color as the barn door.
It looks seamless when it’s closed!
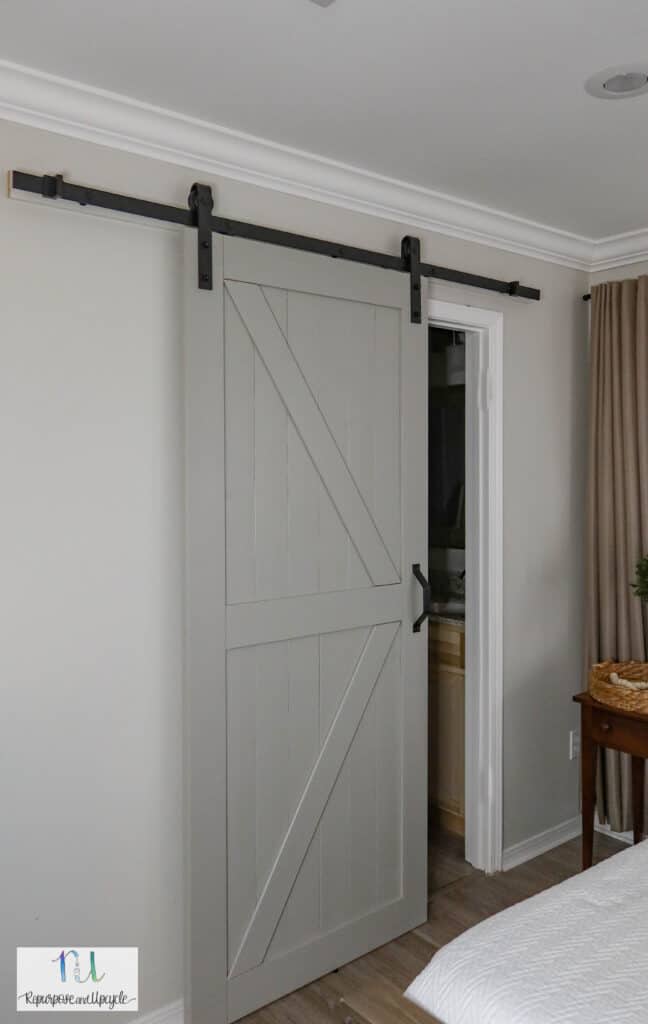
I’m so pleased with not only how it looks but the price and how easy it was to install. I would definitely recommend a SmartStandard barn door hardware kit to anyone looking to add one!
Lindsey**


