Making a simple ribbon wreath can be a fun and creative way to celebrate holidays like the Fourth of July. By using a few straightforward ribbon techniques and materials such as zip ties and various ribbons, it’s possible to craft a festive decoration that can be customized with different centerpieces or accents.

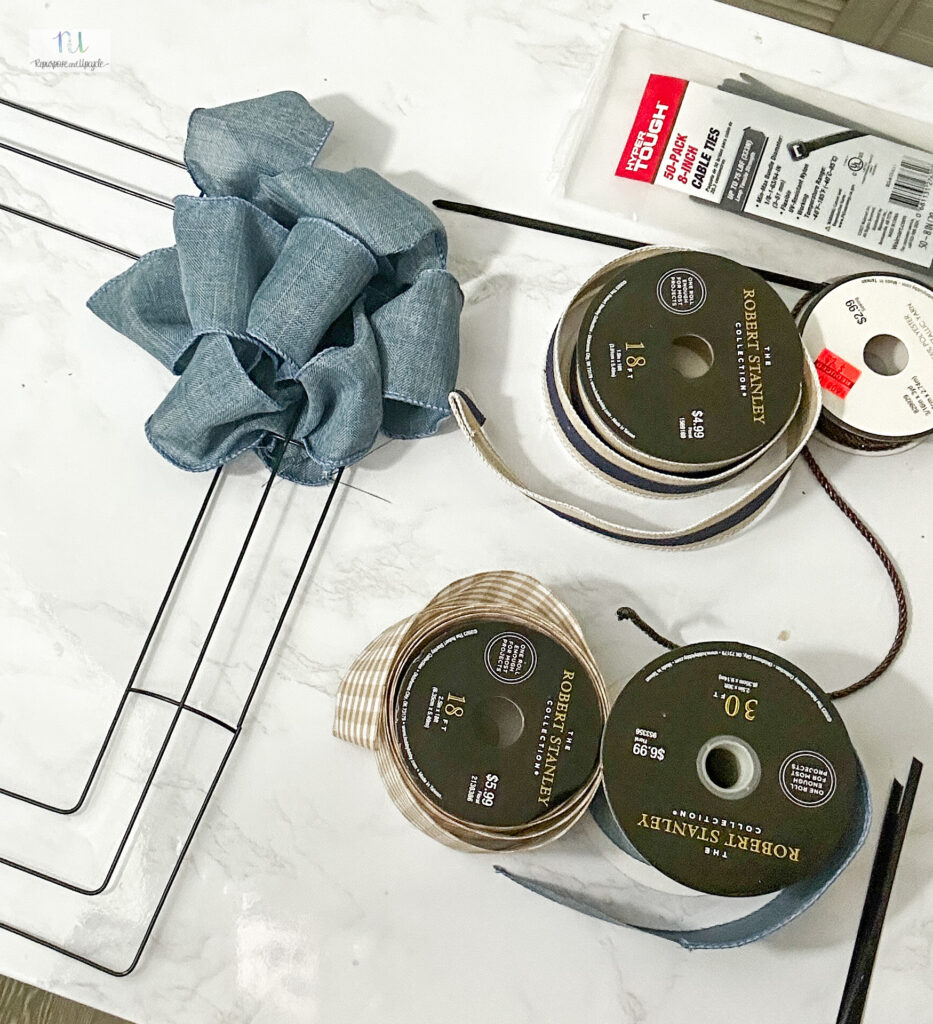
Materials Required
Selecting Ribbons
Use heavier fabric ribbons instead of lightweight cotton for a more robust look. Cut ribbon pieces around 20 inches or more, folding them before securing. Finish ribbon edges by folding and cutting at an angle to give a polished appearance. Alternate between three different ribbons to add variety and texture to the wreath.
Assembly Tools
A sturdy zip tie is essential for securing ribbons at the beginning, middle, and end of the wreath assembly. Staples help join ribbon layers when forming bows. Use a hot glue gun to reinforce bows and attach additional decorative elements securely. Basic cutting tools are needed for shaping ribbon ends and trimming as required.
Making the Corner Bow
Fastening Ribbon with Zip Ties
Start by gathering a generous length of ribbon at the corner. Use a zip tie to firmly secure the first bundle of ribbon in place. Then, pull the ribbon up from the bottom without wrapping it over the top. Repeat zip tying at the end and at intervals in between to keep the bow stable.

Adding Volume by Fluffing
After all necessary zip ties are in place, go back and gently separate each ribbon loop. Fluff and arrange the pieces to create fullness and shape, aiming for a look similar to a flower or a layered bow. This step enhances the bow’s visual impact and texture.
Primary Ribbon Wreath Construction
Measuring and Cutting Ribbon Pieces
Start by cutting generous lengths of ribbon, roughly 20 inches or a bit longer. The edges of each ribbon piece should be neatly folded over and trimmed at an angle to prevent fraying and to give a clean finish. This step ensures each ribbon segment is ready for attachment without unraveling.
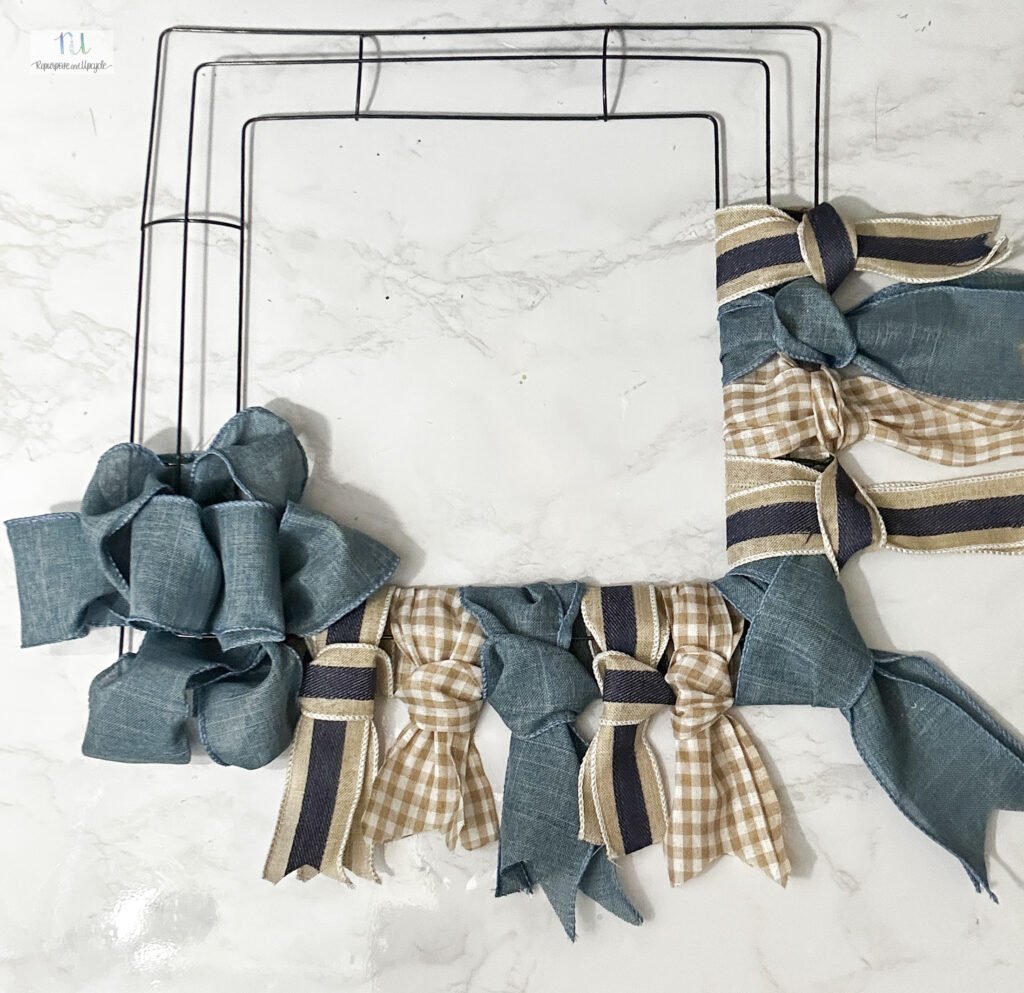
Securing Ribbon Using a Loop and Pull Technique
Fold the ribbon piece in half, then pass the folded end upward through the wreath base. Pull the loose ends through this loop to create a secure knot. This method is repeated throughout to attach all ribbon pieces, creating a consistent and stable wreath texture without overlapping ribbons on top.
Rotating Through Different Ribbon Patterns
Use at least three contrasting or complementary ribbon styles, alternating them around the wreath. This layered approach adds visual interest and depth. Heavier fabric ribbons are preferred for their shape and durability, but any sturdy type can work. Regularly secure sections with zip ties for additional stability.
Key Takeaways
- Techniques focus on securing ribbons and creating bows with zip ties.
- Using different ribbon types and finishing methods enhances the wreath’s appearance.
- The design allows for easy customization to suit various seasons or themes.
- Alternating between different ribbon types adds visual interest and depth.
Finishing Touches
Neatening Ribbon Ends
To achieve clean edges on the ribbon, fold each ribbon end over and cut it at an angle. This simple technique creates a polished finish without fraying. It adds a subtle detail that enhances the overall wreath design.
Making and Securing a Decorative Bow
The bow is crafted by layering folded ribbon sections and stapling the folded edges together for stability. After forming the bow, fluff each section to give it fullness. A smaller bow can be added on top to hide staples, and the entire bow is secured to the wreath using hot glue and zip ties for lasting attachment.
Incorporating a Seasonal Centerpiece
A festive element, such as a small figurine, can be attached to the center of the wreath by hanging it from the bow. This centerpiece is easy to swap out, allowing the wreath to be adapted for different holidays or seasons. This flexibility extends the wreath’s use beyond just one occasion.

Adapting Your Wreath for Various Times of the Year
Changing the focal decoration lets this ribbon wreath fit different seasonal themes easily. After a holiday, the central piece can be swapped out without redoing the entire wreath.
Using zip ties and hot glue keeps the decorations secure and easy to remove. This approach also allows quick updates by switching out bows, figures, or ribbons according to what season or celebration is approaching.

Here’s a simple checklist for seasonal updates:
- Remove current centerpiece carefully
- Select a new bow or thematic figure
- Attach with zip ties or glue for stability
- Fluff ribbons if needed to refresh appearance
This method keeps the wreath versatile, reducing time spent on creating new decorations for each occasion!


