This year I wanted to try something new for my fall wall art, so I put together a simple project that doubles as DIY wall decor and a fun weekend craft.
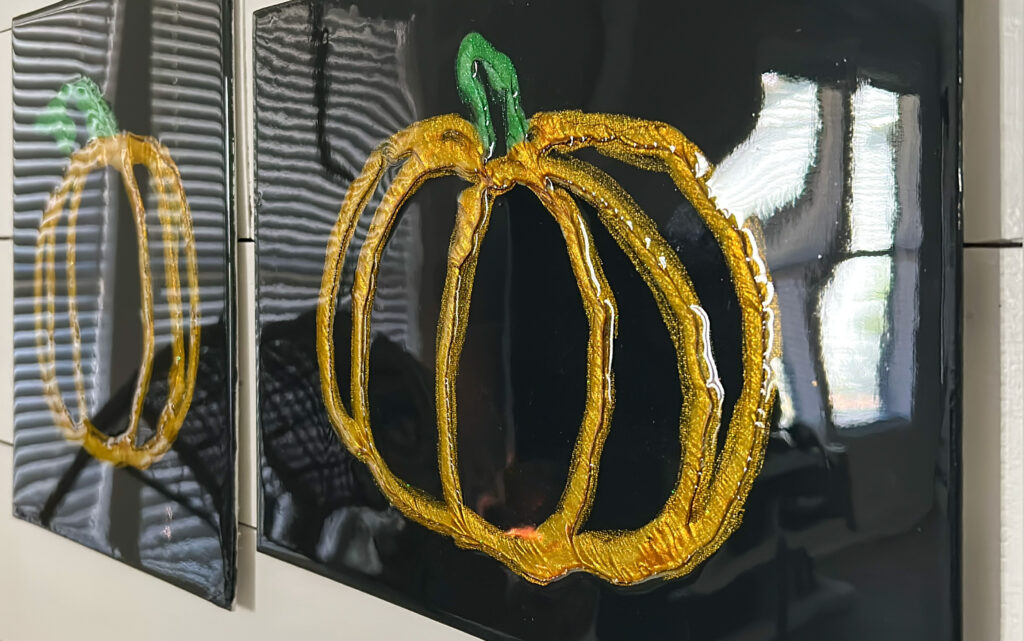
I started with two canvases, and used different colors of Unicorn Spit (which is sort of like acrylic paint) to create a fun art piece. For texture, I traced a pumpkin outline with paintable caulk! It’s an easy way to create a faux pumpkin or DIY fall decorations that feel handmade but polished, and the end result turned out just the right size to hang in my living room.
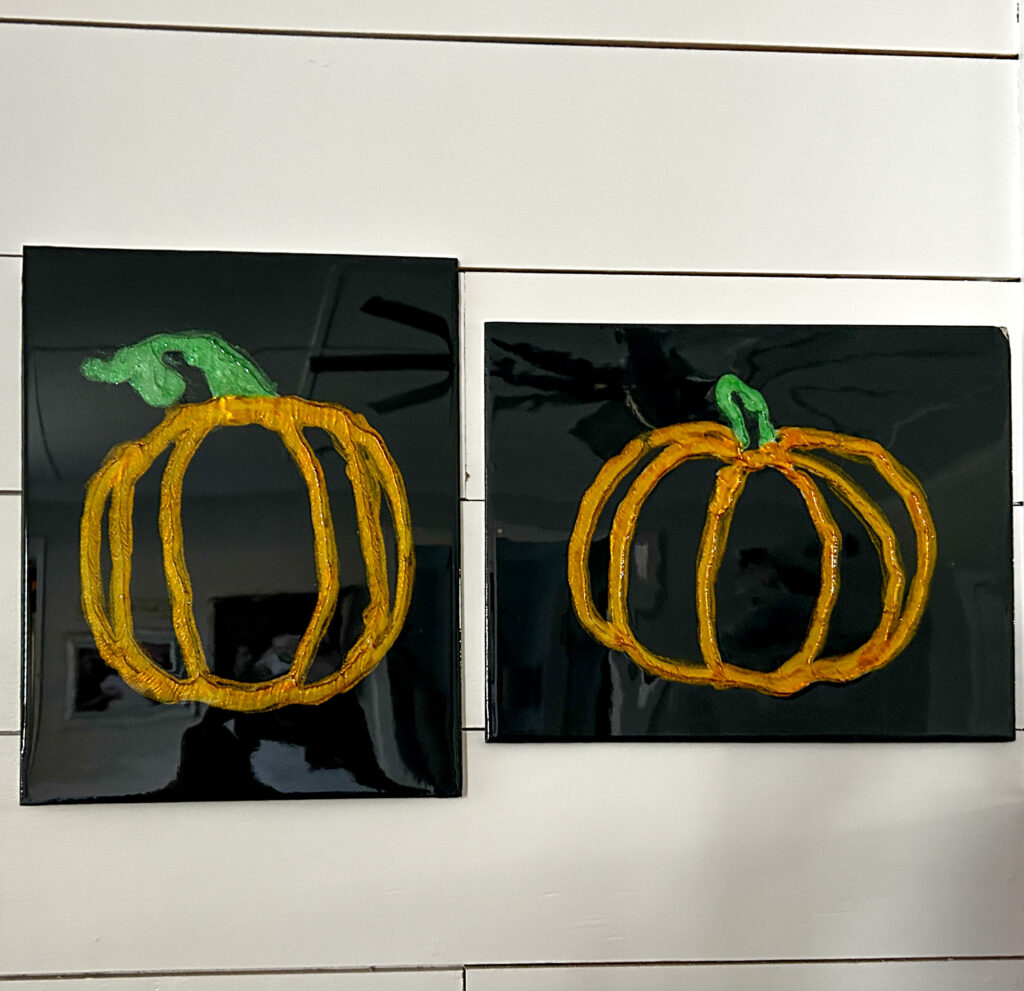
If you love fall crafts, this is a great way to refresh your home decor for the fall season.
Free Printable Pumpkin Designs
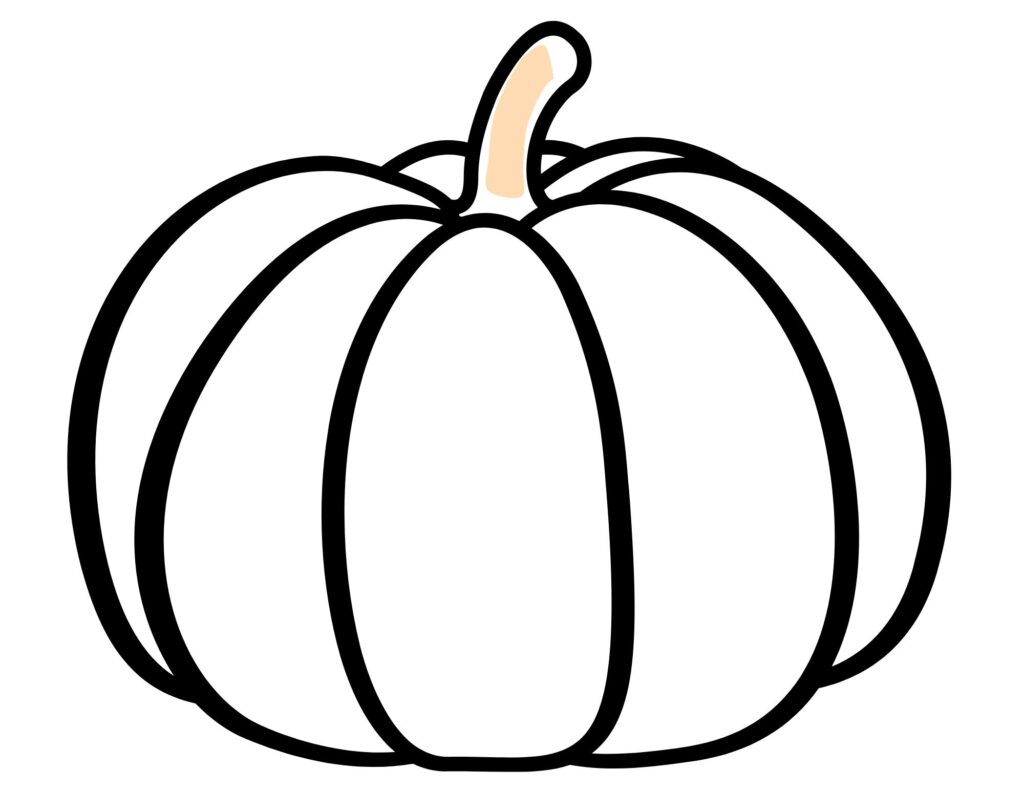
You can find this pumpkin design printable here.
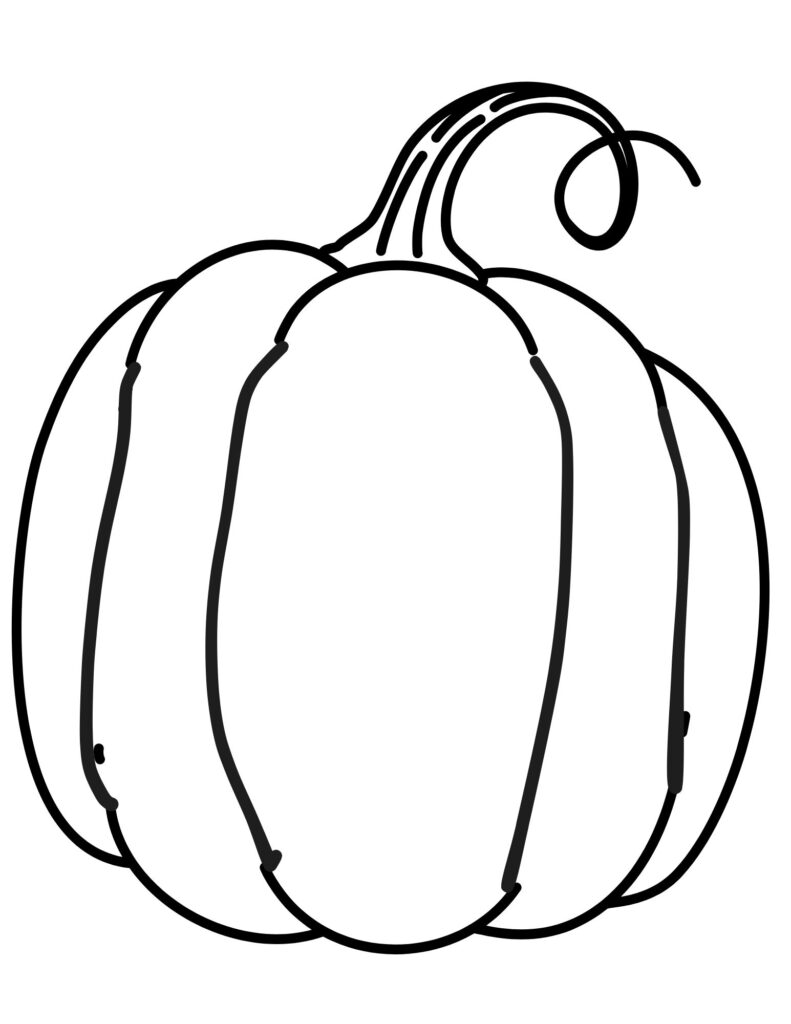
Or if you prefer this one, which is a little less polished, you can get it here.
Disclosure; this post contains affiliate links. As an Amazon Associate I earn from qualifying purchases.This disclosure statement refers to the rest of the amazon links and other affiliate links in this post.
Supplies You’ll Need:
- Blank canvas (choose the right size for your space)
- Printable pumpkin outline (any simple design works). See links above.
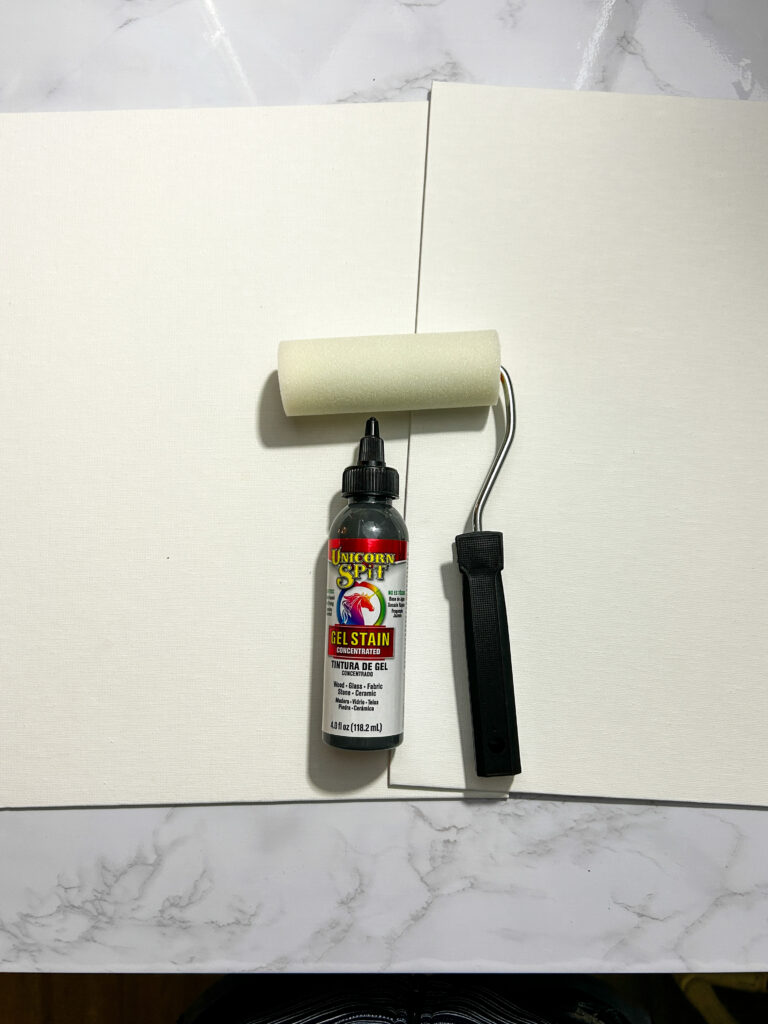
- Paintable caulk + caulk gun
- Acrylic paint or Unicorn Spit (I used THIS gray color, THIS orange glitter color and THIS glitter green. )
- Paintbrushes or sponges
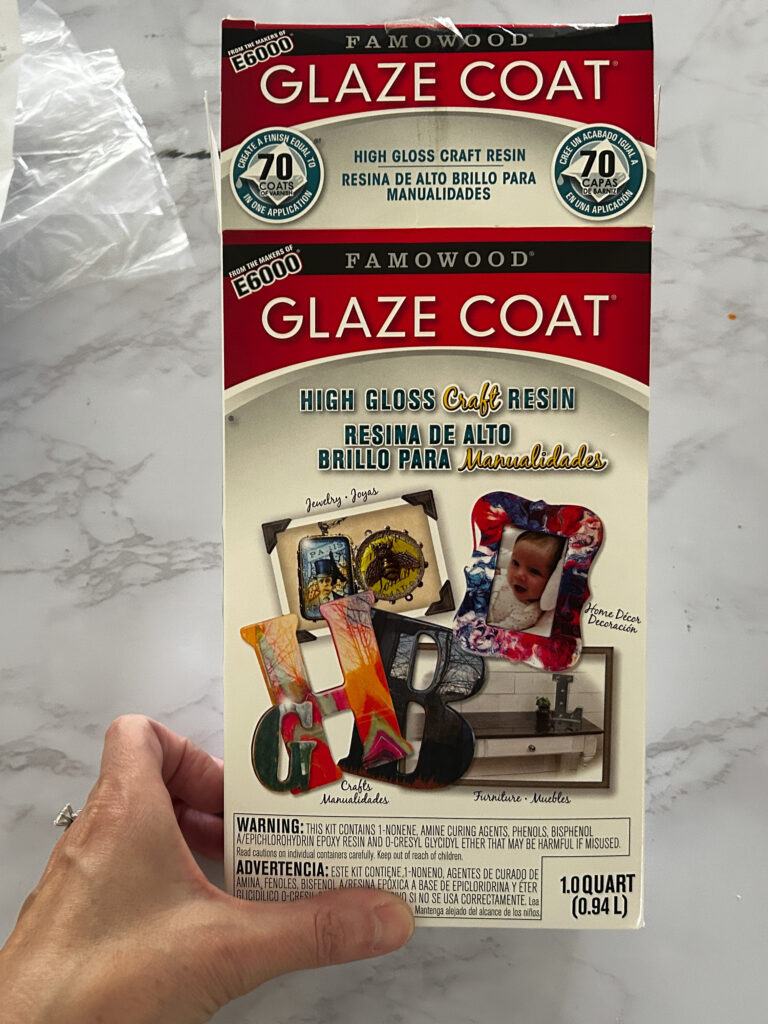
- Famowood Glaze Coat with extra cups for mixing (for the glossy finish)
- Painter’s tape (to keep edges clean)
- Disposable gloves and mixing cups (for working with glaze)
- Drop cloth or protective surface covering
👉 Optional extras: faux pumpkin stems, natural elements from the grocery store, or smaller leaves to add texture and dimension.
Steps to Create DIY Fall Wall Art
- Prepare Your Canvas – Start with a blank canvas and make sure the surface is clean and dry. Paint the background in a dark solid color.
- Print the Pumpkin Outline – Print a pumpkin outline.
- Apply Paintable Caulk – Using a caulk gun, carefully trace over the pumpkin outline on the paper with paintable caulk to create a raised, textured design.
- Place paper face down (caulk side down) on the canvas. Pull the paper up and see how the caulk transfers to the canvas. Allow it to dry fully.
- Add Color – Paint the caulk using your favorite paint and fall shades. Blend different colors for depth and a seasonal vibe.
- Seal with Famowood Glaze Coat – Once the paint is completely dry, apply a thin, even layer of Famowood glaze coat for a glossy, professional finish.
- Display Your Fall Art – Hang your new piece in the living room or entryway as a cozy touch of DIY fall decor.


I thought about keeping them this color without colorful paint, but then I thought, “what’s the fun in that?”
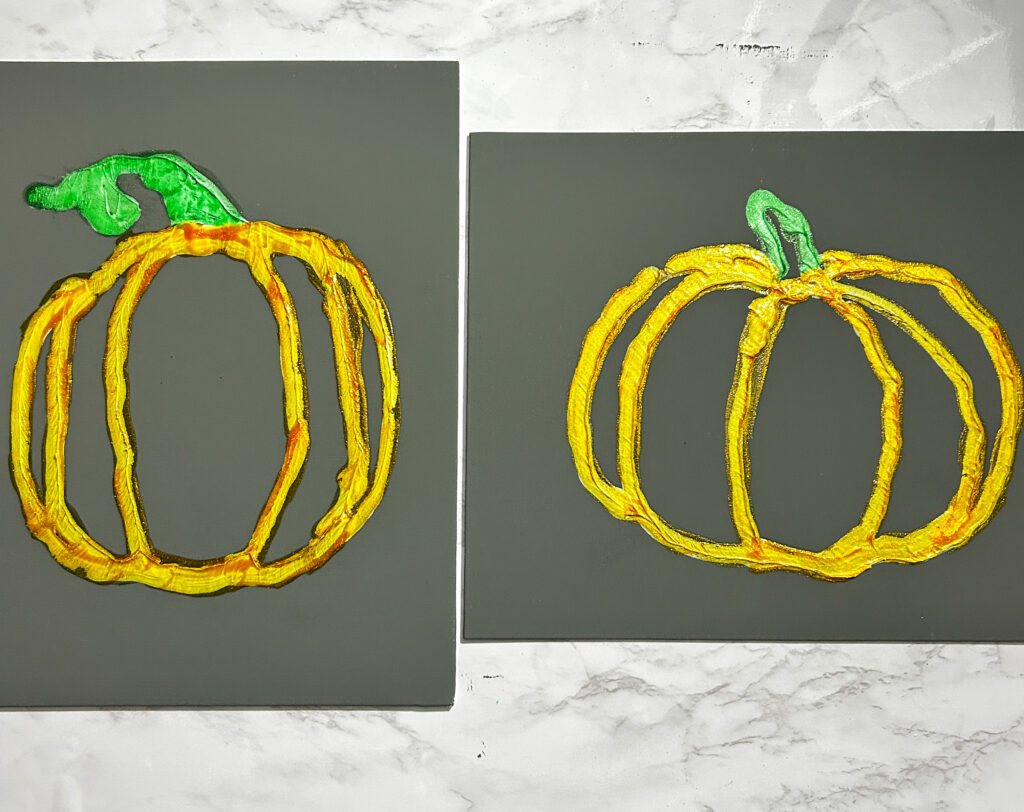
Yes I think it looks better painted, what do you think?
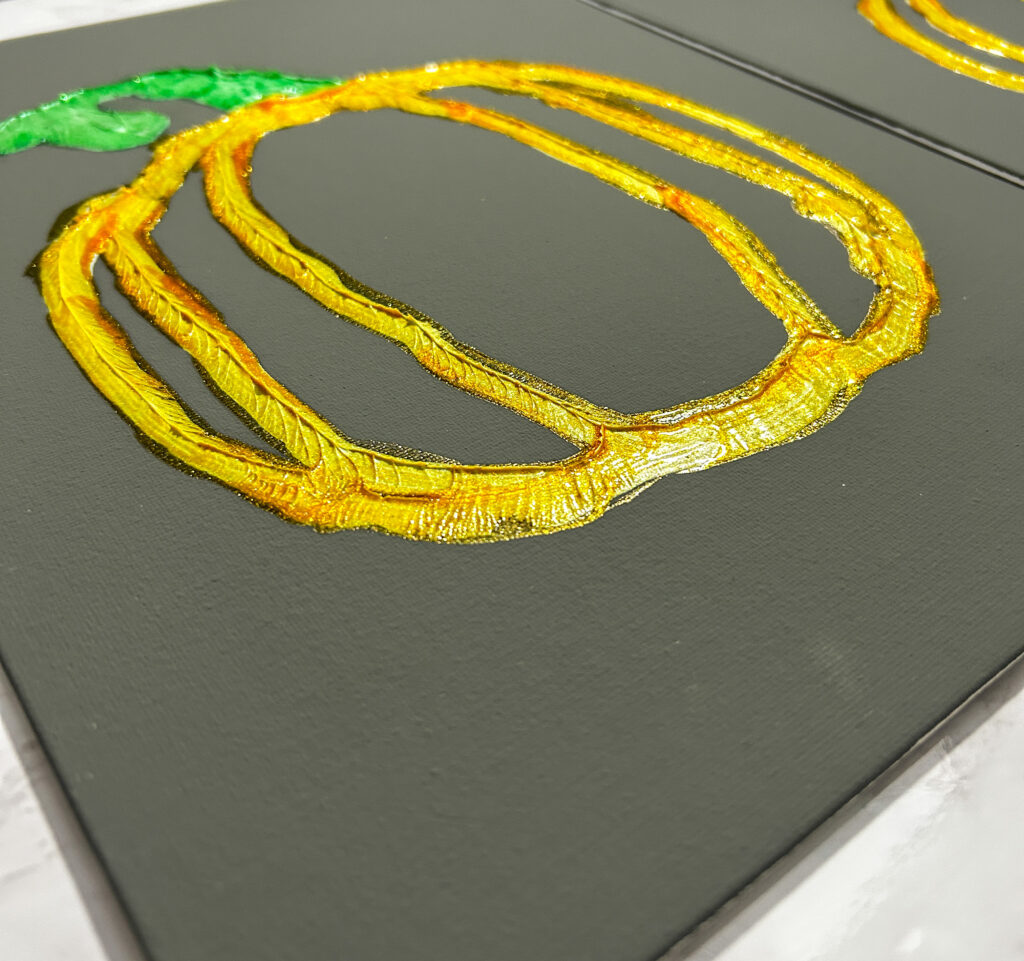
I love the raised texture that the caulk creates.
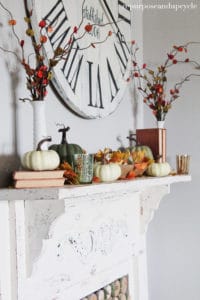
See more fun FREE PRINTABLE wall art and more fall projects below!
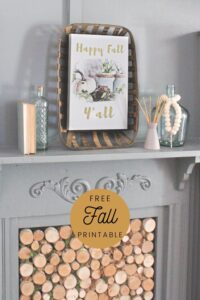
Happy Fall Y’all Free Fall Printable; Farmhouse Style