I’m sharing a simple way to install board and batten or any wainscoting without removing the baseboards.
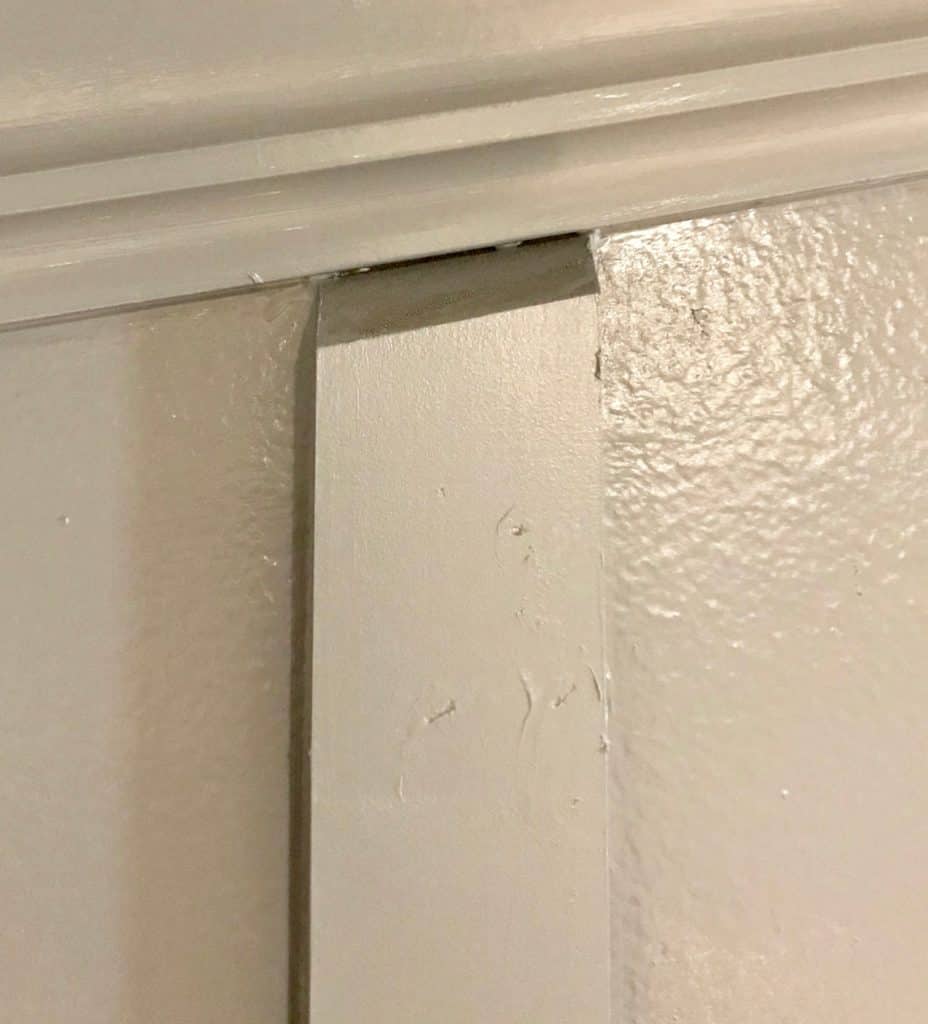
I’m no stranger to creating my own DIY board and batten. Currently, I’m knee deep in a DIY tone on tone wall with a built in bookshelf and trying to figure out what to do about the fact that my boards stick out over the baseboard like a sore thumb.
I have a few options; remove the old baseboards and replace them with something that matches better, add a small piece of molding above the old baseboards to sit the new boards on, or find a way to blend the end of the boards with the old baseboard. I’m sure you can guess by the title which one I chose. Let me show you an easy way to install board and batten or any wainscoting without removing the baseboards.
I’m a little embarrassed to share this. Going back to my older posts and reviewing them is somewhat painful. The more projects I share, the more my “skills” are developed, and the more embarrassing those older projects become. Please tell me you can relate.
What I’m trying to say…..The first time I installed board and batten I did not do anything to the bottom of the boards to blend them to the baseboards. Let me show you.
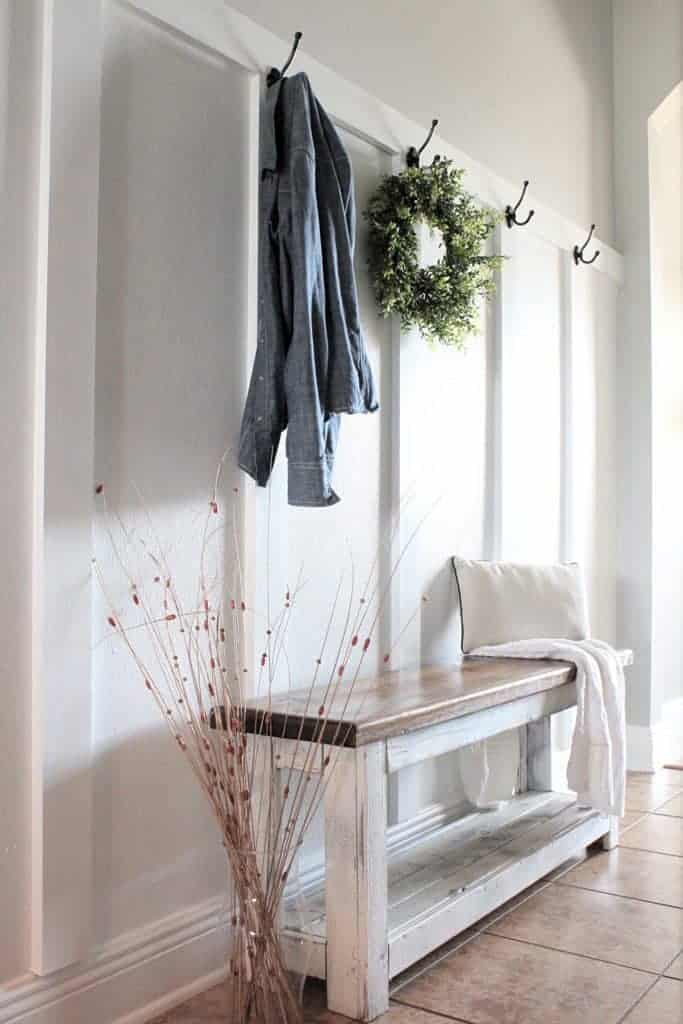
Side note; If you are looking for a full board and batten accent wall tutorial (P.S. I did not add batten, just the boards), my first post might be good to reference. I laid out all the steps I used to create this accent wall including materials. I used this space as a functional mudroom with hooks on the horizontal pieces (or top board) of the accent wall. It transformed this random hallway into a functional space!

At the time I told myself that this board and batten was more “functional” than “aesthetic” so it was ok. To the poor people who bought our Modern farmhouse builder grade home, I’m so sorry (and for all those other DIY’s that they might be cursing me over now ;))
I think it turned out well, but I still cringe at the thought of those boards hanging over the baseboards.
Ok, back to business.
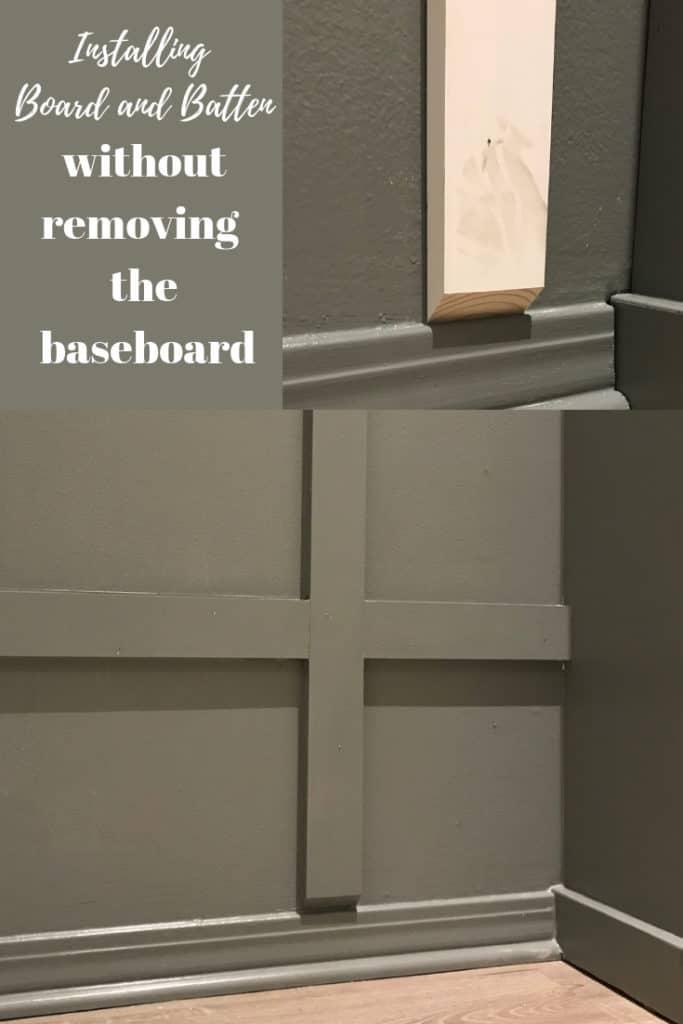
How do you install board and batten or any wainscoting WITHOUT removing the baseboards?
You cut the bottom of the boards at a 45 degree angle with a miter saw.
Rather than having to pull out the old baseboards or add small trim pieces to make the boards meet flush, all you have to do is cut the wood at an angle. Easy enough right!
Then comes the finishing steps; caulk, wood filler and then paint. With minimal power tools, you can create this lovely feature wall too!
Why did I not do this the first time around? Beginners mistakes, right?
This time around I’m going to do it right.
At this point, I would normally share my “methodology” on how to complete this DIY. But, I think this one is pretty straightforward.
First step; cut the vertical boards to length of the total height of the wall. Next step is to make 45 degree miter cuts at the end of the vertical board that meets the baseboards. Use a nail gun or brad nailer to attach the boards to the wall (alternating the angle at which each nail was placed, see more on that below). Once the vertical boards are nailed to the wall, measure and add the horizontal boards the same way you install the vertical boards.
In a nutshell, you use a miter saw to create a 45 degree angled cut and attach it to the wall. Got it? Got it! (Still kicking myself over not doing this the first time around).
Let me show you what it looks like on the wall.
FYI; these boards are 1 by 3 by 8 Primed Pine Finger Joint boards.
A side note; these are not the “prettiest” pics, but real life folks!


Don’t mind the nail holes on the vertical boards. They will clean up nicely with a little putty and bead of caulk. Then paint of course!

Don’t you think it looks nice and finished at the edges? Hooray for honing my DIY skills (about time right?)
I’m so pleased that I didn’t have to remove the current baseboards or add new baseboard to add wainscoting to the entire wall!
Making angled cuts at the base of the boards to make them looked “finished” really saves time and looks good too!
Side note; I took a tip from a friend on Instagram that said rather than using wood glue or liquid nails and nailing straight into the drywall, skip the glue and apply the nails at an angle while alternating the angle each time you use a nail in a piece of wood. Genius!
So if you apply a nail at a 30 degree angle to the left, you need to apply the next one at a 30 degree angle to the right. Even if you aren’t able to apply the boards into a stud, it should still work, as long as the treatment is used only for aesthetics. Does that make sense?
The alternating angles makes the wood more secure against the wall and less likely to come out. Also, if you ever need to remove the wood, it’s a lot easier! This might require a little drywall patch, but nothing terrible, not like removing traditional board and batten. After all, everyone loves the look of beautiful board and batten especially in a dining room, living room or anywhere!
Do you know another way to add wainscoting without removing baseboards? Let me know in the comments below, I might need it for the future:)

I’m off to finish this board and batten wall!
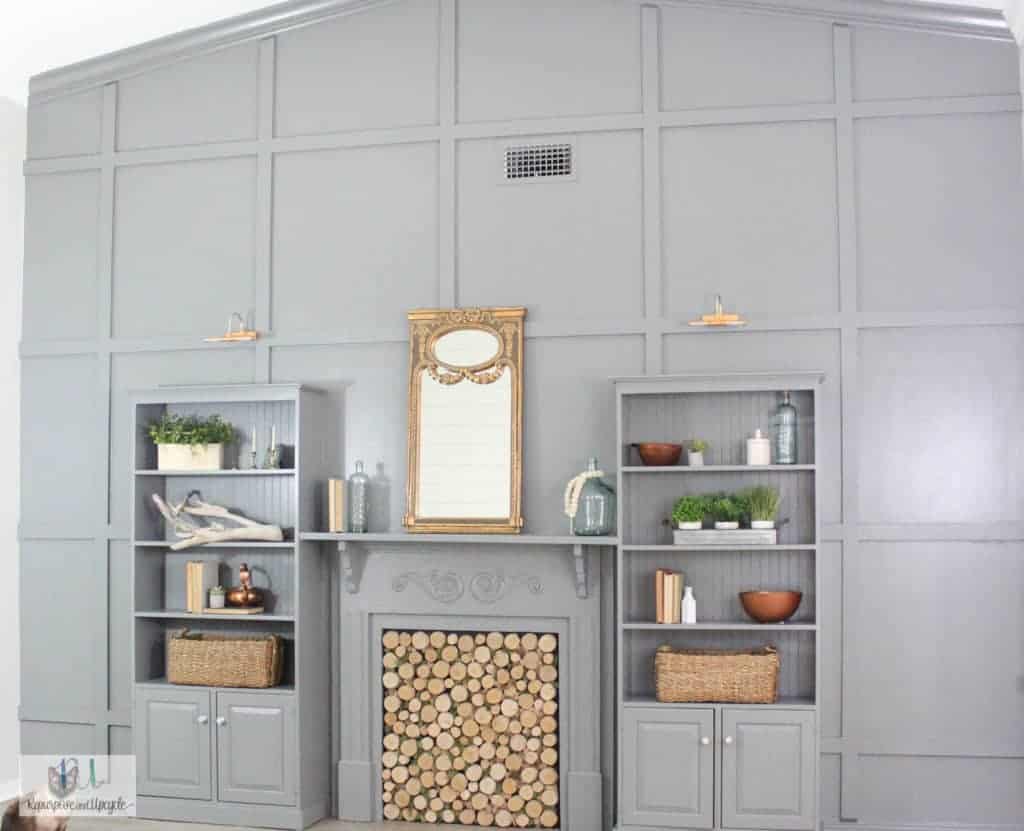
Want to see the final reveal of my DIY tone on tone Feature wall with board and batten?
Lindsey**


