I’m always on the hunt for fine furniture on the cheap. As a matter of fact, I’ve been on the hunt for a few cane chairs for a few years now. They are all of a sudden a hot and popular item (and a bit pricey too). So when I spotted a set of six chairs in good shape sitting outside of a local thrift store I knew I found my next project. Let me show you the best way to paint cane back chairs with chalk paint.
I spotted these cane back wood dining chairs sitting outside a local thrift store. They were apparently “taking up too much room on the store floor.”
This was music to my ears. 🙂
Needless to say I was obliged to help them make more space on the store floor for only $50.
It took two trips to get all six of these chairs home. This vintage set was in mint condition, just not my style. Nothing a little paint and fabric can’t fix!
Disclosure; this post contains affiliate links. As an Amazon Associate I earn from qualifying purchases. This disclosure statement refers to the rest of the Amazon links in this post. See more on my disclosure page.
Materials for the cane back chair makeover
- Cane back chairs
- Primer
- Paint
- Paint Sprayer
- Lint free cloths
- Cleaner or degreaser
- Sealer
- Paint brush
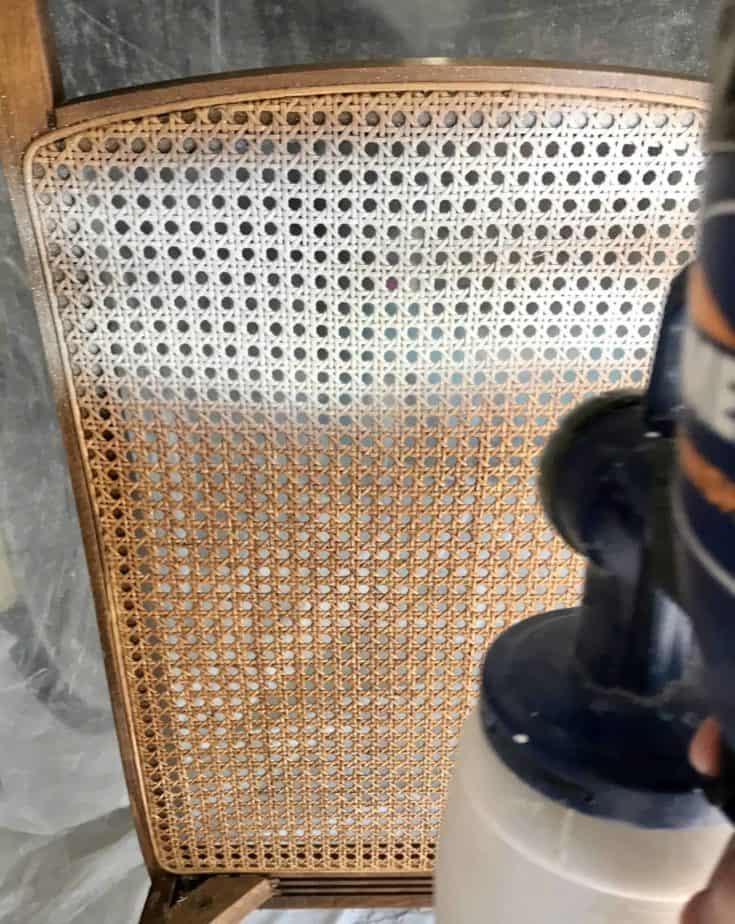
The best way to paint a cane dining chair and get in all those little grooves is to use a spray paint or a paint sprayer. I’ve shared easy steps on how to use chalk paint in a paint sprayer in a recent post.
How to paint cane back chairs
- Remove the seat cushions.
- Clean the surface with a lint free cloth ensuring that there is no lint or debris in between the cane.
- Prepare the paint and primer (dilute with water if needed) for the paint sprayer.
- Use a paint sprayer to spray at least one coat of primer.
- Use a paint sprayer to apply at least two coats of paint.
- Apply a top coat or sealer if necessary.

Above are the six cane back chairs sitting outside the thrift store waiting for me 😉


Like I said in the directions, I used a paint sprayer to apply the chalk paint. You can see directions on how to use chalk paint in a paint sprayer on another post.

If you are looking to purchase a paint sprayer, I’ve got a post about the three best paint sprayers for furniture here.


I DID NOT use the sealer in the paint sprayer. I’ve explained more about why I did this in the post about how to use chalk paint in a paint sprayer.
As far as what sealer to use, you can refer to my post about how to seal painted or unpainted furniture for a high traffic finish. I’ve shared one of the best sealers for chalk paint and really any paint when you don’t want to use the typical chalk paint wax.
I’m so happy with how they turned out. My husband was very skeptical when I brought these chairs home, but he’s super pleased with them now!
As I’ve always said, don’t ever underestimate the power of paint!


I hope I’ve given you the confidence you need to paint cane furniture.

Lindsey**
How to Paint Cane Furniture
Learn the best way to paint cane back dining room chairs. I've shared a simple tutorial on how to paint cane furniture with a few tips about what materials and tools to use. Painting cane furniture does not need to be difficult and with a few easy steps even beginner furniture painters can do it!
Materials
- Cane back chairs
- Primer
- Paint
- Lint free cloths
- Cleaner or degreaser
- Paint brush
Tools
- Paint Sprayer
Instructions
- Remove the seat cushions
- Clean the surface with a lint free cloth ensuring that there is no lint or debris in between the cane.
- Dilute the primer and paint according to your paint sprayer if needed.
- Use a paint sprayer to spray at least one coat of primer.
- After the primer is dry, use a paint sprayer to apply the first coat of paint. Let it dry.
- Apply second coat of paint with a paint sprayer and let it dry.
- Apply a top coat or sealer if necessary.
- Replace the seat cushions
Notes
If you want to know how to dilute your paint in a paint sprayer, I've got a full post about it.
As far as what sealer to use, you can refer to my post about how to seal painted or unpainted furniture for a high traffic finish. I’ve shared one of the best sealers for chalk paint and really any paint when you don’t want to use the typical chalk paint wax.


