Forget the floor. Stop looking at the walls. It’s time to look up.
The ceiling is the “fifth wall,” the most overlooked canvas in your home—and it’s ready for its glow-up. While most people play it safe with a coat of flat white paint, I’m about to do something daring. Err maybe I just did.
Imagine a room that doesn’t just sit there, but breathes. By adding a bold pattern, a rich texture, or a whimsical floral overhead, you can turn a standard room into a high-end sanctuary. It’s the ultimate design secret for making a large room feel intimate or a small room feel infinitely more sophisticated.
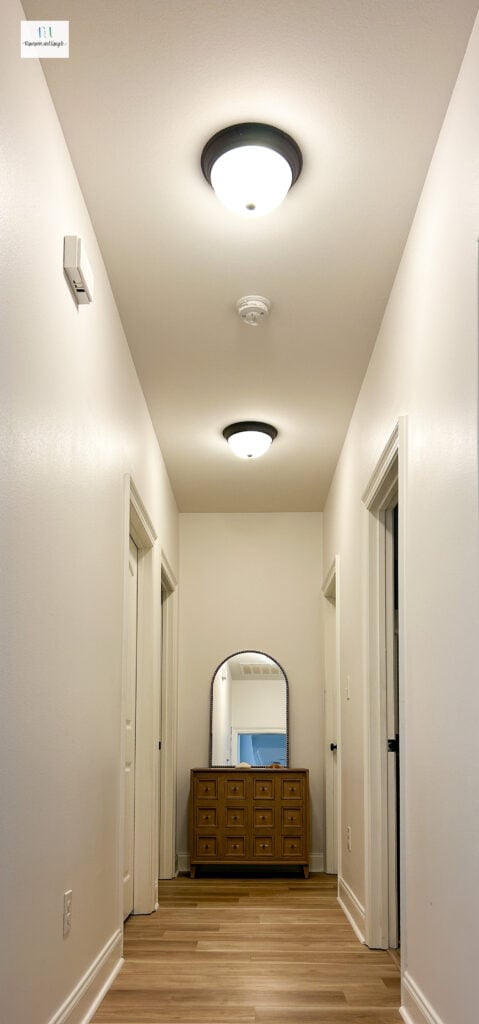
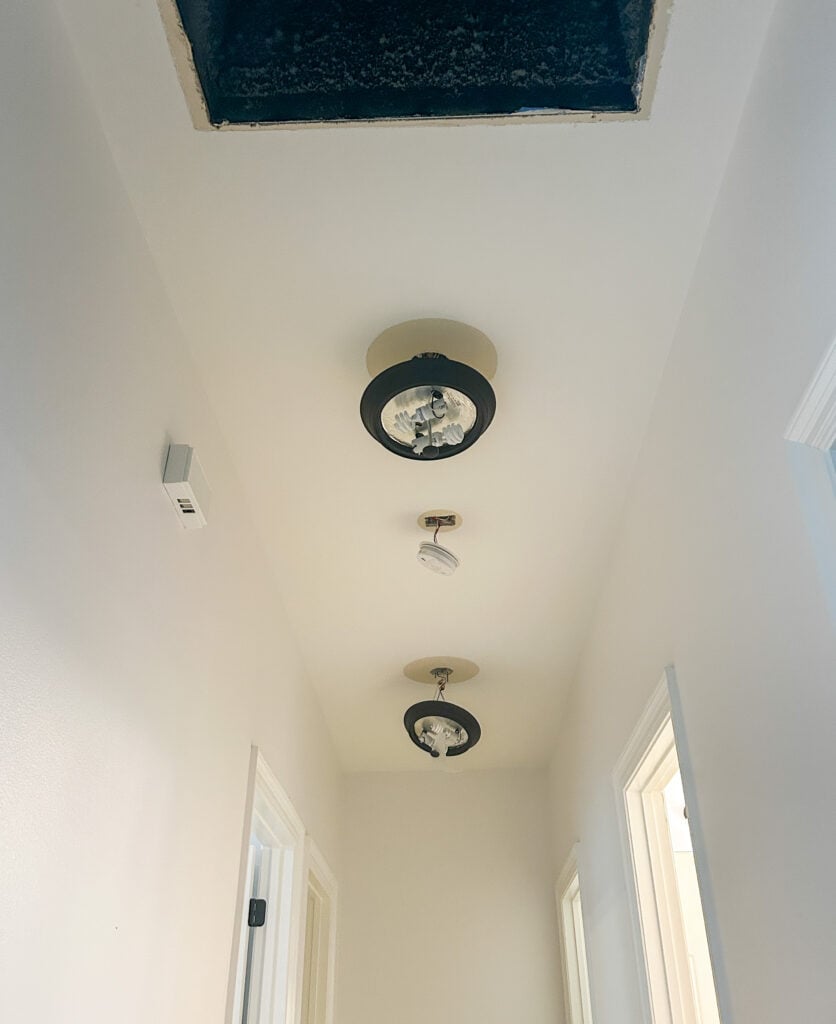
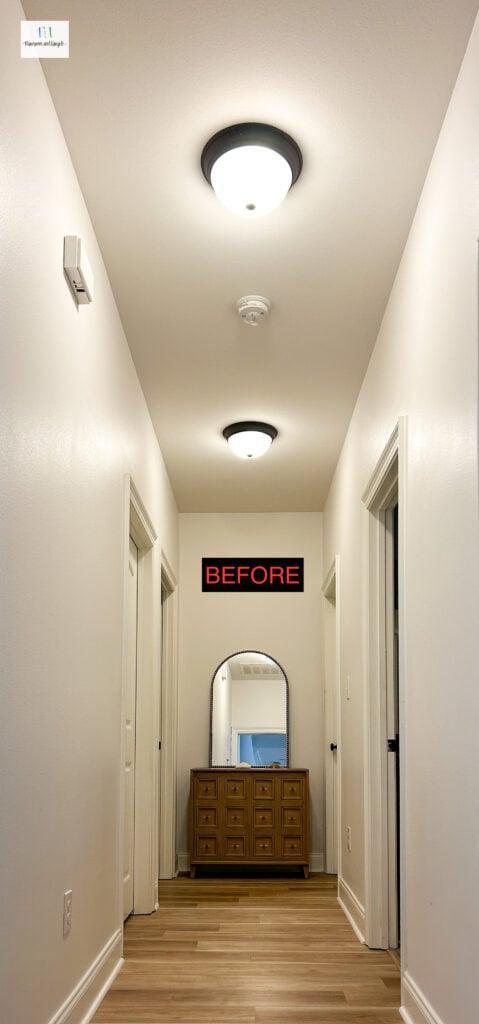
The boring ceiling BEFORE the lovely wallpaper
But let’s be real: wallpapering the ceiling can be the ultimate DIY battle. You aren’t just decorating; you’re defying gravity. In the past I’ve painted the ceiling, and that was a job too. Anything you do to a ceiling is a physical feat of engineering- Especially wallpaper where you’ll be fighting air bubbles, matching intricate patterns, and wrestling with heavy paper—all while working over your head.
Against my family’s wishes, I ordered the wallpaper and began. After all, a well-executed ceiling creates a “jewelry box” effect that stops guests in their tracks, right? It provides a sense of architectural completeness that paint simply cannot replicate.
I’m not saying I didn’t hit a few snags here and there. Actually, I ended up throwing away the first wallpaper product I purchased out of frustration (more about this product in a bit) and moving on to my old faithful peel and stick. Ready to learn the good, bad and ugly about wallpapering a ceiling? Read on…
Disclosure; this post contains affiliate links. As an Amazon Associate I earn from qualifying purchases.This disclosure statement refers to the rest of the amazon links and other affiliate links in this post.
The wallpaper purchase mistake
Below is the first wallpaper product I ordered. It was a beautiful pattern, with just the right colors. It’s from a company called York Wallcoverings and came with the paste already applied, I just had to use water to “activate” it. I thought this would work well, but I didn’t take into account the time it takes for the paste to dry, all the while hanging onto (or falling off of) the ceiling.
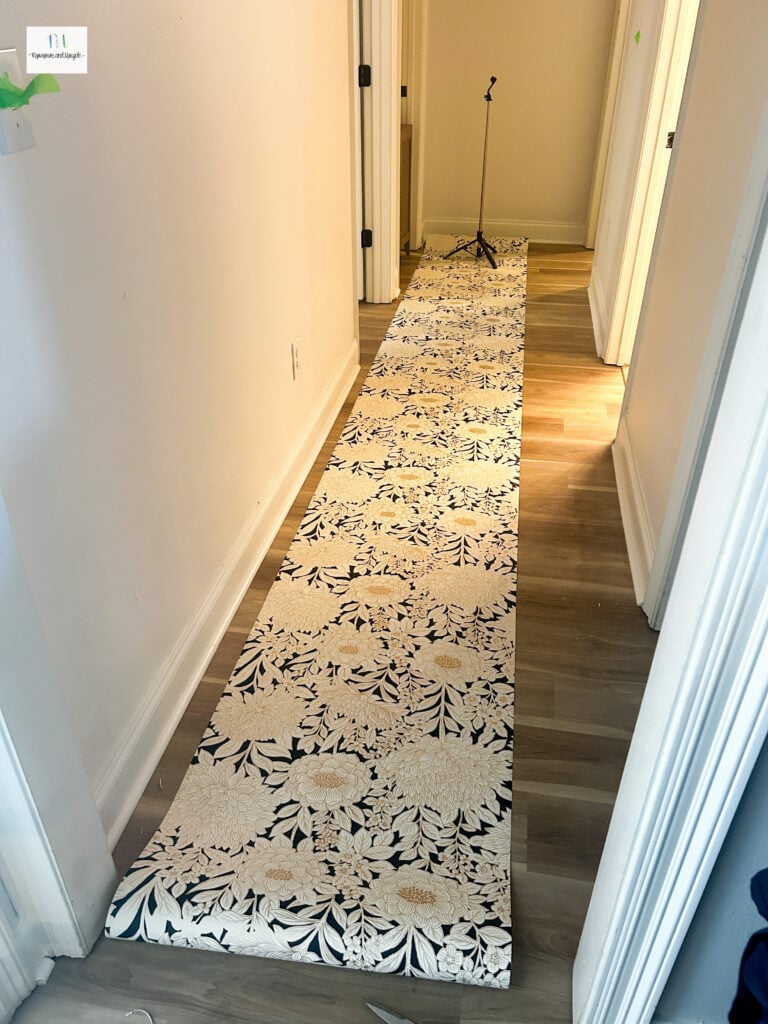
I’m not sure why I didn’t think of the problems I would have with hoisting up a heavy roll of paper that’s been heavily doused with water. I won’t even talk about trying to line it up and holding it long enough to dry.
I even tried to paste it to a vertical wall just to see if I liked it better, but nope it was a pain to work with (and this isn’t my first rodeo with wallpaper).
Let’s just say I realized pretty quickly I needed a product that would stick IMMEDIATELY to the ceiling. Onto the old faithful peel and stick…
The best type of wallpaper for a ceiling
The best type of wallpaper for a ceiling is a peel and stick product. Because you are working against gravity, it’s best to choose a product that will immediately stick to the surface.
Trust me, you’ll thank me later.
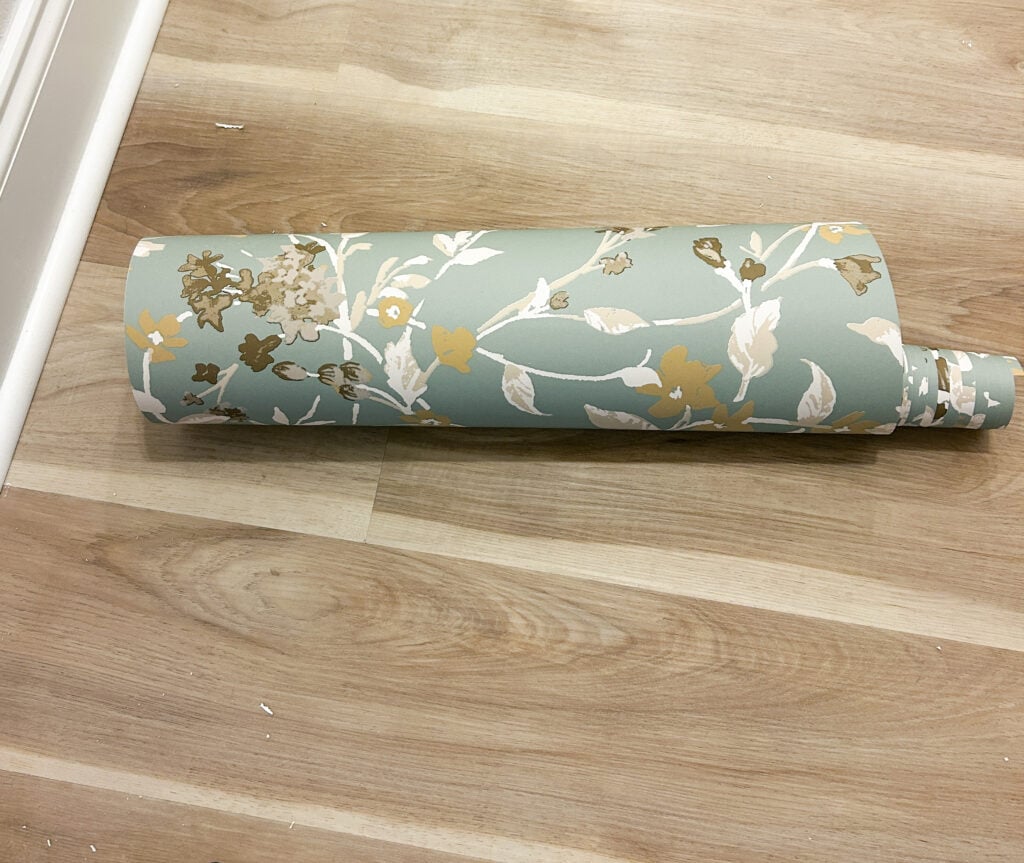
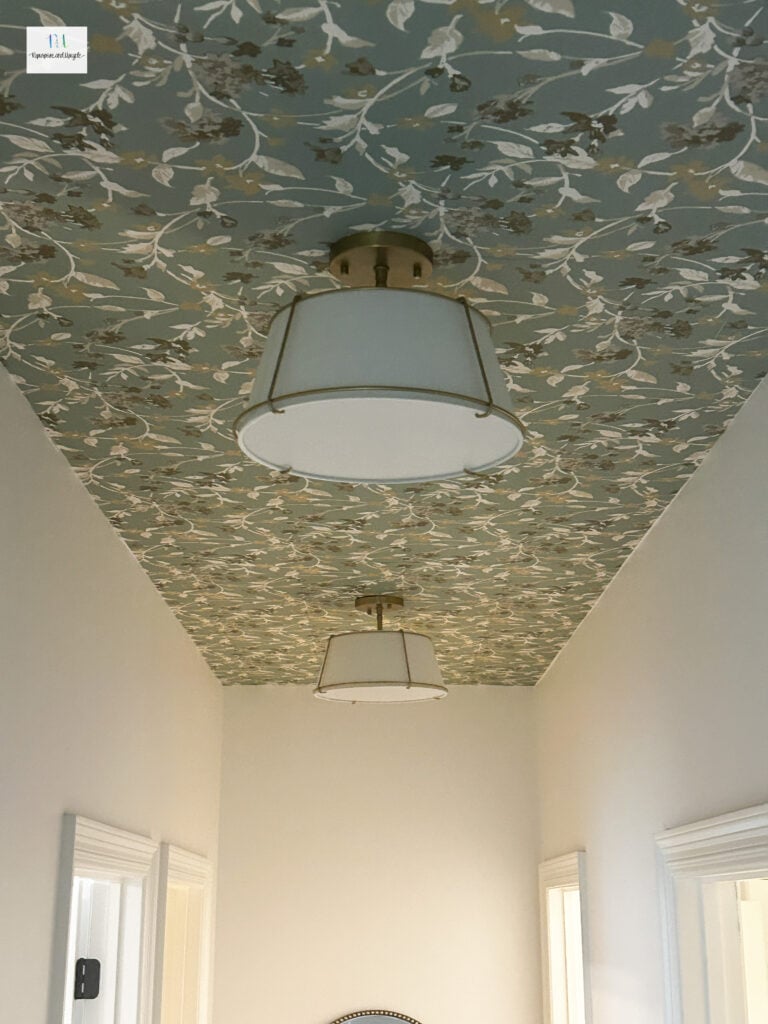
This peel and stick wallpaper came from Target. What can I say other than I’m a sucker for blue. I think the tones in this paper worked well with the rest of our house too.
Preparing the ceiling for wallpaper
First things first, I removed the lights, the air vent and the fire alarm. Oh and I made sure the surface was free of dust (don’t look inside the air vent, ewww).
By the way, I’m not going into full detail on how to wallpaper a ceiling. This is my first time attempting to do this, and I’ve already learned a handful of things. Maybe on my next go-around I’ll know more and write a “how to” on this subject. I will share a handful of tips and things I wished I had known at the bottom of this post.
Before I began, I went to AI to get some inspiration. Eek I love it.

Time to wallpaper!
Applying wallpaper to the ceiling
I personally don’t think there is a right or wrong answer as to where to start. The only MUST is; measure and use a laser level to make sure you apply the wallpaper straight.
I promise your walls aren’t straight, so don’t use the wall as a straight edge!
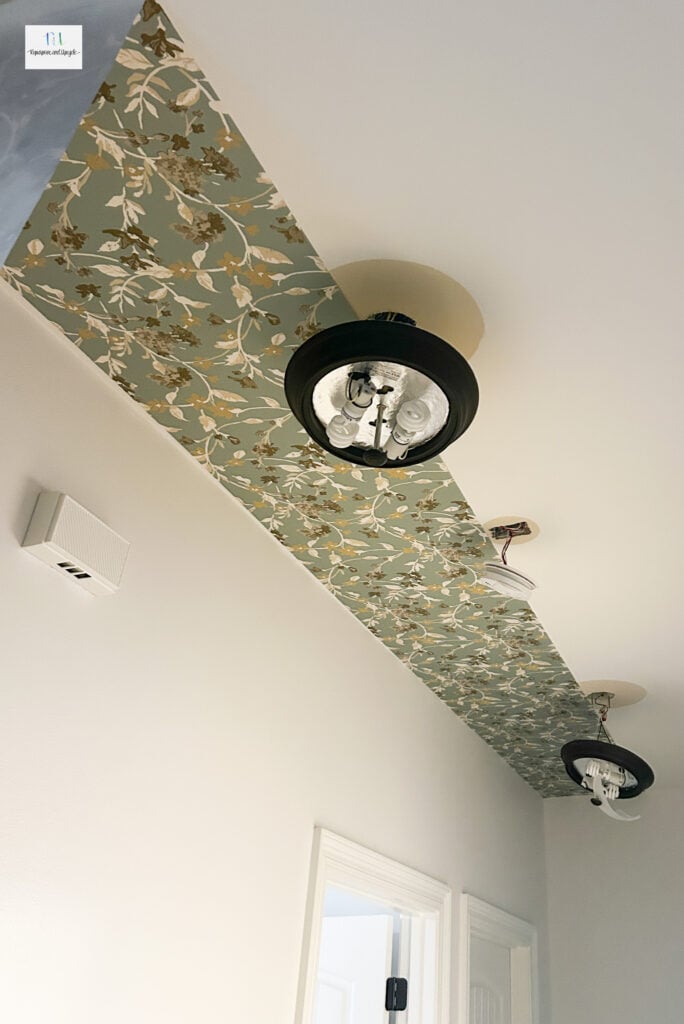
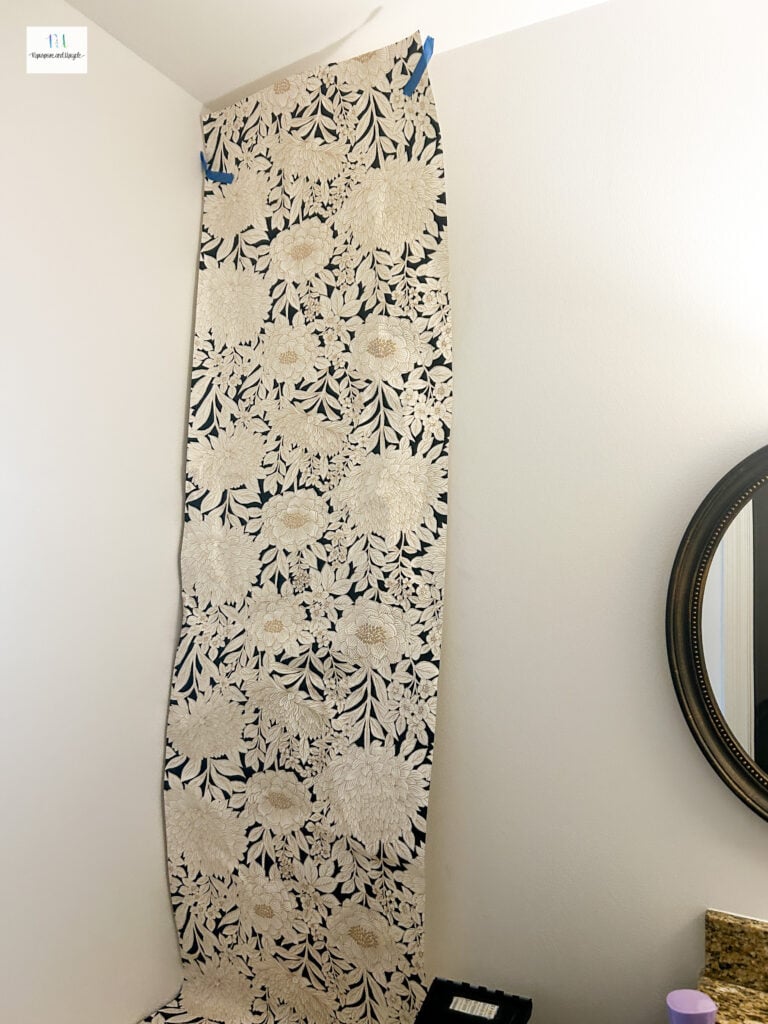
If you look carefully in the pic above, you can see where I started at the edge of the wall closer to the back, but ended up with about an inch or more of ceiling showing by the time I was done with the first pass of paper. This is because the wall isn’t square. No wall is square, so don’t be deceived in thinking so.
Point in case; make sure to measure and level before you apply the first roll of paper.
But what if you don’t measure and level? By the time you’ve reached the other end of the ceiling (or wall), the paper will be lopsided and the pattern will be off track. I’ve learned this the hard way.
Once you’ve applied the first roll, the hardest thing is lining up the patter and hoping it all goes smoothly for the second.
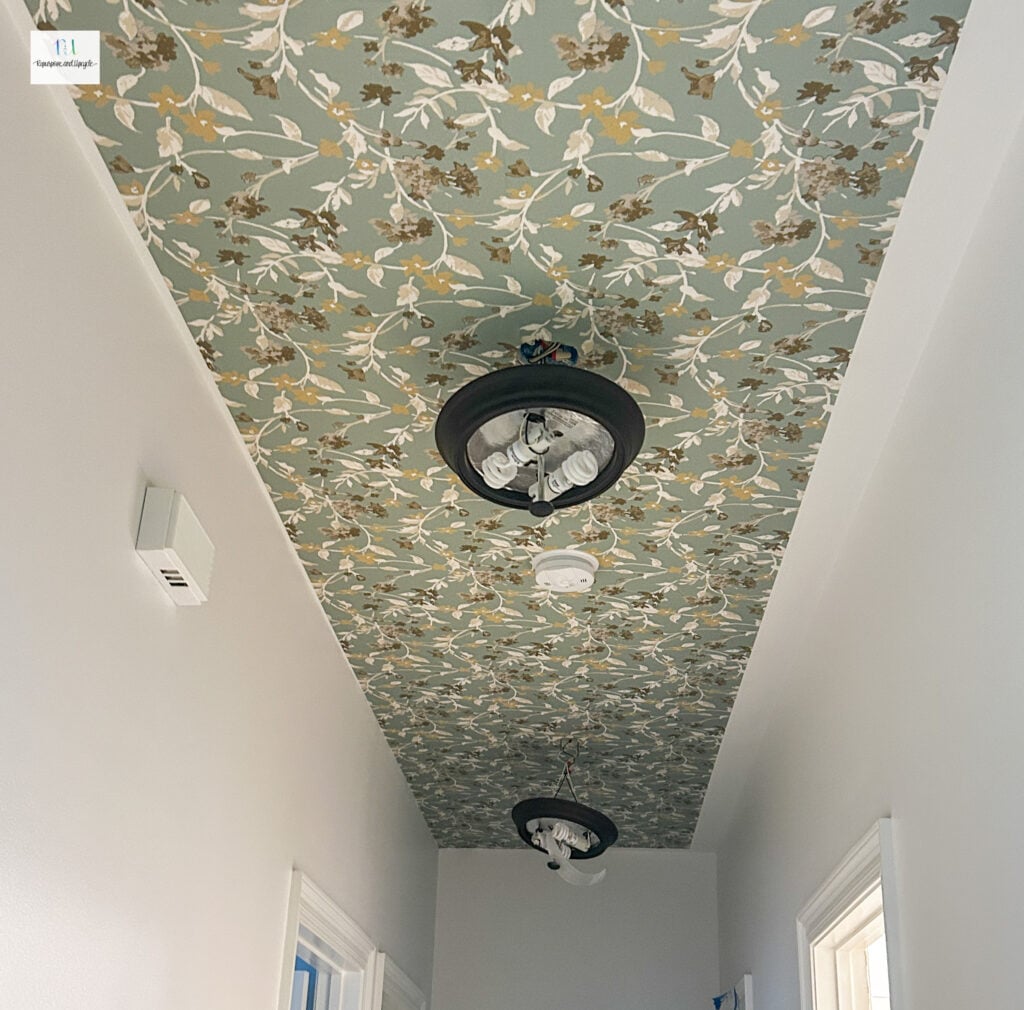
You can see the ceiling is going to require about 2 and 1/4 of a roll of wallpaper. I’m still deciding if I’m going to go back with a small strip of wallpaper to the edge or install moulding to finish it up.
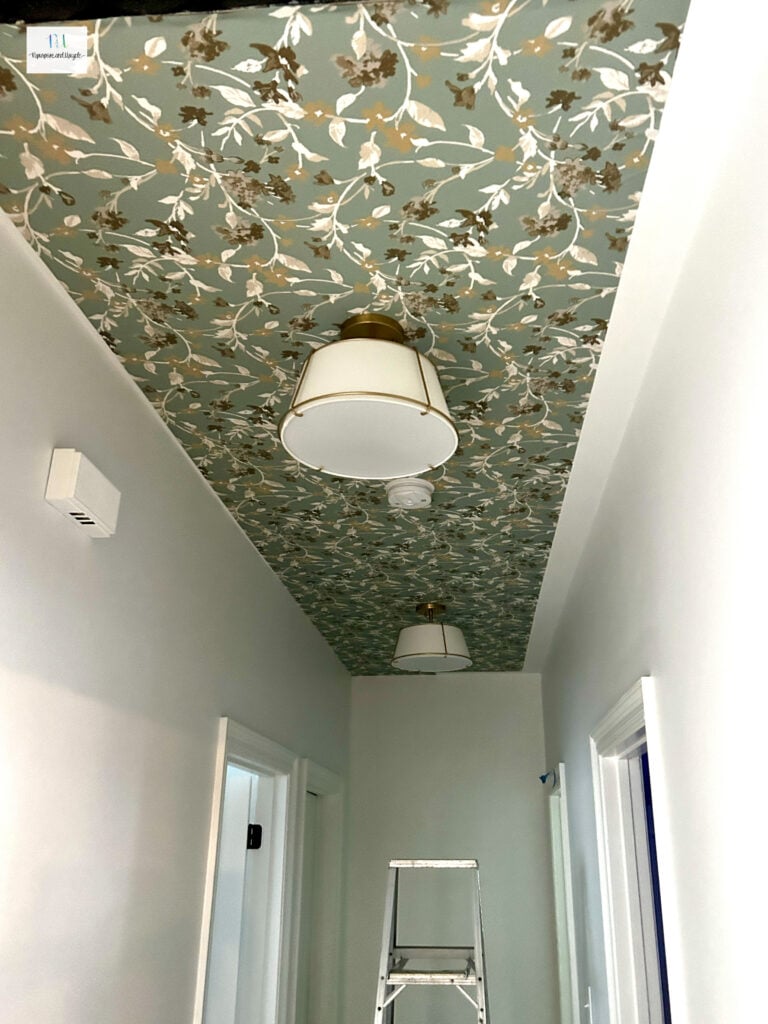
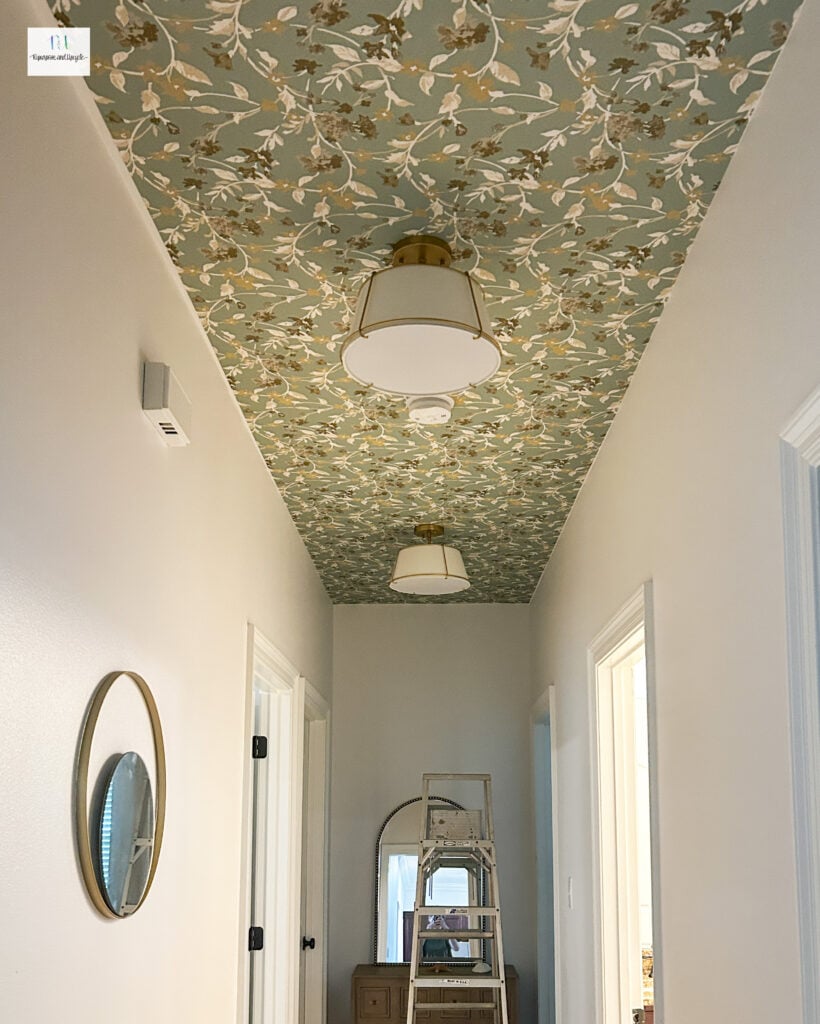
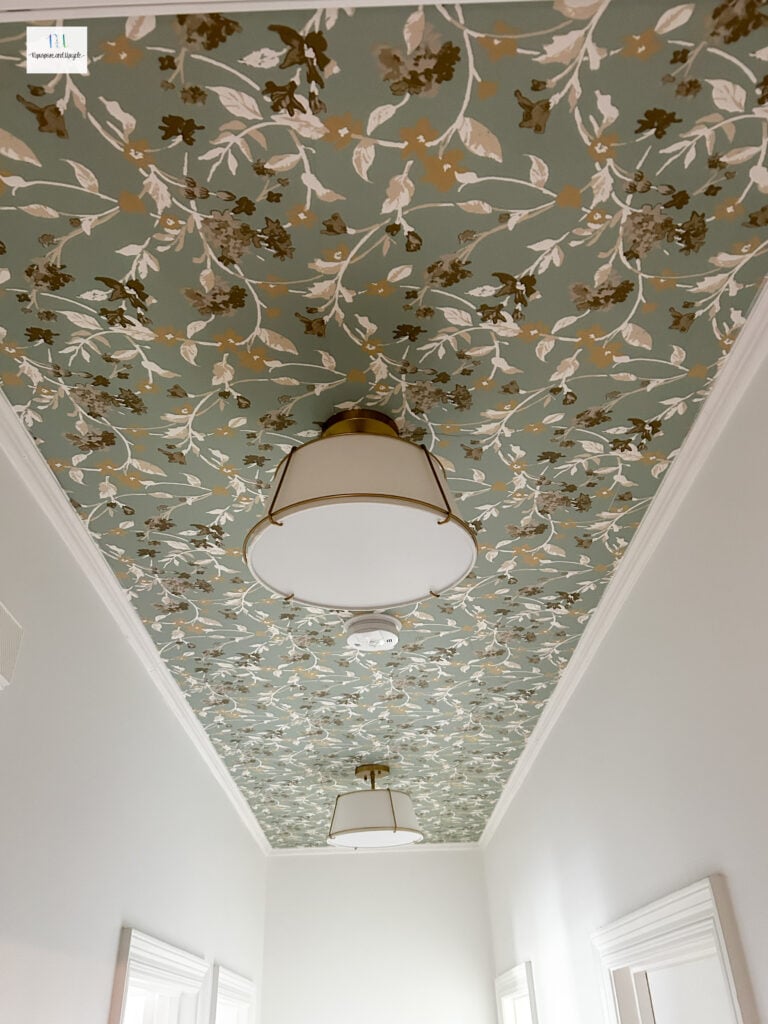
Check out the new flush mount lights from Wayfair! Eeek I love them.
I’m loving it so far!
I finally got the last little piece of wallpaper up and decided to add some small moulding. Moulding can really make or break a space. Let me show you the moulding I chose to install.
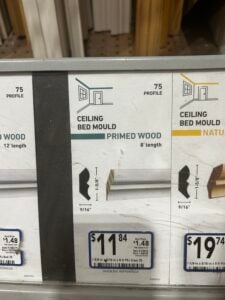
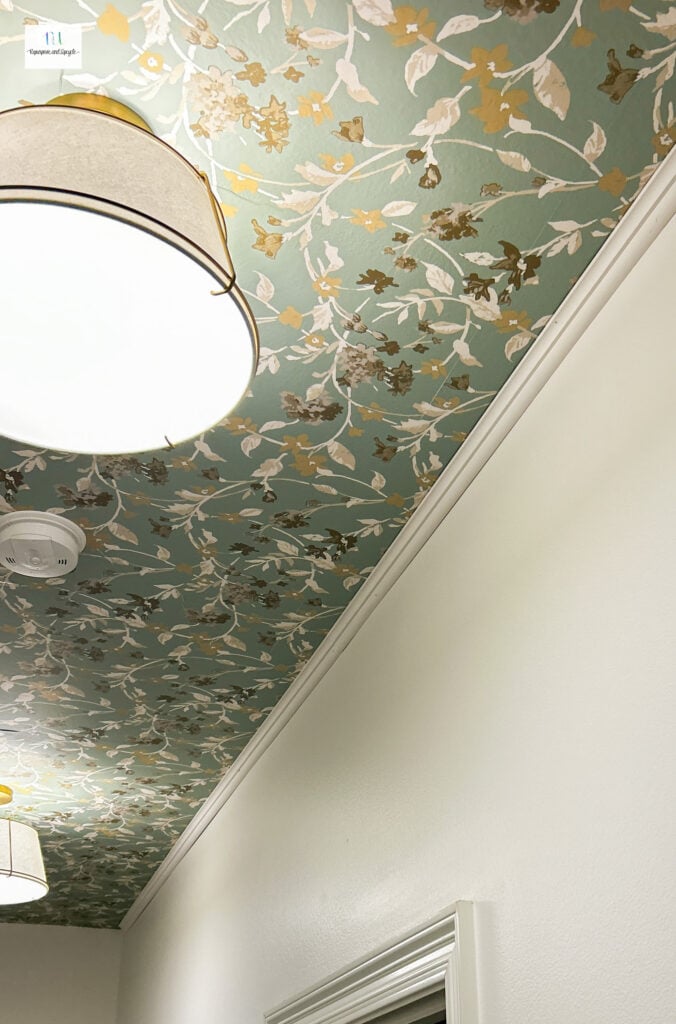
Once moulding was up and caulked, I added the finishing touches.
Here’s another AI image below for more gallery wall inspiration. Of course I added personal family photos instead of these floral prints.
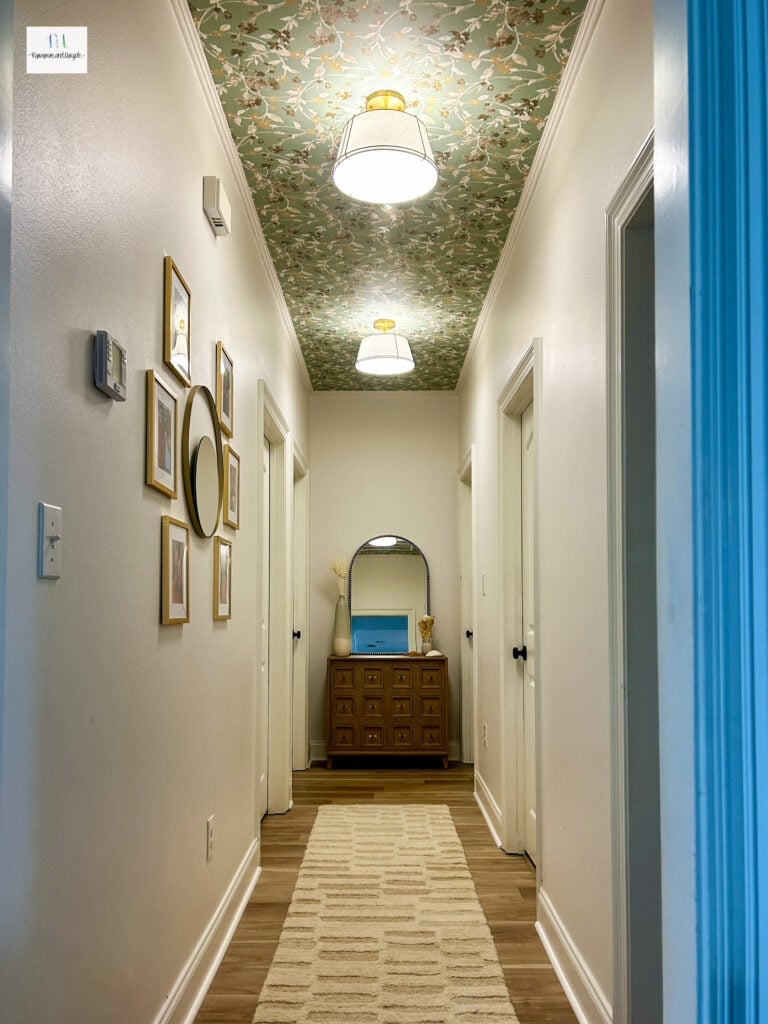
Hallway with wallpapered Ceiling and new flush mount lights
The wallpaper looks great, but these new flush mount lights were the jewelry this space needed!
Ready to see this space with all the details?
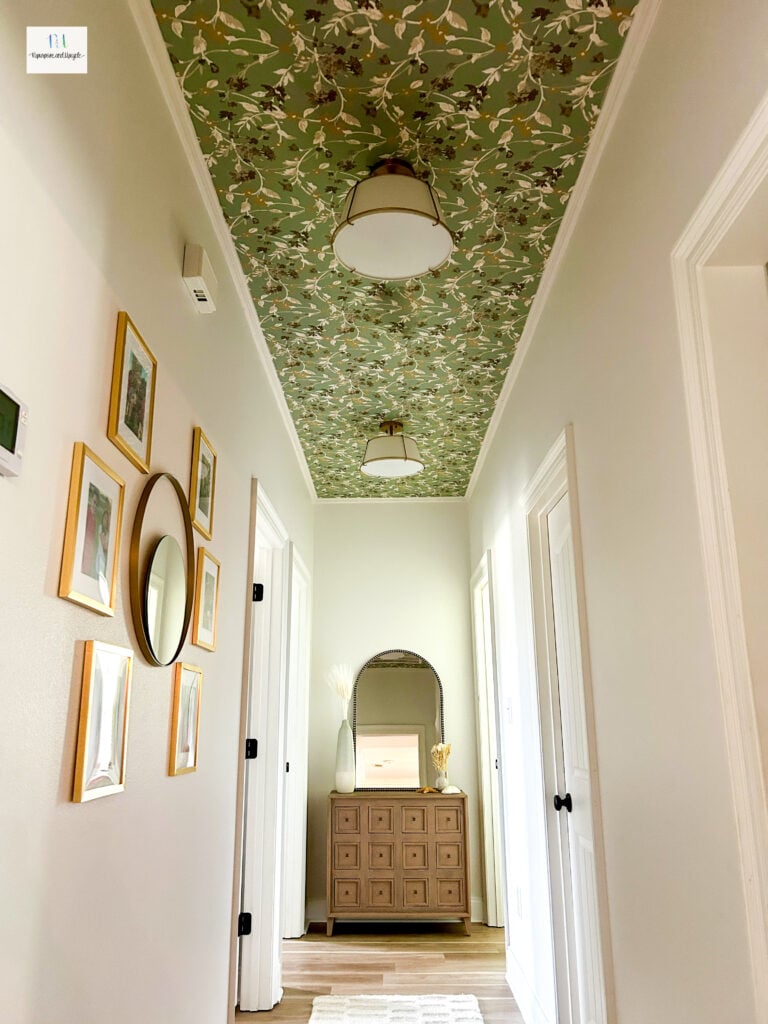
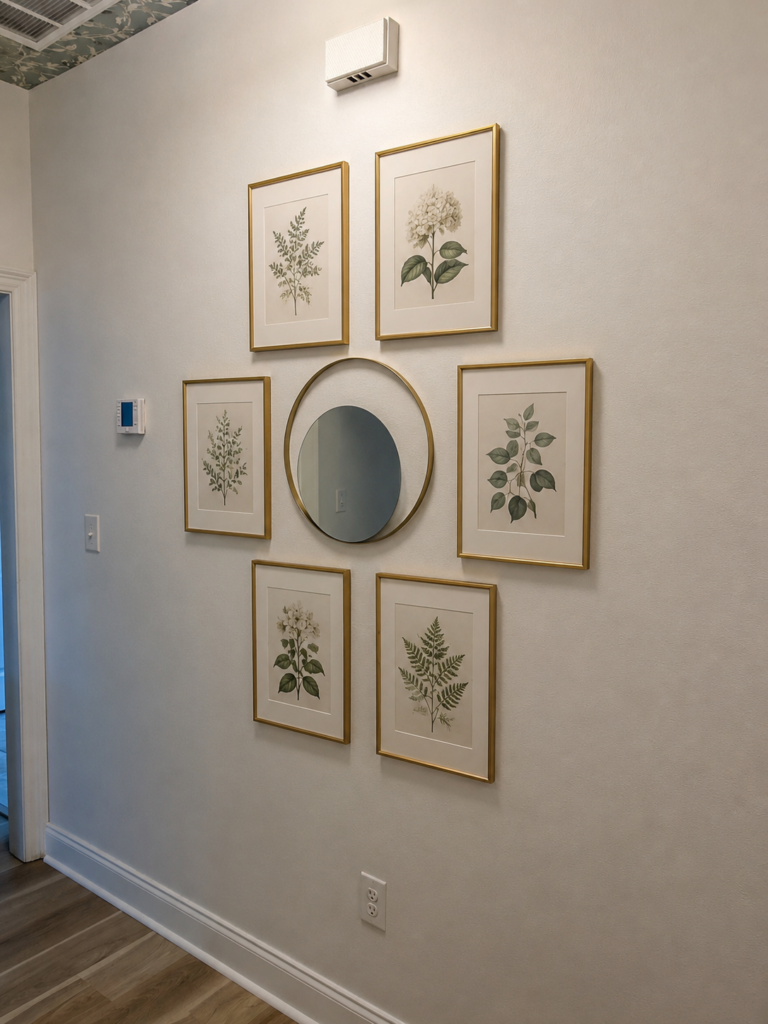
What do you think? I think it looks similar to the lovely AI image I pulled so much inspiration from. I purchased these frames from Amazon if you are interested in them too.
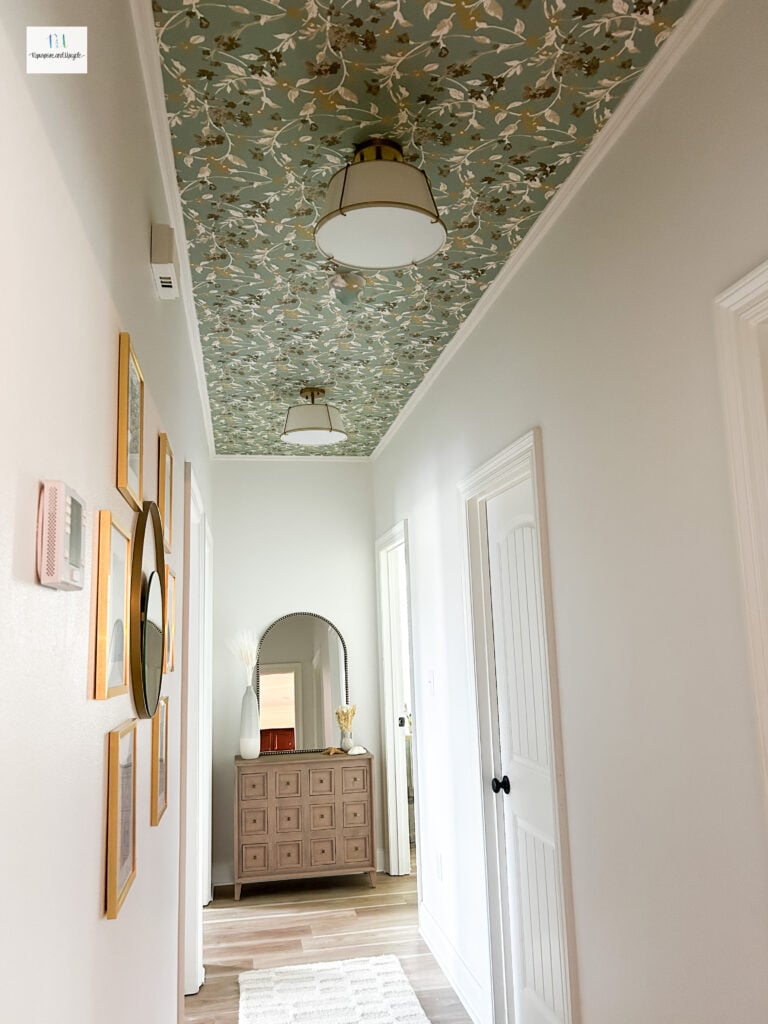
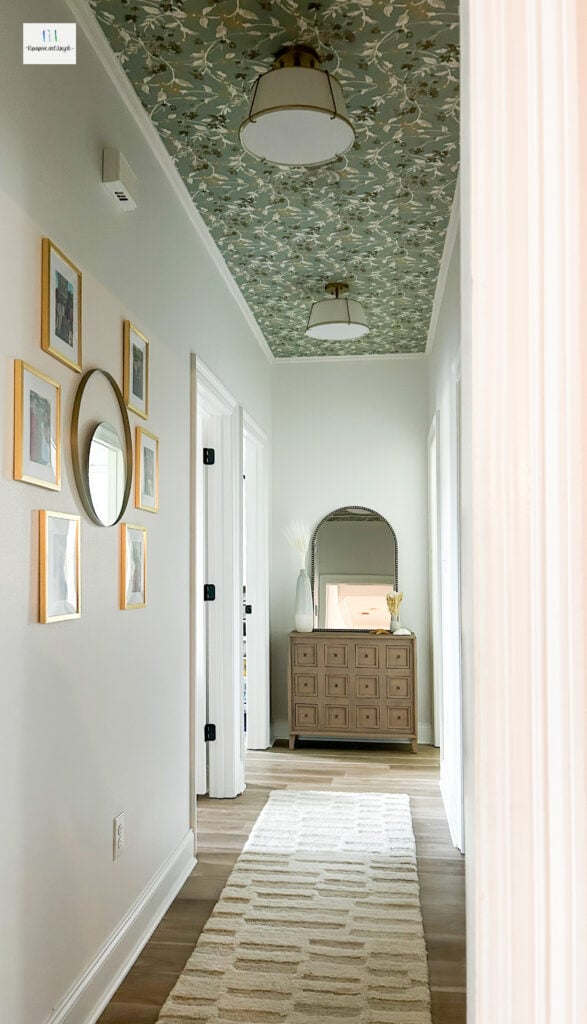
The rug is from Wayfair. It adds a touch of cozy don’t ya think?
Now time for a before and after.

Well there it is friends. Now i’m off to figure out where else to apply this wallpaper.


