Skip to Content

Two Easy Picture Hanging Tips Everyone Should know

Some of you might think this post is really silly. I almost didn’t write it because I figured most of you already knew about these picture hanging tips and tricks. Then I remembered that it wasn’t until a few months ago that I figured out this easy trick. Hanging multiple pictures straight can be daunting. For those of you that don’t know, let me show you a few tips and tricks on how to hang pictures correctly on the first try. 

Honestly, I wish I had known about it years ago. Oh the time and nail holes I could have saved. I figured if I didn’t know this information until recently, then some of you may not either. 

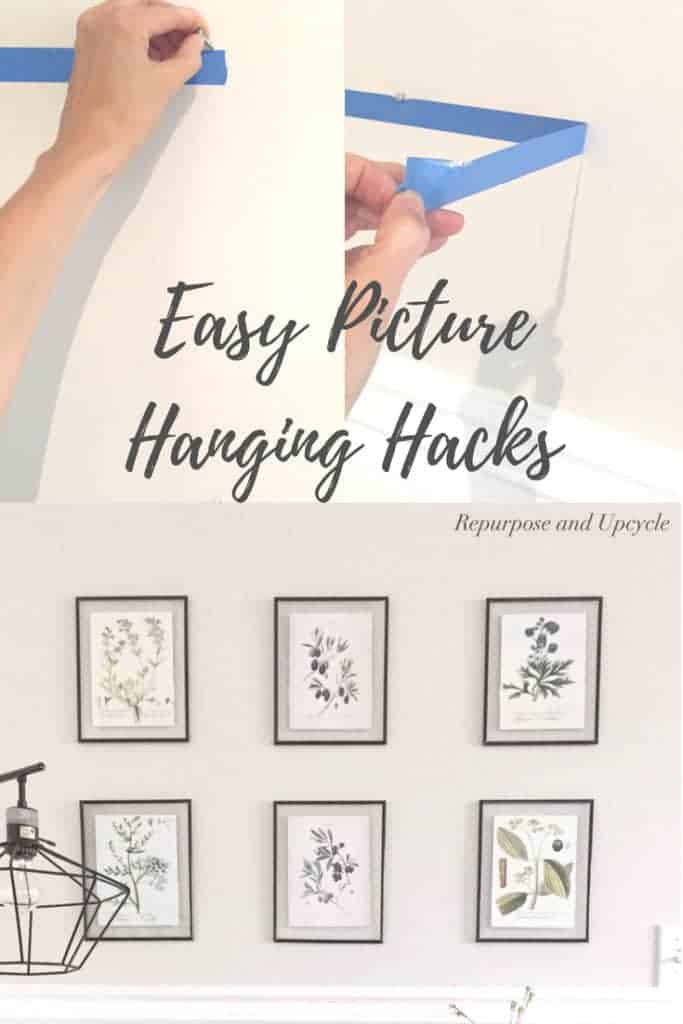
Picture-hanging hack

The first tip is about how to hang multiple pictures evenly and the other tip is about how to hang pictures with a double hook on the back of the picture frame.

After all, everyone needs to know the best ways to hang a picture right? 

how to hang pictures evenly

I finally started to feel like I’m settling in since we moved.  When I feel unsettled in a space it helps when I can create or “recreate” a room. 

I haven’t wanted to rush the “nesting” process and add too many holes in the walls if they weren’t going to be in the perfect spot. One of the first few spaces I decided to create was in our dining nook and on my office wall.

It hit me when I was hanging my DIY botanical prints on the wall behind my new office space and I thought; “I need to share this tip I just learned about.” 

Disclosure; this post contains affiliate links. As an Amazon Associate I earn from qualifying purchases. This does not affect the price you pay. This disclosure statement refers to the rest of the Amazon links in this post.

Before I get to the details I’ll share my YouTube video on how to hang pictures evenly and in a row.  I totally get that most of you would prefer to watch the process rather than read about it.

Using painter’s tape to hang multiple pictures in a row

Materials:

the wall before the pictures

How to hang multiple pictures evenly and in a row

  • Start with a blank wall and figure out about where you want your pictures to hang
how to hang pictures in a row with painters tape
how to hang pictures in a row and evenly with painters tape
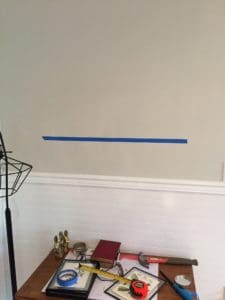
  • Take a piece of painter’s tape and stick it to the wall in the center of where you want the first set of pictures to sit. Measure to make sure the painters tape is centered and level. 
Two easy picture hanging hacks how to hang pictures in a row
  • After you’ve added your painters tape to where you want the first set of pictures to be, start by adding a second row on top.
Two easy picture hanging hacks how to hang pictures in a row
  • Once again measure and make sure it’s level and in the right spot. We want your picture frames to be perfectly straight.
Two easy picture hanging hacks how to hang pictures in a row
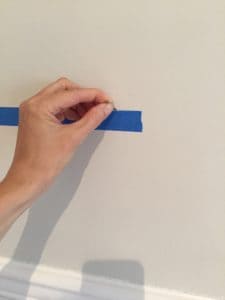
  • Add a nail head or small hole right above the painter’s tape where you want to hang your picture. Repeat this step for however many pictures you need to hang. 
  • Once you’ve added your nails to the wall, remove the tape and hang your pictures

Step back and admire how straight and level your pictures look with these new picture hanging tips.  I can’t believe I didn’t know about this sooner. 

office area with multiple pictures hung evenly and in a row
multiple pictures hung evenly and in a row

Now it’s time for Picture hanging tip number two.

Before I knew about this hack I added string or fishing wire to the back of the frame of all my double hooked pictures because I couldn’t stand to try to hang them evenly.

I know you know what I’m talking about…

I’ll make this quick and simple.

How to hang a double hook picture frame evenly

Once again this tip involves a piece of painters tape. Painters tape comes to the rescue again!

Two Easy Picture Hanging Hacks; How to hang a double hook picture evenly

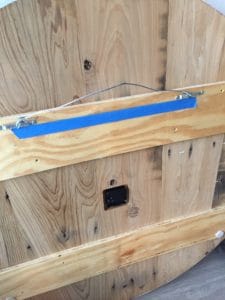
Lay your painters tape over the hooks in the center of the picture on the back of your frame like you see in the picture above. Make each end of the tape stop at the exact spot where you want the nail to sit.

Two Easy Picture Hanging Hacks; How to hang a double hook picture evenly

Remove the piece of tape from the picture and place it on the wall where you want it to hang. Make sure to use a level so it’s even. Using a level is key because you want to get this right the first time!

using painters tape to hang a double hook picture

Once you have it in place, set a nail or screw above the ends of the tape. Remove the tape and hang your picture! Why didn’t I know about this simple life hack before? 

Two Easy Picture Hanging Hacks; How to hang a double hook picture evenly

Look how easy that was! No real measuring required. This is and has been the easiest way to add pictures to a wall without ending up with a bunch of holes. 

What do y’all think? These picture hanging tips saved me so much time and guesswork. I hope it helps y’all too!

If you know of any other picture hanging hacks, please feel free to enlighten me with a comment below. I’m all about sharing ideas!

How to hang a double hook picture frame evenly

Two Easy Picture Hanging Hacks; How to hang a double hook picture evenly

Learn how to hang a double hook picture frame evenly.

Active Time 30 minutes
Total Time 30 minutes
Difficulty Easy
Estimated Cost varies

Materials

  • painters tape
  • measuring tape
  • level
  • screw driver or hammer
  • nails or screws
  • Picture 

Instructions

  1. Lay your painters tape over the hooks on the back of the picture. Make each end of the tape stop where you want the nail to be.
  2. Remove the tape and place it on the wall where you want your picture to hang.
  3. Place your nail or screw on the end of the blue tape.
  4. Remove the tape and hang your picture.

How to hang a group of pictures in a row

Two easy picture hanging hacks how to hang pictures in a row

How to hang a group of pictures evenly and in a row.

Active Time 30 minutes
Total Time 30 minutes
Difficulty Easy
Estimated Cost 10 dollars

Materials

  • Painters tape
  • measuring tape
  • level (if you want to be super precise)
  • pen
  • screw driver or hammer
  • nails or screws
  • pictures

Instructions

  1. Start with a blank wall and figure out about where you want your pictures to hang.
  2. Take a piece of painters tape and stick it to the wall in the center of where you want the first set of pictures to sit. Measure to make sure the painters tape is centered and level. 
  3. After you’ve added your painters tape to where you want the first set of pictures to be, start by adding a second row on top.
  4. Once again measure and make sure it’s level. We want the set of pictures to be perfectly straight.
  5. Add a nail or screw right above the painters tape where you want to hang your picture. Repeat this step for however many pictures you need to hang. 
  6. Once you’ve added your nails to the wall, remove the tape and hang your pictures!

Related Posts:

You can see more of this side buffet and clock and  my rustic beach cottage dining room with all decor sources HERE.

Thanks for stopping by friends.

Lindsey**

Leave a comment

Your email address will not be published. Required fields are marked *


  1. Katherine says:

    Hello !
    I’m absolutely in love with these vintage botanicals and have been looking for exactly these , they are gorgeous! Thank you so much .. my question is every time I try to save it’s forcing me to Dropbox and then wants my credit card and I don’t want to do that , am I doing it wrong ? Do you have another way I can get these ?

    Thank you again
    Katherine

    • Oh goodness, yes it should be a free download. It will send you to dropbox, which is a free online host server like google drive. I’ll see if I can locate those files and email them to you.

  2. Erin H. says:

    Hi!! I love this tip! I’m going to use it. But I have to ask you about that floor lamp. Where did you get it? Is it an up cycled design? I love it too!!

  3. Thanks for teaching me how to hang pictures without having to use string to make sure they’re even. My wife and I moved into a new house and we want to decorate our walls with some recent family pictures. We’ll have to look at getting custom frames and using your tips.

  4. My husband gave me some very large photo prints of our dog, and we want to hang them to a wall since she looks very cute on her photos. I think I’ll get some custom picture frames for the prints since her photos would look nice with a custom frame. Thanks for the tip that I can use painters’ tape to try to use it as a guide on where we should hang the photos, so I’ll be sure to do that.

  5. […] pictures with double hooks. Really hate that one. Lindsay of Repurposed and Upcycle shows us 2 ways to hang pictures that will help you keep your stress level down and have a “picture~perfect” pretty group […]

  6. These tips are very much useful in hanging the picture in short time as this helps in hanging picture very quick as a person not getting enough time to carry out such task will surely be helped by the art installers. In case you need any help then check out art services provider in LA for free guidance and project reviews.

  7. Eleanor Yue says:

    Can you tell me what paint color you used in your office space?

    Thank you!

  8. These are great tips, and I sure wish I’d had them a few months ago when I was hanging a group of six prints in a guest bedroom! It took me forever to get those hung. I’ll be pinning this for future reference!

    Thanks so much for joining the Grace at Home party at Imparting Grace. I’m featuring you this week!

  9. […] Two Easy Picture Hanging Hacks by Lindsey […]

  10. […] Two Easy Picture Hanging Hacks by Lindsey […]

  11. Mother of 3 says:

    Great ideas! I do have a few pictures with multiple holes behind them…. this would have come in handy. Thanks so much for sharing with us at the Summer Time Fun party. Pinned.

  12. […] pictures with double hooks. Really hate that one. Lindsay of Repurposed and Upcycle shows us 2 ways to hang pictures that will help you keep your stress level down and have a “picture~perfect” pretty group […]

  13. angie says:

    love tips and tricks like these thanks for sharing your knowledge and tip
    come see us at http://shopannies.blogspot.com

  14. Kathy A says:

    I buy a lot of thrifted frames; they often have no picture hanger on the back. I HATE fractions (I think the only time I willingly use fractions is when I am doubling a cooky recipe!). I found the easiest way to find the center of a small frame is to line a straightedge of scrap paper along the top, score where the frame ends with a fingernail, then fold the paper in half from end to score line. That fold line is the center of the frame! For a larger frame, string works well. Make a pencil mark, then center your picture hanger on that line, and voila, a centered hanger. I recently figured out that if I hang a picture that has wire as its hanger that I can hang the picture on the nail, level it, then grab each side of the frame and pull down gently. It creases the wire so that it more likely to hang straight!

  15. […] pictures with double hooks. Really hate that one. Lindsay of Repurposed and Upcycle shows us 2 ways to hang pictures that will help you keep your stress level down and have a “picture~perfect” pretty group […]

  16. […] pictures with double hooks. Really hate that one. Lindsay of Repurposed and Upcycle shows us 2 ways to hang pictures that will help you keep your stress level down and have a “picture~perfect” pretty group […]

  17. […] pictures with double hooks. Really hate that one. Lindsay of Repurposed and Upcycle shows us 2 ways to hang pictures that will help you keep your stress level down and have a “picture~perfect” pretty group […]

  18. […] pictures with double hooks. Really hate that one. Lindsay of Repurposed and Upcycle shows us 2 ways to hang pictures that will help you keep your stress level down and have a “picture~perfect” pretty group […]

  19. Pam says:

    Great tips, thanks! We moved in November, and I STILL don’t have much on the walls, because I’m so afraid to put those nails in the walls! Stopped by from Strawberry Butterscotch.

  20. That second hack is genius and I can’t believe I didn’t think of it when I was struggled to hang a couple of canvases recently. I certainly know for future!
    Thank you for joining the #FamilyFunLinky x

  21. Jann Olson says:

    Thanks for sharing these great hanging tips with SYC.
    hugs,
    Jann

  22. Very useful, thanks you #BlogCrush

  23. Jean says:

    Lindsey, I always have two hooks on the back of pictures because I can’t stand crooked pictures. With the two hooks, you can dust them vigorously and they don’t move. Never have to straighten a picture. I’m not quite sure what method my husband uses, but I’ll run this one by him. #BloggersPitStop

  24. Brett says:

    How do you deal with the fact that most of the double hooks are not level?

  25. I can’t stand pictures that are crooked, and I’m pretty good at eyeballing it, but it usually takes several holes to get it right. LOL I’ll definitely be using this hack! Pinning, too.

  26. I think that this is brilliant. I usually use toothpaste to mark where I want the hole to be but this seems like it would work so much better!
    I’d love for you to share this post with me over at my party, Make Life Pretty Monday. You can find it at http://www.theorganizeddream.com

  27. Erlene says:

    I use the same hack to hang pictures too! It’s so much easier than trying to eyeball it and a lot less holes too. Thanks for sharing on Merry Monday. Pinned.

Skip to Instructions