I’m sort of embarrassed to admit this but a couple months ago a friend of mine asked for some advice on choosing a pretty “rain chain.” I thought to myself, “what is a rain chain?”
Once she explained what it was I knew immediately what she was talking about. I’d seen the non traditional gutter downspout things mainly around the 30A and Destin area but I didn’t know they provided more than just pretty decor!
So the question is;
What is a rain chain and how do rain chains work?
A rain chain is essentially a decorative alternative for gutter downspouts that work by using surface tension. Instead of water flowing through traditional downspouts, it flows from the chains on the “rain chain.” The rain naturally flows from the path of least resistance which allows it to travel down the metal chains to the ground. If you need a gutter but you want something with a little more visual appeal for your outdoor space, a rain chain might be a good idea.
Do rain chains really work?
I was skeptical myself at first, but after watching a few videos I was convinced! I had to try one of these functional pieces of outdoor decor. After all, our rustic beach cottage always has areas of constant water and wood rot, and why not add a pretty water feature?
One thing to note; most rain chains do well with a small amount of water, not heavy rainfall. Like you can see from my video, when you get large amounts of water flowing down, you are more likely to see lots of splashing which means more chances for water damage.
What about windy conditions? I live in a coastal area and I was worried about that. There are things called anchor stakes or anchor pins that allow you to secure them to the ground. You can even put a rain barrel at the end of it or the bottom of the “gutter”!
Can you use a rain chain in the winter with snow and ice?
I don’t live near the cold weather, so I can’t say I have personal experience with this, but I do know the weight of the ice can damage the rain chain. That being said, there might be a reason why you see more rain chains down south then up north in colder climates.
Different Types of Rain Chains
There are two main types of rain chains: cup chain style and link chain style. Other than the design of the rain chain, there isn’t much difference in the effectiveness between the two.
Cup style rain chains
The cup-style rain chains consists mostly of tapered “cups” found every few links. Most of the rain chains you will see are this type. The idea is that the rain water will gather in the cups and then trickle down the chain until it reaches the end of the rain chain.
Link chain style rain chain
The link-style rain chains are definitely less bulky. They only consists of the chains and no decorative cups. The link chain style suites a more modern aesthetic appeal and offers a sleek look for water runoff.
Types of Rain Chain materials
These decorative chains can be made of any material, but you will find them mostly made from: copper, stainless steel or aluminum.
Copper rain chain
The cool thing about a pure copper rain chain is that it won’t rust over time like the other materials. Instead, it will turn a pretty shade of green.
One thing you need to watch out for with a copper rain chain is something called electrolysis. This happens when a copper gutter clip or anchor is installed on an aluminum gutter. When two metals interact, they start to deteriorate over time. One way to prevent this is to place a barrier between the two metals.
Stainless steel rain chains
A lot of rain chains are made from stainless steel. Make sure to note what grade of stainless steel you are buying before you purchase. The higher the grade, the more rust resistant they are.
Aluminum rain chains
Since most traditional gutters are aluminum, you will find the most popular metal for rain chains are aluminum too. They are mostly rust resistant.
Now that I’ve explained a little about rain chains, it’s time to talk about a problem I ran into when thinking of installing one on my house.
Let me show you the dilemma:
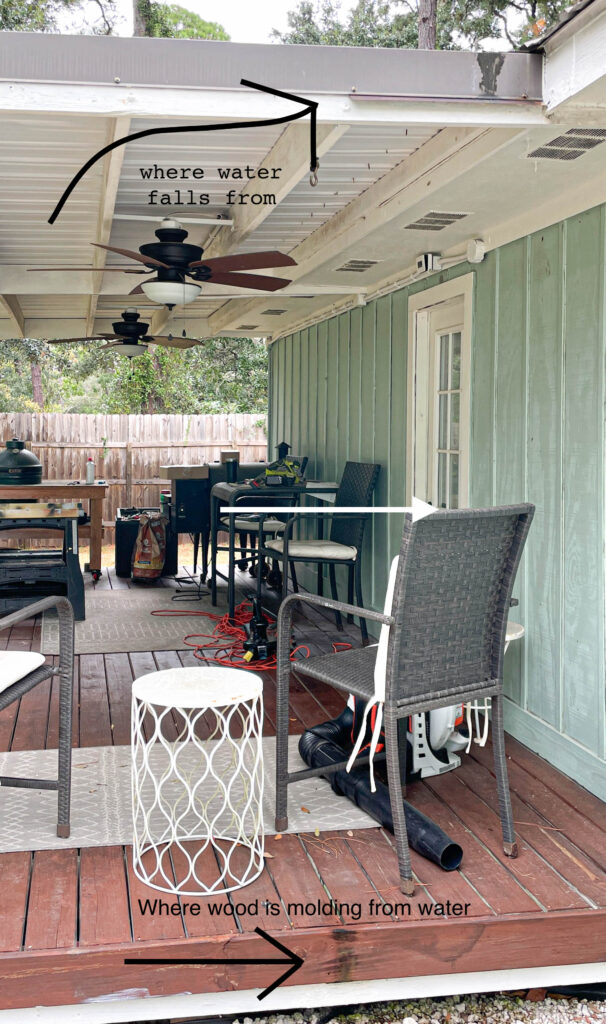
You can see the metal lip that was installed for water to fall off from the roof. This works ok, but you can also see the bottom of the porch where the wood is starting to rot from constant water drips.
We’ve thought about installing a downspout, but how ugly would that be?
I decided to buy a rain chain. This created a problem but I knew I could also figure a way to install it without a gutter.
Make sure to check out my list of 10 highly rated rain chain kits from Amazon here! Most of them come with all you need to install it yourself (rain chain installation kit included). Don’t forget to measure your space and order a longer length (or more chain) if needed.
Here is the rain chain I purchased from Amazon.
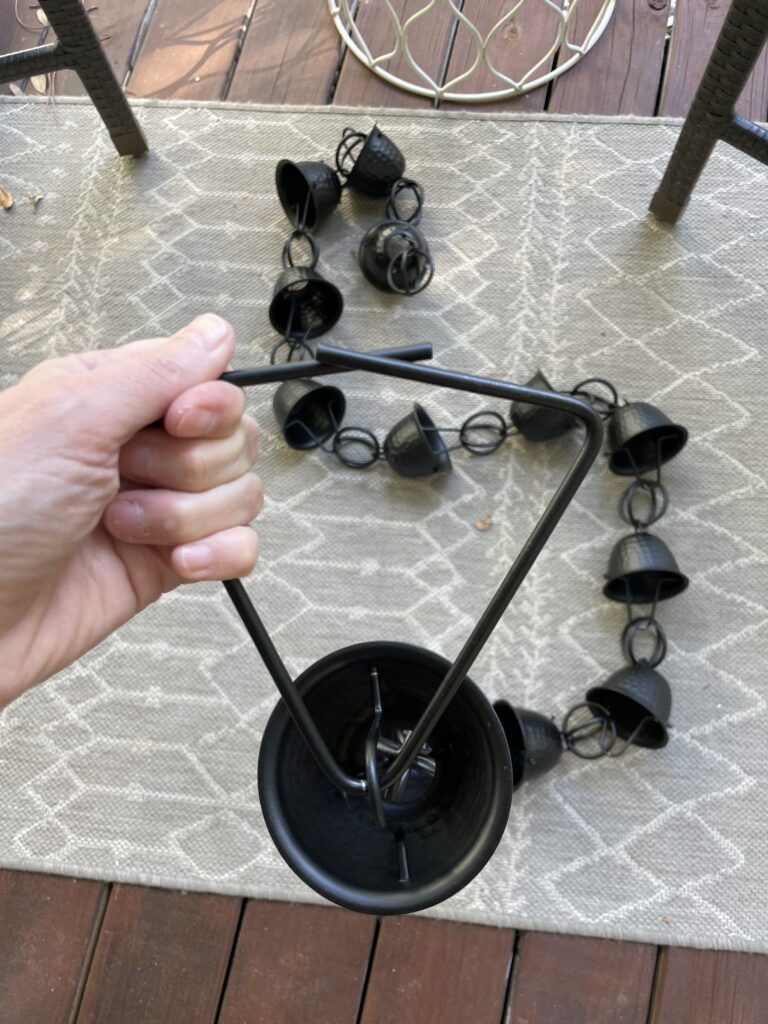
It came with this triangle attachment piece that was supposed to be installed to a gutter. I had other plans for it among a handful of other new DIY projects.
Installing a Rain Chain without a gutter
I had to create something that would divert water from the top of the piece of metal over to the first cup on the rain chain. Let me show you my solution.
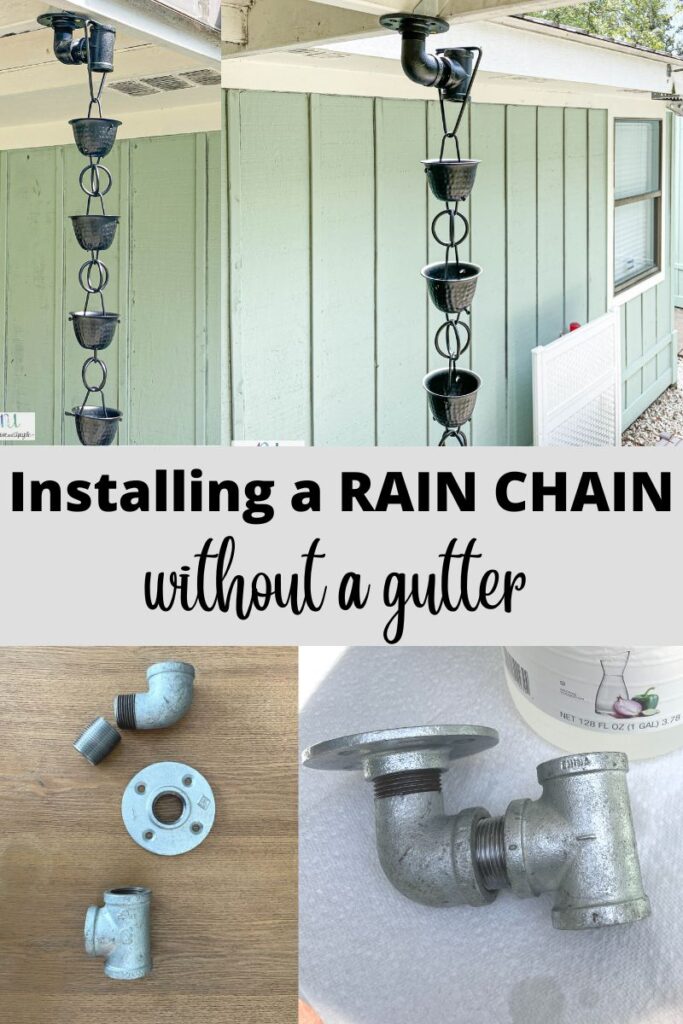
Plumbing material!
I used 1″ products but you could get away with using something larger too. I wouldn’t go smaller than 1″ though.
Material used:
- 1″ 90 Degree elbow male and female
- 1″ flange
- 1″ nipple
- 1″ street tee
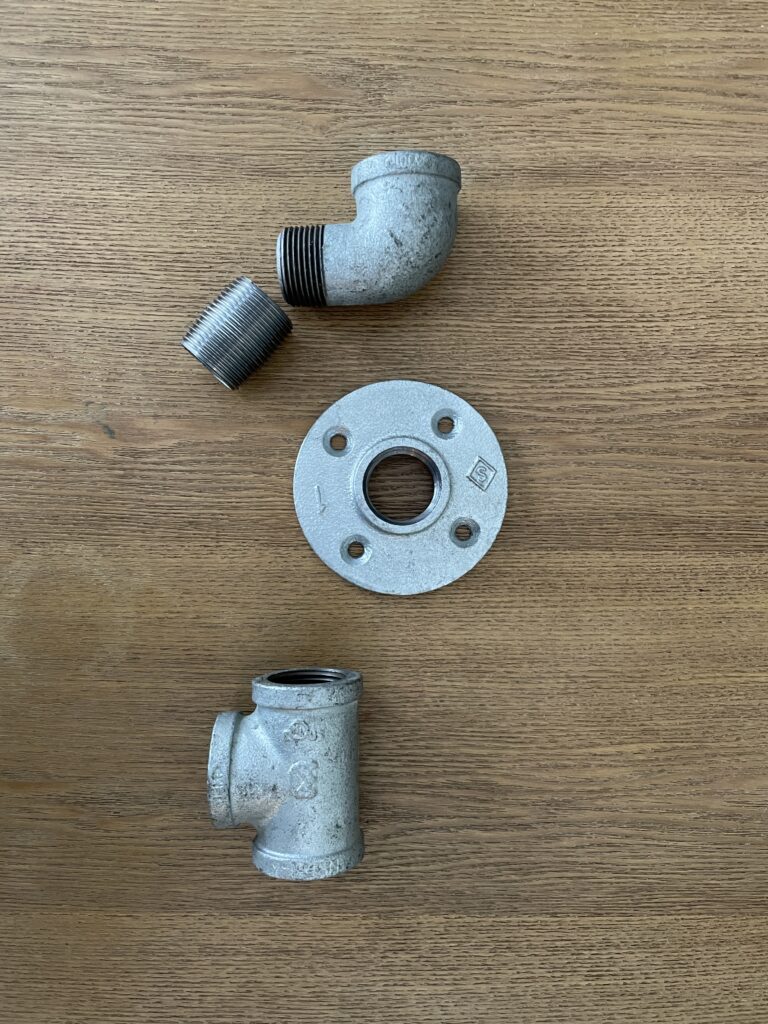
The key with the plumbing material is 1) It’s waterproof 2) I could create a gutter system to funnel water and 3) I could spray paint it to match the rain chain.
After I assembled it, I cleaned it with white vinegar and started to spray paint it with a textured black matte spray paint.
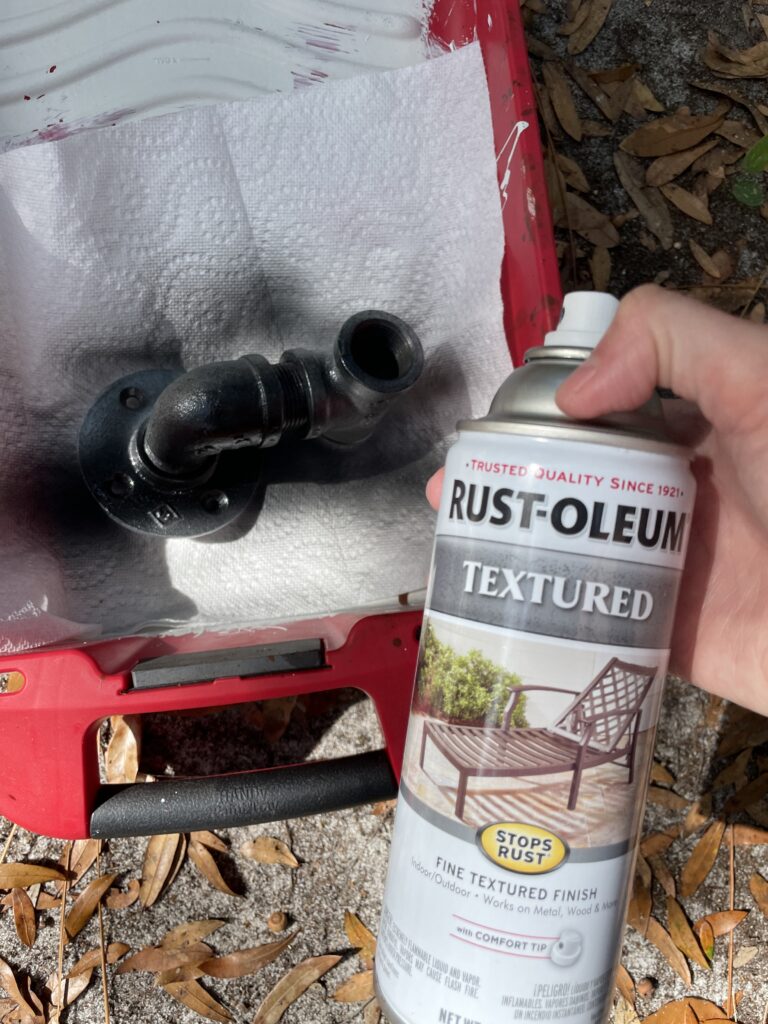
I applied two coats of spray paint and then installed it. I used two deck screws to mount the piece of plumbing into the roof structure.
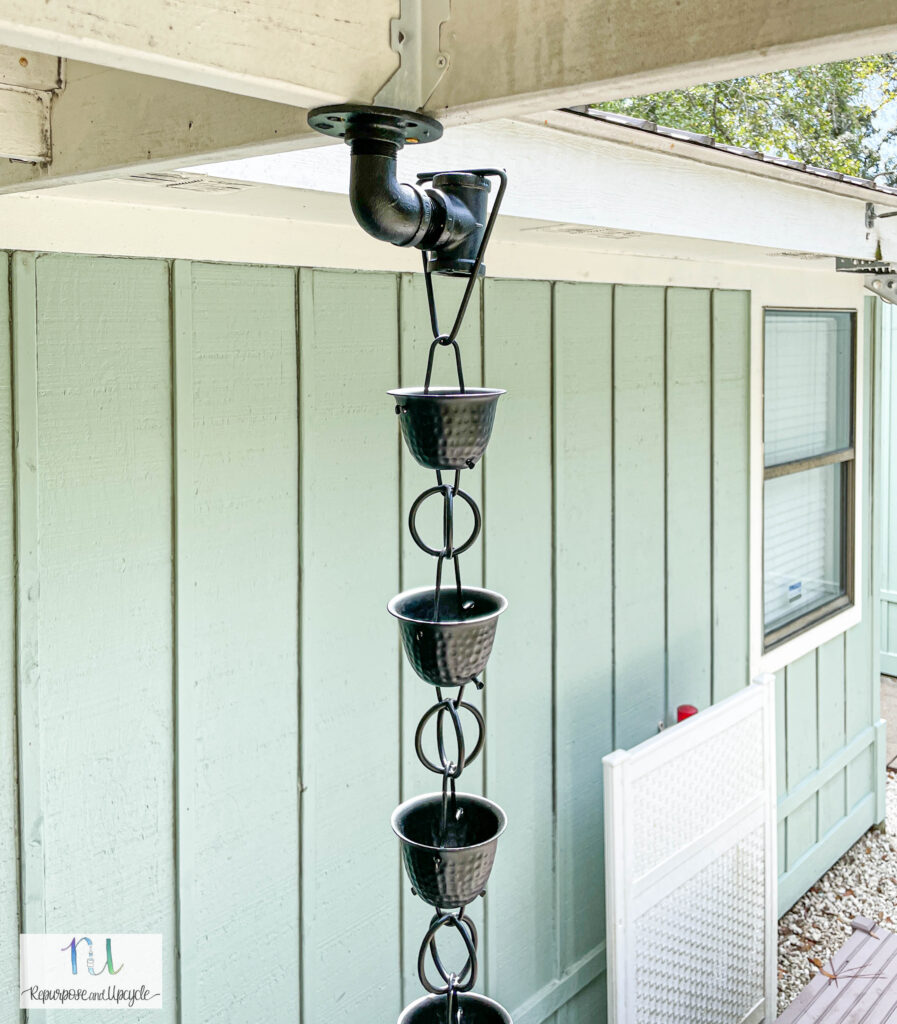
Before I installed it, I ran a little water over the metal piece to see exactly where the flow of water would fall. I then placed the plumbing piece under it until it was right over where the water would trickle down.
You can see I used wood screws to attach it to the ceiling beams. I waited to fully tighten the screws until I knew exactly where the water would fall.
I then placed the triangle piece over the plumbing material and ran some more water until I got the rain chain perfectly placed. I then tightened the triangle piece of the plumbing material so it was secure.
Ta-Dah!
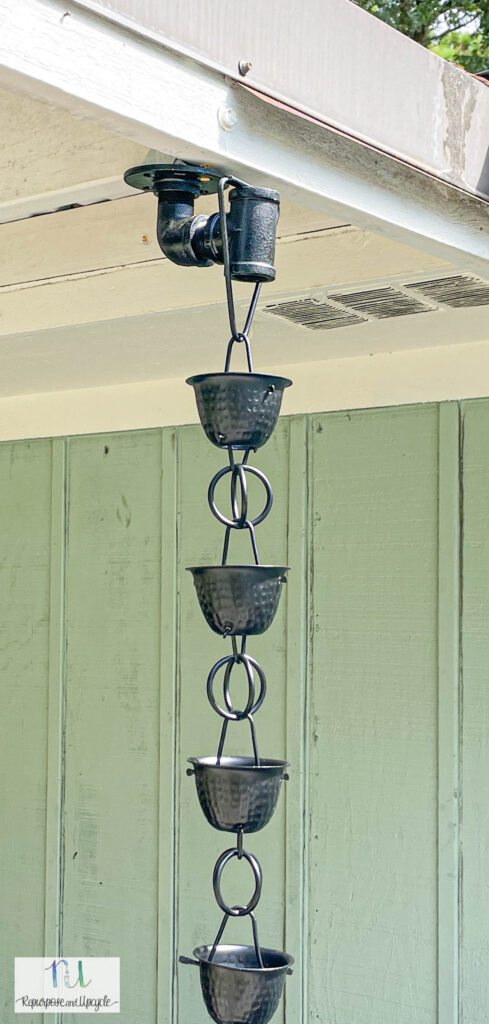
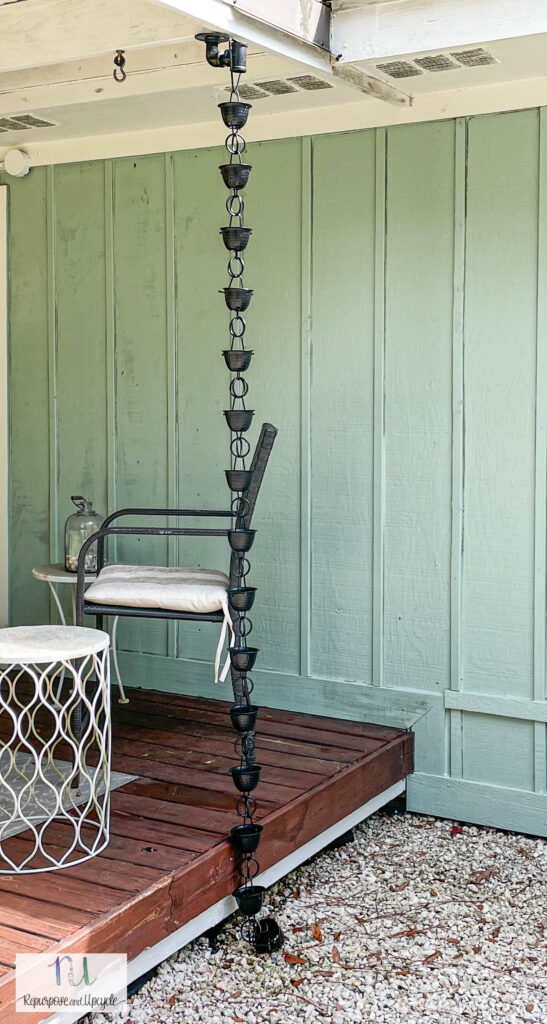
Make sure to watch the video to see it in action.
Thanks for stopping by and I hope I’ve given you a simple solution that is easy to replicate!
