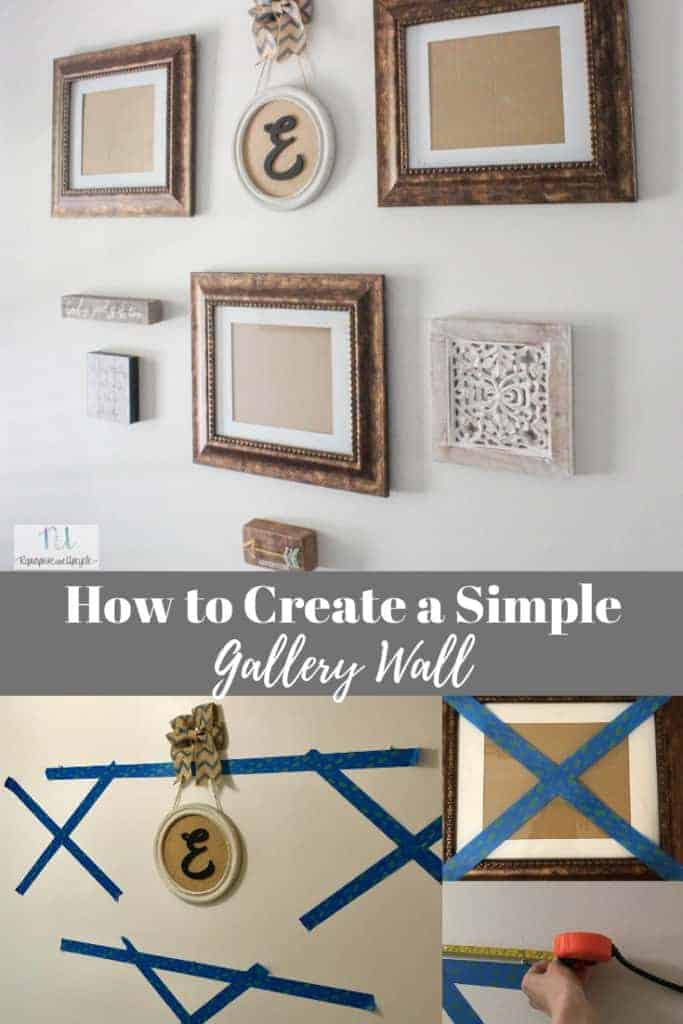
I love the look of a gallery wall. They look so easy to hang, but things can get tricky when you are hanging multiple pictures with multiple different sizes. What picture do you hang first? Where do you hang the second picture. Do you add elements other than picture frames? I’m hoping to answer all of these questions with a guided video of how I’ve created a simple gallery wall in my home.
I’ve got a few tricks up my sleeve that I can’t wait to show you. Whether you are adding a gallery wall to your living room or dining room or any room, with these simple tricks, you’ll be able to hang those frames to look like a piece of art!
Disclosure; this post contains affiliate links. As an Amazon Associate I earn from qualifying purchases. This disclosure statement refers to the rest of the Amazon links in this post. See more on my disclosure page.
Before I begin, let’s talk about a few tools you will need:
- Painter’s tape
- Measuring tape
- Hammer
- Nails
- Command strips (optional)
- Hanging hardware
- Paper template or Kraft paper (optional)
Once you’ve gathered the materials, where do you start?
First of all, there isn’t a right or wrong way to hang a gallery wall. You will probably find loads of different ideas on the internet, but this post shares my opinion on what has worked for me when hanging a handful of pictures together.
Looking for easy picture hanging tips? I recently shared a few ideas on how to hang pictures evenly and in a row. Check this post out too before you leave!

Easiest tip to hang a Gallery Wall
Over the years of hanging picture walls, in my opinion the easiest way to hang a gallery wall is to start at the center with an “anchor piece” (artwork, pictures, wall sayings etc.) and thoughtfully place other frames around it. The anchor piece is often one of the larger frame sizes that you want to hang and a good starting point to help place the rest of the frames.
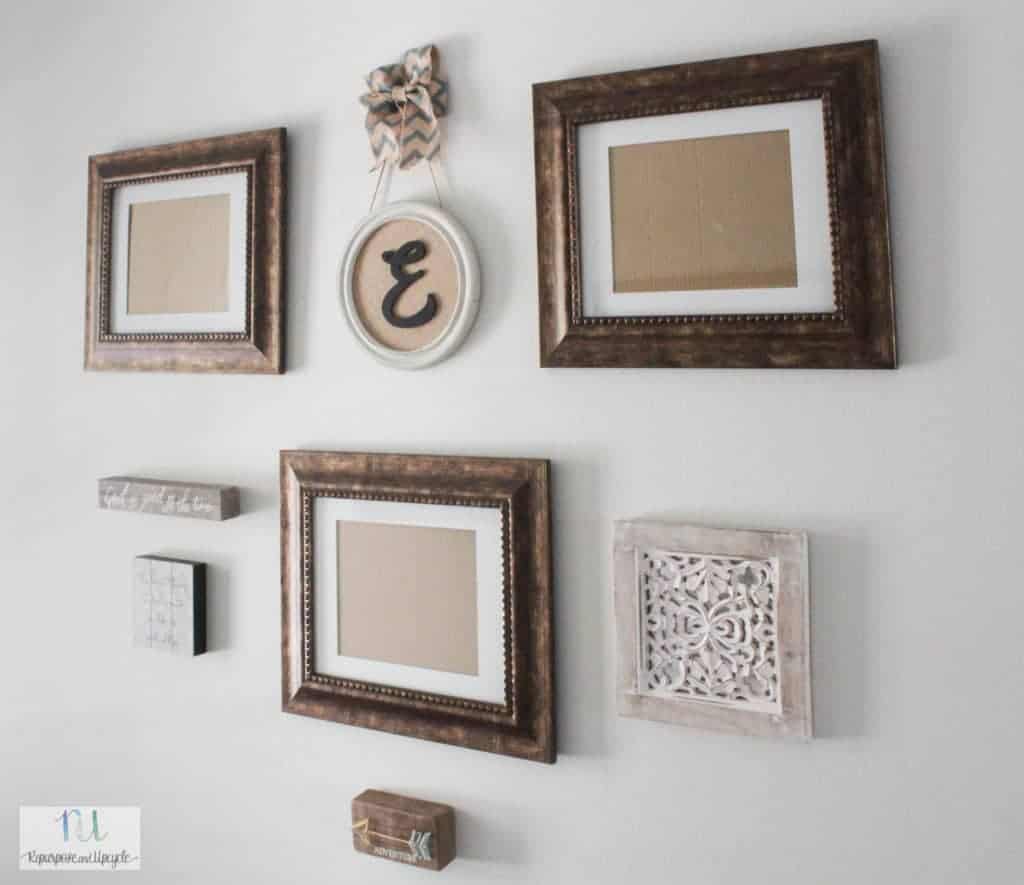
That being said, the anchor piece (center starting point) can be whatever you want it to be. For my gallery wall, I’m using a smaller frame with the letter E and ribbon on top because it makes a good centerpiece to base my kids photos around (my kids names start with the letter E).
Read on to find more details with specific tips on how to do this.
Step-by-step tutorial on how to hang a gallery wall
- Gather the picture frames and anything else you want to hang. Remember; a nice gallery wall has not only picture frames with different frame styles, but other elements like signs that bring in different textures and colors.
- Choose a “center or anchor piece” that you want to hang in the middle of your gallery.
- Measure the wall and decide where to start. When deciding where to hang the largest piece or anchor piece, a good rule of thumb is to make sure the top third of the image is at eye level, which is roughly 60 inches above the ground.
- Decide what other pictures or elements you want to add around the anchor piece and lay them out on a flat surface so you can get an idea of how you want them to look. You can also use painters tape (refer to video above) to get an idea of how your frames will look on the wall. Keep in mind you want everything to look “balanced.” I’ve described what I mean about being “balanced” below.
- Begin by hanging the middle or anchor piece.
- Once the center piece is hung, it’s best to apply painters tape or kraft paper to fully visualize where the rest of the elements will be hung. I like to begin hanging the frames on the wall (or piece of tape/ paper) starting in the center and working your way out. Make sure to step back and look at the “whole picture” after you’ve hung every item. This ensures that you aren’t leaving a large space open or leaving something “unbalanced.”
- Once you’ve found the perfect place for all your pieces by visualizing them with the tape or kraft paper, replace them with the real thing! Starting with the tape or kraft paper helps cut down on the number of mistakes and nail holes.
- Sit back and enjoy your gallery wall.
What does it mean for a gallery wall to look balanced?
Have you ever looked at a wall of pictures and thought “that doesn’t look symmetrical?” Sometimes this is the effect the artist is wanting to achieve, but this is not the intent for most gallery walls. You DON’T want one side of the wall to look like it has more frames or larger pieces than the other side of the wall.
How do you fix this? For example, if you have a large picture frame on the left side, counterbalance it with two smaller frames or a similar sized frame on the right side. When your perfect gallery wall is complete, ideally you want to see the same amount of “white space” or wall space on either side of the center.
Does this make sense?
I’ll share some progress pictures of the gallery photo wall including some of these tips.

Find the center of your “gallery wall.” Remember, a good rule of thumb is to make sure the top third of the image is at eye level, which is roughly 60 inches above the ground.


I used painters tape and created an x on this frame so I can place it on the wall and have an idea of the size of the frame. I have three of these frames. Some folks prefer to cut out paper templates of each wall frame to visualize exactly what they will look like on the wall. I find the painter’s tape works just as well and doesn’t take as much time or effort.
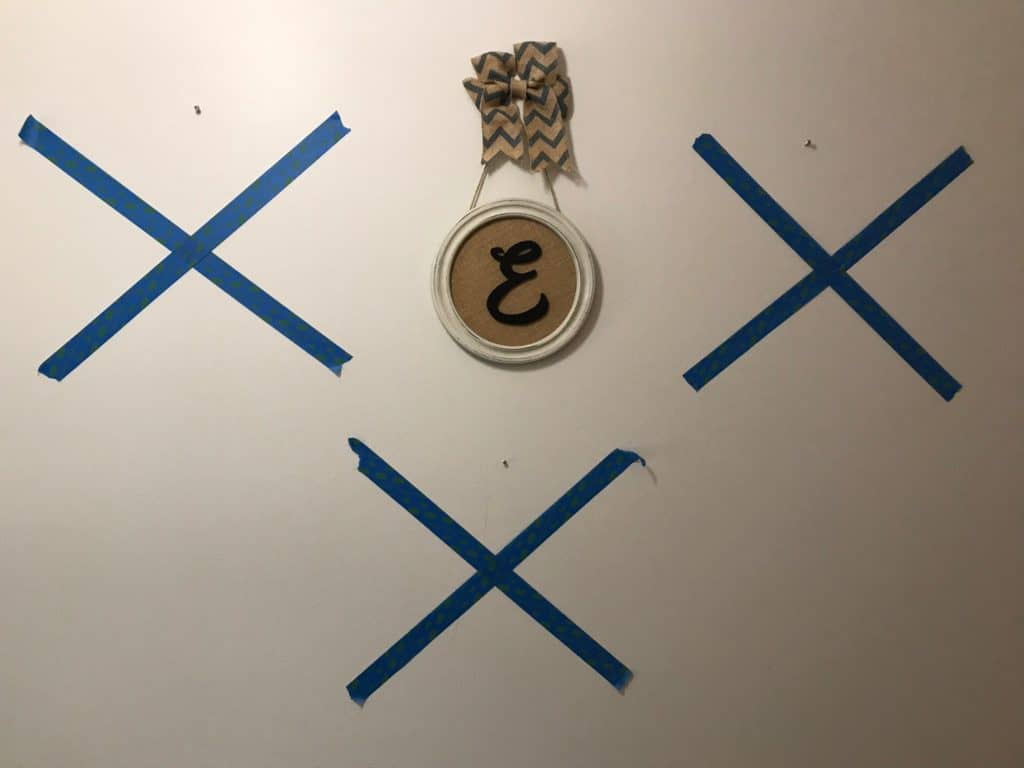
Below you will see how I placed painters tape on the wall to get an idea of how three frames will look. The one bonus about masking tape is that you can easily move it around the wall until you find the perfect spot.

To ensure that my pictures hang evenly, I used painters tape and measured out the same distance from both sides of the center or anchor piece.

Next I used a level to make sure the line on the painters tape is level.

I then measured directly below the anchor piece to find the center.

Once I placed the larger frames on the wall, all that was left was some smaller signs.
You can see how I “balanced” the larger white frame on the right lower side with two smaller frames on the left.


Thanks for stopping by friends! Let me know if you have any questions.
Lindsey**


