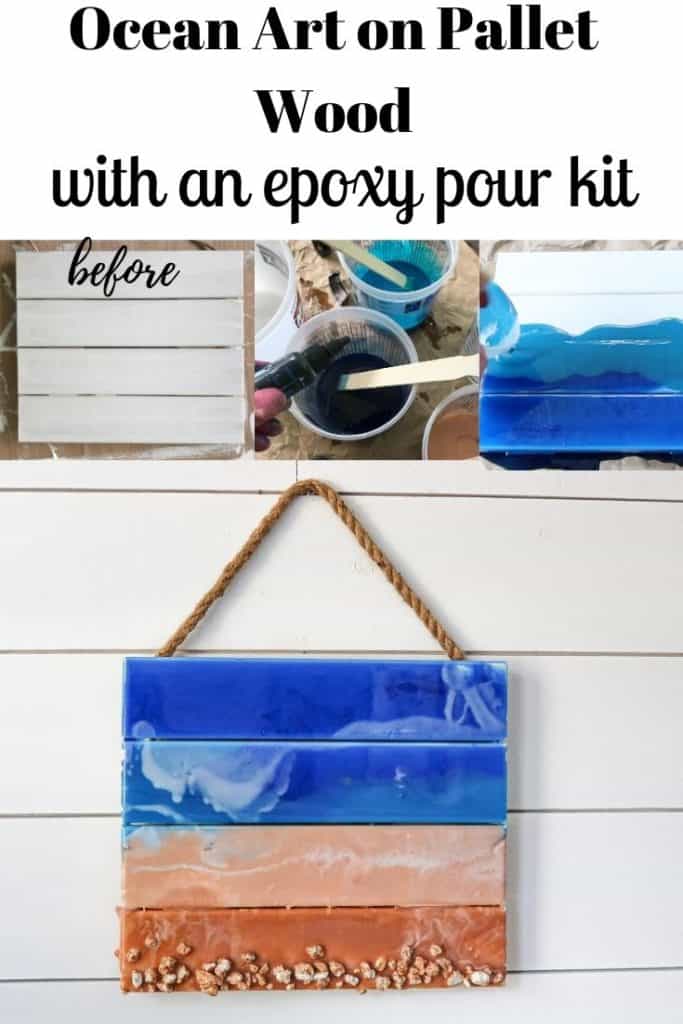
I’ve recently started dabbling in epoxy pouring to create my own art. I love finding new ways to up cycle wood, especially with epoxy. Speaking of up cycling, I can’t wait to show you how I created my own ocean art on a piece of pallet wood! This was a fun project that involves pouring colored epoxy to create a fun ocean scene. I can’t wait to show you how!
Let me first show you the pallet wood wall decor that I purchased from a craft store. You could easily cut this from an actual pallet, but I happened to have one of these already.

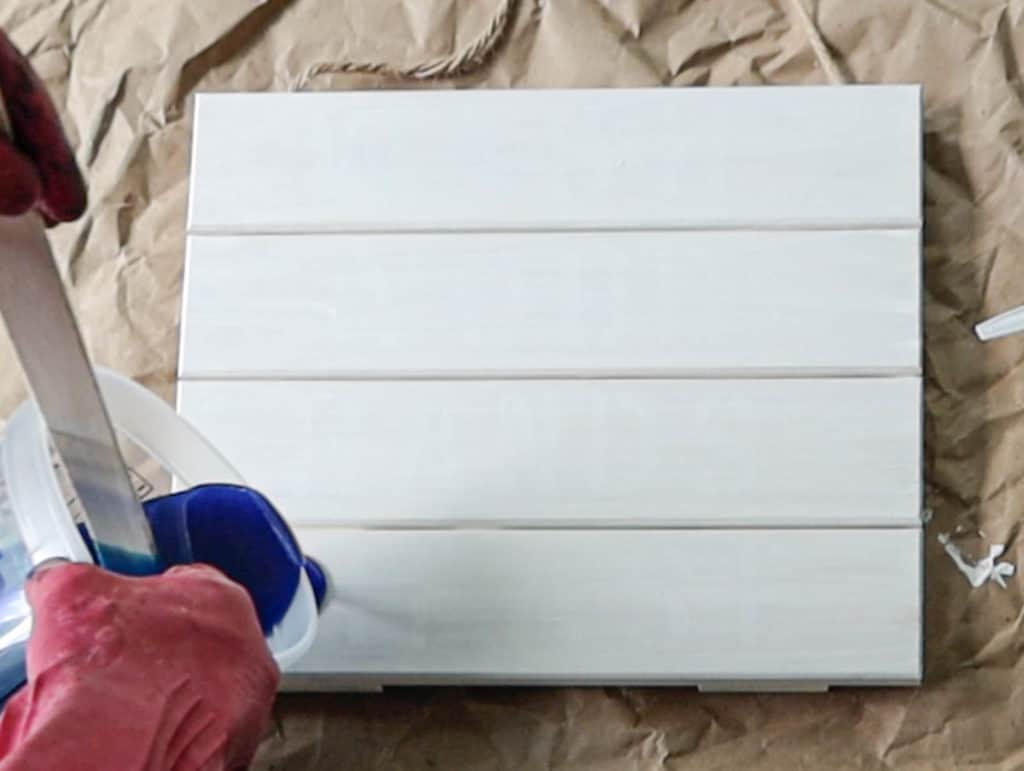
I used regular white acrylic paint to give it a little color. You don’t have to paint it, but since it had been previously used (you can see how I created a wood pallet art sign with a dry brush technique), I needed to create a blank slate. You can use paint or you can use primer too.
Disclosure; this post contains affiliate links. As an Amazon Associate I earn from qualifying purchases. This disclosure statement refers to the rest of the amazon links and other affiliate links in this post.
Did I mention that I got all the materials for this project in an Ocean Art kit through a company called Alumilite? They provide everything you need, including the best epoxy resin, dye to make the resin colors (ocean blue, blue, white, brown), buckets for mixing and even the stir stick or large stir attachment (Since this post was written I can’t find the actual kit anymore, so I’ve linked to the individual products as best as I can). Since this is a deep pour, you need large heavy duty stir sticks not a flimsy popsicle stick! Don’t forget plastic sheeting or a good drop cloth.
Side note; you can also buy pigment powders to mix in clear epoxy resin. Sometimes you can find more variety of colors with the powders than with the dyes.


Before I get into the epoxy pour project, I often get asked “what’s the difference between acrylic pour paintings and epoxy pour paintings?”
In a nutshell, acrylic pouring and epoxy pouring are both popular techniques in fluid art, but they involve different materials and processes:
Acrylic Pouring:
- Medium: Uses acrylic paints mixed with a pouring medium (like Floetrol or a similar product) to achieve a fluid acrylic paintings which some call fluid acrylics or even dutch pour painting.
- Surface: Typically done on canvas or wood panels.
- Drying Time: Dries relatively quickly, usually within a few hours to a day, depending on the thickness and environmental conditions.
- Finish: The final surface can be matte or glossy, depending on the pouring medium used.
- Techniques: Common techniques include the flip cup, dirty pour, and ring pour, allowing for vibrant colors and interesting patterns.
Epoxy Pouring:
- Medium: Involves epoxy resin mixed with a hardener. The mixture cures to a solid finish.
- Surface: Can be applied to a variety of surfaces, including wood, canvas, and even tabletops or coasters.
- Curing Time: Takes longer to cure, often 24 hours to several days, depending on the product and thickness.
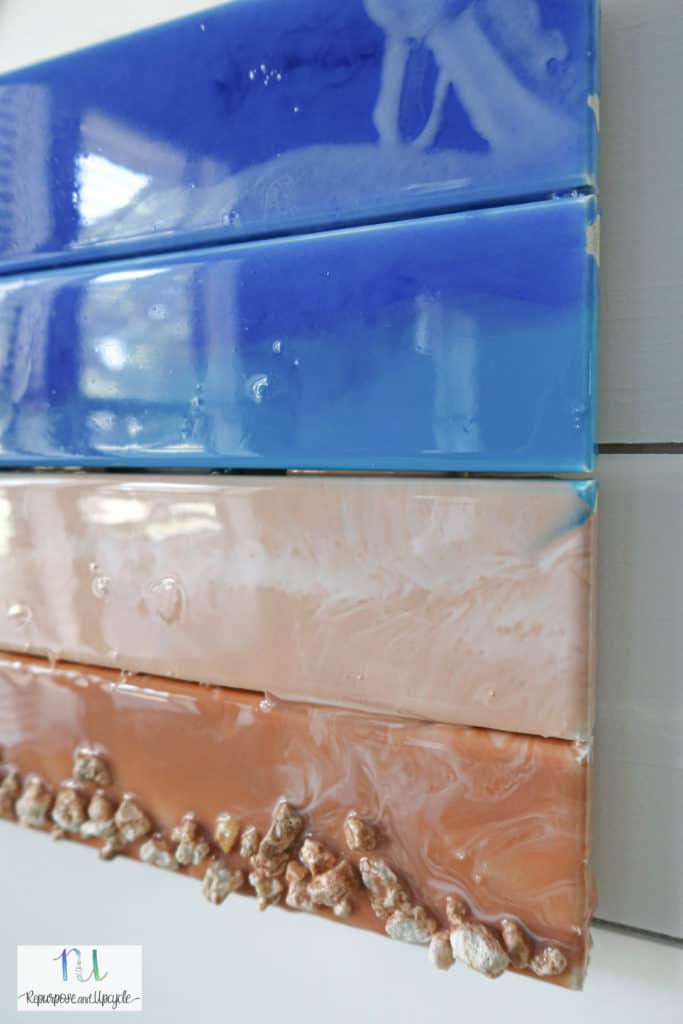
- Finish: Results in a very glossy, durable, and often waterproof finish, making it suitable for functional items.
- Techniques: Techniques can include layering colors, creating cells, and using heat to manipulate the resin.
DIY ocean art project with an epoxy resin pour on pallet wood
The first thing you need to do is mix equal parts A and B together for 4-6 minutes. Make sure to use the mixing attachment with the drill- this makes mixing a breeze!
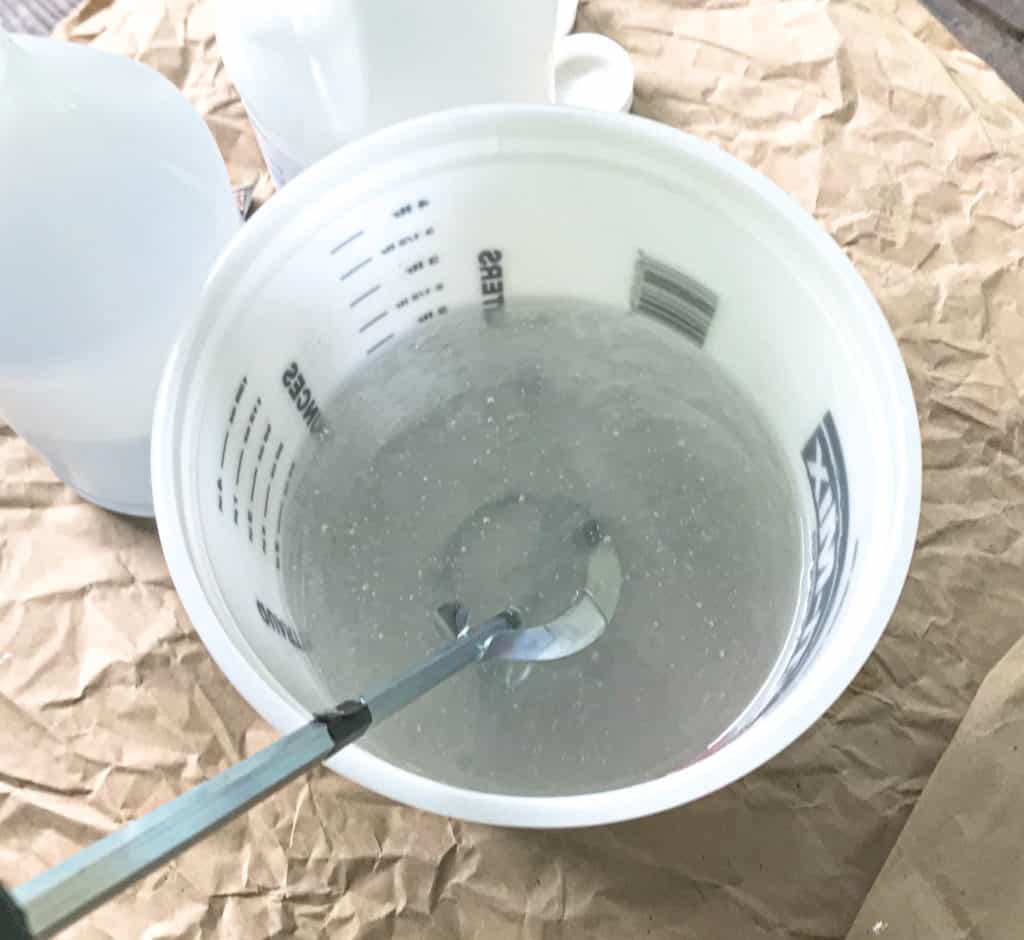
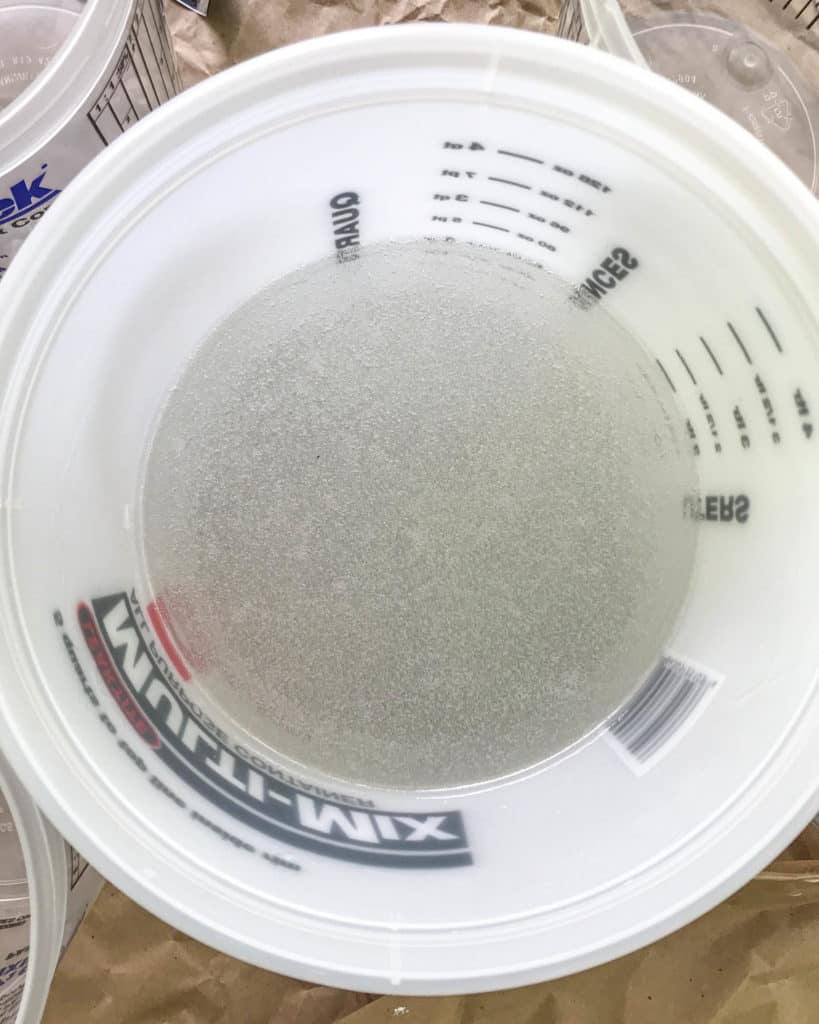
This is what the epoxy should look like after it’s mixed. For best results, make sure to mix for the entire time that is suggested- this is so important! If you see streaks or anything cloudy (minus air bubbles) that means you have not mixed enough!
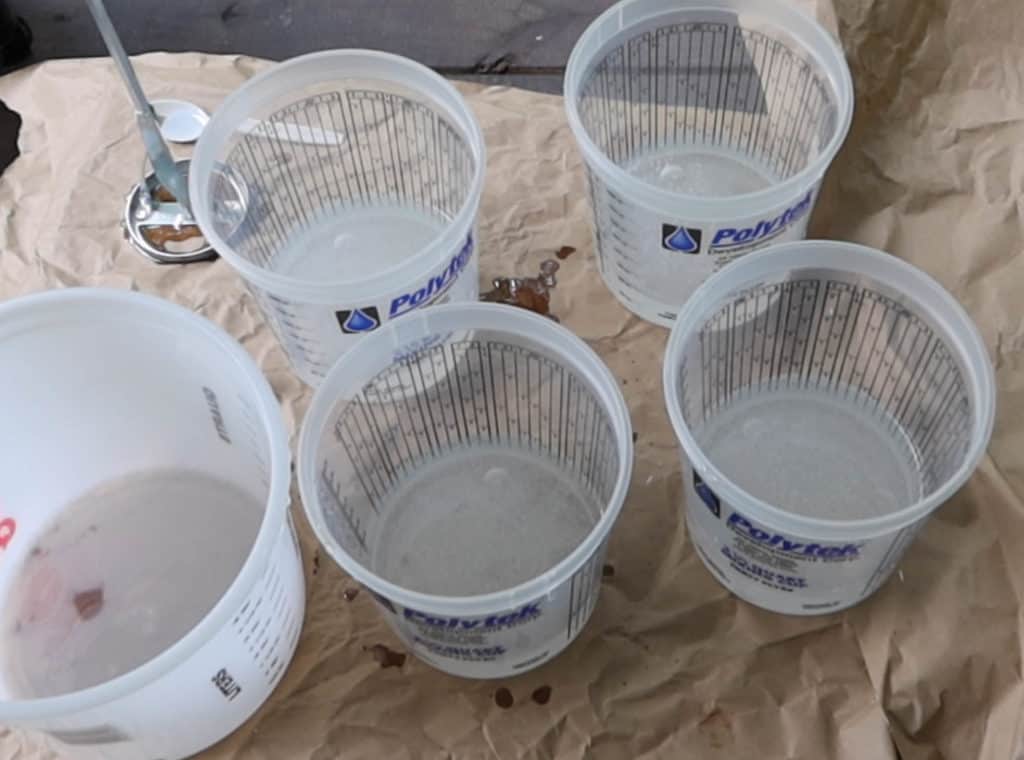
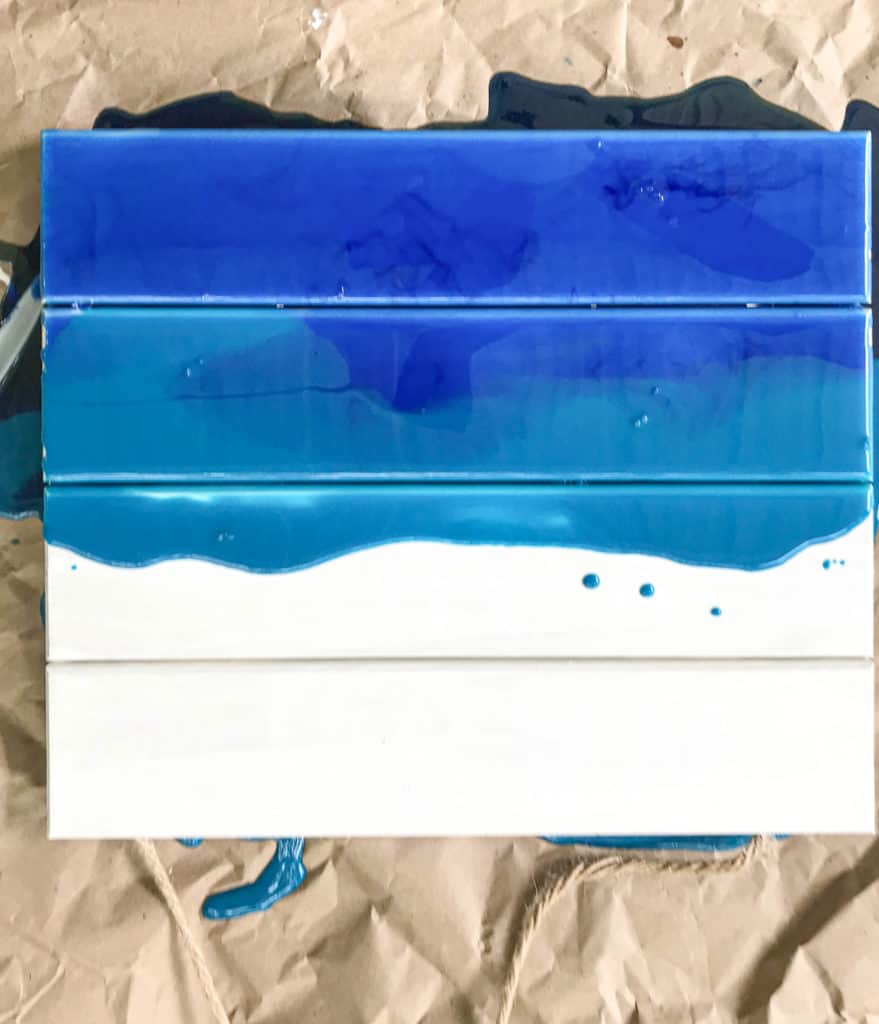
Next use your big bucket to pour your epoxy resin into the smaller four buckets. Make sure to leave an equal amount in the large bucket. You will have five colors (blue, dark blue, tan, white and clear).
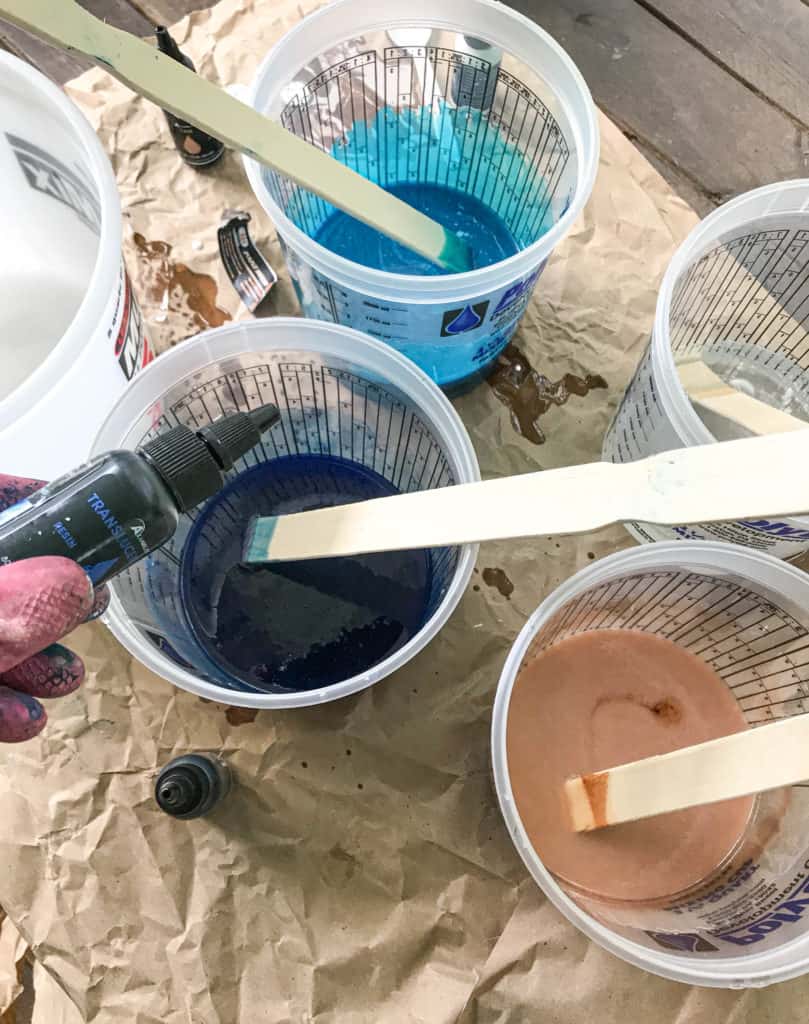
Follow the instructions to add color to each smaller bucket of epoxy. Mix them really well.
Decide about where you want to pour the different colors. You can make marks with a pencil if you need to. I used the wood slats to mark the delineation between colors.
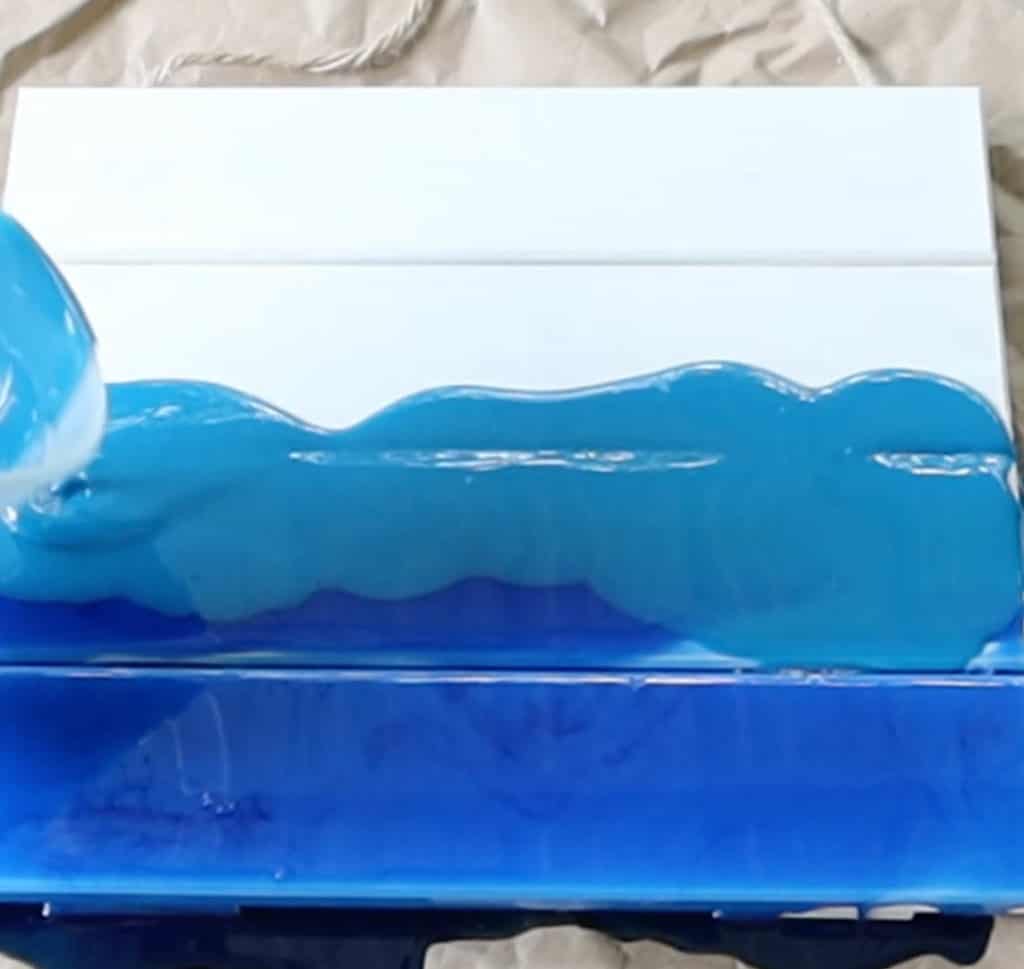
Pour the light blue above the dark blue making sure to mix the colors a little.
At this point you can use either a blow dryer or heat gun to blend the colors together to make it look more “fluid.”
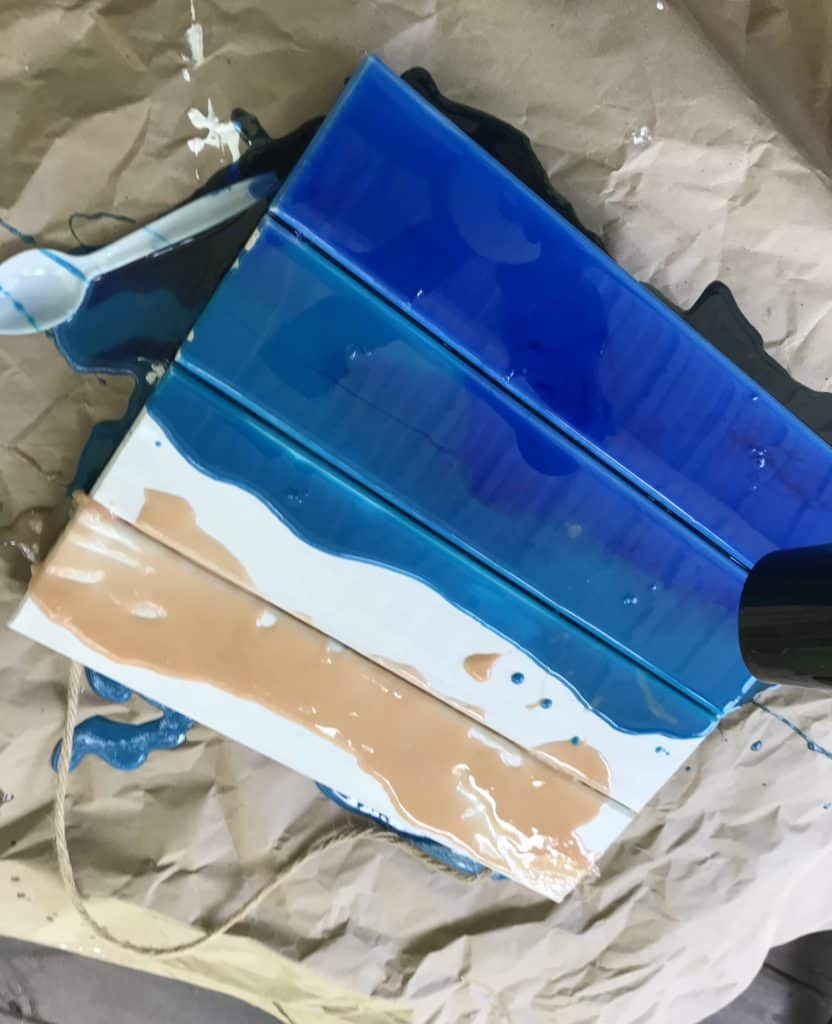
Here is where I hit a snag. When I started pouring the tan epoxy I noticed it already started to harden. I couldn’t believe how quick that chemical reaction began and how easily the resin cures to a high gloss finish! Ugh. Good thing I left extra part A and part B because I needed to mix more.
Note to self; work fast after mixing the epoxy resin. I’m so bad about getting distracted, LOL. That being said, it had only been about 20 minutes since I mixed the epoxy.

After I mixed and added more tan epoxy resin I decided to drop a few pieces of gravel to make the “beach area” look more realistic.
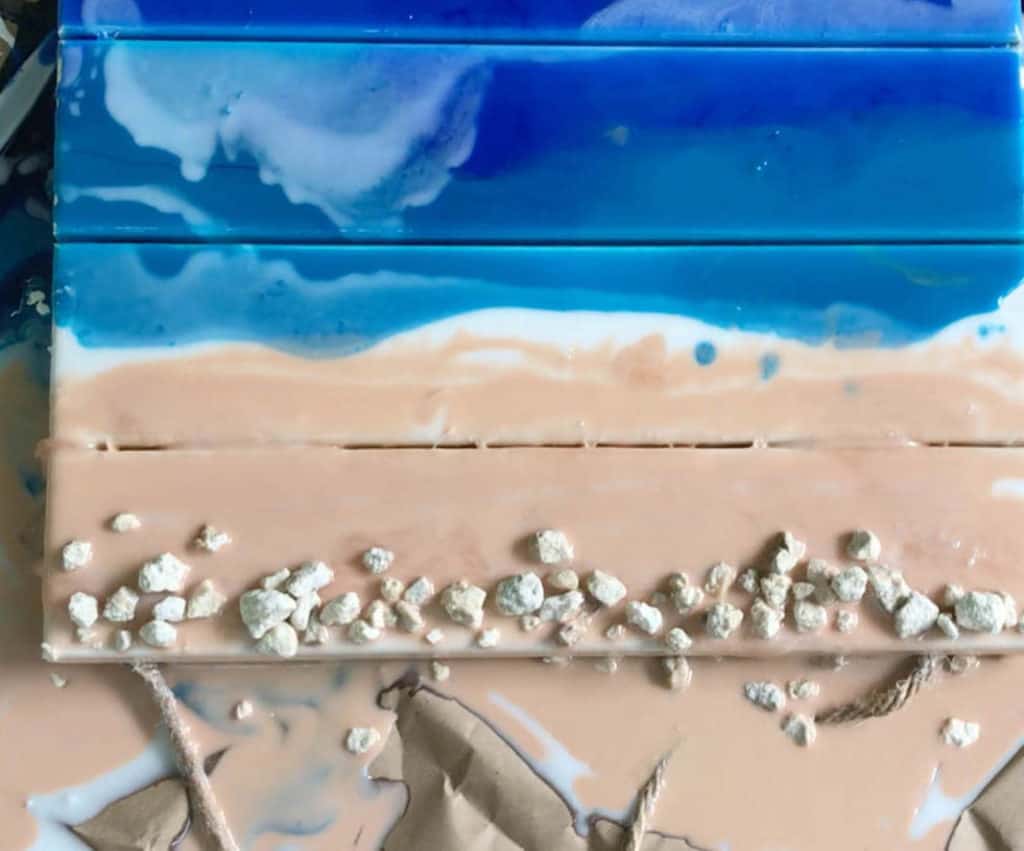
At this point I still wasn’t totally satisfied with the ocean art scene, so I decided to mix a little more tan epoxy- this time I decided to make it a little darker.
After a little more trial and error with the colors and using the hair dryer, I decided to call it quits.
Oh, I almost forgot to add that I hot glued a little rope to the top!
Video Tutorial on how to pour epoxy to create ocean art
My new ocean art epoxy pour

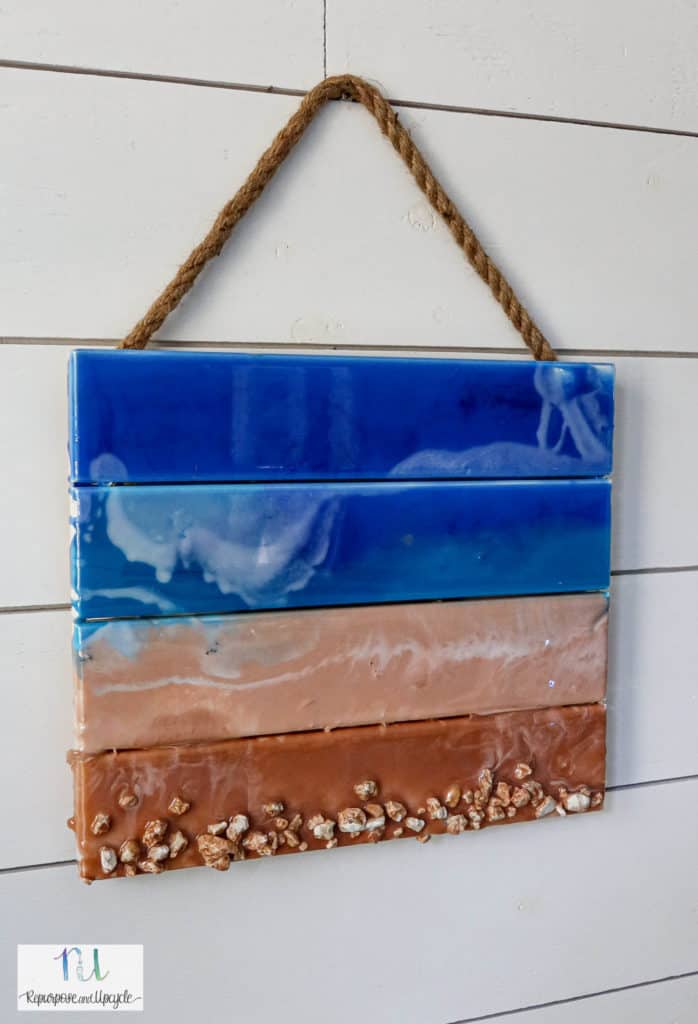
I love how it turned out and it was so much fun to create! It took a little trial and error, but that’s all part of the process right?
See you next time!
Lindsey**


