Since moving into our rustic beach cottage we’ve transformed quite a few of our many ugly bifold doors. From converting bifold doors into swinging cafe doors to repurposing bifold doors as lights, this isn’t my first rodeo trying to update these old 1980 style doors. This post, however, is all about updating my son’s closet doors and turning them into classic swinging doors or french doors.
When I first started on this bedroom door adventure, my intention was to purchase sliding barn door hardware and turn the bifold doors into sliding bifold door with barn door hardware. As a matter of fact, I even purchased the bifold barn door hardware!
Sadly, after they were delivered, I realized that I would have to purchase four new bi-fold doors as well because the current ones weren’t tall enough. Duh. I thought and thought about how I could make it work without buying new doors, but in the end, I decided it was best to return the hardware and start over. Ugh
I did look at purchasing 4 new doors, but the cost would have been near $1000. Nope! That wasn’t worth it in my book.

Then it hit me, duh!
What is the most affordable way to update a bifold door?
The most affordable and easiest way to update a set of existing bifold doors is to use hinge hardware and mending braces and turn them into classic swinging doors.
YES!
When I say classic swinging doors, I mean the classic hinged doors. Since I have two sets of hinged doors that swing open and meet in the middle, these doors can also be called French doors.
Different Types of doors
When it comes to updating bifold doors into classic swinging doors or French doors, it’s important to understand the different types of doors available. Here are some common door types and their characteristics:
Hinged Doors
Hinged doors are the most common type of interior door. They swing open on hinges and are available in a variety of styles and materials. Hinged doors can be single or double, and can be solid or have glass panels. They are a good choice for rooms that require privacy, such as bedrooms and bathrooms.
Sliding Doors
Sliding doors are a popular choice for closets and small spaces. They slide open and closed on tracks and are available in a variety of styles and materials. Sliding doors can be single or double, and can be solid or have glass panels. They are a good choice for rooms where space is limited, as they don’t require any clearance to swing open.
French Doors
French doors are a classic choice for interior and exterior doors. They consist of two hinged doors that swing open on hinges and meet in the middle. French doors are available in a variety of styles and materials, and can be solid or have glass panels. They are a good choice for rooms that require a touch of elegance, such as dining rooms and living rooms.
Bifold Doors
Bifold doors consist of two or more panels that fold in half and slide on tracks. They are a popular choice for closets and small spaces. Bifold doors are available in a variety of styles and materials, and can be solid or have glass panels. They are a good choice for rooms where space is limited, as they don’t require any clearance to swing open.
Louvered doors
Louvered doors are doors that have horizontal slats angled to allow for ventilation and airflow while still maintaining privacy. They are commonly used for closets, utility rooms, and other areas where ventilation is important. These doors are also popular for their aesthetic appeal and can be made from various materials such as wood, metal, or composite materials.
One thing to note; the main purpose of bifold doors is to take up less space when they are opened. Because we are “mending” two doors together, you will need approximately double the floor space for the door opening. Keep that in mind when deciding if this is the type of project for your space.
Honestly, we don’t have a lot of space in my sons room, but it still wasn’t worth spending $1000 on new doors.
Now that we have a plan, let’s look at this set of bifold doors, shall we?

These doors haven’t ever lined up correctly and have a tendency to fall off of their track. What a pain!
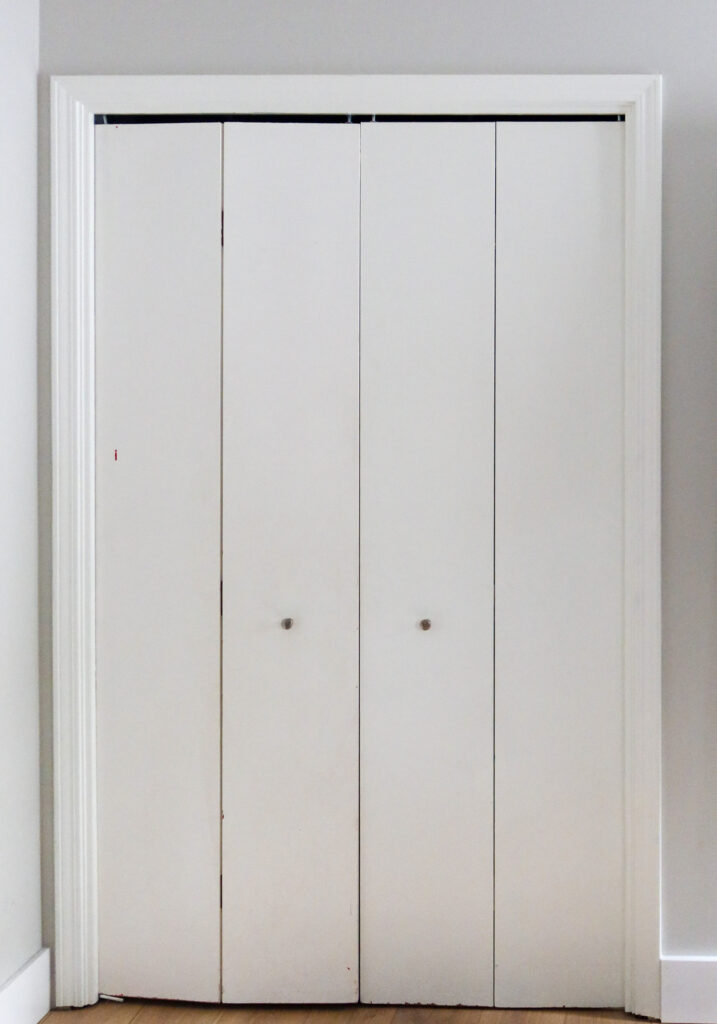
Here is a look at just one set of the old 1980’s bifold doors. They need a good paint job too. Let’s get to it!
Disclosure; this post contains affiliate links. As an Amazon Associate I earn from qualifying purchases. This disclosure statement refers to the rest of the Amazon links in this post. See more on my disclosure page.
Materials Needed
To update bifold doors into classic swinging doors or French doors, you will need the following materials:
- Measuring tape
- Drill
- Screws
- wood glue
- Hinges- 3.5″ (make sure to measure the width of your doors first)
- nail gun (Brad nailer)
- 5/8″ brad nails
- Sand paper
- electric sander
- Paint or stain (optional)
- Primer
- paint sprayer
- Mending braces
- Standard bifold door (s)
- Paint able wood putty
- Water putty
- Magnetic catch hardware
- 1/4 by 1-1/2 Lattice Molding
- Miter saw
- painter’s tape
Removing Bi Fold door hardware
Once you have everything you need to start your DIY project, remove the bifold doors from the track and remove any hardware that may be attached to the door frame. A lot of times, bifold door frames will have extra trim pieces that will need to be removed too. These trim pieces helped keep the bi-fold doors from swinging out, but they will also prevent your French doors from opening if you don’t remove them. Don’t forget to remove the door knobs as well especially if you plan on giving the doors a makeover.
DIY Bifold door makeover
This is my favorite part of the makeover; updating those dated doors that were in dire need of a face lift. First things first though; attaching two bifold doors together with mending braces.
How do you make two bifold doors into one door?
The easiest way to attach two smaller bifold doors together is to add mending hardware down the center of the back of the door. You can see below where I used two mending braces to securely hold two doors together. There might be other options to attach the doors but this was the easiest in my opinion.

Once I secured the doors with mending hardware, I had to close up that seam line to make it look like one door.
My favorite go-to wood filler putty is water putty. I like it better than Bondo mainly because I think it’s easier to mix.
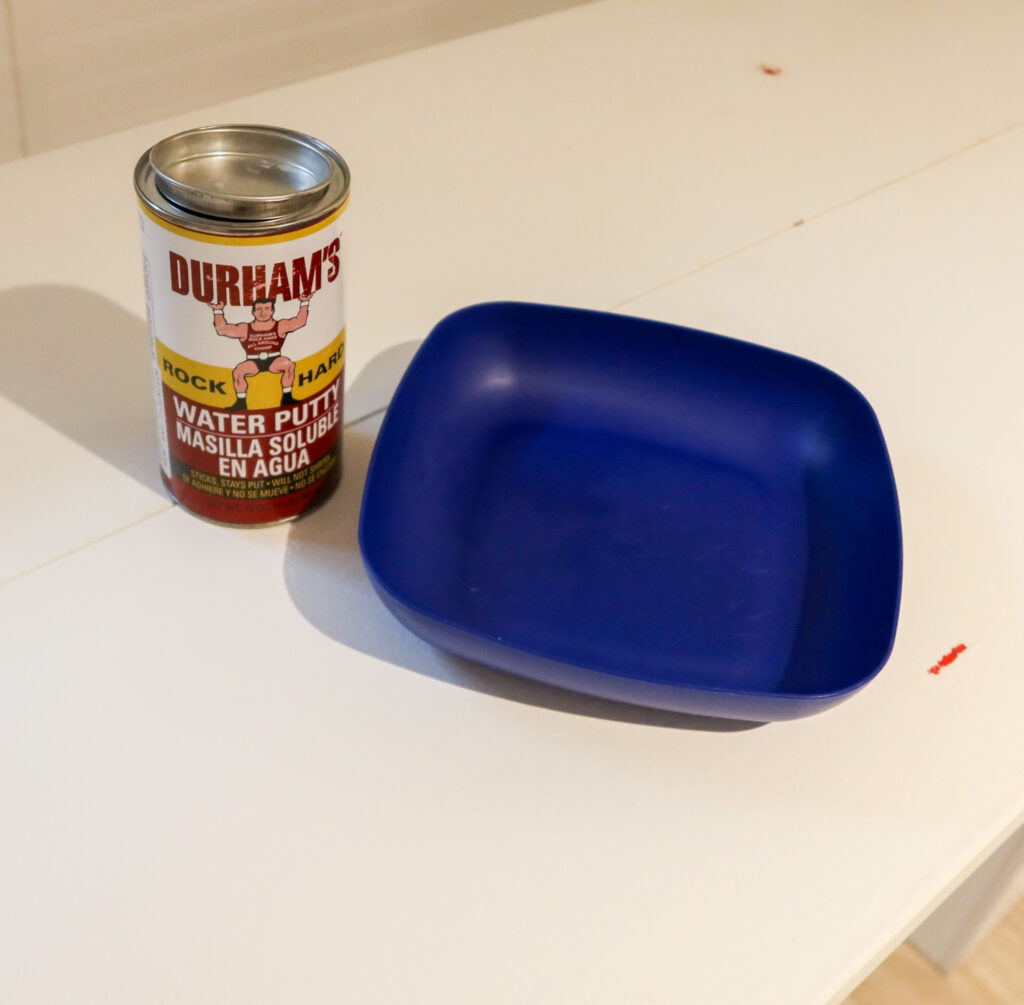
You can see in the video how easy it is to mix. I applied it to both sides of the doors.
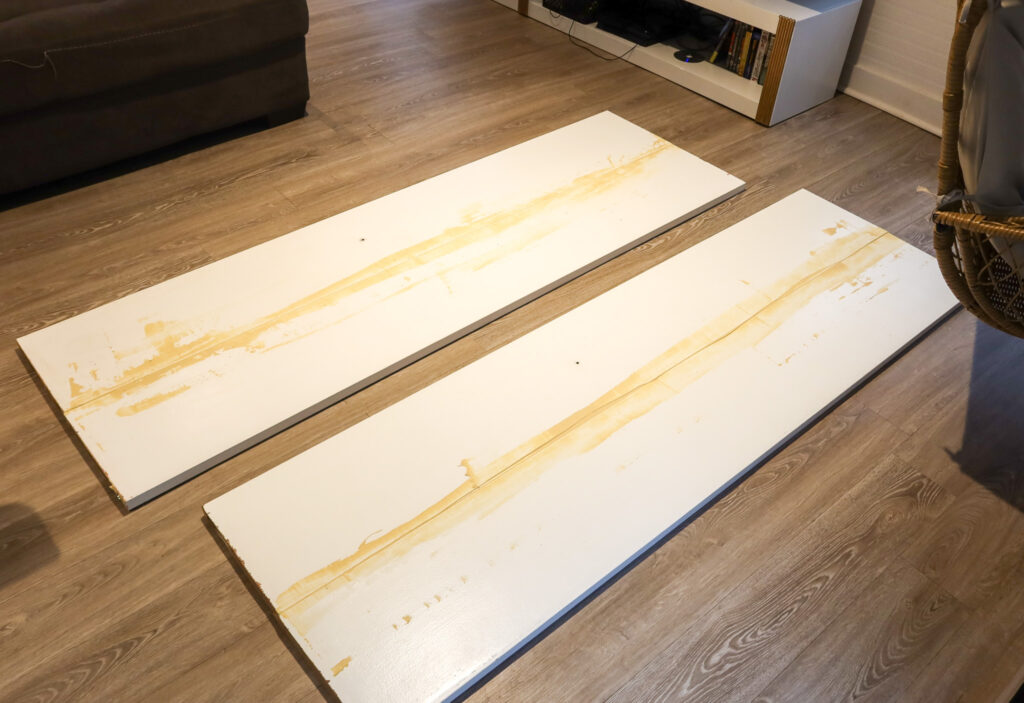
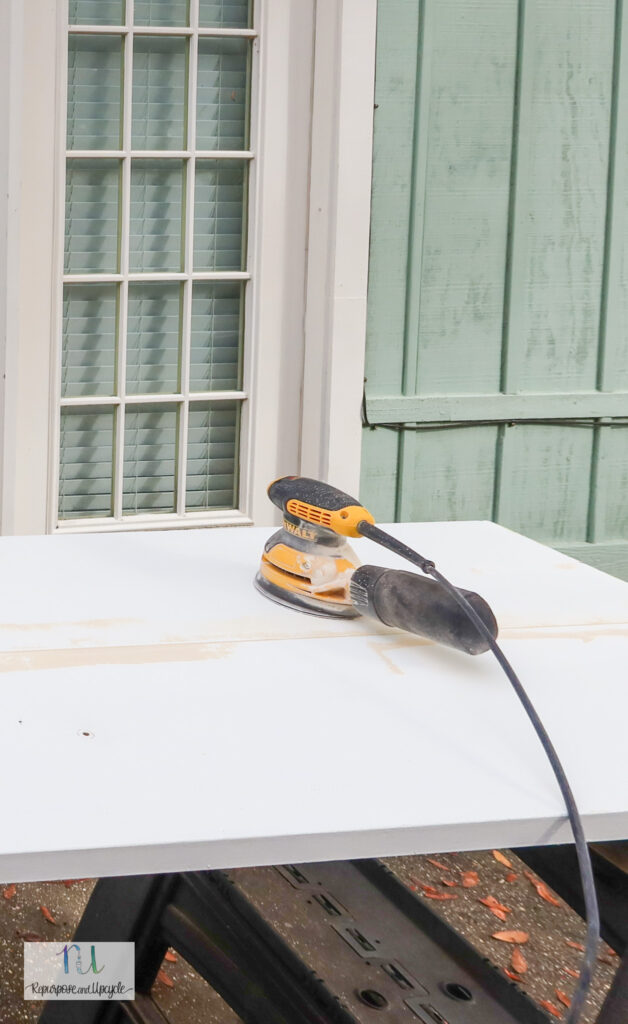
It dries to a really hard consistency. I attempted to use a block hand sander to sand it smooth but then I got smart and pulled out my electric sander.
After I sanded down the doors (both sides) I realized it didn’t look as “seamless” as I wanted it to. I thought about adding another layer of water putty, but I decided to add a strip of lattice molding down the middle to cover the front of it. The back side of the doors looked decent enough not to worry about adding lattice or redoing the putty.
Adding lattice molding was the key to giving this door a real “updated look.” Lattice molding is affordable and a simple way to give a flat door a little dimension.
Adding lattice molding to the front of the door
In order to keep things simple, I installed 3 strips vertically and 3 strips horizontally. Once I measured how much I needed to cut, I made straight cuts with the miter saw. Then I laid it out on the door front to make sure it looked ok.

I used my nail gun with 5/8″ brad nails to secure the wood slats to the old doors. Once the lattice was attached, make sure to use wood filler or paintable wood putty to cover up the nail holes and the seams where the lattice was cut. Lastly, I used a fine grit sandpaper and my electric sander to make sure it was good and smooth.
Now time to paint!
I sat the doors upright in my garage and used a damp paper towel to remove any dust and debris.
Painting the updated bifold doors
Before you begin using a paint product, always use at least one coat of a good primer product. Primer is necessary to not only help the paint adhere well, but to also cover any old paint or stains that might bleed through the paint.

I used my trustee paint sprayer to apply one coat of primer and two coats of paint.
As far as paint goes, I used a white Behr cabinet paint in satin. You can see where I previously did a blog post testing the Best White Paint for Kitchen Cabinets. One thing I liked about this paint was it’s durability. You can use any paint color, but I always prefer a classic white satin color.
Installing french door hardware
Now for the fun part; installing the hardware to give these doors functionality and more like a regular door!

I installed the hinge hardware on each door (I used two hinges per door) and then used a few books to sit under the door in the doorway to gauge how high each door needed to be installed (refer to the video for more information on this).
Once the doors were put up, I installed the magnetic catch hardware. I had to use a scrap piece of wood to attach the hardware to.
Also make sure to add the finishing touches with the knobs or pulls.

Now I have two sets of functioning and updated hollow core doors! Or should I say updated swinging bifold doors!
Make sure to check out 10 DIY bifold door ideas here before you leave!
DIY Bi-fold closet doors turned into french doors or double doors
I’m so excited with how these doors turned out. As a matter of fact, I wish I had completed this DIY 4 years ago.
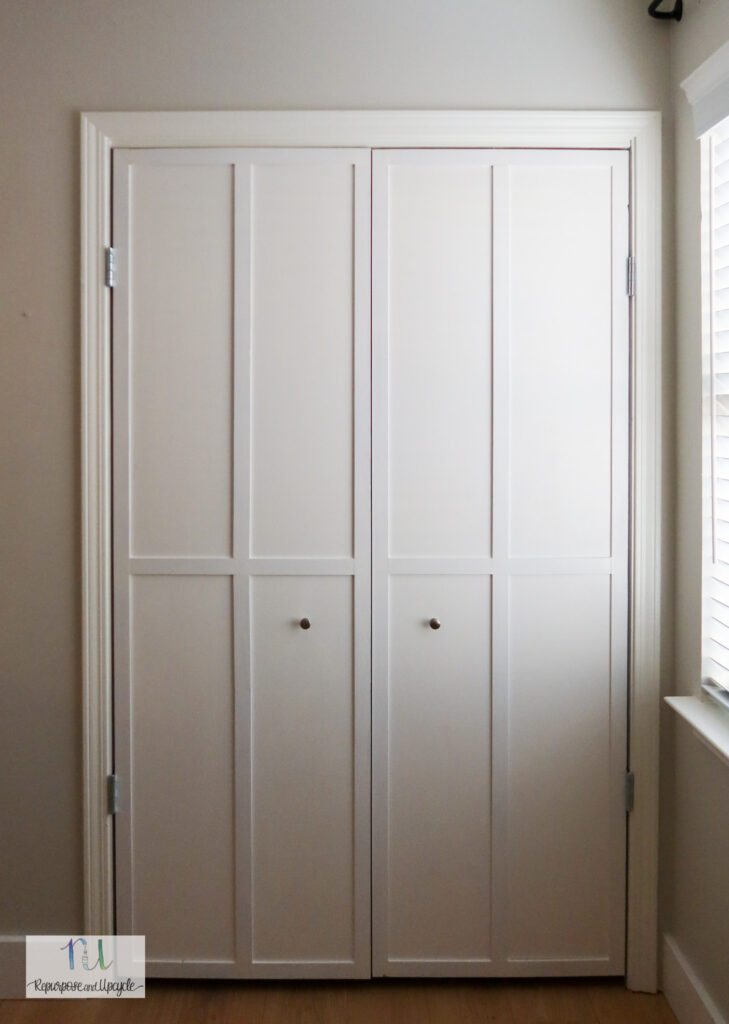
What do you think? I love how the trim work really elevates the look of this room.

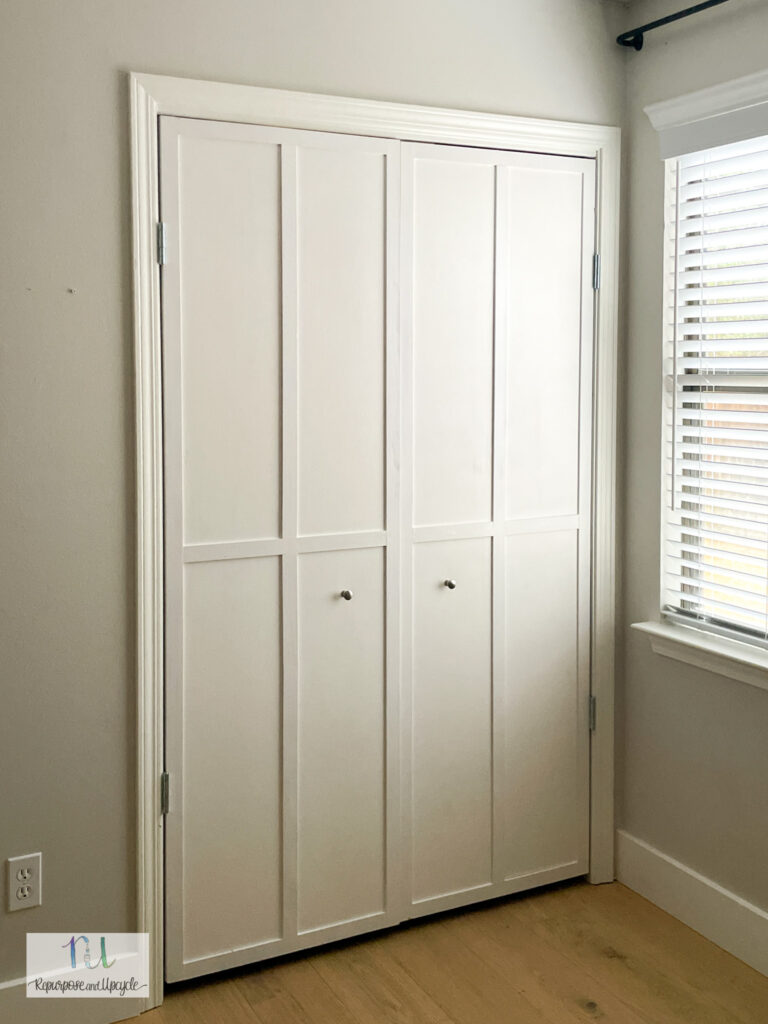
I love how a little moulding can add such dimension to a flat surface! I’m no stranger to adding all sorts of molding all over our house. Check out 10 wall moulding ideas that you can do in your house.

I hope this great project has given you an idea of how to update your old bifold doors.
Until the next project…


