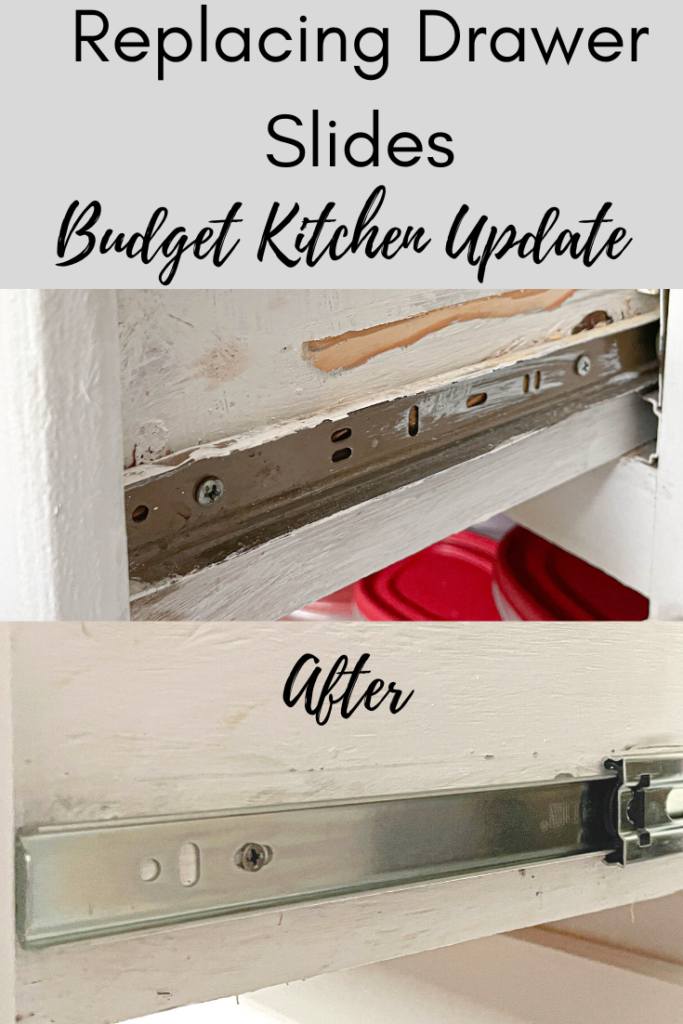
Learn about replacing drawer slides for our budget kitchen update. I’ve shared how I replaced our old drawer glides with new ones.
I’m no stranger to budget kitchen renovations. As a matter of fact, in our last home (builder grade turned modern farmhouse) I gave that lovely kitchen a HUGE update for under four thousand dollars!
Guess what? Times have changed and so have prices. Getting away with a kitchen renovation under five thousand dollars is impossible these days.
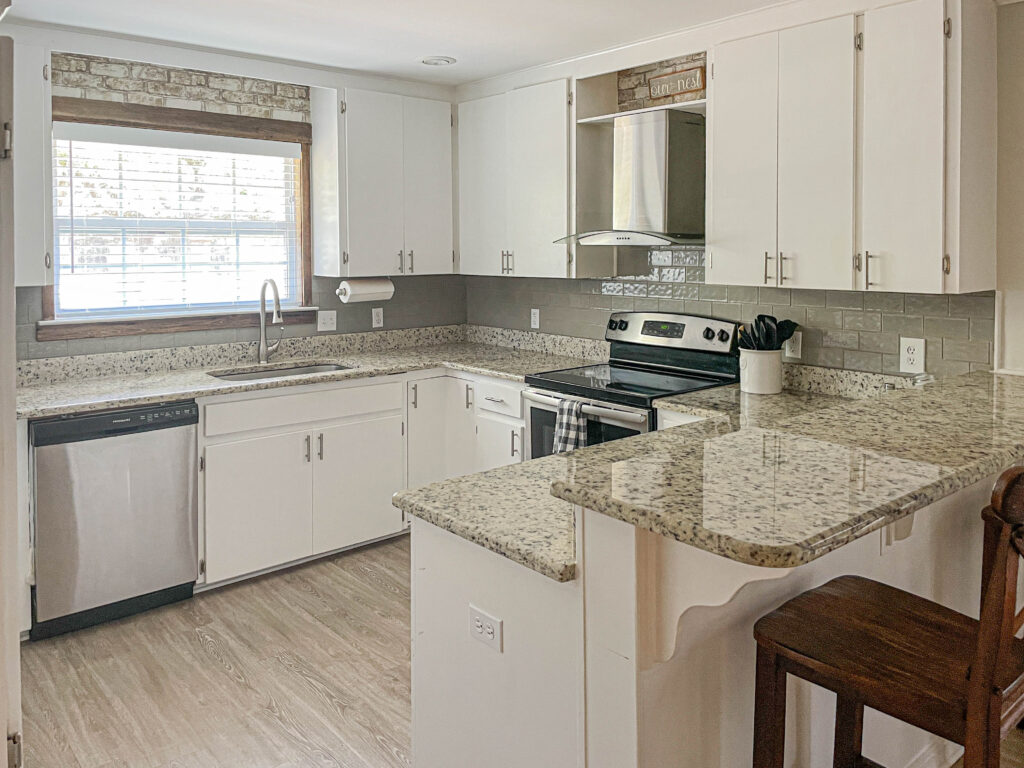
When we moved into our rustic beach house, the plan was to gut the 1980’s kitchen within 3 years and give it a full makeover.
Even though it went through a “facelift” with the previous owners, all the cabinets were still that original pine wood and desperately need help.
Fast forward four years… A lot has happened in the world and to us.
Not only has inflation gone nuts, but my husband and I recently bought a business which makes our finances not nearly as stable as they used to be.
Long story short; our full gut job of a kitchen is on hold- or permanently scratched.
On to plan B!
My first thought was to keep the existing blueprint of the kitchen and purchase new drawers and/or cabinet faces. Then I started looking at prices….
When I realized it might cost as much (or nearly as much) to purchase the new drawers and faces than it would to buy new cabinets, I had to compromise.
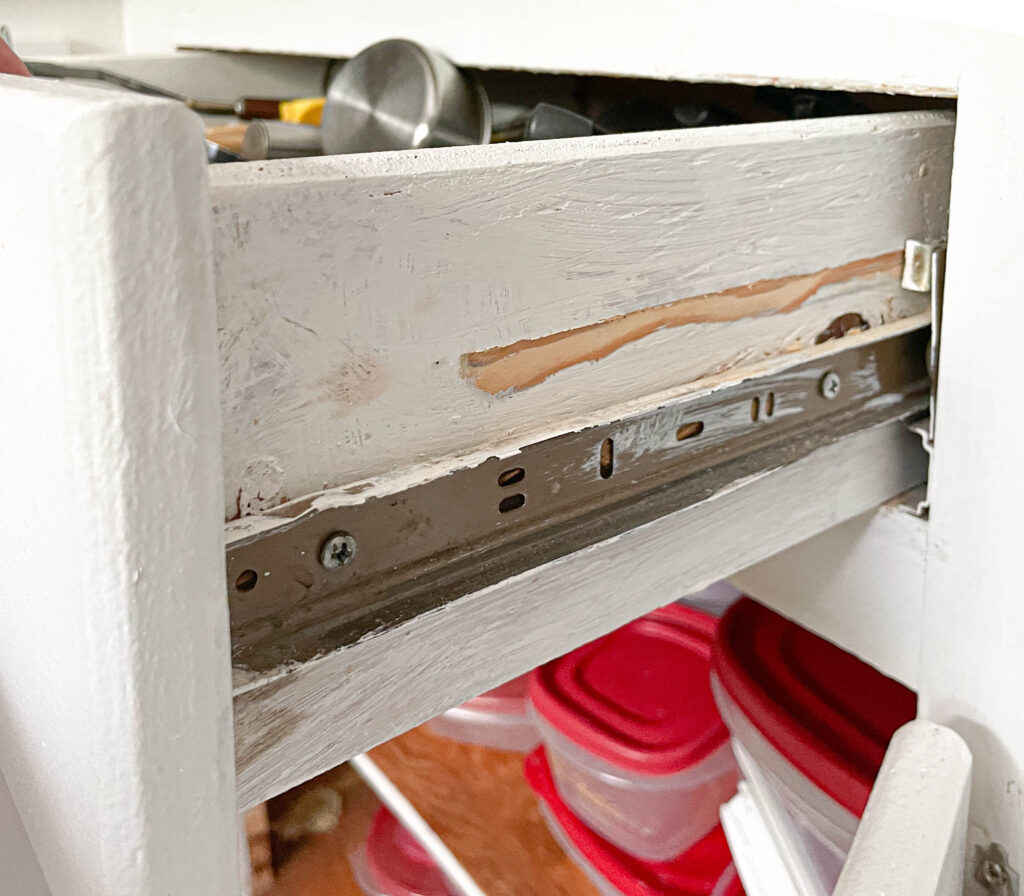
There were a handful of things that need replacing in our kitchen ASAP. The first was the drawer slides. Even though the drawers were old wood and pretty disgusting, I could always give them a good clean and paint job.
The drawer slides had to go though…
Half of them wouldn’t even open and the other half were so old and crusty it was embarrassing.
I’m pushing aside my embarrassment to show you a hint of what the old roller drawer slides look like below.
This is my first post in a series of budget kitchen update posts.
Disclosure; this post contains affiliate links. As an Amazon Associate I earn from qualifying purchases. This disclosure statement refers to the rest of the Amazon links in this post.
Let’s first discuss a little about the different types and options of drawer glides.
Drawer slides types
There are generally three main types of drawer slides.
- Ball bearing drawer slide
- Roller drawer slide
- Wooden drawer slide
Ball bearing drawer slides
Ball bearing drawer slides move on a set of stainless steel ball bearings to provide a smooth, quiet operation. These types of slides can be purchased with the option of soft close, push to close and self close.
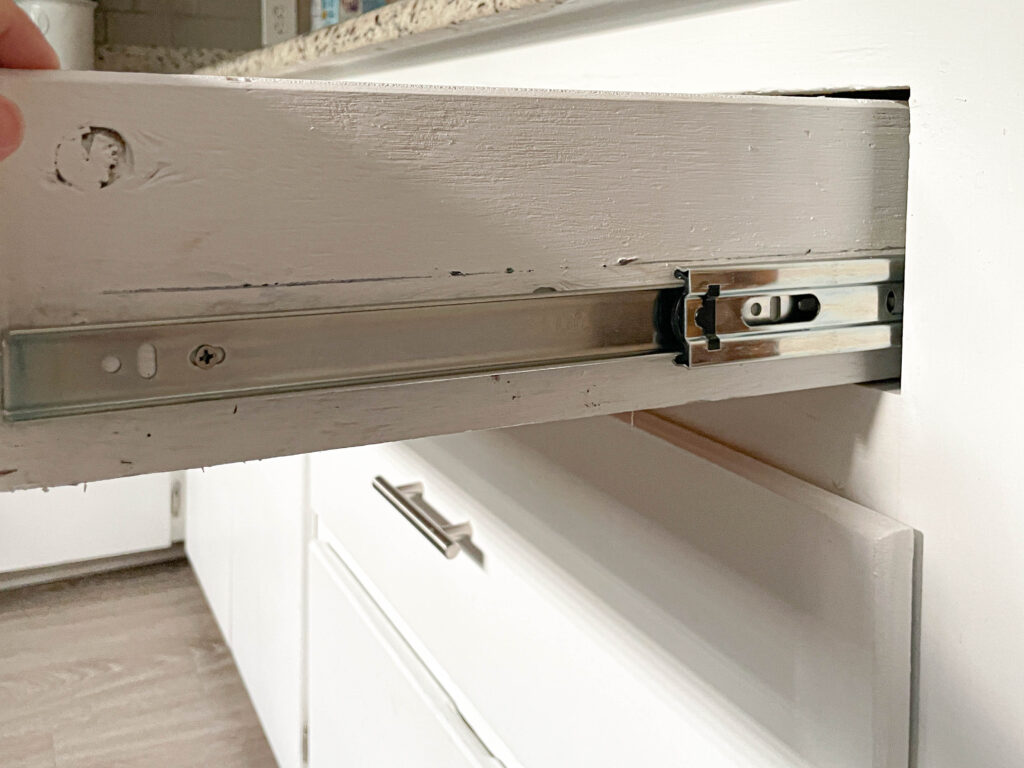
I purchased 10 push to close ball bearing slides for my kitchen drawers.
Roller drawer slides
These are normally a bit cheaper than the ball bearing slides and don’t offer as many options. They often have a plastic or nylon roller on a metal track. They are usually not as quiet to open and close and they wear out quicker.
The old drawer slides that I’m replacing are roller drawer slides (like you saw in the first picture on this post).
Wooden drawer slide
In older furniture and cabinets you might also find what’s called wooden drawer slides. Wooden drawer slides are exactly what they say; two pieces of wood that slide between each other. Wooden slides are rarely seen in a kitchen today.
Types of Drawer Glide options
- Center mount drawer slides – A single slide found on the bottom of the drawer (not visible).
- Undermount drawer slides – Two slides attached to the underneath (invisible) of the drawer and side. Most undermounts come in limited lengths of 12″, 15″, 18″ and 21″.
- Side mount door slides– side mount slides are available in 2″ increments from 10″ up to 72″ and make them a great fit for any cabinet or furniture.
These options come in either a ball bearing, roller or wooden drawer slides and delineate where the slide will be installed.
Side mount drawer slides
Side mount drawer slides are just as they say; they mount on each side of the drawer. So one drawer will have two side mount drawer slides. They will hold more weight than a center mount drawer slide which makes them a good choice for a kitchen.
Center mount drawer slides
Center mount drawer slides are mounted beneath the drawer centers and are intended for extremely light applications.
Undermount drawer slides
Undermount drawer slides are two slides found beneath the box of the drawer. They hold the most weight and provide more support than side mounts and center mounts. They are a good choice for large drawers.
Soft Close vs. Self Close Drawer slides
Soft close drawer slides simply mean that they “slide” closed.
Self close drawer slides have a built in element that automatically pulls the drawer closed once it reaches a certain point.
How to measure for drawer slides
- Choose which type of slide you will be purchasing (center mount, undermount or side mount).
- Measure the length of the drawer where the slide will be mounted (don’t include the drawer face).
- Choose a slide equal to or less than the length of it.
The general rule is to measure the depth of the cabinet, then subtract 1/2-inch and round down to the next even number.
Our drawers measured 23″ deep so I subtracted 1/2″ and rounded to 22″. That’s how I figured out the length on the drawer slides. Also, since I was removing side mount drawer slides, I figured I would stick with the same type of glides.
I chose to install side mount ball bearing drawer slides. I installed them on each side closer to the bottom of the drawer because I knew that some of these drawers would be holding a good amount of weight with heavy pots and pans (and silverware isn’t light!). My thought was that I wanted the drawer slide near the “weight” of the drawer.
Check out my review video below!
Replacing Side Mount Drawer Slides
Installing the side mount drawer slides (or replacing them) was a fairly easy task.
- Remove the drawer
- Remove the old drawer slides
- Measure for the new drawer glides
- Install the new drawer slides
I’m so pleased that these drawers feel new without having to buy an entire new set of drawers! Not to mention that they function so much better!
I’ll be sharing more details about our budget kitchen update soon. Step 1 down, now onto adding new metal pull out cabinets.
Lindsey**


