Skip to Content

Replacing the Builder Grade Boob Light or Dome Light with a Lampshade

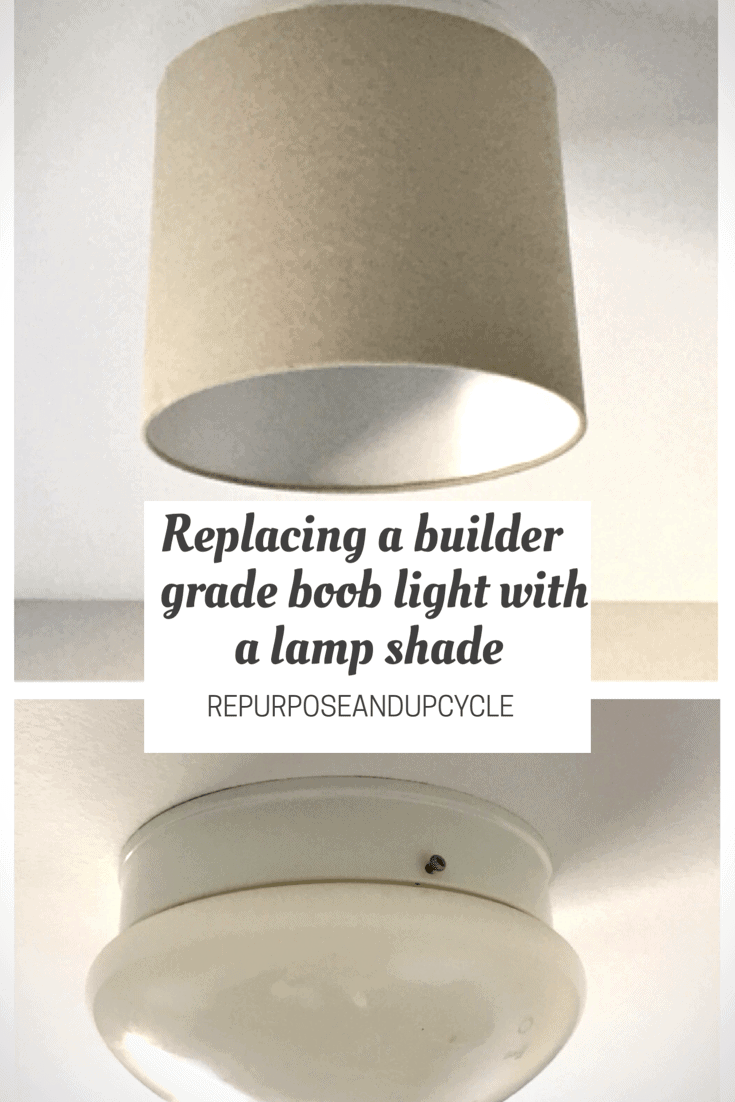
I didn’t know how to title this post; How to get rid of the boob light? The easy way to hide the dome? Removing the boob, with almost no money and very little time? There is no better way to title this post other than just calling it what it is; Replacing the builder grade boob light or dome light with a lampshade.

For those of you reading who have no idea what I’m talking about, let me show you the ugly truth.

the boob light or dome light

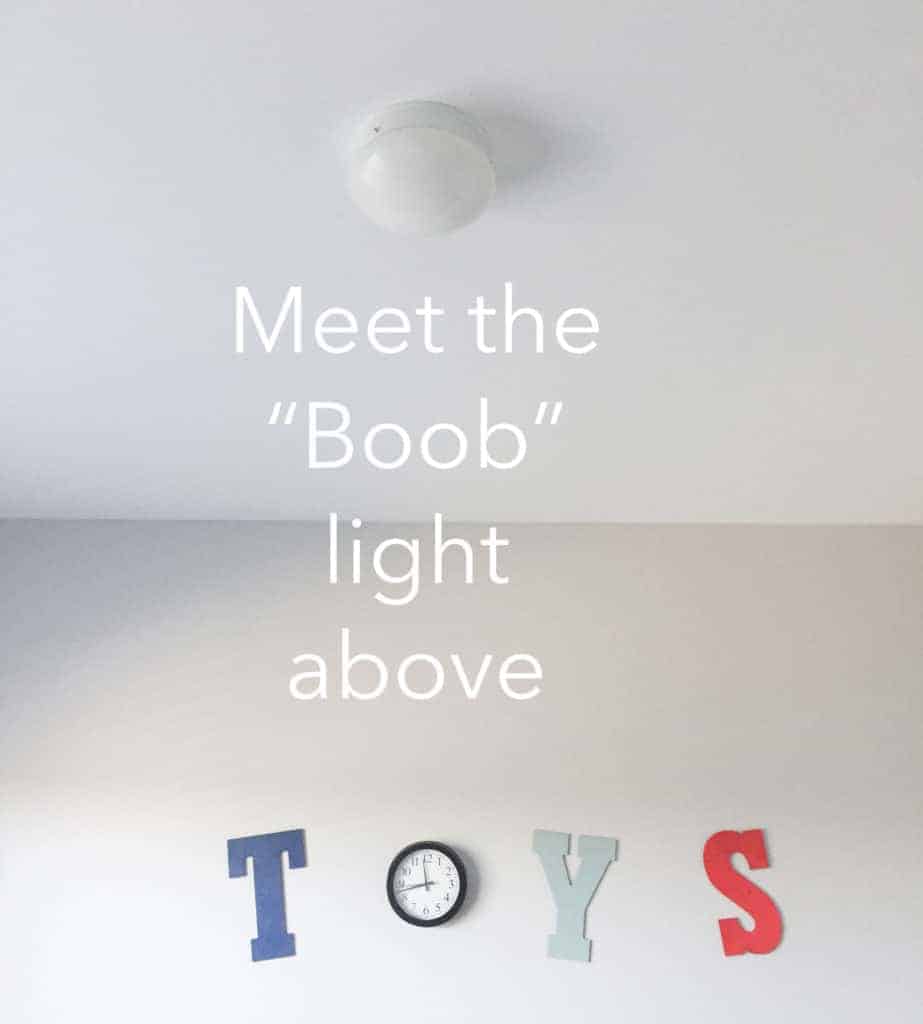
Let me first say that this particular light is even a step below the “builder grade dome light.”

Disclosure; this post contains affiliate links. As an Amazon Associate I earn from qualifying purchases. This does not affect the price you pay. This disclosure statement refers to the rest of the Amazon links in this post. See more on my disclosure page.

When my lovely home was built, they cut corners on quite a few upgrades, especially when it came to lighting. No joke, if the room didn’t have a fan (there were only two fans when we moved in), the rest of the lights were that ugly round “bulb.” 

That’s was ok with me because you know I love a project anyway!

This project started in our front bathroom a few years ago. I found some old mini drum shades that I removed off of a chandelier. I got the idea that I could replace the builder grade glass drum with a lamp shade and not spend a dime! 

Replacing the Builder Grade Boob Light or Dome Light with a Lampshade

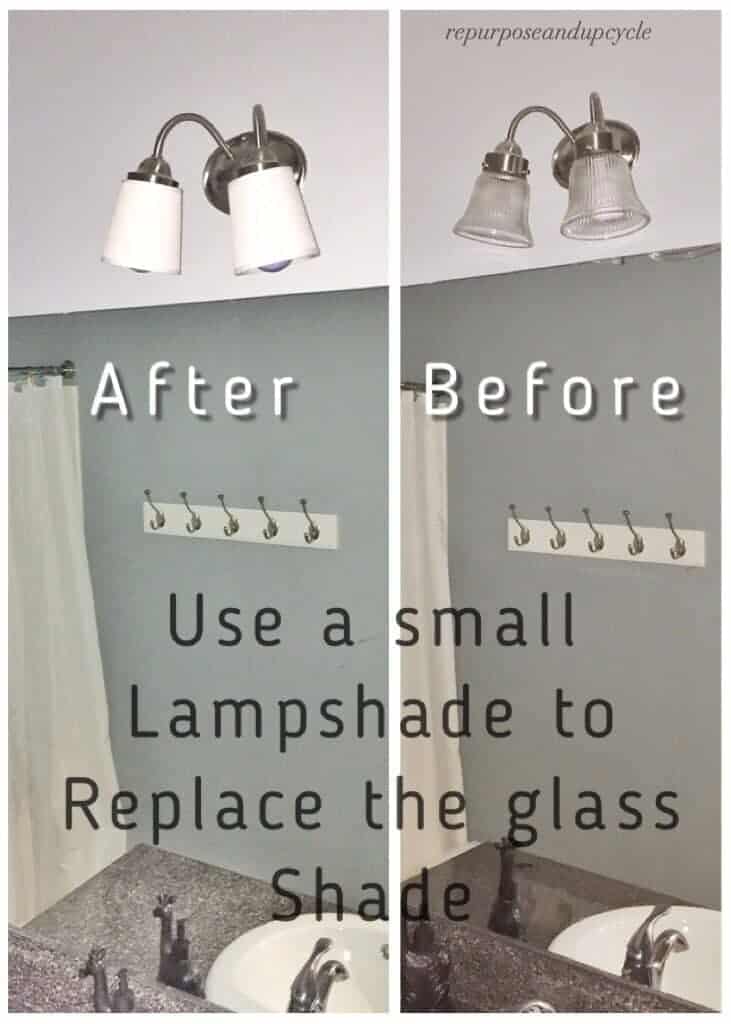
I decided I could re create my builder grade bathroom light fixture hack, but on a larger scale.

We’ve currently replaced all of our builder grade light fixtures in every bedroom but the playroom.

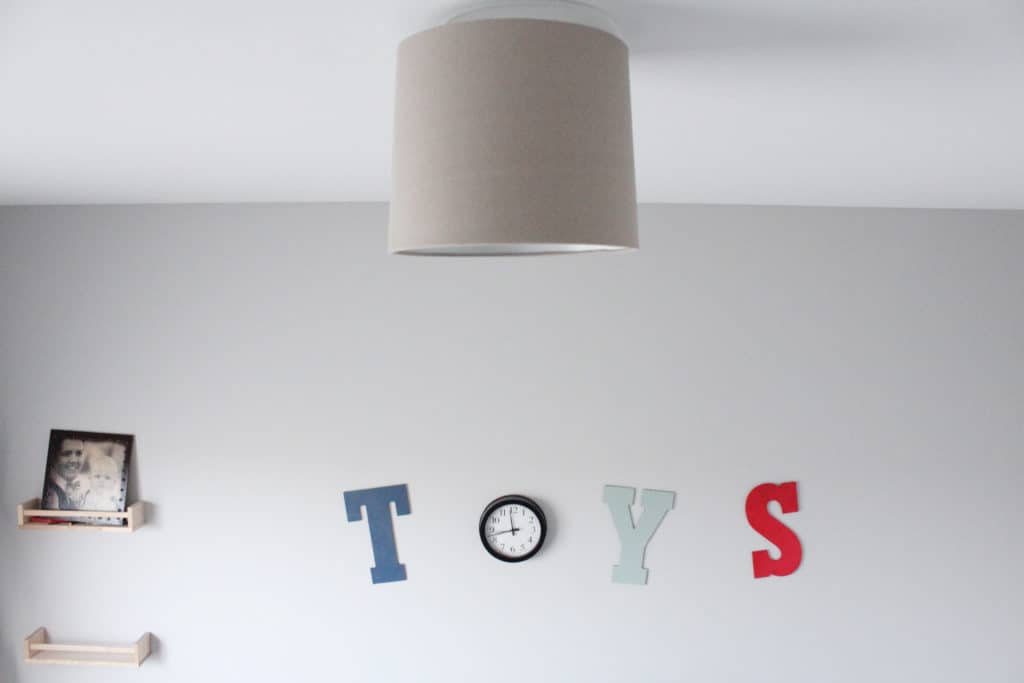
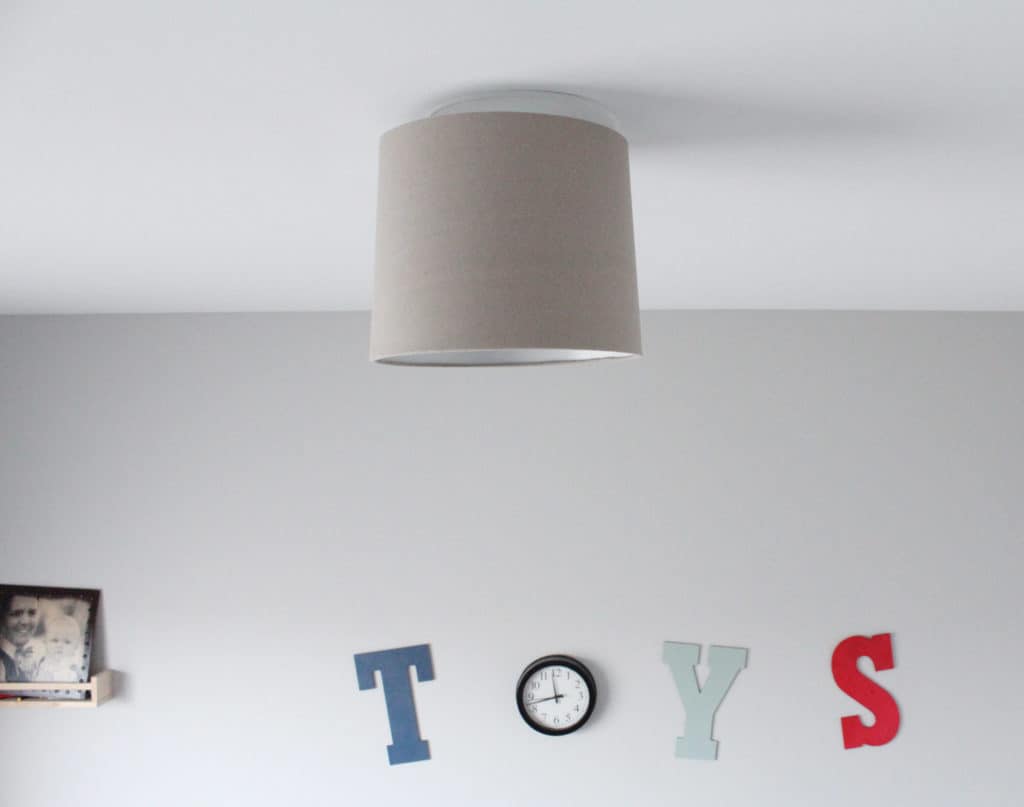
I decided it was time to remove the old dome light and give it a face lift.

First things first, in order to start this project you need a drum shade or similar item you wish to use to replace the old dome. 

I know most of you have an old lamp with a drum shade lying around. It doesn’t have to be a fancy drum or expensive lantern. As a matter of fact, depending on your decor in the room, the simpler the better. I’ve even seen people turn metal trash cans upside down to replace the old light.

Materials:

  • Drum shade or lantern or any other item you wish to use. Make sure the opening at the top of the item is larger than the circumference of the light.  I guess you could use an item with a smaller opening, but the base of the light would be exposed and it might look a little funny.
  • Zip Ties
  • scissors
  • tool to cut the metal frame in the shade if needed

How to update a builder grade dome light

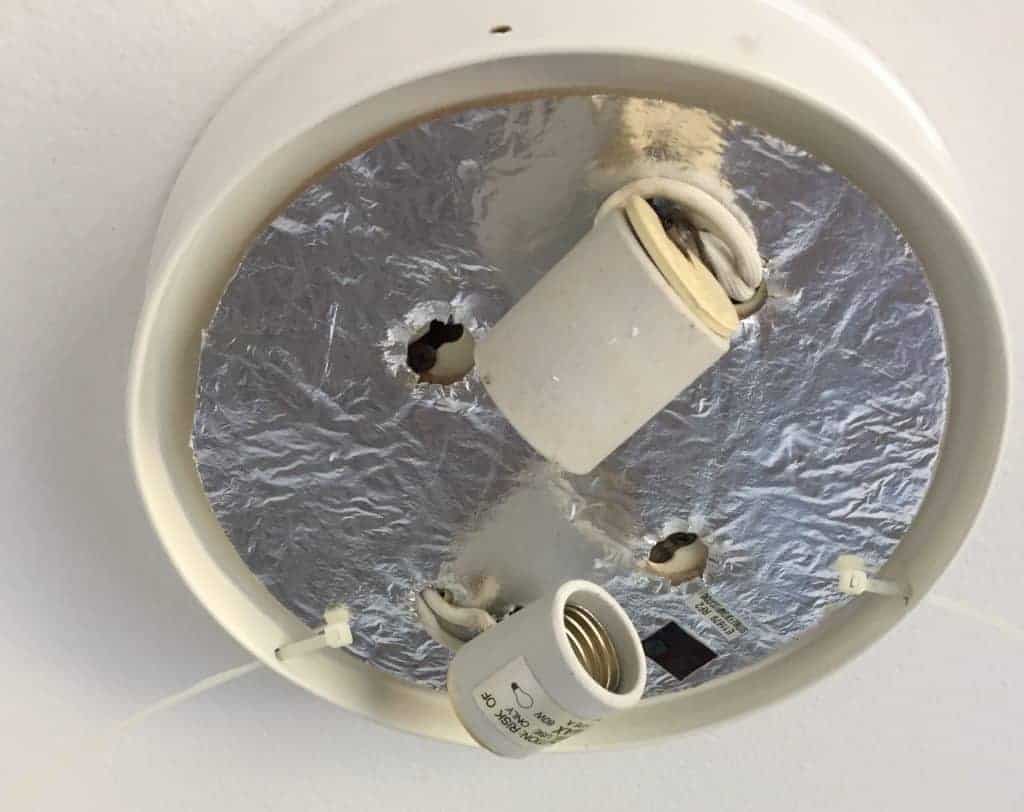
  • Remove the old builder grade dome cover (this might be glass or plastic). Most of the time this includes un screwing it from the fixture.
  • remove screws from the housing that it fit into.
  • Unscrew the light bulbs.
  • Check the zip ties and make sure they fit through the screw holes.

In my case, the screw holes were too small for the zip ties to fit through. I decided to cut the zip ties to make them narrower.

  • Next position the lamp shade over the light fixture and make sure the metal frame fits around where the light bulbs will fit.

NOTE: This is where I made a mistake. I slipped the shade over the light and adjusted it to fit around the light sockets, but I did not account for the light bulbs.  Let me show you below.

The metal wiring fits under one of the light sockets, but I’m going to need to cut the other side of the metal frame so when I screw the light bulb in, it wont touch the metal.

  • Use the zip ties to tie around the metal in the lamp shade and SLOWLY tighten to make sure it fits evenly around the base of the fixture.

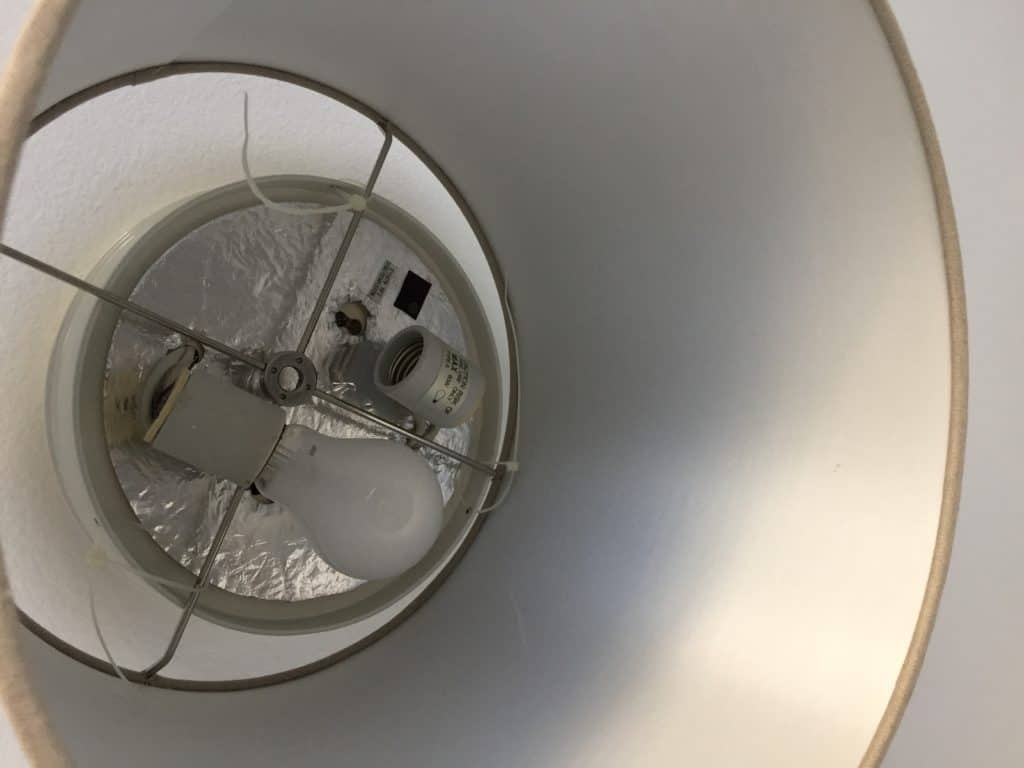
You can see above where I’m going to need to cut a part of the metal from the lamp shade so it won’t interfere with the light bulb.

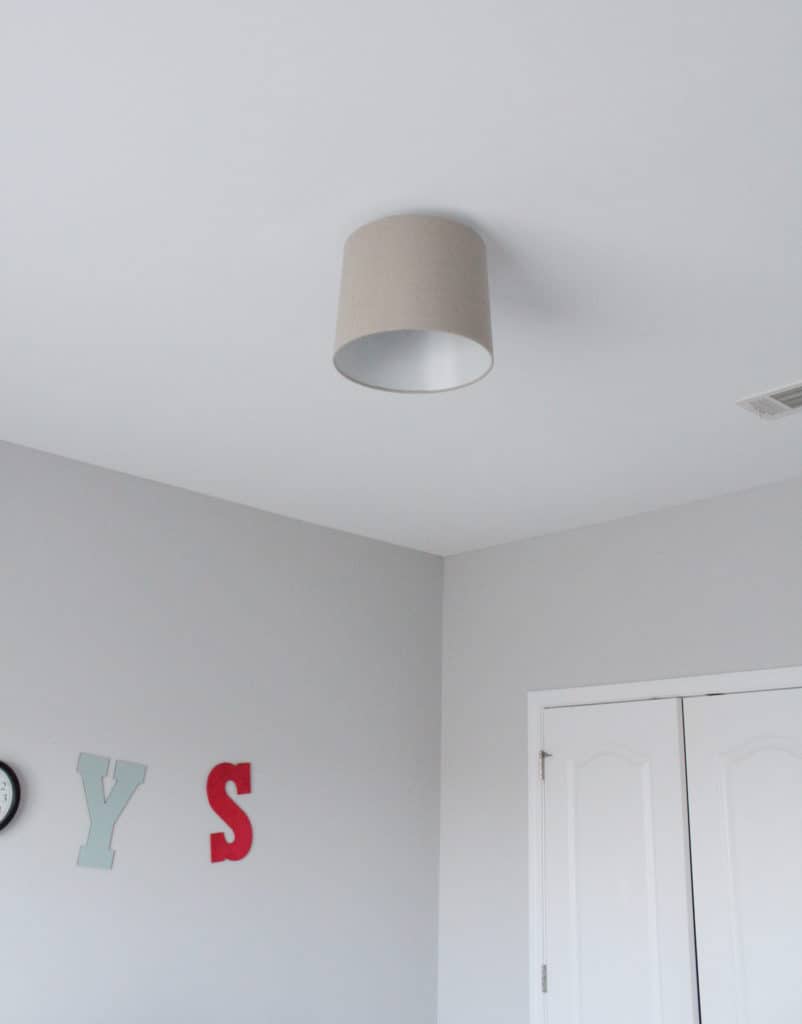
  • After you have secured the zip ties and tightened everything evenly, step back and enjoy your new light!
Replacing the Builder Grade Boob Light or Dome Light with a Lampshade
updated dome light with lampshade
updated boob light with lampshade

What do you think?

Do you have an old shade lying around that is just itching to replace the old dome light?

If you enjoyed this post I would love for you to Pin the image below to Pinterest.

Replacing the Builder Grade Boob Light or Dome Light with a Lampshade

Thanks for stopping by and as always I hope you’ve been inspired to find beauty in the blemishes.

Lindsey**

Leave a comment

Your email address will not be published. Required fields are marked *


  1. AJ says:

    I am getting ready to replace our boob lights and your clever idea just saved me time and money using shades I have in boxes. Thanks. I love your posts!

  2. BC. says:

    Thanks for showing how to do this. We have a ‘fancy boob light’ in the entry way– regular boob light with a brown metal vine twining around it. Still looks crazy. I want to replace all 4 boob lights with recessed lighting, but the shade might be faster, easier, and less time. Thank for the info!

  3. Cindy says:

    What’s worse than a boob light? 2 boob lights, in the bedroom….so when you’re lying down and looking up at the ceiling, guess what’s staring back at you. A lovely pair. NOT.

  4. Julie says:

    What a clever idea, nicely done!

  5. Great ideas! Thanks for linking up at Friday Frenzy Link Party!

  6. Teresa B says:

    I love it, it looks so much better now. Thank you for sharing at The Really Crafty Link Party. Pinned!

  7. What a great post!
    I’m a big fan of DIYing… much handier than my hubby!

    Thank you for linking up to #fakeituntilyoumakeit!
    Samantha
    XXX
    http://www.fakefabulous.com

  8. Naomi Shelton says:

    But what about the view from underneath the shade? You see all the wires and the light bulbs, right? Seems like that would look pretty ugly. Am I missing something?

    • Charmaine says:

      @[email protected],
      Hi Lindsey, as I read this post I pictured a sheer or burlap fabric cut to size to fit inside the shade just under the lights (far enough away to not cause a hazard) attach the fabric with eye hooks with hot glue on shade and sewn onto the fabric for easy removal to change out the bulbs when needed.
      It will camouflage the ugly we don’t want to see, and still allow for access and won’t defuse the light too much either.

    • You are right, you can see all the wires and bulb and I’ve been racking my brain to figure out what to do about it.

  9. JESS44903 says:

    LOL…hilarious! 🙂

    I would love for you to share this with my Facebook Group for recipes, crafts, tips, and tricks: https://www.facebook.com/groups/pluckyrecipescraftstips/

    Thanks for joining Cooking and Crafting with J & J!

  10. Lydia C. Lee says:

    I had no idea what a boob light was!! #TwinklyTuesday

  11. Leanna says:

    Very nice idea. I like that it still hugs close to the ceiling. I have two “boob” lights left to get rid of, nice makeover. Thank you for the tutorial.

  12. harropaj says:

    I never even knew it was called a boob light but love the change

  13. K.Rupp says:

    HAHA! This was funny! But I love what you did here. My son has an awkward light like that in the corner of his room. A lamp shade would look really nice. Thanks so much for the idea! Saw your post from the amaze me monday party. pinned:)

  14. Carol says:

    a simple way to make your room more stylish and modern

  15. Nige says:

    Love this boob light never heard that before haha! Thank you for linking to #Thatfridaylinky please come back next week

  16. playdatesparties says:

    Any way to get rid of boob lights is a good idea! Though we still have several in our house…..this might be a good fit for one or two. Thanks so much for sharing at the #happynowlinkup!

  17. Those darn boob lights get me every time. I wonder what the designers were thinking when they came up with the idea but I love your quick and easy fix Lindsey. It’s a great idea

  18. Jann Olson says:

    I have the step up boob lights in some of my rooms. I too would like to see them go. Instead, I lost my real boobs and they seem to be hanging around! lol! Thanks for sharing with SYC.
    hugs,
    Jann

  19. What a great way to update some fixtures! Thanks for sharing at The Blogger’s Pit Stop! Roseann from http://www.thisautoimmunelife.com

  20. twinmumemily says:

    Ha, the boob light! Love it! It looks a lot better after it’s make over! Thanks for linking up to #ThatFridayLinky

  21. Louise says:

    Such a useful guide if you’re trying to replace a boob light with a lampshade. We have one of these lights in our dining room and it’s the worst room in the house lighting-wise. We’re planning on rewiring and replacing with different lights elsewhere though. #sharingthebloglove

  22. What an easy and cheap way to upgrade the light fixtures. I’m disappointed I’ve no boob lights I can upgrade in this way.

    #thatfridaylinky

  23. Kari says:

    You had me at boob.
    Also, I love this idea.