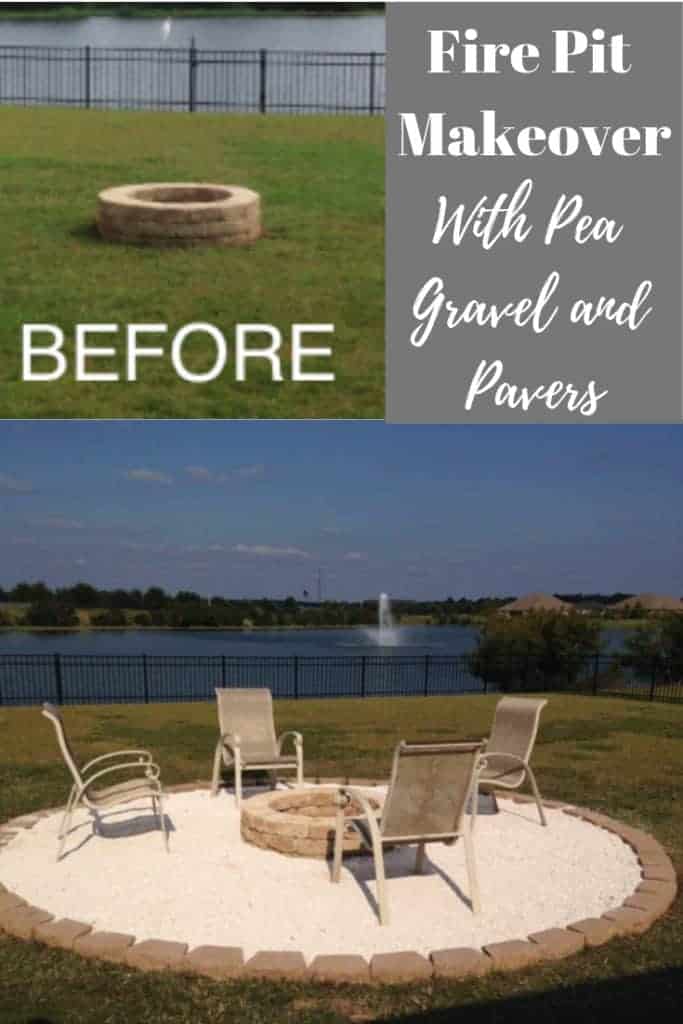
Learn how to create a simple fire pit with pea gravel and pavers for an updated DIY outdoor fire pit.
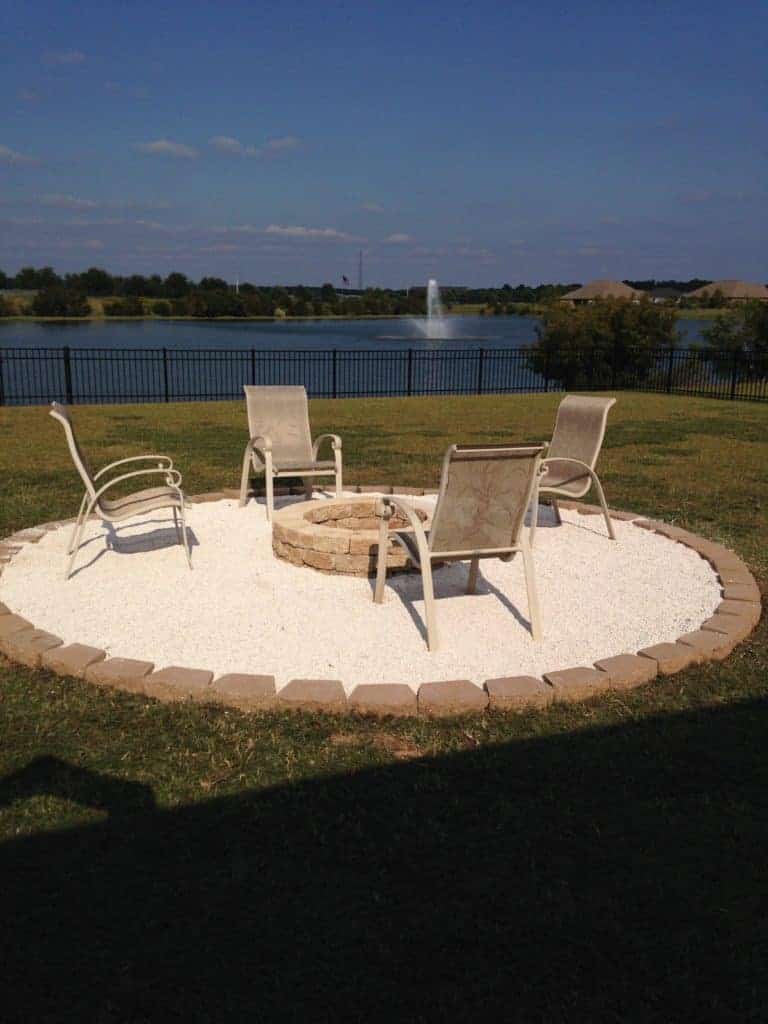
Do you have any unfinished projects around your house? Can I tell you that I hate unfinished projects. When we bought our builder grade home it came with a random fire pit that looked like an unfinished project. How do you dress up a fire pit? It took me six months to figure it out but I finally decided to create a fire pit with pea gravel and pavers. The pea gravel around the fire pit creates a nice gravel fire pit seating area.
Before we dive into this outdoor DIY project, I want to show you our simple outdoor fire pit before we added anything around it. We have a large back yard and this poor paver fire pit sits in the middle of it. So random!
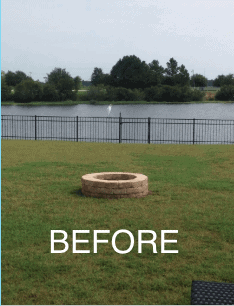
Doesn’t it look sad and lonely? Ok, I know it’s not a person, but it needed some help!
Side note; this post isn’t about how to create a fire pit but rather how to build a pea gravel patio around a fire pit. If you are looking for how to build a concrete paver fire pit check out my recent post about that.
At the same time I was contemplating the fate of this fire pit, we were also debating on what to do with our mess of a front yard.
Below is what the front landscaping looked like when we bought the house.
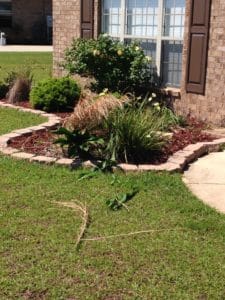
We decided it looked overgrown and not that great to begin with, so it was time to re landscape. That left us with a bunch of nice and expensive pavers that we didn’t know what to do with. I had thoughts about tearing the fire pit down because I just didn’t like the way it looked. Until one day I had a thought.
I could REPURPOSE those Pavers and use them for a new backyard project involving our lonely fire pit.
So during my “AHA” moment I decided to place the pavers from the front yard around the fire pit, fill it in with pea gravel, and then add some chairs for seating! Wouldn’t that make a lovely gravel fire pit seating area?
I really wanted an inviting area where we could to sit and roast s’mores, tell stories, (sing kumbaya! LOL) or whatever you do around a fire pit.
This is where my outdoor fire pit makeover really begins.
I thought about waiting on my hubby to help move the pavers, but being the impatient person that I am, I couldn’t wait. As soon as I put my 1 year old down for a nap, I raced outside to begin. And yes, I laid all those pavers in a circle around the fire pit all by myself. WOW, let’s just say my back felt it for the next few days.
How to make a pea gravel patio around a fire pit
Once I moved the pavers from the front yard to the back yard I decided where to place them.
As far as creating a perfect circle with those pavers, I didn’t do any fancy calculating like my husband the engineer would have done.
I did measure the distance from the fire pit to the pavers to make sure it was even on all sides. This is how I did it;
- Set the first paver down where you want it. Measure the distance from the base of the fire pit to the base of the first paver.
- Continue to place 2-3 more pavers next to the first one and then measure.
- Continue this process until you have completed the circle
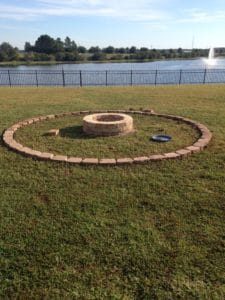
Note; This was a very rough and simple way to make a circle. In my post where I shared how to create a simple paver fire pit I shared a more accurate (but still simple) way to measure a circle. Below is a picture from that post.
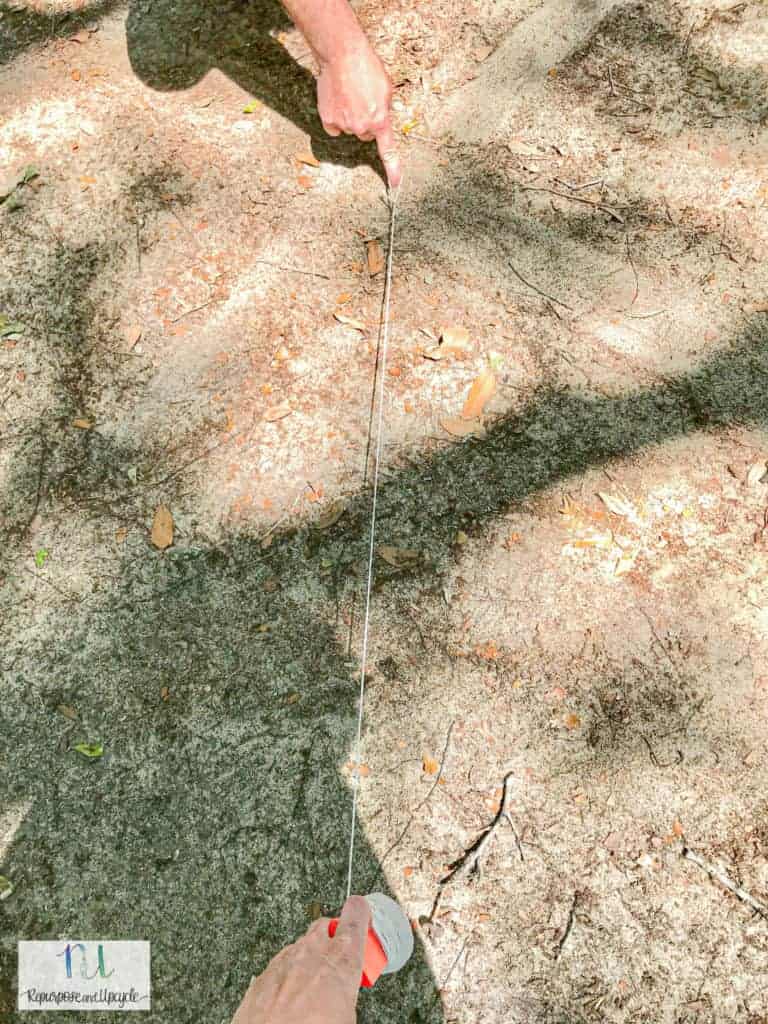
Rather than measuring and “guesstimating” where the pavers should go I used string and a pencil to make a perfect circle.
Back to creating a lovely pea gravel patio area around our lonely fire pit.
After I created a circle with the pavers, I needed to decide what I wanted to fill the space with. As always, I needed a budget friendly solution.
Ideally, we would have liked to lay concrete, but we decided for the mean time that pea gravel was quick, cheap and easy.
Here is where we went wrong. Learn from our mistake friends.
We decided NOT to dig up all the grass, but to spray it with a very strong grass killer (my husband swore it would kill everything). This was a very bad idea, because months later, we STILL had to continually spray the gravel with grass killer.
Word to the wise; if I was to do it over again, remove the grass, then put a layer of the flower bed liner down for extra protection, THEN add the pea gravel. Learn from my mistakes. I tend to make a lot of them…
I did, however, learn from this mistake. When we created a DIY gravel patio in our current home, we made sure to remove all the grass and lay a heavy weed barrier before we put down the gravel.
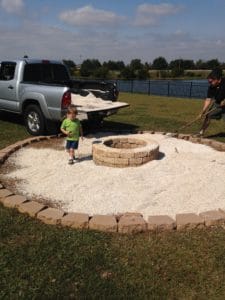
I have to admit, the kids were more excited about our new pea gravel filled fire pit than we were. I didn’t realize at the time how much it would resemble a sand box to them.
Speaking of a sand box, my only word of warning; the neighborhood stray cats have used it as a litter box. EWWWWW. If you have any ideas on how to discourage this puulease let me know below.
We’re pleased with the way it turned out and have already enjoyed a few fires. With a little thought and effort, you can dress anything up, even a random outdoor fire pit!
If you liked this post, please feel free to Pin it to Pinterest.
Thanks for stopping by friends.
Lindsey**
Can you tell me how many blocks it took? I am getting a little impatient too… and ready to take it on… thanks.. you inspire me
I believe I used about 44 blocks.
I’m in the process of creating my fire pit in the backyard using pea gravel as well but I have one concern……do the legs of the chairs sink into the gravel when someone sits down? Wonderful job on yours, loving the circle design! 🥰
Hi!
They sink (or settle) the first time someone sits in them but once they’ve been sat in once, they don’t sink anymore.
I mixed a large restaurant size container of cinnamon in my kids sand box. It keeps cats and ants out of it. It’s worth a try!
Good to know! Thanks for the tip.
This looks great. What are the dimensions of your fire pit area and how much pea gravel did you end up using? I am currently planning a similar project?
Hi Brandy,
I believe we used about 10 Cubic Yards for the pea gravel. We purchased the pea gravel to fill the space for about $150. I wish I could give you dimensions, but unfortunately we just moved from this house a few months ago. I hope this helps and I’m sorry I don’t have more info.
Thank you for the idea. I have a huge yard and we were thinking to add a fire pit, too many ideas and too expensive, this is perfect we have the pavers already in the front yard and want to get rid of them an update the front yard, but you just make it easy for me with this beautiful idea. Thank you again.
I’m so glad this post has inspired you! Thanks for stopping by.
[…] Planter by Anika’s DIY Life | Rustic Twine Dispenser by Making it in the Mountains |  Fire Pit with Pea Gravel by Repurposed and […]
Your fire pit area looks wonderful! My husband is also an engineer and I can imagine how long he would take to measure precisely. I’m like you though-in a rush to get it done and finding shortcuts. You did a fantastic job! Thanks for sharing at Snickerdoodle. Pinning to my Outdoors Board.
Lindsey you did a great job. And extra kudos for reusing your pavers so that they didn’t go to waste. I’d say your impromptu calculations are spot on! Pinning!
Nice job, Lindsey–I’m with you, I hate unfinished projects. It’s so satisfying to see something through the end 🙂 Thanks for linking up your fire pit project with us at Vintage Charm!
What a fabulous project! I am sure there will be plenty of fun occurring around your fire pit!
Thank you so much for sharing your project with us over at Waste Not Wednesday! Pinned!
[…] favorite post was “ Fire Pit with Pea Gravel and Pavers“! “My hubby bought me a very nice metal fire pit, a few years ago. I would love to find […]
Thanks so much for the Feature! Blessings,
Lindsey
This looks so great!
I would love for you to share this with my Facebook Group for recipes, crafts, tips, and tricks: https://www.facebook.com/groups/pluckyrecipescraftstips/
Thanks for joining Cooking and Crafting with J & J!
Just shared to your facebook group! Thanks for the invite and glad you like the Fire Pit.
Lindsey
You took an ugly duckling and made a swan!
What a world of difference!
Great work Lindsey – it looks fabulous! xx
Oh wow, it looks great! Fantastic DIY job you did, I am sure you enjoy sitting around the fire ona cool evening! Thanks so much for sharing at Celebrate Your Story!
I like how you just decided to tackle the job on your own while you had a chance! You are inspiring me to just go for it and just start in on our backyard project!
It looks awesome…thanks for sharing!!
Love this! This is exactly what we might do. We have an area where we lost a huge tree in a storm last year and we are going to be turning it into a fire pit area! #trafficjamweekend
Thanks Jen!
It looks great, and I love how you re-purposed stuff that was going to get thrown away otherwise. Awesome.
#happynowlinkup
Okay, I have MAJOR fire pit envy — GREAT job!! We have a little portable fire pit, but I may need to talk to my husband about installing a permanent pit like yours.
Visiting from Inspire Me Wednesday! Come visit us sometime at MammaTech — we are always looking for guest bloggers (and we pay)!
Annie
Thanks for the sweet words Annie! Your kindness means a lot. And I would love to be a guest blogger. Have a great day
Lindsey
It looks so much better, now! It looks like an inviting place for folks to gather for conversation and to enjoy a fire. The pavers around the outside look nice and also serve the purpose of keeping the pea gravel from scattering — brilliant!
your fire pit area looks great we are busy at diy projects as well.
would love to have you come visit us at http://shopannies.blogspot.com
Thankfully you decided to keep the fire pit, this is a great before and after. Thank you for sharing with us this week at Celebrate Your Story, and have a great week.
Looking GOOD! Well done girl!
We’re so similar! I’m too impatient to wait for the husband to get things done. (That’s why I built our outdoor bar by myself…including placing the 7-ft pallet on top!) If it makes you feel any better, though, we placed landscaping fabric underneath some of our projects, and it didn’t really stop everything. We still need to spray for weeds and grass. Love the fire pit area. Looks like a fun place to spend summer evenings!
@[email protected],
If you lay down the weed barrier and then add a layer of quikrete, rake it out to about an inch and lay the pea gravel on top, that should help. When it rains, it hardens the bottom layer. Tah-dah!!
wow great idea! If we do this again I’ll remember this.
Good to know that even the fabric doesn’t stop the weeds! we’ve kicked around the idea of laying concrete, but another day another project. Thanks for stopping by and have a great day!
Lindsey
What a beautiful project…. that will be a big blessing to your family… lots of memories to be made there! 🙂
[…] Cheap & Easy Spring Decorations TWO. DIY Firepit THREE. How to Make a Green Wreath for Spring FOUR. Metal Wall Decor Makeover FIVE. Accent Chair […]
SO pretty! LOVE it. Thank you for sharing at the Creative Gallery.
Oh my, you guys did a wonderful job. It turned out amazing. Thank you for sharing at The Really Crafty Link Party this week. Pinned!