Learn how to create your own DIY Mercury Glass vases with this easy mercury glass tutorial and video tutorial too!
I love the look of mercury glass. I love how it shimmers and yet still looks like vintage decor! Wikipedia says Mercury glass is “glass that was blown double walled, then silvered between the layers with a liquid silvering solution, and sealed.”
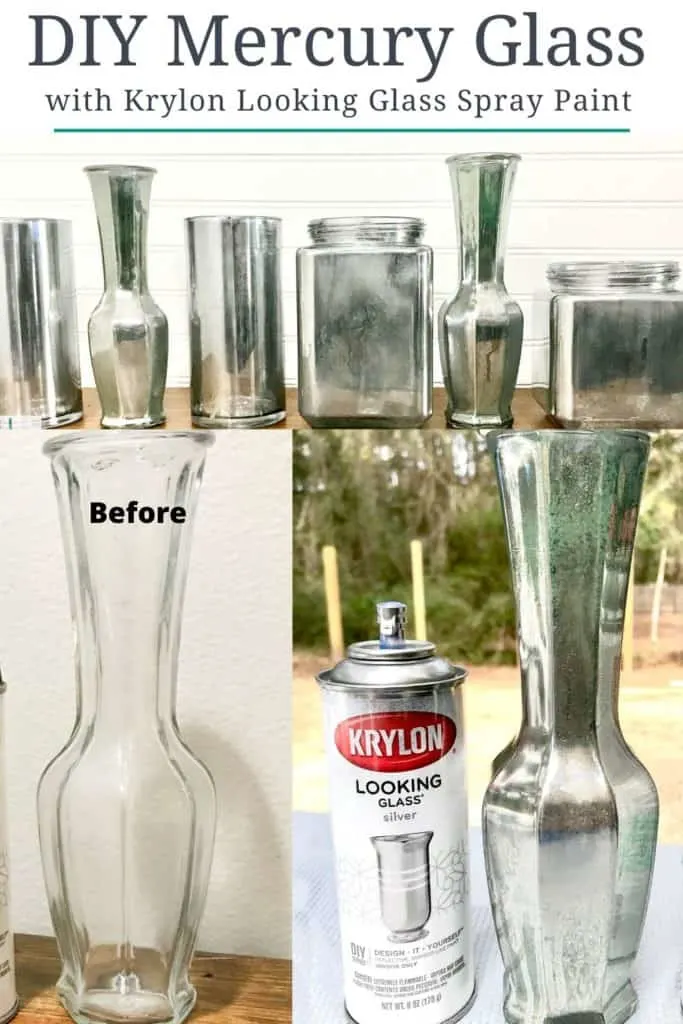
Mercury glass vases, with their antiqued look and luxurious feel, are stunning decorative pieces that can elevate any home decor. Sadly purchasing authentic mercury glass can be quite expensive. Luckily, achieving this dazzling effect on your own vases has never been easier with Krylon Looking Glass Spray Paint. This do-it-yourself project can transform ordinary glass vases into breathtaking, reflective masterpieces that will gain compliments from everyone who sees them.
Krylon Looking Glass Spray Paint is a specially formulated product that has the ability to create a mirror-like finish on clear glass surfaces. This paint is specifically designed for glass items, ensuring an even coating and a captivating antique appearance. The process involved in creating mercury glass vases with this spray paint is simple, cost-effective, and accessible to anyone, regardless of experience level in crafts or home decorating.
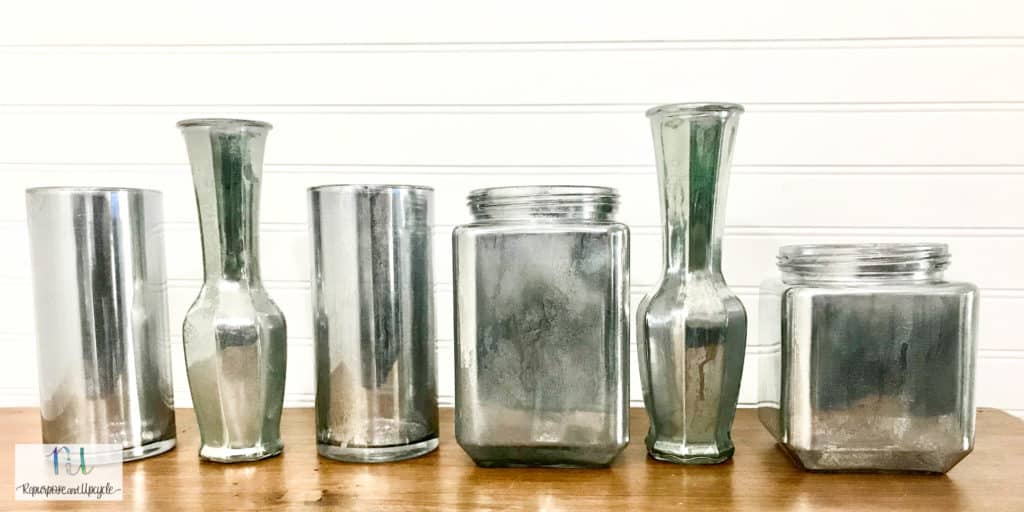
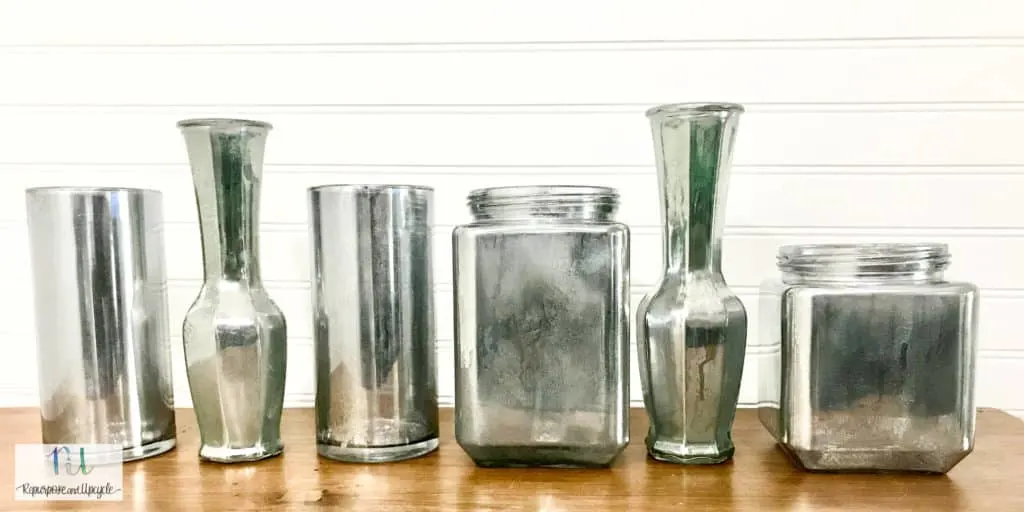
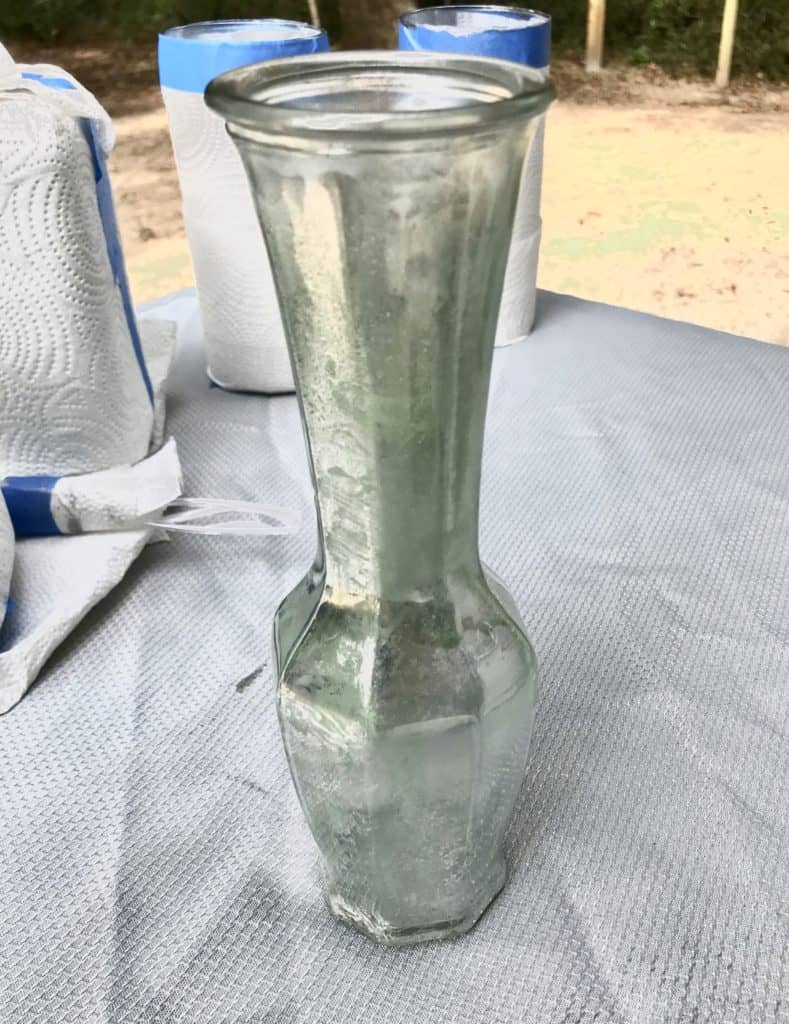
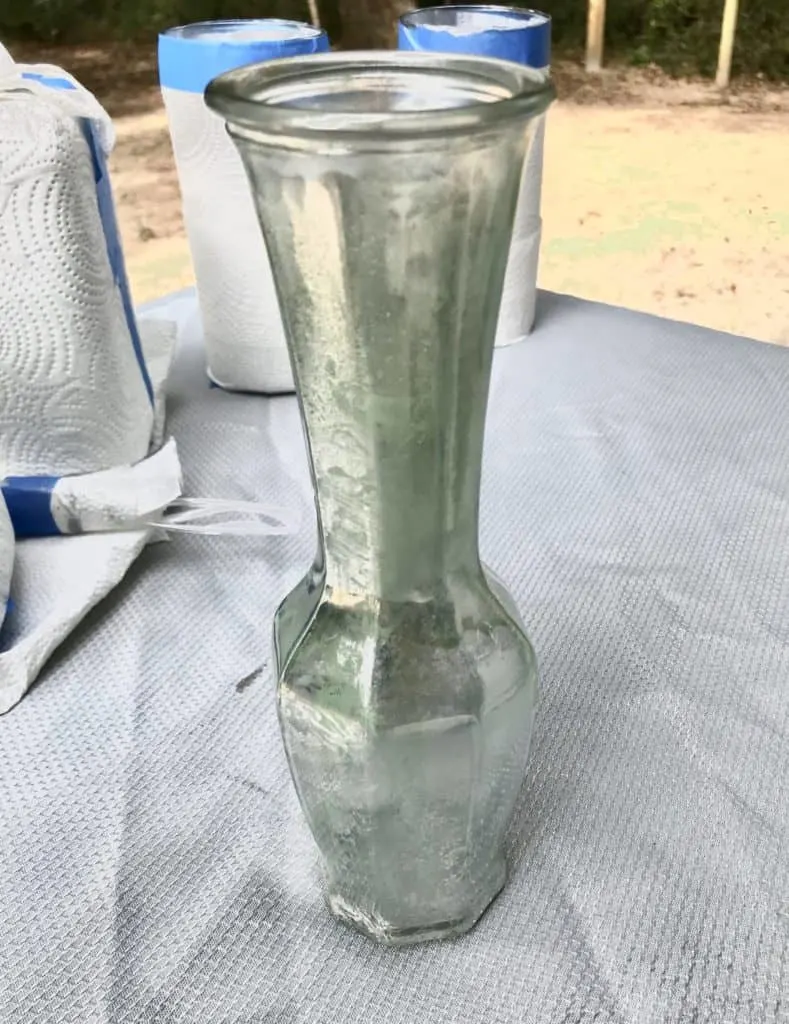
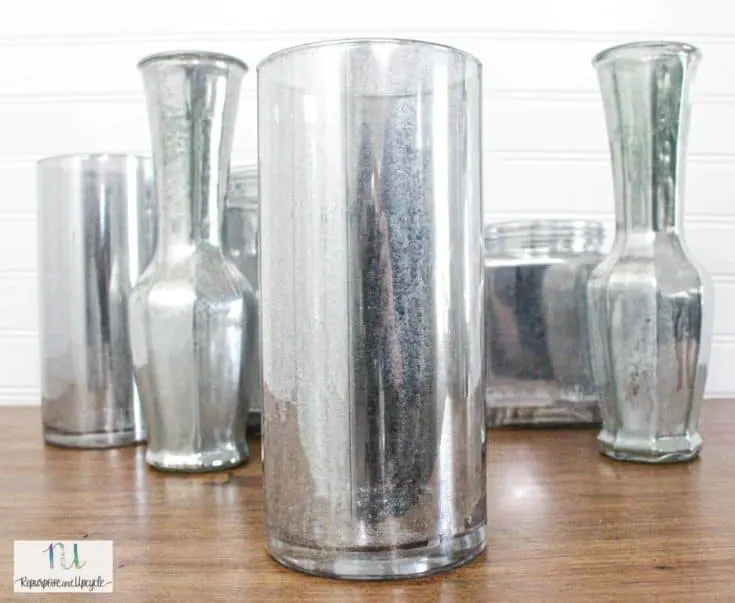
I had a handful of glass vases that were dying for a makeover! LOL, OK maybe I hoard them and save them for future projects.
You can see where I previously used these Dollar store vases as Halloween candle holders. They worked well for the season, but I was ready to give them a more “permanent” makeover.
In all the tutorials I read, it said to use WIDE mouth vases or bottles. This is due to the fact that the mercury glass spray paint works best when applied to the INSIDE of the vases to give it that double walled look like Wikipedia talks about.
Since I have a few small mouth vases and large mouth vases too, I decided to try it both ways (spray painting the inside and outside of the vases) and let YOU decide which one looks better.
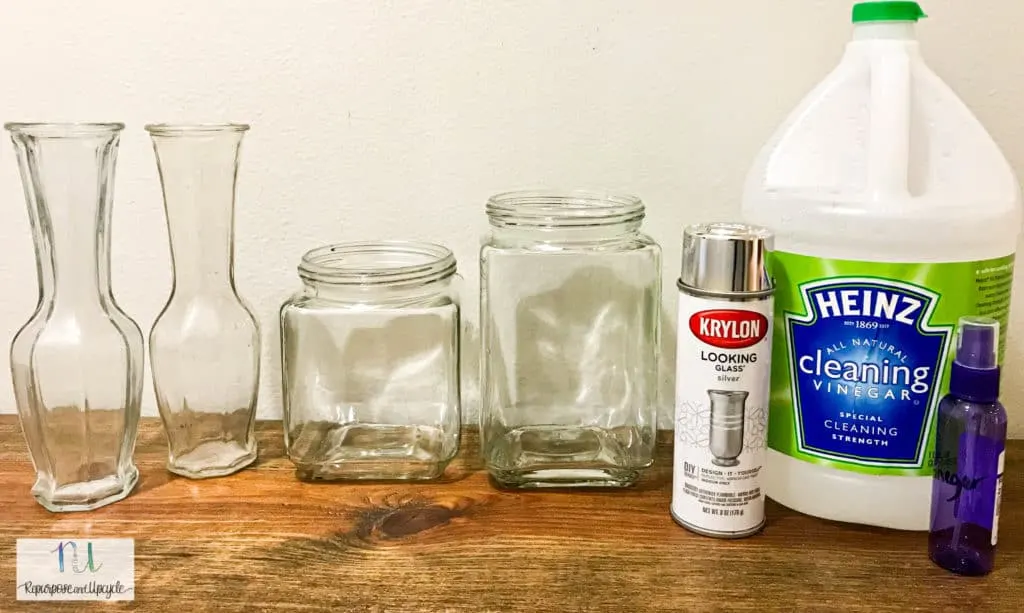
Below is a picture of the vases I’ll be transforming and the products I’ve used.

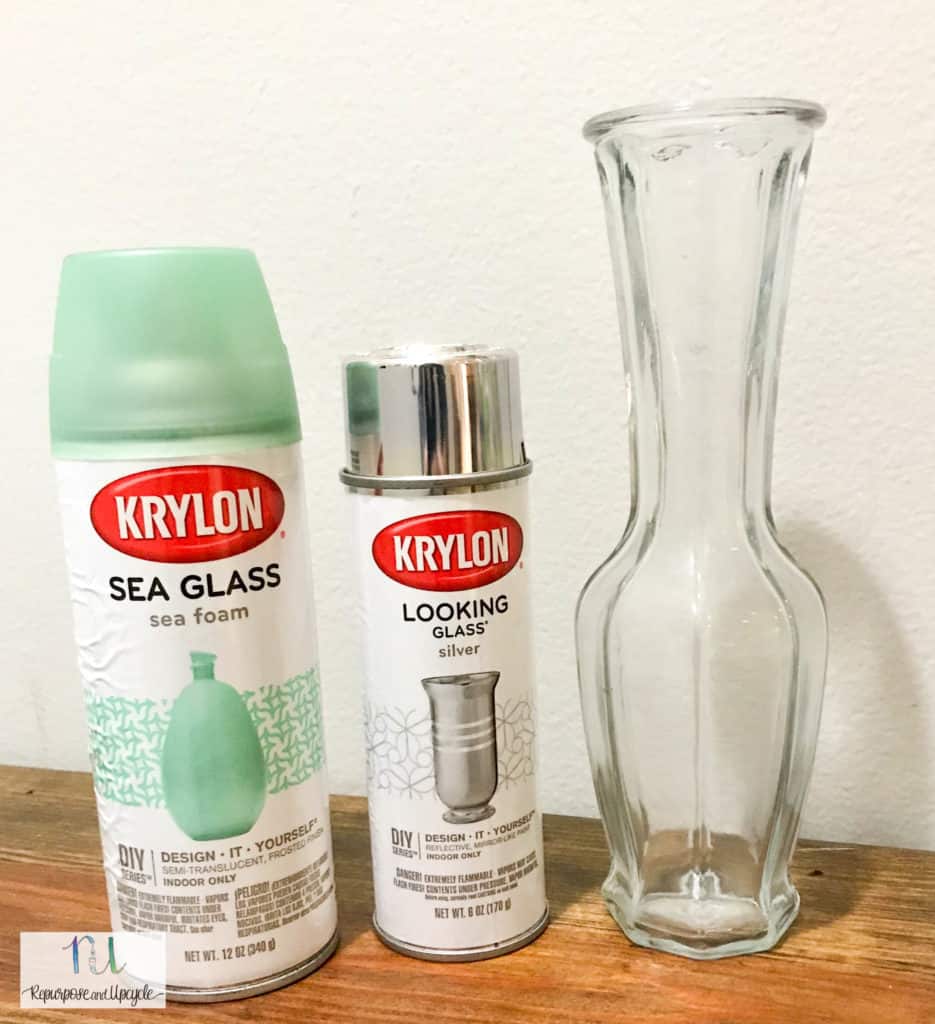
I decided while I was experimenting with applying the Krylon looking glass outside of the small mouth vases, I would add some color too!
I’m going to apply the Krylon Sea Glass spray paint on the inside and the Krylon looking glass to the outside. Can’t wait to see how this turns out!
Related Post:
Different Types of Spray Paint with real life reviews
DIY Modern Vintage Style Chair Makeover with Gold Spray Paint
Table of Contents
Understanding Mercury Glass and Krylon Looking Glass Spray Paint
Mercury glass, also known as silvered glass, is a beautiful and vintage-looking material with a shiny, reflective finish. It was first created in the mid-19th century through a process involving the application of a silvering solution to the interior of clear or colored glass. The result is a stunning, shimmering effect that has become popular in home décor and crafting projects.
Krylon Looking Glass Spray Paint is a product specifically designed to recreate the appearance of mercury glass. It is formulated with a unique composition that, when applied to the surface of glass, creates an instant, reflective mirror-like finish. This spray paint is ideal for transforming ordinary glass items into beautiful mercury glass pieces.
There are numerous creative ways to incorporate mercury glass accents into your home décor using Krylon Looking Glass Spray Paint. Use it to upcycle old vases, candle holders, or other glass items into elegant pieces with a vintage touch. The stunning reflective finish can add a touch of glamour and sophistication to any living space.
When using Krylon Looking Glass Spray Paint, it is important to keep in mind that this product is intended for decorative purposes only and is not dishwasher or food safe. Always follow the manufacturer’s instructions and safety guidelines when working with spray paint, including working in a well-ventilated area and wearing appropriate protective gear.
Disclosure; this post contains affiliate links. As an Amazon Associate I earn from qualifying purchases. This does not affect the price you pay. This disclosure statement refers to the rest of the Amazon links in this post. See more on my disclosure page.

Materials to DIY your own Mercury Glass
- Glass vases
- Vinegar
- Krylon looking glass – make sure you buy THIS brand
- Spray bottle
- Rag
- Sea glass spray paint (optional)
- Paper towels
- Tape
Choosing the Right Vases
Choosing by Shape and Size
When selecting vases for your DIY Mercury Glass project, consider the shape and size. Vases with a variety of shapes and sizes can create an interesting visual display. Tall, slender vases can add height and drama, while shorter, wider vases bring balance to the arrangement.
- Tall vases: Ideal for longer stems, such as gladiolus or delphiniums.
- Medium vases: Work well with flowers like roses or tulips.
- Small vases: Perfect for petite arrangements, such as baby’s breath or daisies.
Take into account the space where you plan to display the vases. A larger vase might be more appropriate for a mantle, while a smaller vase may be better suited for a coffee table.
Considerations for Material
The material of the vase is important when using Krylon Looking Glass Spray Paint. Choose vases made from glass, as the paint is specifically designed for glass surfaces. Other materials, such as plastic or metal, may not achieve the desired mercury glass effect.
- Clear glass: Allows the paint to create a reflective, mirror-like finish.
- Colored glass: May alter the final appearance of the mercury glass effect.
- Textured glass: Can add dimension and interest to the finished product.
When selecting a glass vase, consider the thickness and quality of the glass. Thicker, higher quality glass is less prone to breaking during the painting process. Additionally, opt for vases with a smooth surface, as this will help the paint adhere more evenly.
Before you begin creating your DIY mercury glass, mix a vinegar solution of 1 part water and 1 part vinegar in a spray bottle.
How to create your own Mercury Glass Vases with Spray Paint and Vinegar
Preparing the Vases
Before starting the DIY Mercury Glass Vases project, make sure to gather all the required materials and tools. These include Glass vases, Krylon Looking Glass Spray Paint, Water and vinegar solution (1:1 ratio), spray bottles, gloves, newspaper or drop cloth, and a well-ventilated area to work in.
First, clean the glass vases thoroughly to remove any dirt, dust, or residues. To achieve the best results, use a microfiber cloth and a glass cleaner. Rinse and carefully dry each vase to ensure a clean and streak-free surface.
Cover the work surface with newspaper or a drop cloth to protect it from paint. For safety and proper ventilation, it is advised to work outdoors or in a well-ventilated area.
Spraying Process
In this step, pour equal parts of water and vinegar into a spray bottle and shake well to mix. Put on gloves to protect the hands during the painting process.
Spray a light mist of the water-vinegar solution on the surface of the vases. It’s essential not to saturate them; instead, aim for a subtle damp effect. The droplets will create the textured, mercury glass appearance.
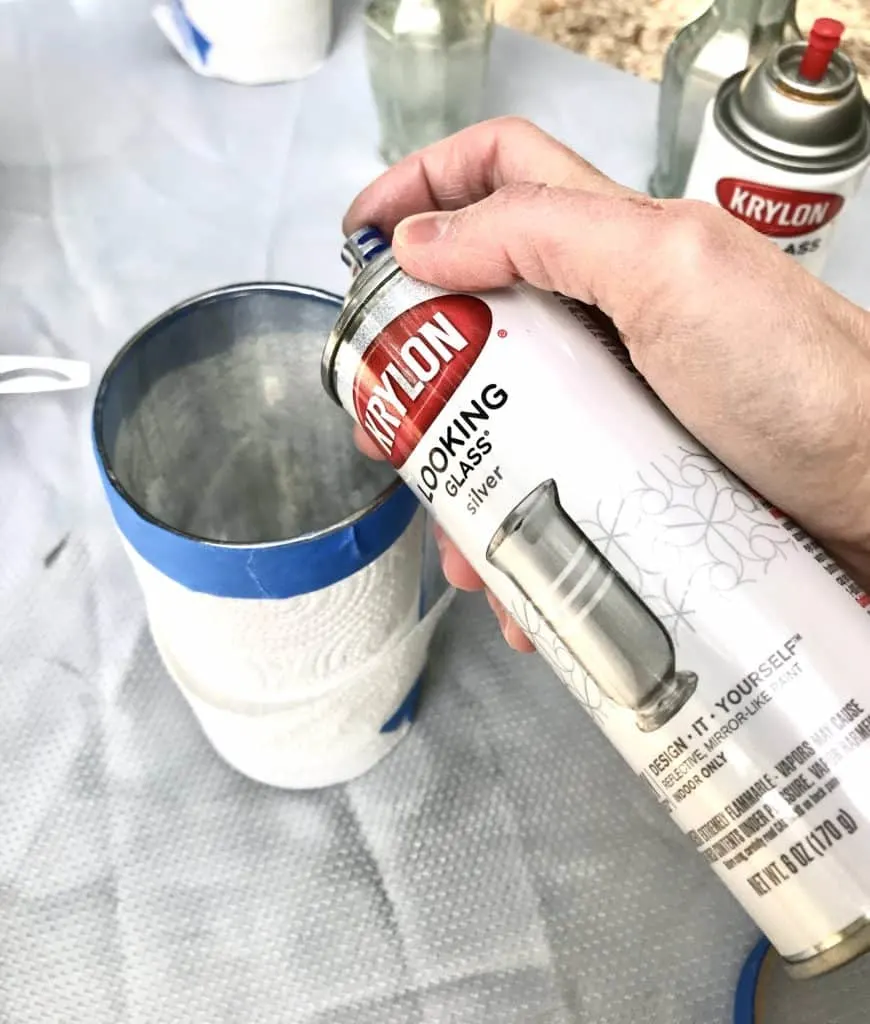
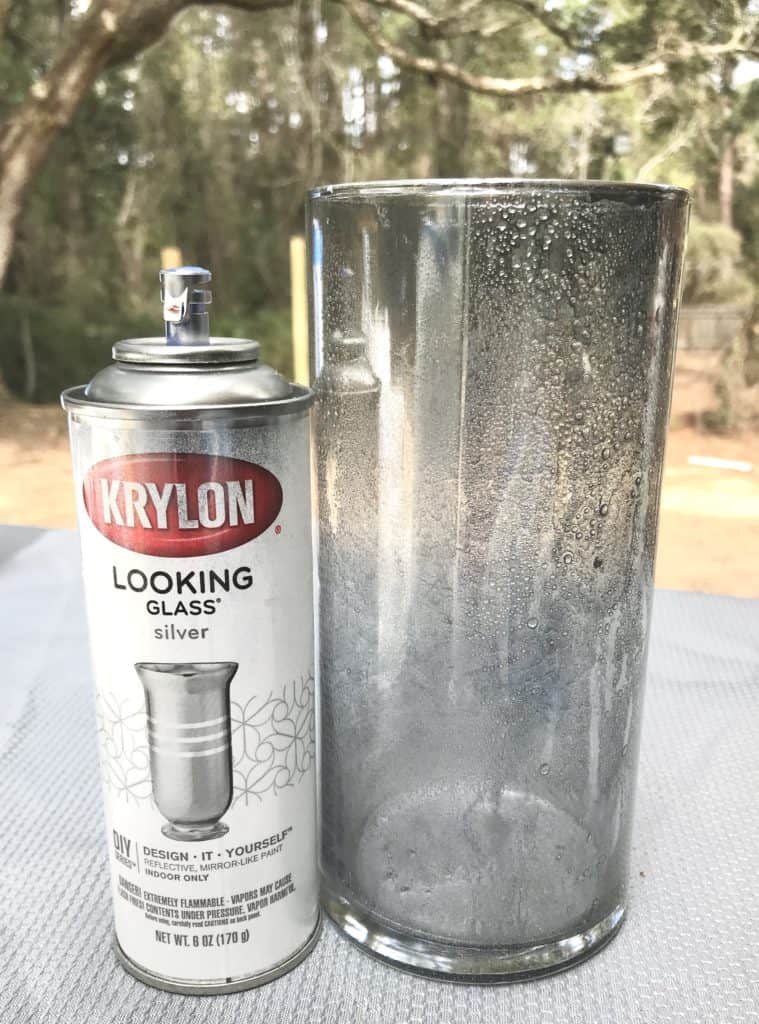
Shake the can of Krylon Looking Glass Spray Paint well for at least two minutes. Hold the can about 10-12 inches away from the vase and evenly apply the spray paint over the droplets created by the water-vinegar mist. Spray paint in light, even coats to avoid drips and ensure a consistent finish.
After a few minutes, dab away excess water-vinegar droplets using a paper towel or a soft cloth. This will help to create the distressed, antique mercury glass look.
Drying and Curing Stage
Once you have finished spraying, let the vases dry in a well-ventilated area for about 30 minutes or until the paint is no longer tacky.
To completely cure the paint and ensure maximum durability, allow the vases to air-dry for a full 24 hours. It is essential not to touch or move the vases during this time to prevent smudging or marring the finish.
After the drying and curing period, your DIY Mercury Glass Vases with Krylon Looking Glass Spray Paint should be ready for decorating or displaying.
Step by Step DIY Process
- Clean the vases or surfaces with a lint free cloth
- Decide if you are going to spray the outside or the inside of the vases
- If you are going to spray the inside, cover the outside surface with a disposable wrap
- Shake the can of Krylon Looking Glass spray paint at least one minute
- Spray one light and even coat
- Immediately spray a little vinegar solution on top
- Use a paper towel to lightly dab what you’ve sprayed
- Let it dry for at least 10 minutes
- Repeat steps 5-8 until you reach your desired finish
I’ll share some pictures of the faux mercury glass process.
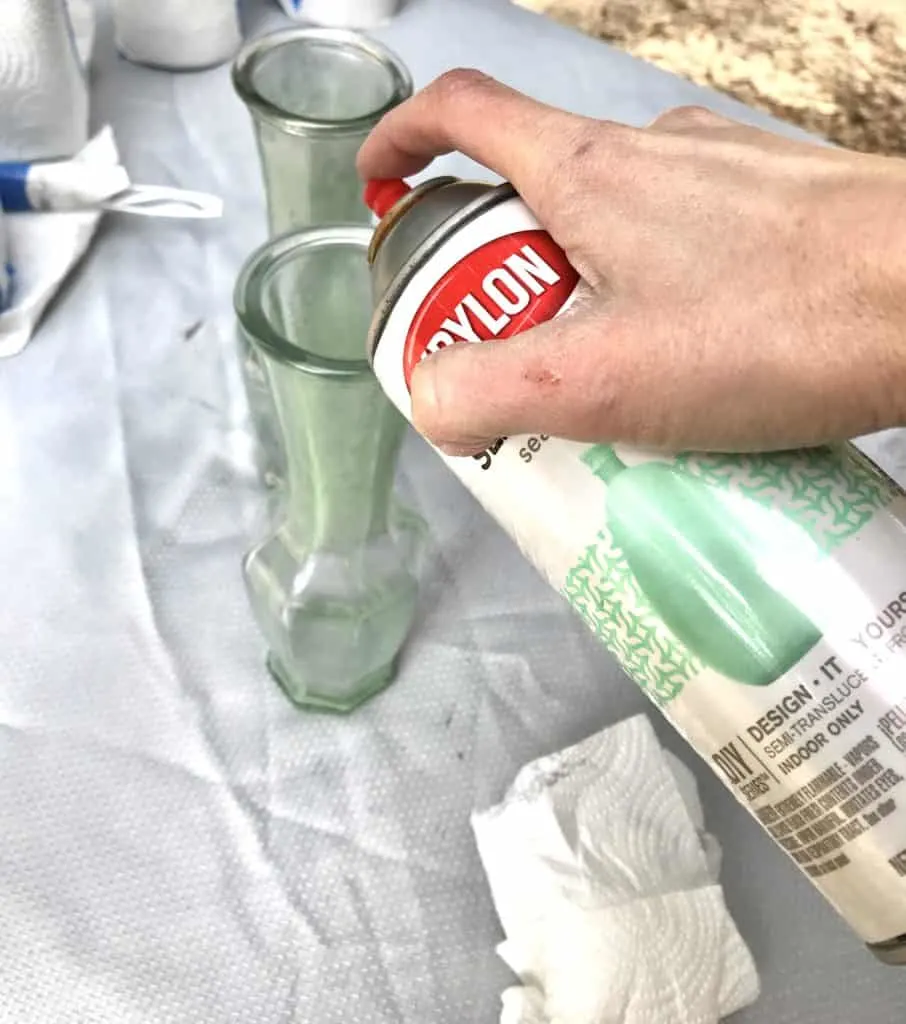
You can see below where I covered the outside of the vases with painters tape and paper towels before I sprayed the Looking Glass.
After I sprayed the Looking Glass spray paint, I lightly sprayed the vinegar mixture on top.

You can see below what the vase looked like after a few coats of the Looking Glass INSIDE the vase.
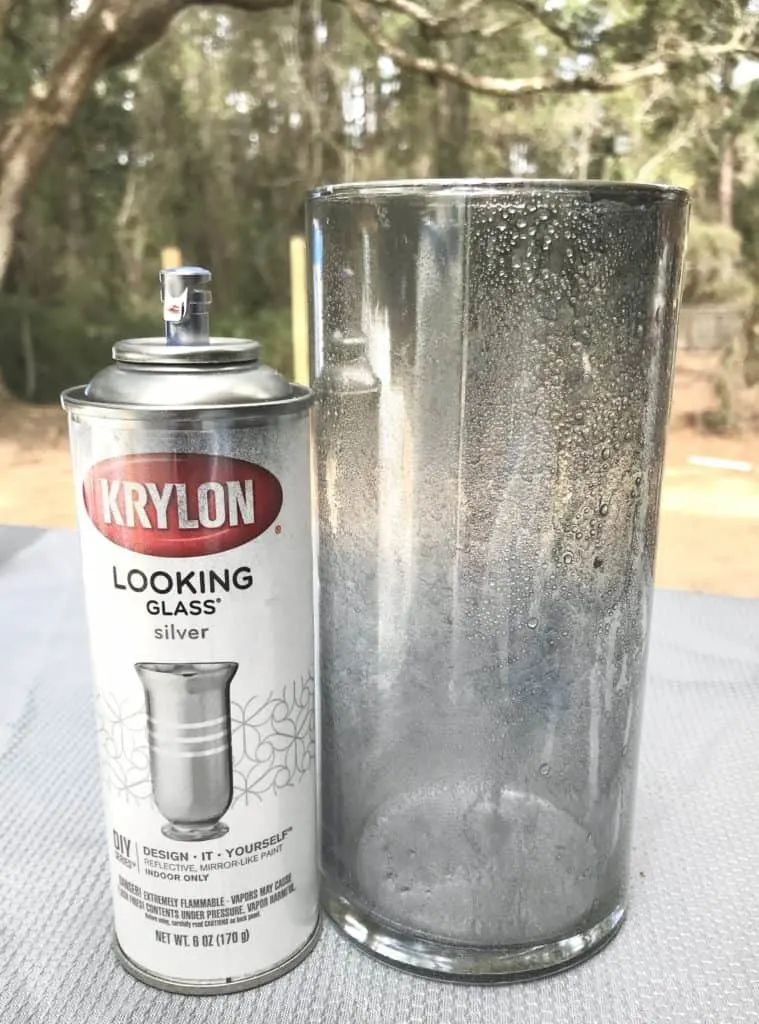
Even though I like it, I thought it would still look better with a light coat of Looking Glass ON TOP of the vase as well. Below is what it looked like finished.

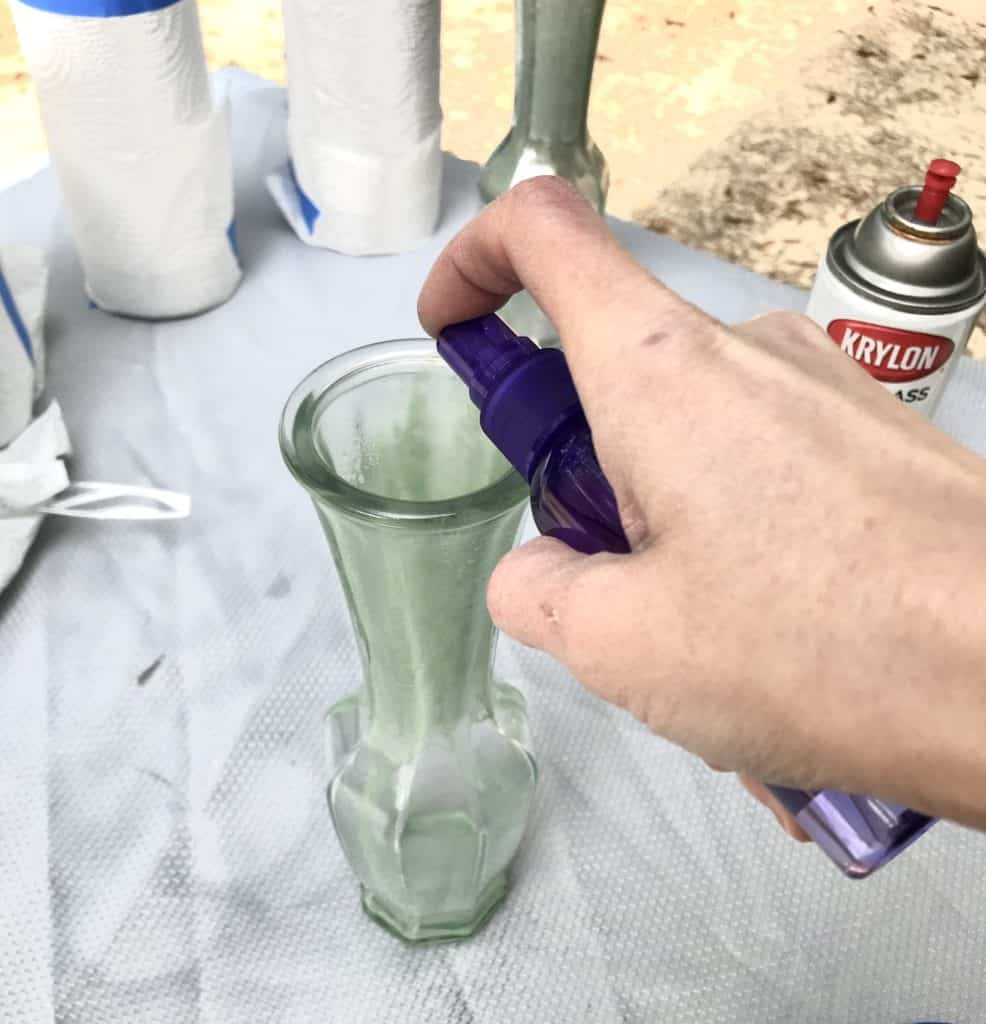
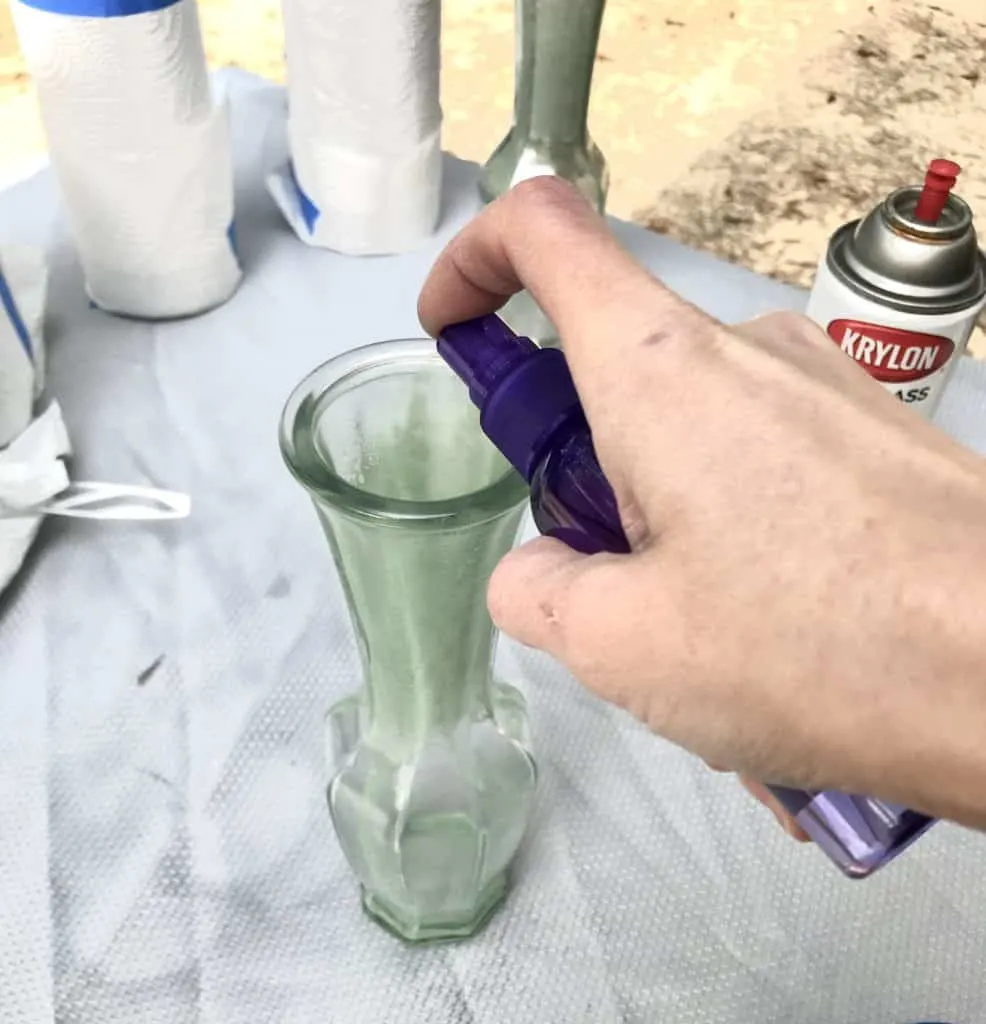
I said earlier that I wanted to experiment with a little color. I pulled out some old Krylon Sea Glass spray paint and decided to spray that to the inside of the small mouth vases.

Next I sprayed the vinegar solution.
Then comes the Krylon Looking Glass spray paint, but this time, I applied it to the OUTSIDE of the vase.

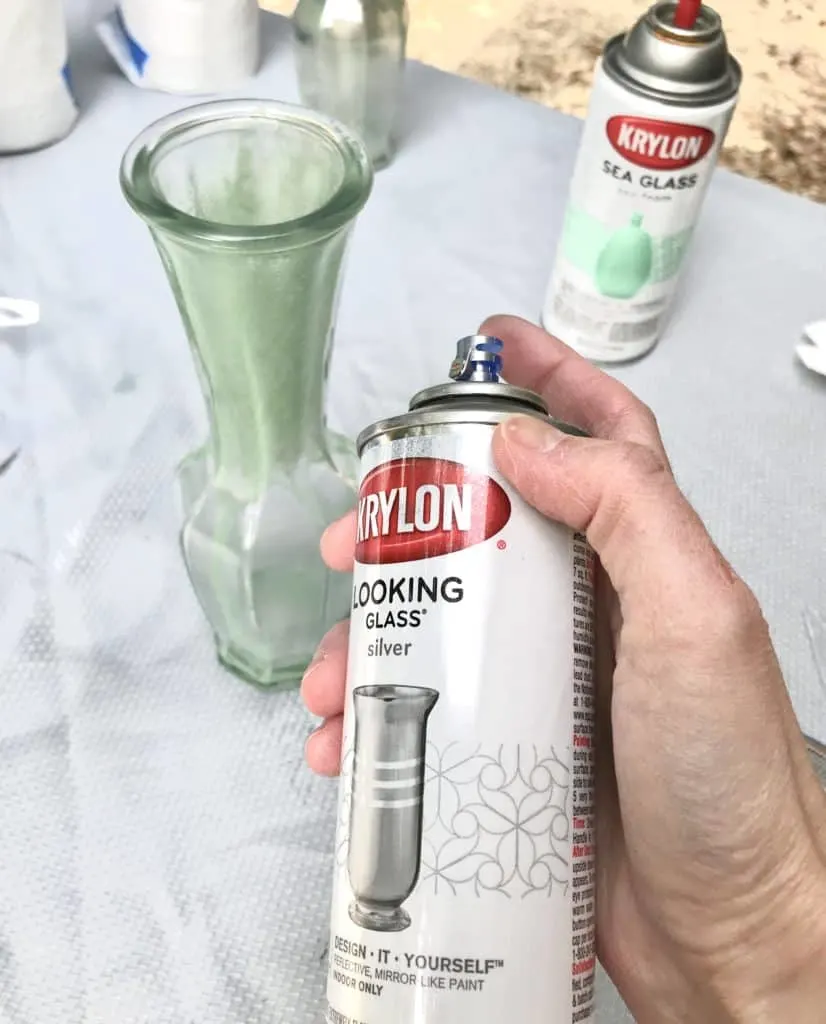
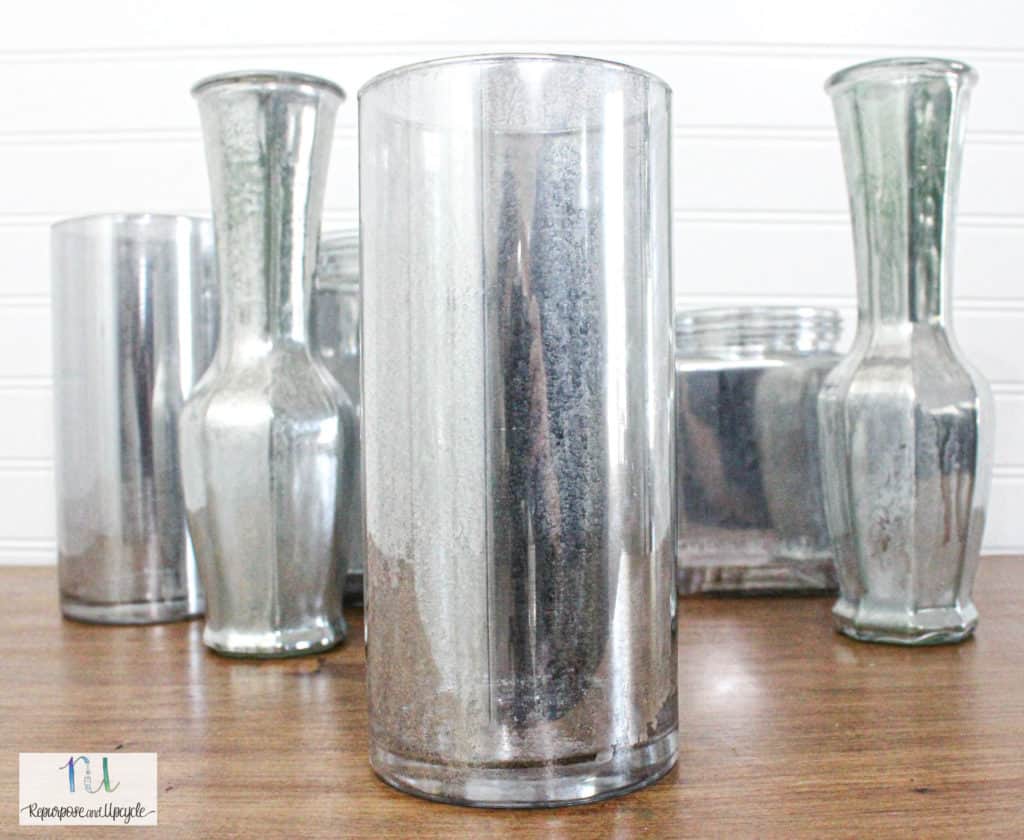
The picture above is after the first coat of Looking Glass. A part of me wishes I had only done one coat. I ended up applying two coats and the picture below is what the final product looks like!
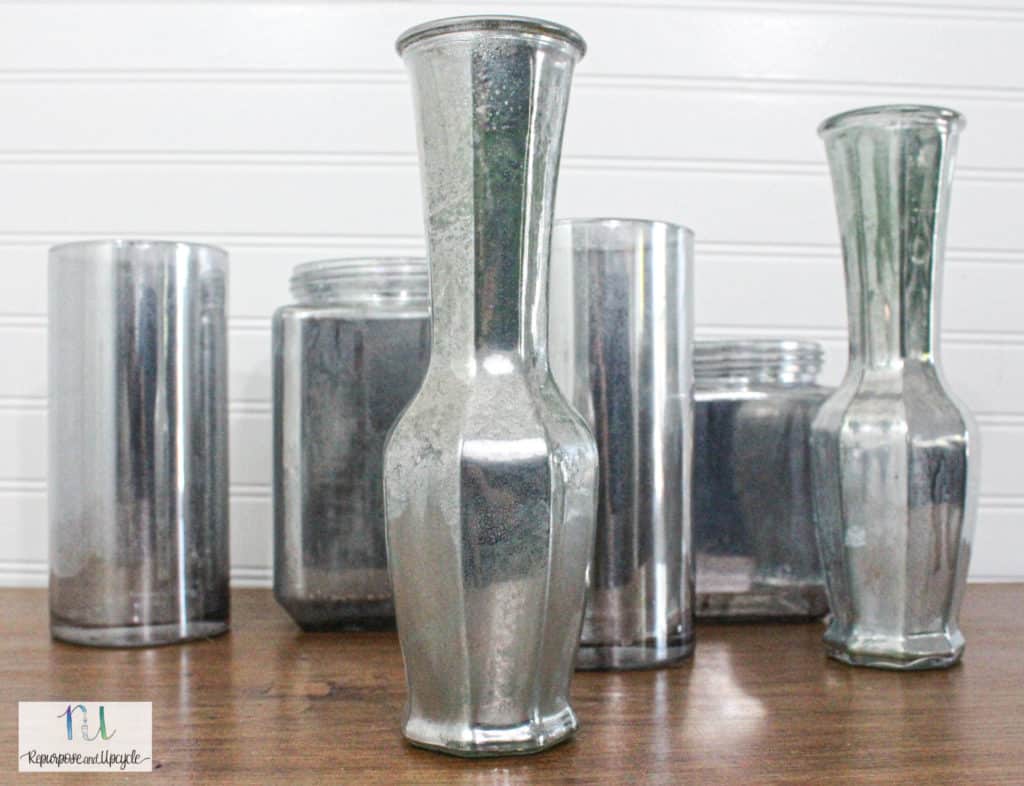

You can still see a little color, but mostly the vintage mercury glass look.

I still think the small mouth vase is my favorite!
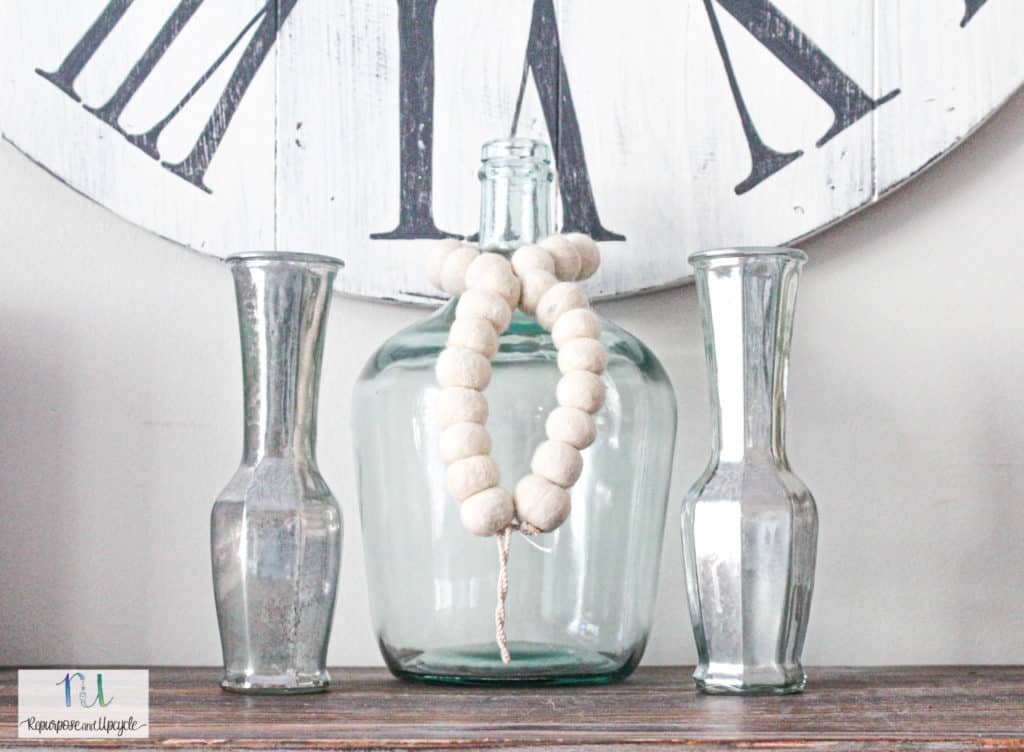
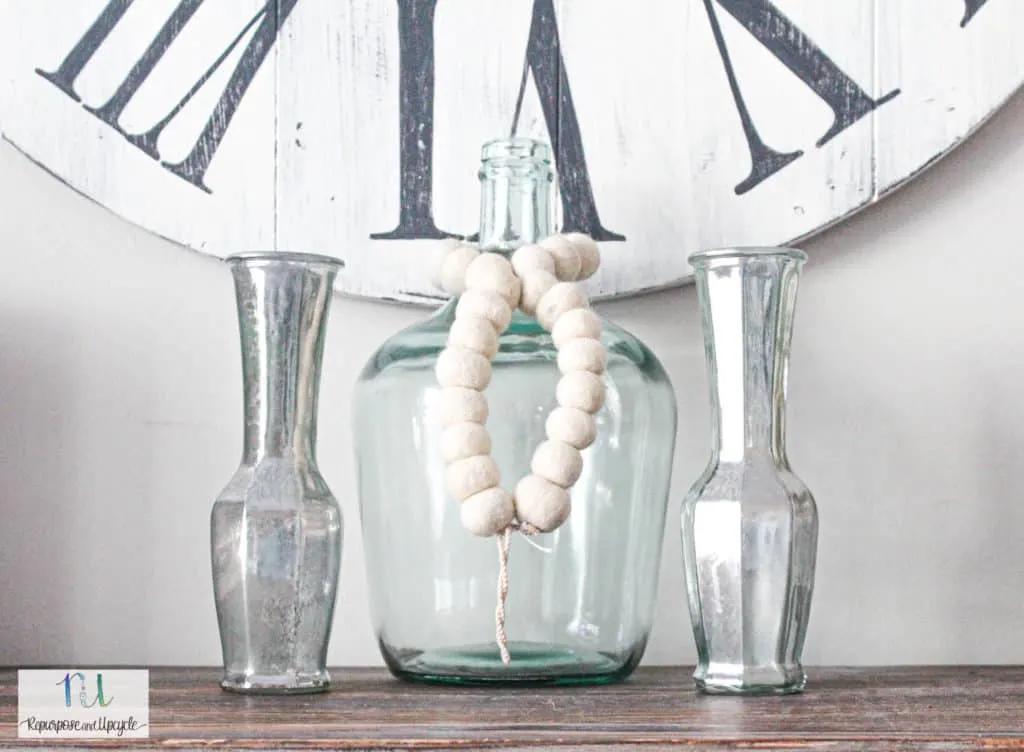
You know I love subtle pops of light blue and light green!
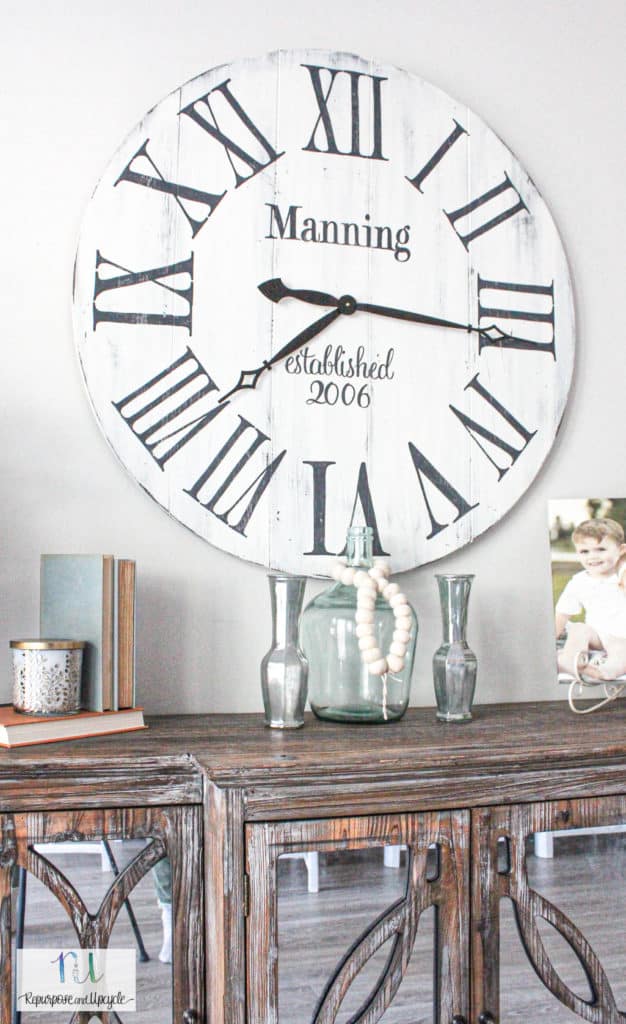
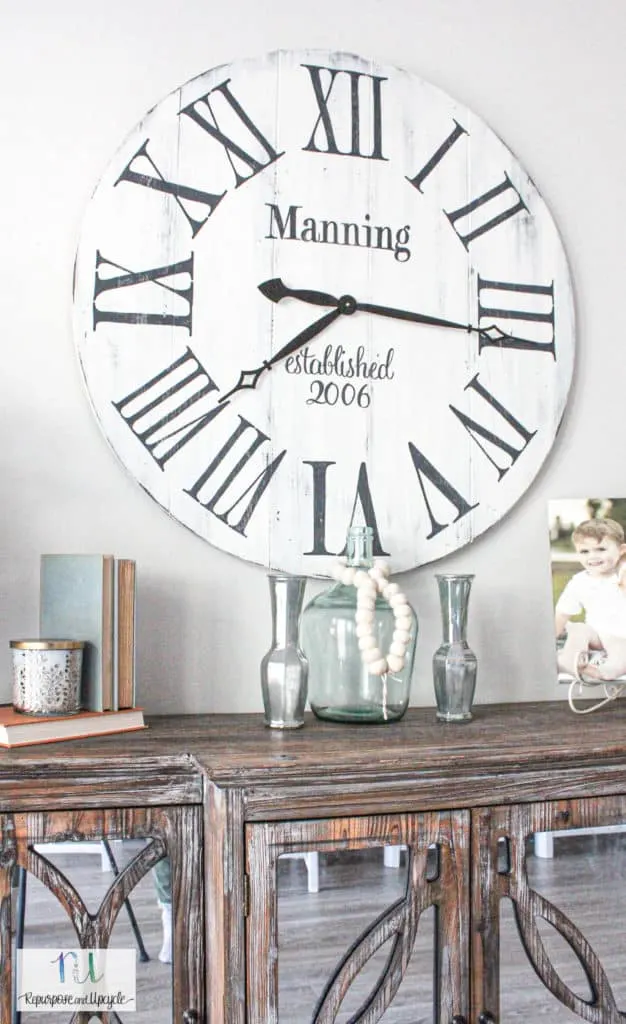

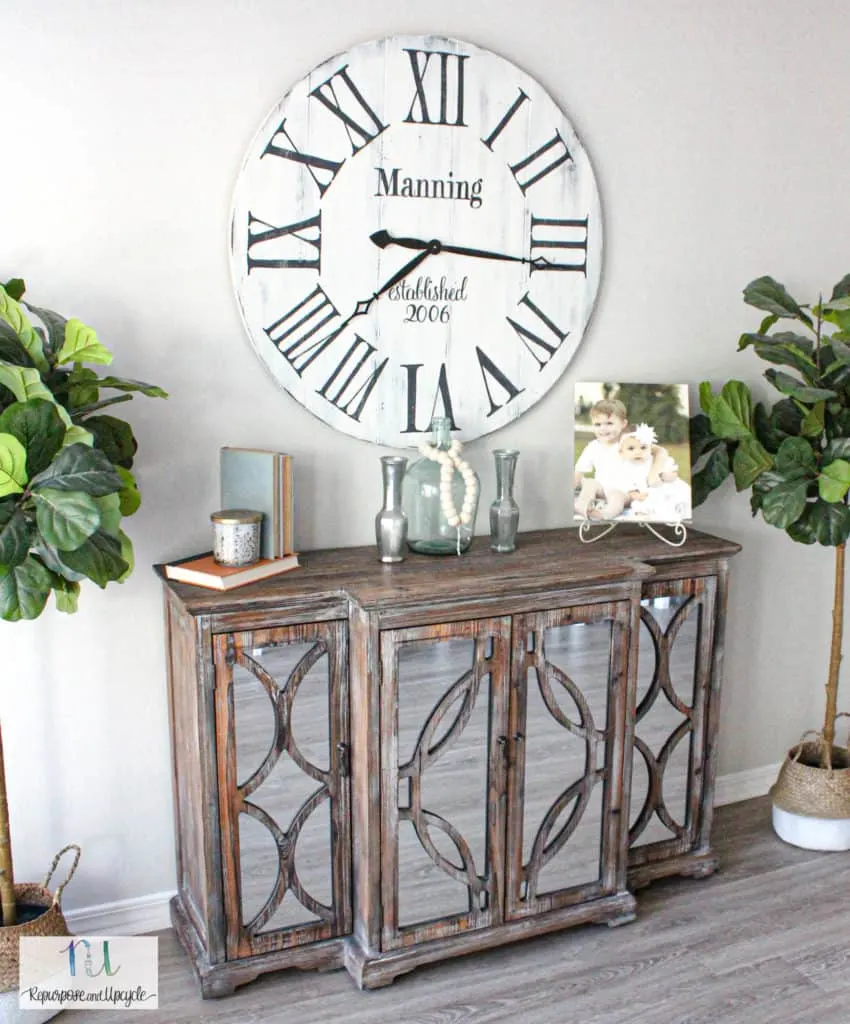
My cottage style dining room is coming together with a little faux mercury glass.
Hints and Tips for Better Outcome
To achieve a professional-looking finish on your DIY Mercury Glass Vases, it’s crucial to follow a few essential tips and tricks. Remember to:
- First, clean the glass surface thoroughly. Use a glass cleaner and a microfiber cloth, making sure to remove dust, fingerprints, and grease. This step will ensure proper adhesion of the Krylon Looking Glass Spray Paint.
- When working with Krylon Looking Glass Spray Paint, work in a well-ventilated area. It’s important to protect yourself from fumes, and spray paint can be quite strong. Consider using a protective mask as well.
- Shake the spray paint can well for at least a minute to mix the paint thoroughly. This will help you achieve an even, consistent coat on your vase.
- For the best results, apply multiple thin coats of spray paint, rather than one thick layer. This will prevent dripping or running, resulting in a smoother finish. Wait for the paint to dry between coats, which may take around 15 minutes.
- Hold the spray can about 10-12 inches away from the vase while spraying. Keep the can in motion as you spray, applying the paint with even, sweeping motions. This will help you avoid buildup or pooling of paint.
- To achieve the desired marbled or mottled effect typical of mercury glass, consider applying one more layer of a contrasting paint color. For example, a light layer of gold or silver metallic paint can add dimension and visual interest.
- After spraying, allow the vase to dry for 24 hours before handling or using it in your decor. This ensures that the paint has enough time to fully bond to the glass surface and achieve maximum durability.
Troubleshooting Potential Issues
When working on DIY Mercury Glass Vases with Krylon Looking Glass Spray Paint, it’s possible to encounter a few problems. Here are some tips for troubleshooting common issues that you might face.
Poor Coverage: If the Krylon Looking Glass Spray Paint is not covering the vase evenly, ensure that you are holding the can at least 10-12 inches away from the surface. Also, make sure to shake the can well before spraying and use slow, even strokes while applying the paint.
Drips and Runs: To avoid drips and runs in the paint, apply thin layers of the spray paint instead of a heavy coat all at once. Allow each layer to dry for a couple of minutes before applying the next. This technique will lead to a smoother and more even finish on your vase.
Lack of Mirror Effect: Krylon Looking Glass Spray Paint is specifically designed to create a mirror effect. However, if you are not achieving the desired look, ensure that you are applying the paint to the inside of the vase rather than the outside. Also, applying several thin layers of paint will help improve the reflective quality.
Difficulty in Removing the Tape: Sometimes, the tape applied to protect specific areas of the vase might become difficult to remove after the paint has dried. To avoid this problem, remove the tape while the paint is still wet. Be sure to use a good quality painter’s tape that will not leave residue behind.
Remember, practice makes perfect. If you are new to using Krylon Looking Glass Spray Paint, test it out on a small, inconspicuous area to get a feel for the spray and the desired outcome. The more comfortable you become with the product, the better your DIY Mercury Glass Vases will turn out.
DIY Mercury Glass with Krylon Looking Glass Spray Paint

Learn how to create your own DIY Mercury Glass vases with this easy mercury glass tutorial and video tutorial too!
Materials
- Glass vases
- Vinegar
- Krylon looking glass - make sure you buy THIS brand
- Spray bottle
- Rag
- Sea glass spray paint (optional)
- Paper towels
- Tape
Tools
- no tools
Instructions
- Clean the vases or surfaces with a lint free cloth
- Decide if you are going to spray the outside or the inside of the vases
- If you are going to spray the inside, cover the outside surface with a disposable wrap
- Shake the can of Krylon Looking Glass spray paint at least one minute
- Spray one light and even coat
- Immediately spray a little vinegar solution on top
- Use a paper towel to lightly dab what you've sprayed
- Let it dry for at least 10 minutes
- Repeat steps 5-8 until you reach your desired finish
Notes
Before you begin creating your DIY mercury glass, mix a vinegar solution of 1 part water and 1 part vinegar in a spray bottle.
In all the tutorials I read, it said to use WIDE mouth vases or bottles. This is due to the fact that the mercury glass spray paint works best when applied to the INSIDE of the vases to give it that double walled look.
I’ve got a few more projects for this room (cane back chair makeover and a new dining table!) and it will be done!
I hope I’ve given you an easy tutorial to create your own DIY mercury glass. Happy crafting friends.
Lindsey**
Why does it HAVE to be Looking Glass paint? I had someone else pick up paint for me and they brought home Rust-Oleum Gold Metallic paint. Why won’t this work?
I would give it a try! It might not have the “mercury glass” look but that doesn’t mean it won’t look cool!
Hi, two questions
1 is it okay to use apple cider vinegar
2 if I spray the inside with the looking glass paint after drying can I use a candle inside?
H Diana!
The apple cider vinegar should work too. I am using candles inside my vases that I spray painted and they have worked just fine. I’m assuming you are worried about it being flammable?
Hi Lindsey! Thank you for experimenting for us. I agree with you, i like the smaller ones with color. Pinned
Lindsey, I like the look a lot but I have a question. How can you “dab” the inside of a small mouth vase after you spray the inside with the paint and the water and vinegar solution? I mean, what would you use? Also, wouldn’t dabbing it just make smear marks? If you can clear up my confusion I just might be tempted to try doing this project. Heaven knows, I have enough various clear vases and containers!
Hi Naomi, I used a stick or a straw and taped a paper towel to the end to “dab” the inside of the small mouth vases. Does it “smear?” Yes a tad and you have to be careful, but as long as it’s in the inside it still looks good from the outside.
I love these vases. You did a fabulous job. I do have a question. Why did it cost $40? I guess I’m not up to date on what these items cost. Thanks.
My mistake, I meant to put $10. Thanks for seeing that!
Best mercury glass tutorial I’ve seen and I LOVE the seaglass color peeking through. Definitely trying this!
Thanks Kim! I try to make all my tutorials super easy to follow. Good luck with yours!
I love this, Lindsey! What a creative and beautiful idea!
Thanks Marty, it was a fun project!
How fun is that!!! They are look sooooo good! I need to get myself a can too!!
These look so cool! What a great before and after.
I didn’t realize this was so easy. Thanks for the step by step tutorial. Looks like my vintage vases are going to get a whole new look.
Pinned!
What a great tutorial! Love this! Pinning for sure!
These look exactly like the ones you see in the stores! Great job!
Thank you! It was a fun project.
So cute! The small mouth vases are my favorite too, great upcycle project!
Thanks Lia! They are my favorite too.